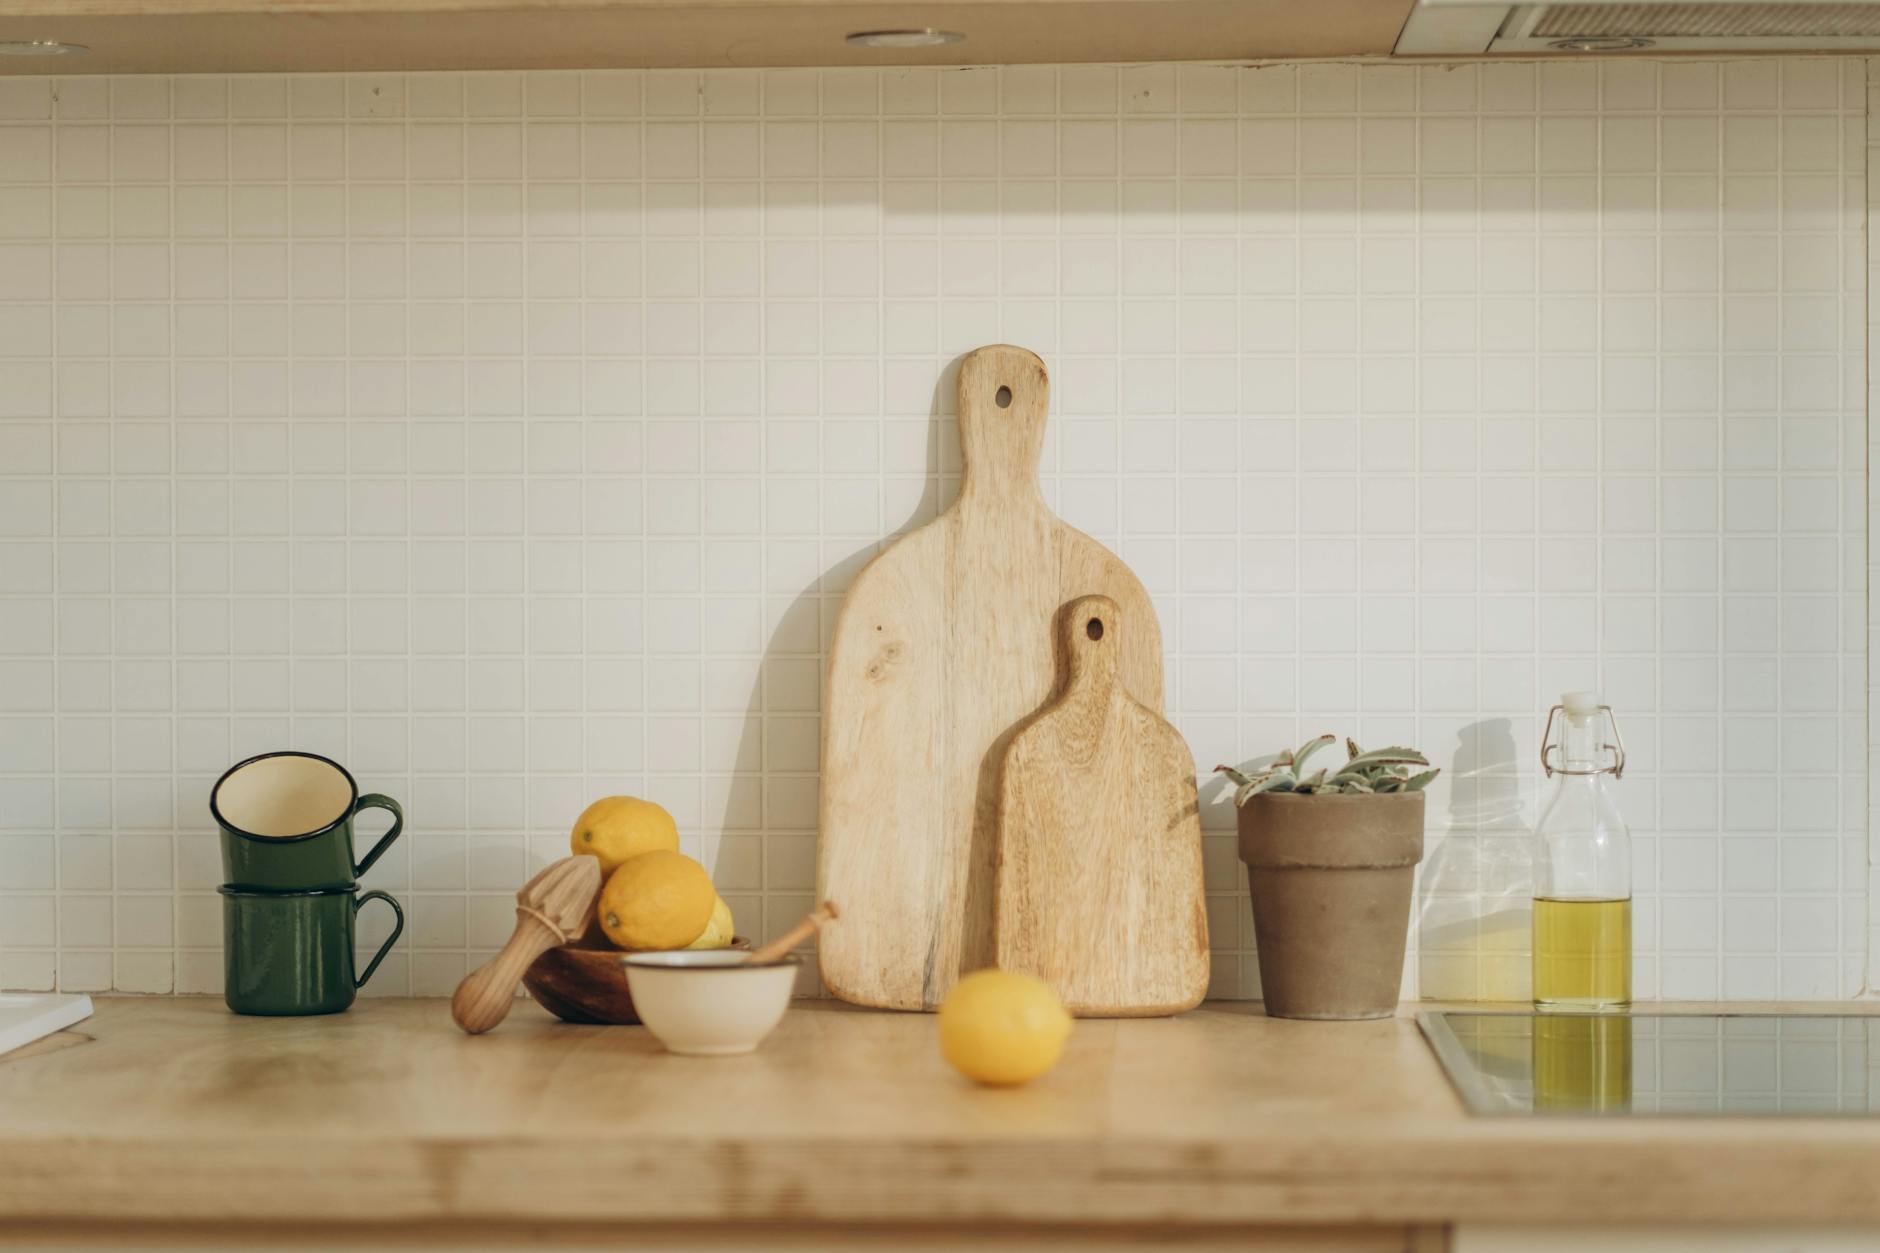
A thorough bathroom deep clean removes soap scum, mold, mineral deposits, and hidden bacteria that routine scrubbing misses. In Tucson, hard water and dry desert heat create unique buildup challenges that make deep cleaning especially important. This guide walks you through every step, from the supplies you need to the finishing touches that keep your bathroom fresh between professional visits.
Why You Should Deep Clean Your Bathroom Regularly
Most Tucson homeowners wipe down surfaces during a weekly clean, but a true deep cleaning goes far beyond that. Tucson’s famously hard water leaves calcium and mineral scale on faucets, showerheads, and tile grout that only breaks down with targeted products and real dwell time. Beyond aesthetics, bathrooms are one of the highest-humidity rooms in any home, which creates the perfect environment for mold and mildew. According to the CDC’s guidance on mold in homes, mold exposure can trigger respiratory irritation, allergies, and other health problems, making regular deep cleaning a genuine health priority rather than just a cosmetic preference.
A deep clean also extends the life of your fixtures, grout, and caulk by removing corrosive buildup before it etches surfaces permanently. For families with children, elderly relatives, or anyone with asthma, a sanitized bathroom reduces pathogen exposure significantly. Whether you tackle this yourself or call in a professional, building a bathroom deep cleaning routine is one of the highest-return habits you can build as a homeowner in Tucson.
Step 1: Gather Your Supplies and Bathroom Deep Cleaning Checklist
Before you start scrubbing, gather everything you need so you are not running back and forth between rooms. Having the right products and tools on hand is what separates a surface wipe-down from a true bathroom deep cleaning. Use this as your bathroom cleaning checklist before you begin:
White vinegar or a commercial descaler for hard water mineral deposits
Baking soda for gentle abrasive scrubbing on grout and tubs
Microfiber cloths (at least four to avoid cross-contamination)
An old toothbrush or grout brush for crevices
A squeegee for glass shower doors
Rubber gloves and eye protection
A mop or scrub brush for bathroom floors
A trash bag for decluttering expired products
If you prefer eco-friendly options, look for products listed in the EPA Safer Choice database. Many Tucson families have shifted to plant-based cleaners, especially in homes with pets or young children, and they work surprisingly well on the hard water scale common in the area. You can also check Good Housekeeping’s cleaning product reviews to find vetted options before you buy.
Step 2: Declutter and Prep the Space Before Cleaning
Empty the counter completely. Pull every product off the shelves, check expiration dates, and toss what you no longer need. Remove bath mats, towels, and any fabric items so they can be washed separately. Take out the trash can liner and replace it at the end. If you have a shower caddy, move it out of the shower so every surface is fully accessible.
This prep step is worth taking seriously. Cleaning around clutter means you will miss buildup on the edges of counters, under soap dispensers, and in the corners of shelves. A clear bathroom is the foundation of any effective deep cleaning procedure. Think of it as resetting the room before you restore it.
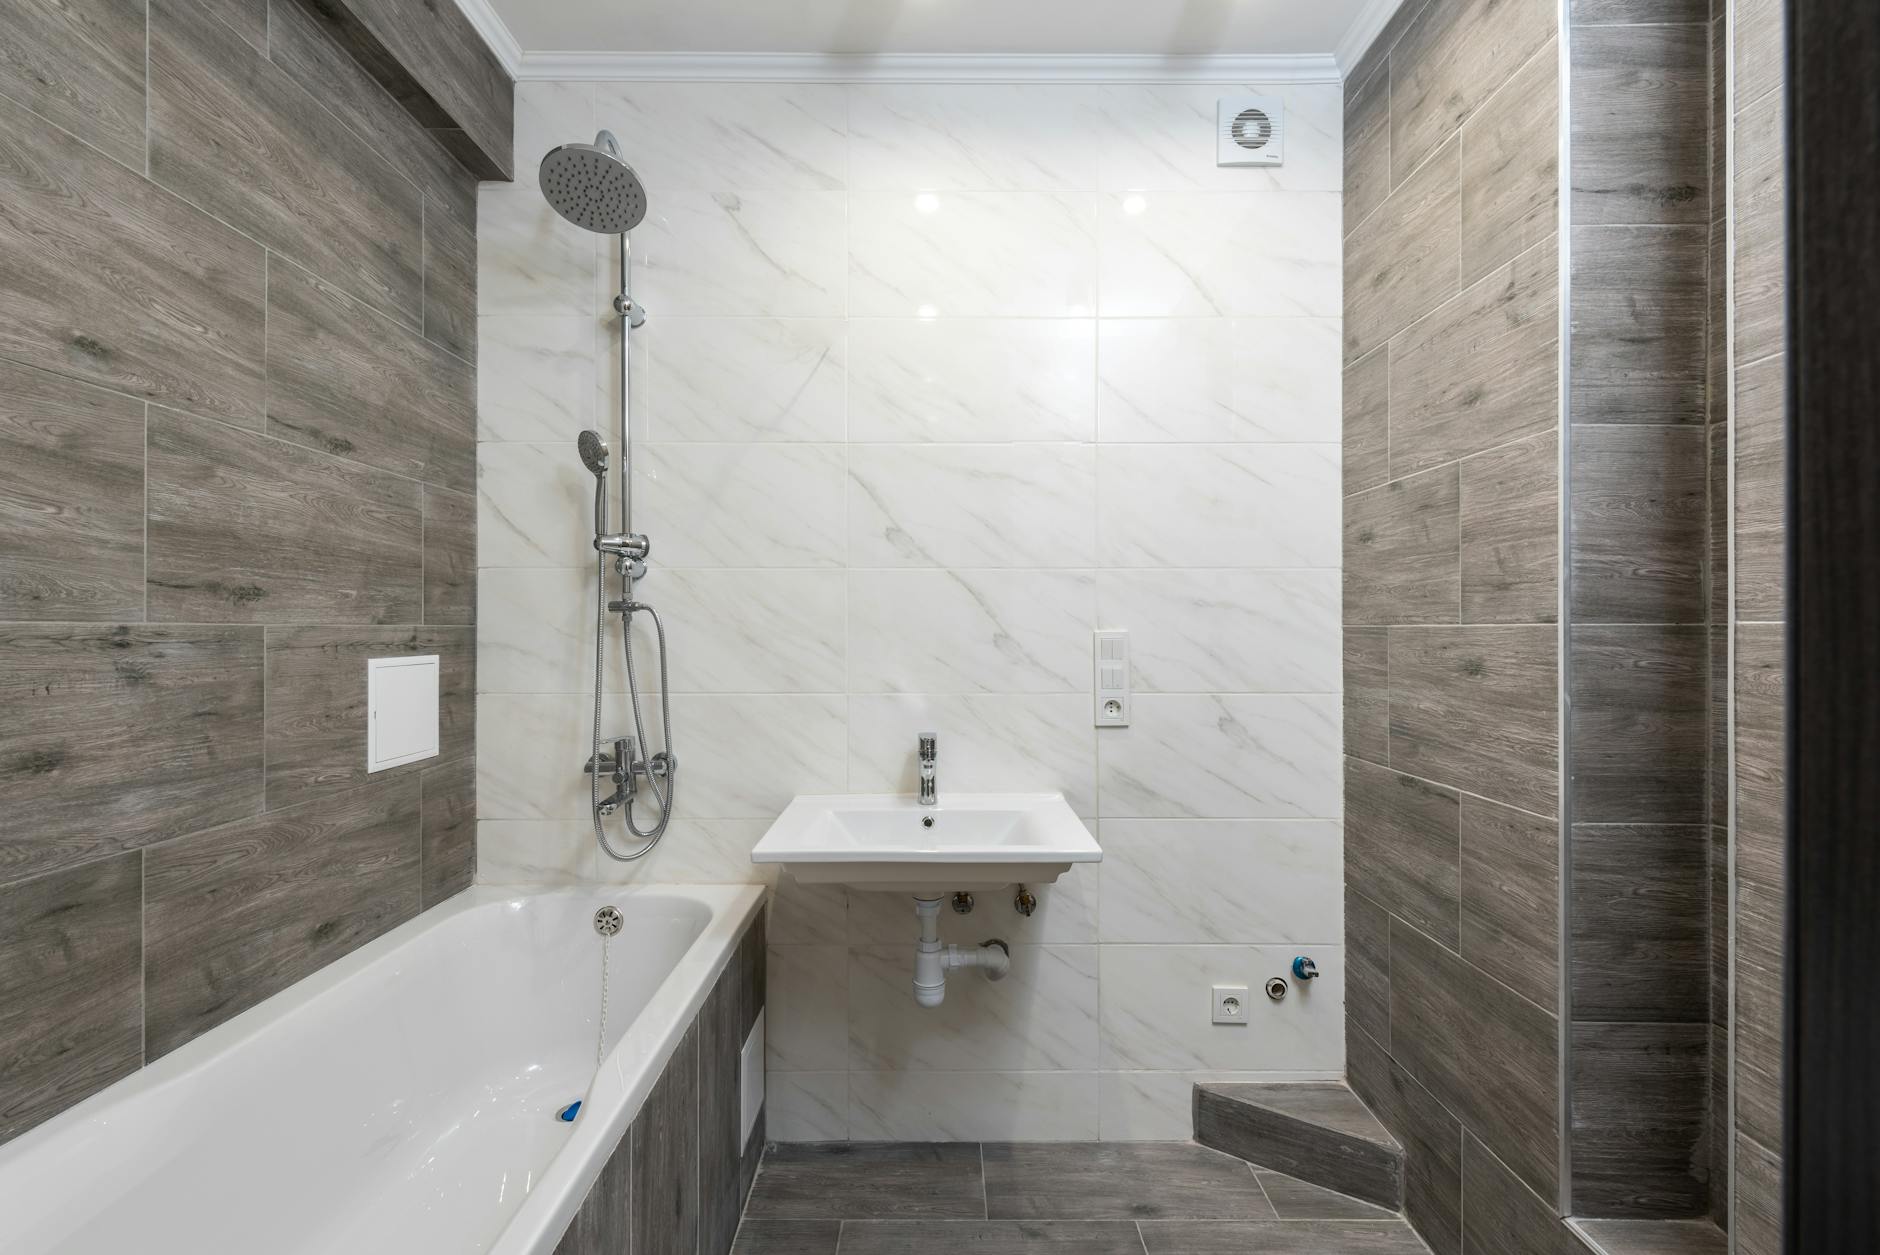
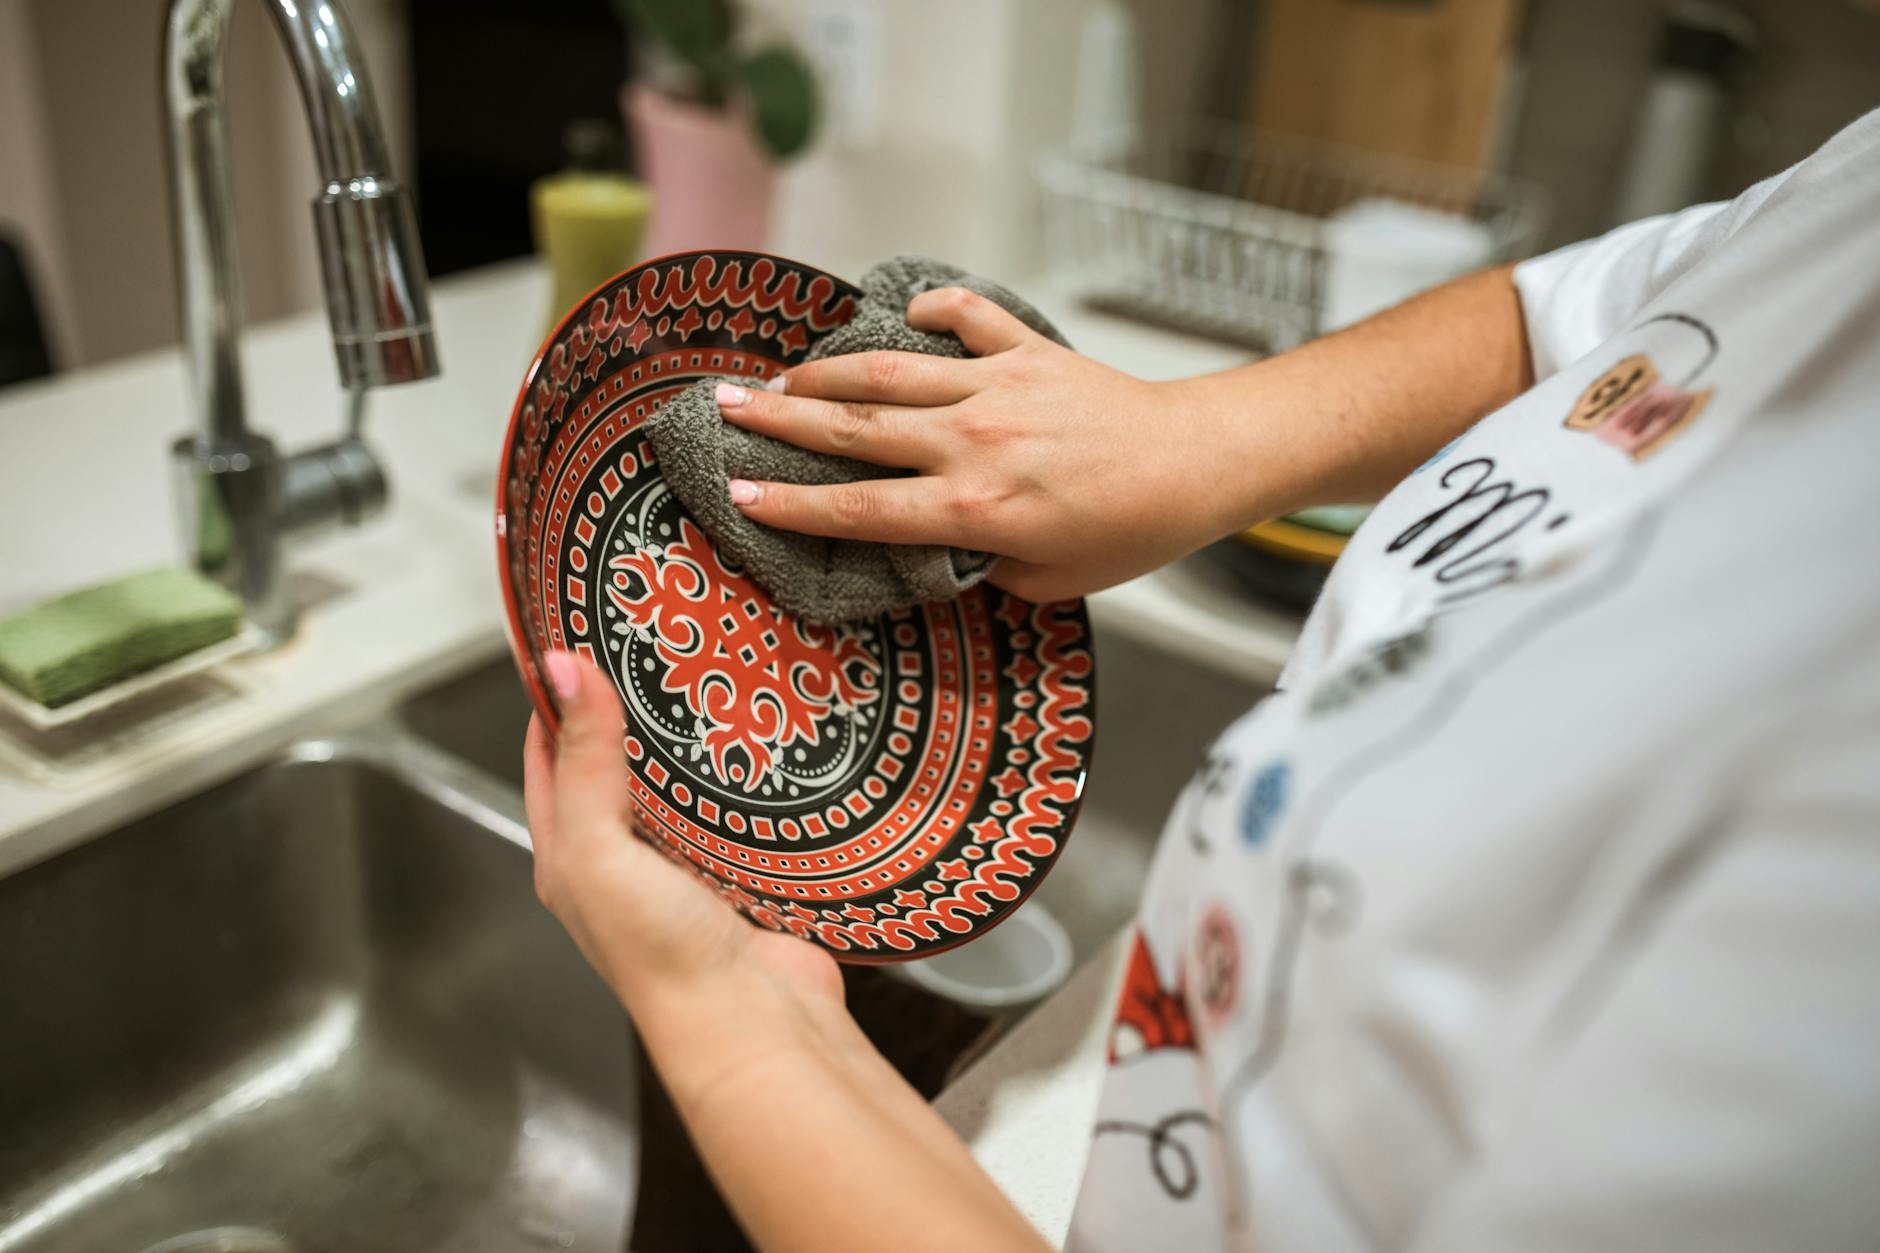
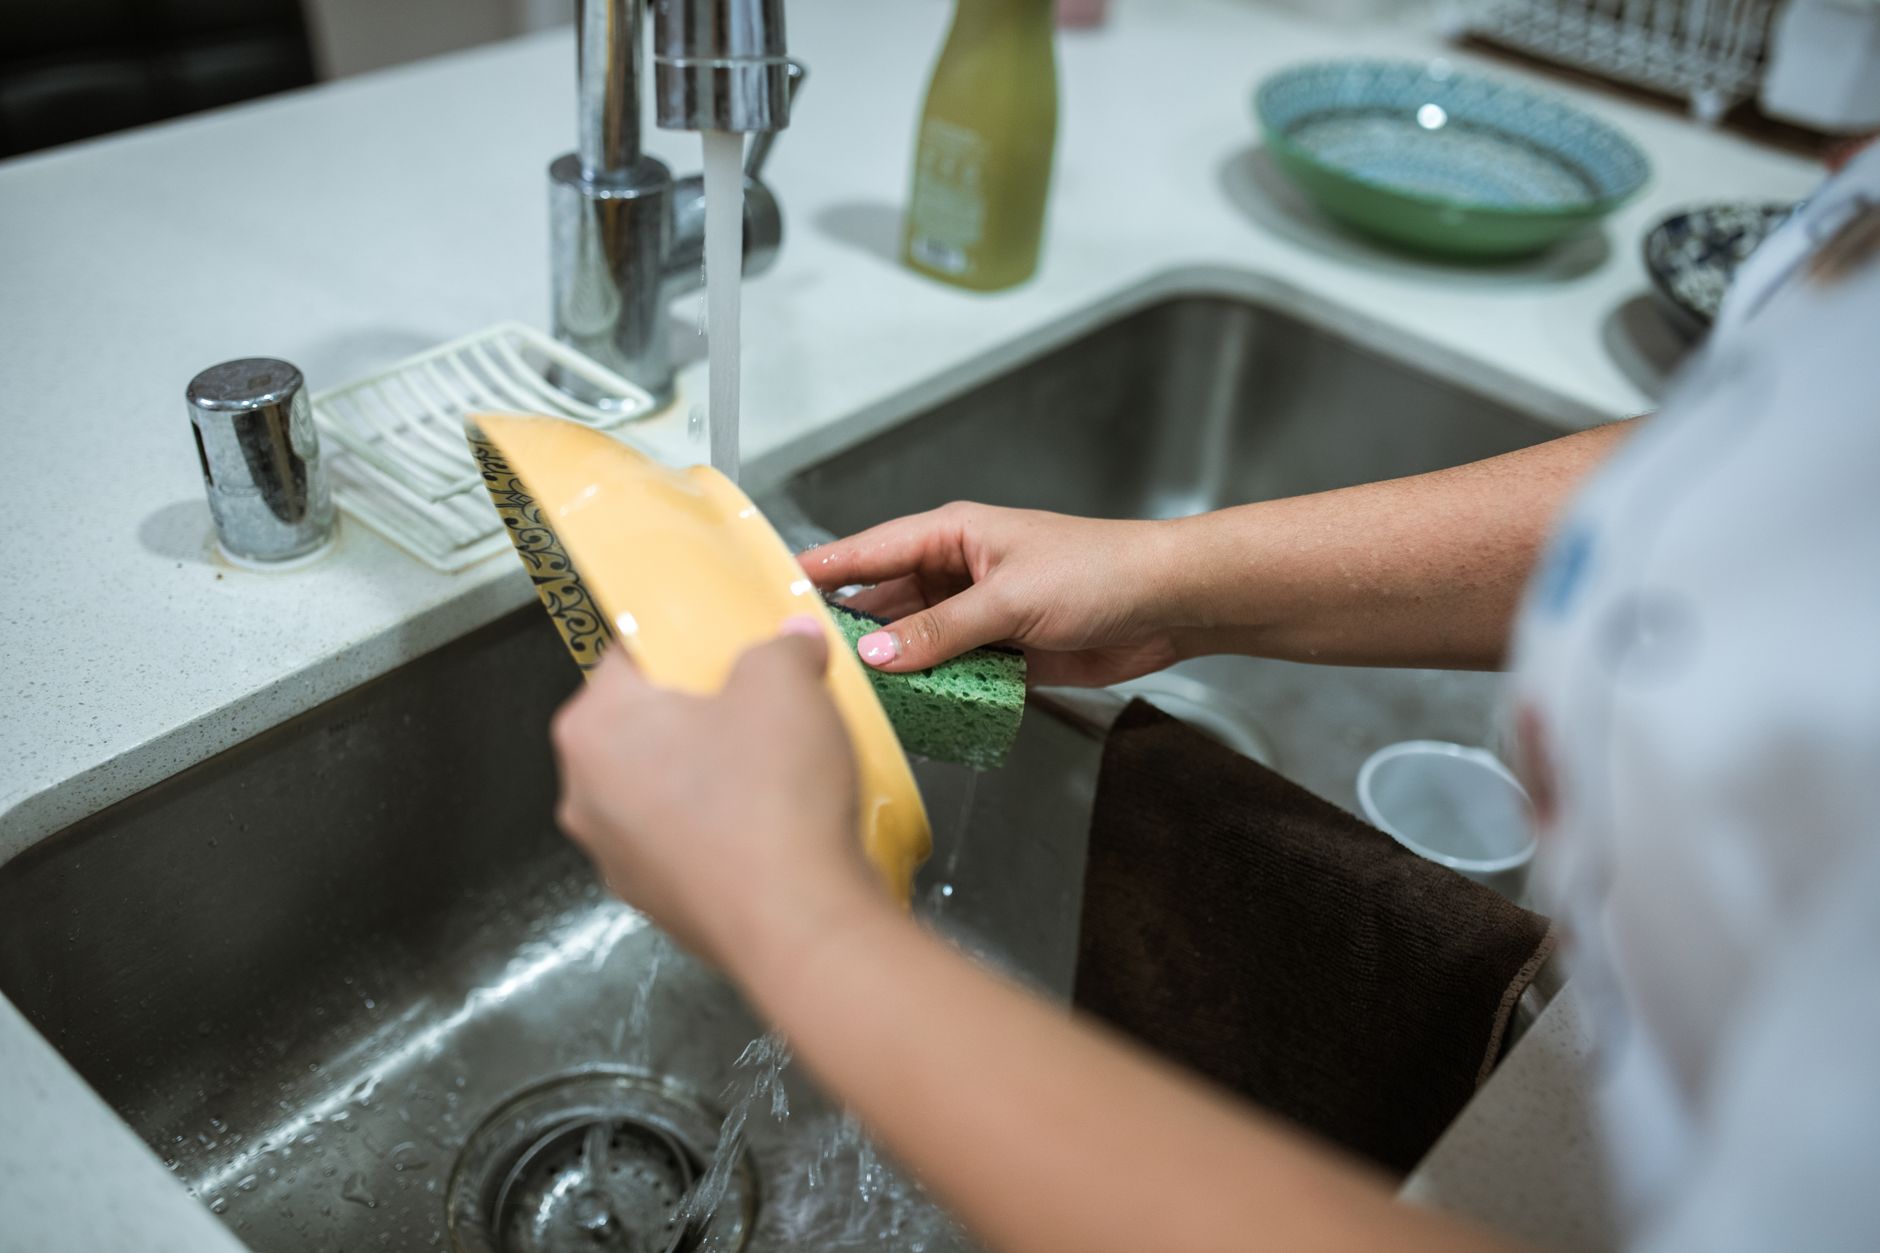
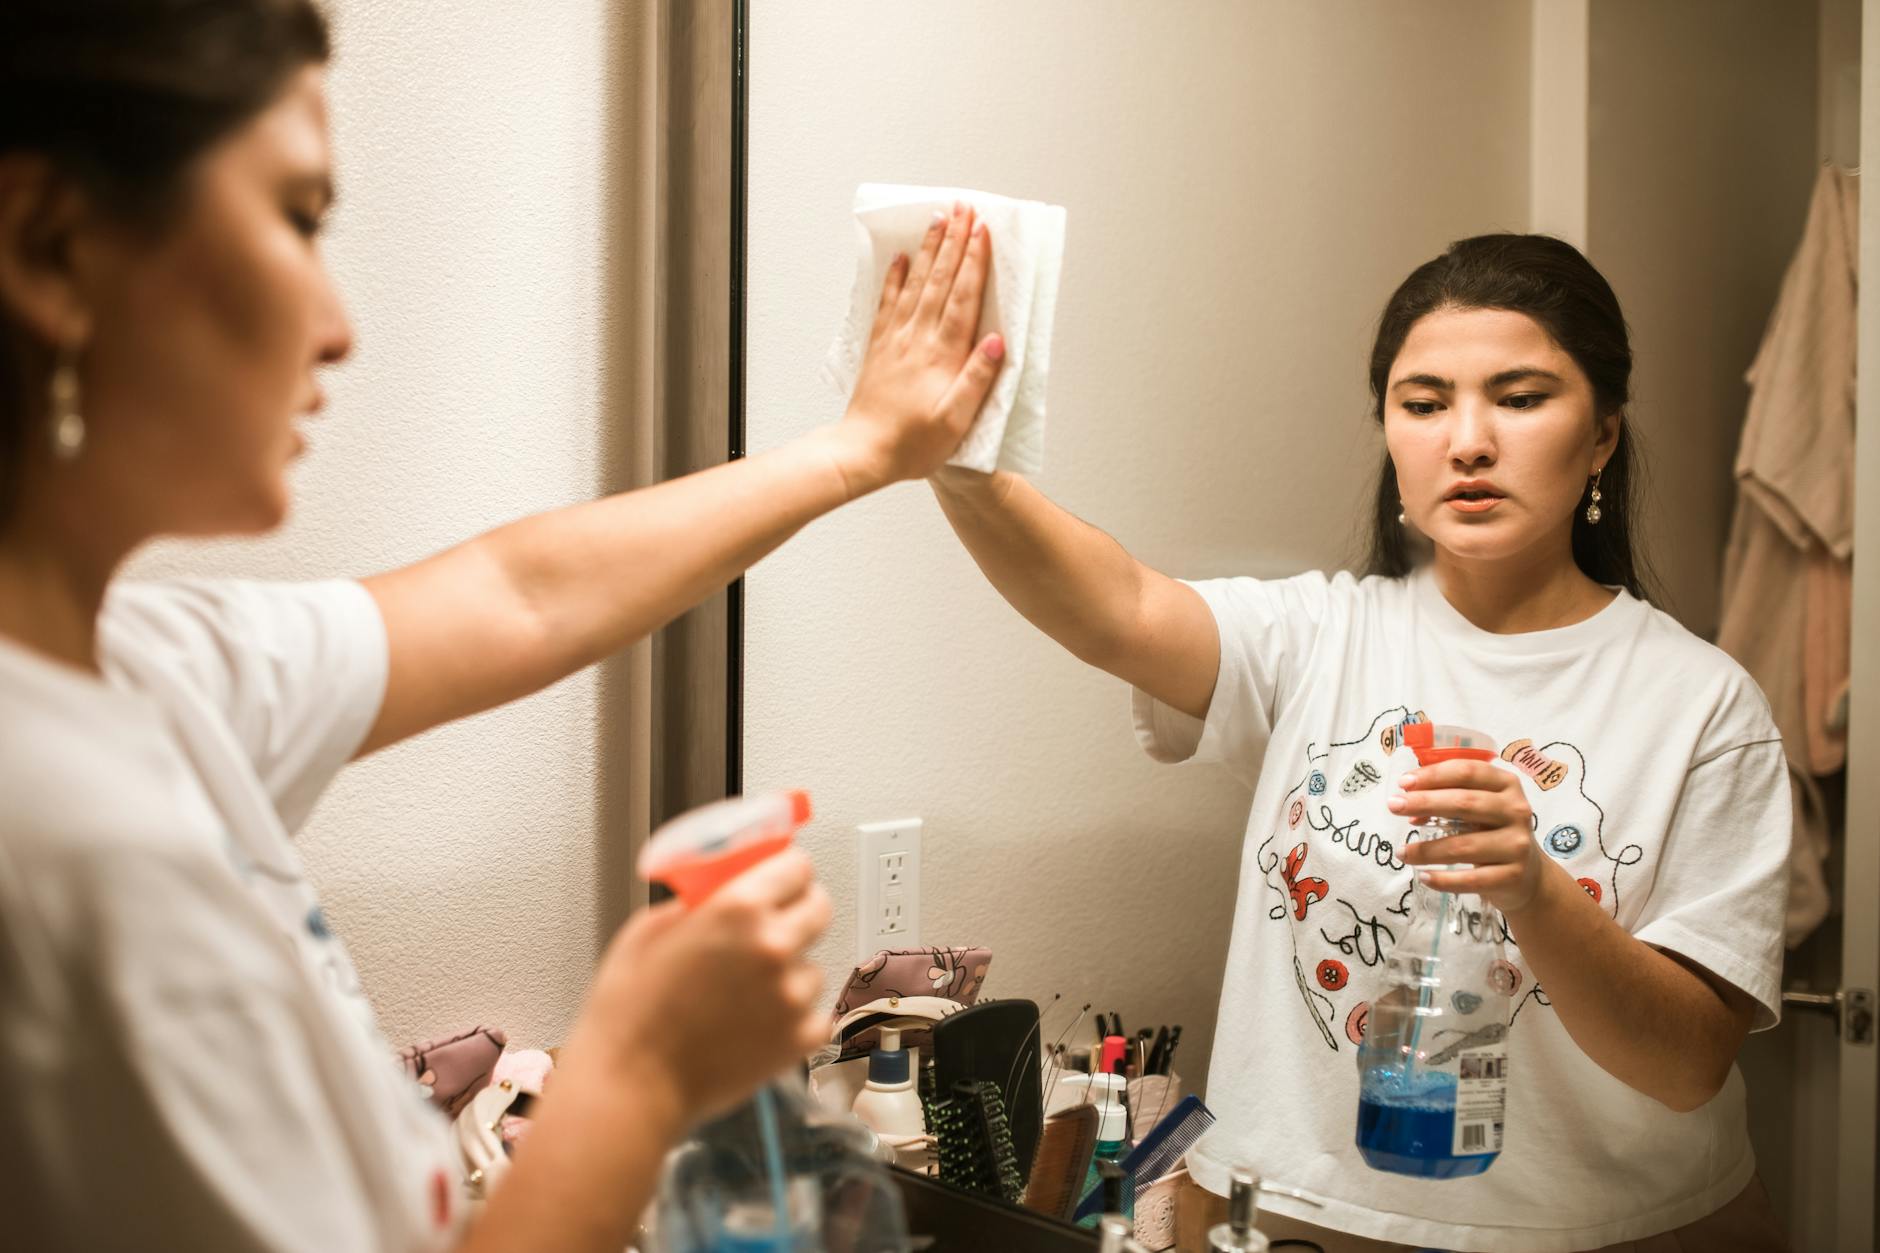
Step 3: How to Deep Clean Bathroom Tiles, Grout, and Shower Walls
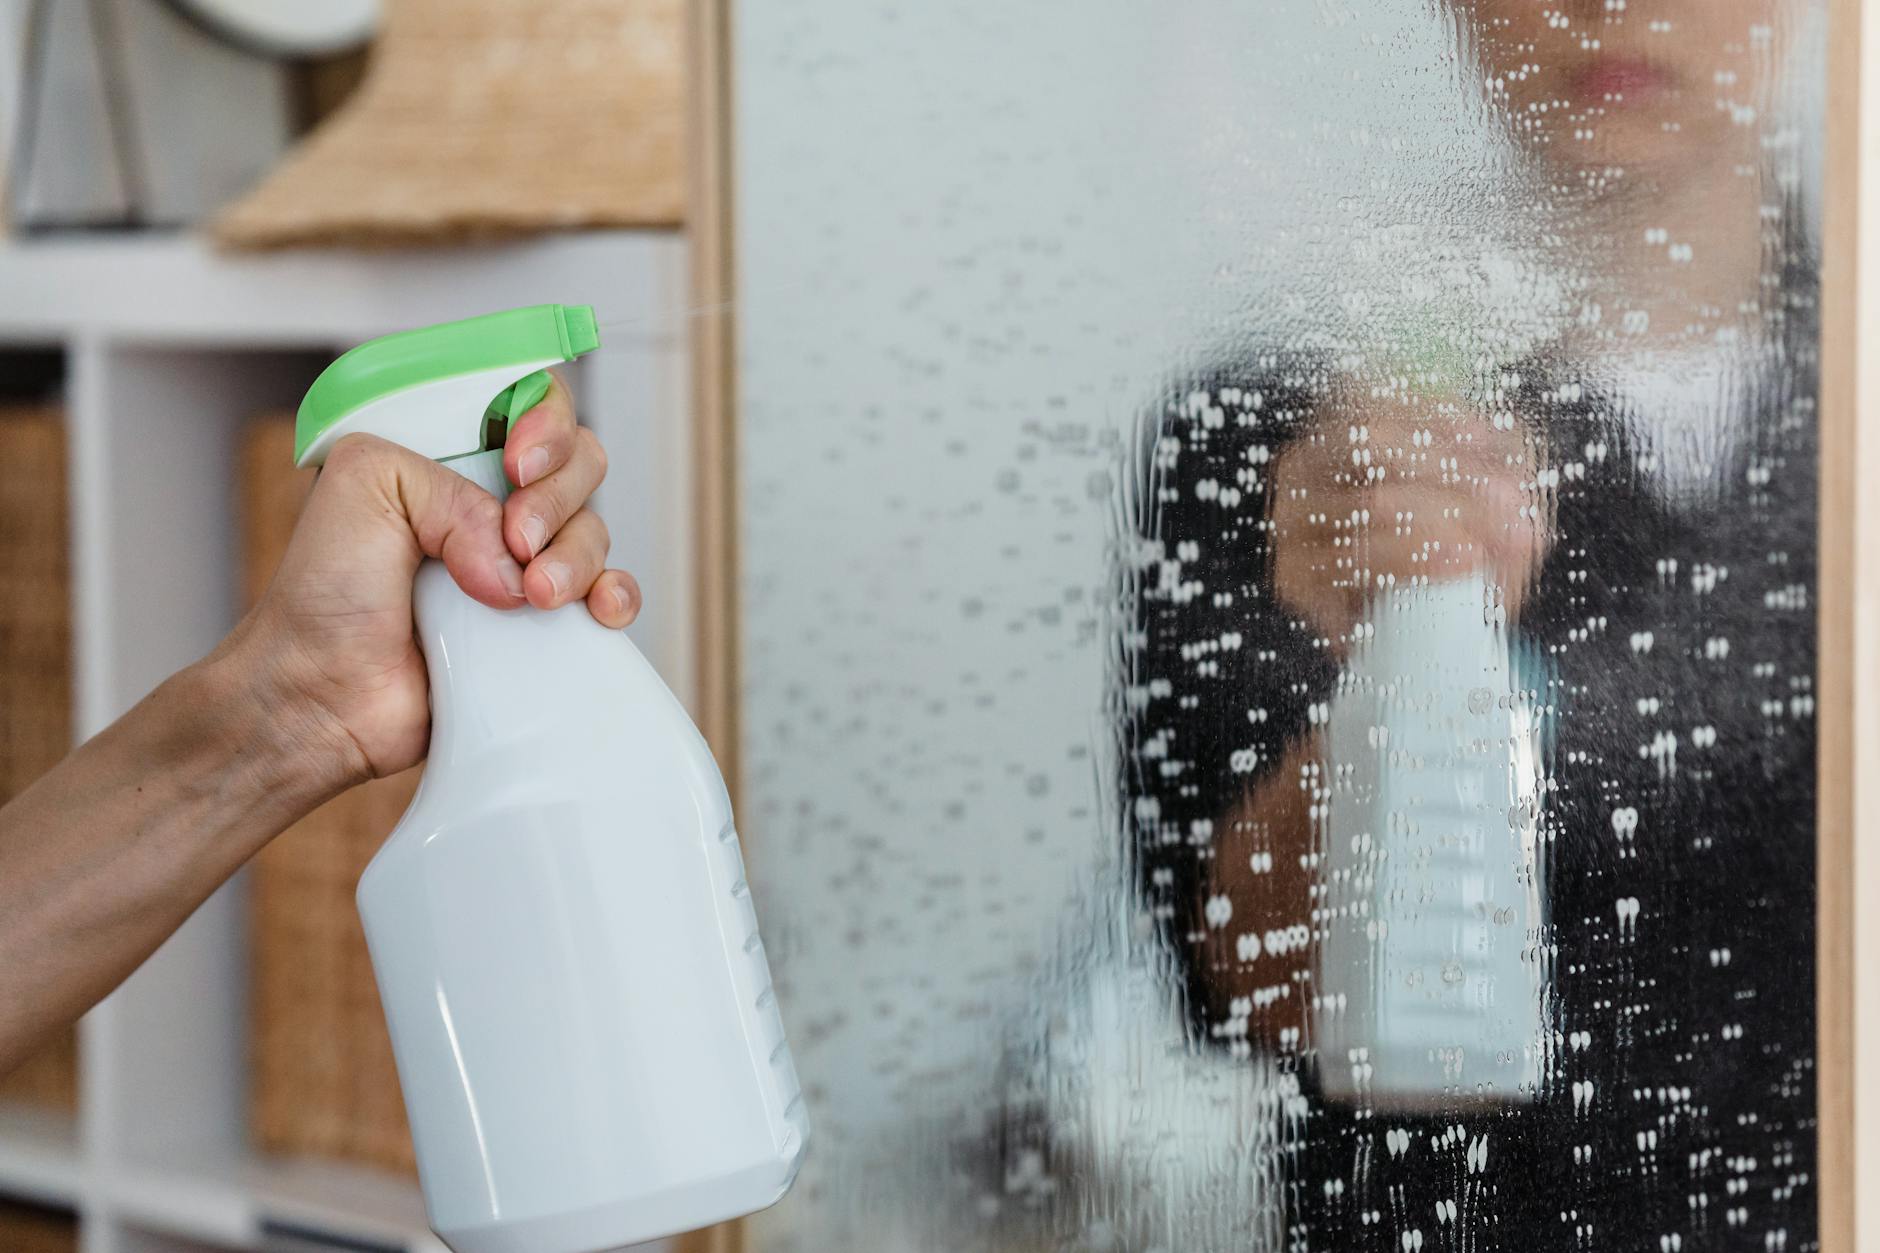
Shower walls and tile grout are where Tucson’s hard water does the most visible damage. Start by spraying your descaler or a white vinegar solution generously across all tile surfaces and let it dwell for at least five to ten minutes. The acid in vinegar dissolves limescale and mineral deposits without scratching most tile finishes.
While the solution dwells, apply a paste of baking soda and water directly to grout lines using an old toothbrush or grout brush. Scrub in small circular motions. Grout is porous and holds onto soap scum, mold spores, and grime at a microscopic level, which is why surface wiping never fully cleans it. For black or pink mold on grout, use a diluted bleach solution or a hydrogen peroxide spray and let it sit for ten minutes before scrubbing.
Rinse all surfaces thoroughly with warm water and use a squeegee on glass doors to prevent new water spots from forming immediately. This is one of the steps that a professional bathroom deep cleaning service will always include, and for good reason: it makes the biggest visible difference in the room.
For more room-by-room deep cleaning techniques beyond the bathroom, the deep cleaning services Tucson guide to one-day DIY projects has a practical breakdown worth bookmarking.
Step 4: How to Deep Clean a Toilet the Right Way
Apply toilet bowl cleaner inside the bowl and let it sit while you clean the exterior first. This dwell time is critical for breaking down stains and killing bacteria under the rim. Starting from the outside and working inward is a key part of any bathroom cleaning procedure: clean from least to most contaminated.
Wipe down the tank, lid, seat (both sides), and the full exterior of the bowl using a disinfectant spray and a dedicated microfiber cloth. Use your grout brush or an old toothbrush to get into the hinges on the toilet seat, which accumulate an alarming amount of grime. After cleaning the exterior, scrub the inside of the bowl thoroughly under the rim using your toilet brush, then flush.
If you notice orange or rust-colored staining inside the bowl, that is a sign of iron in Tucson’s water supply. A pumice stone or an iron-specific toilet cleaner will handle those marks without scratching the porcelain.
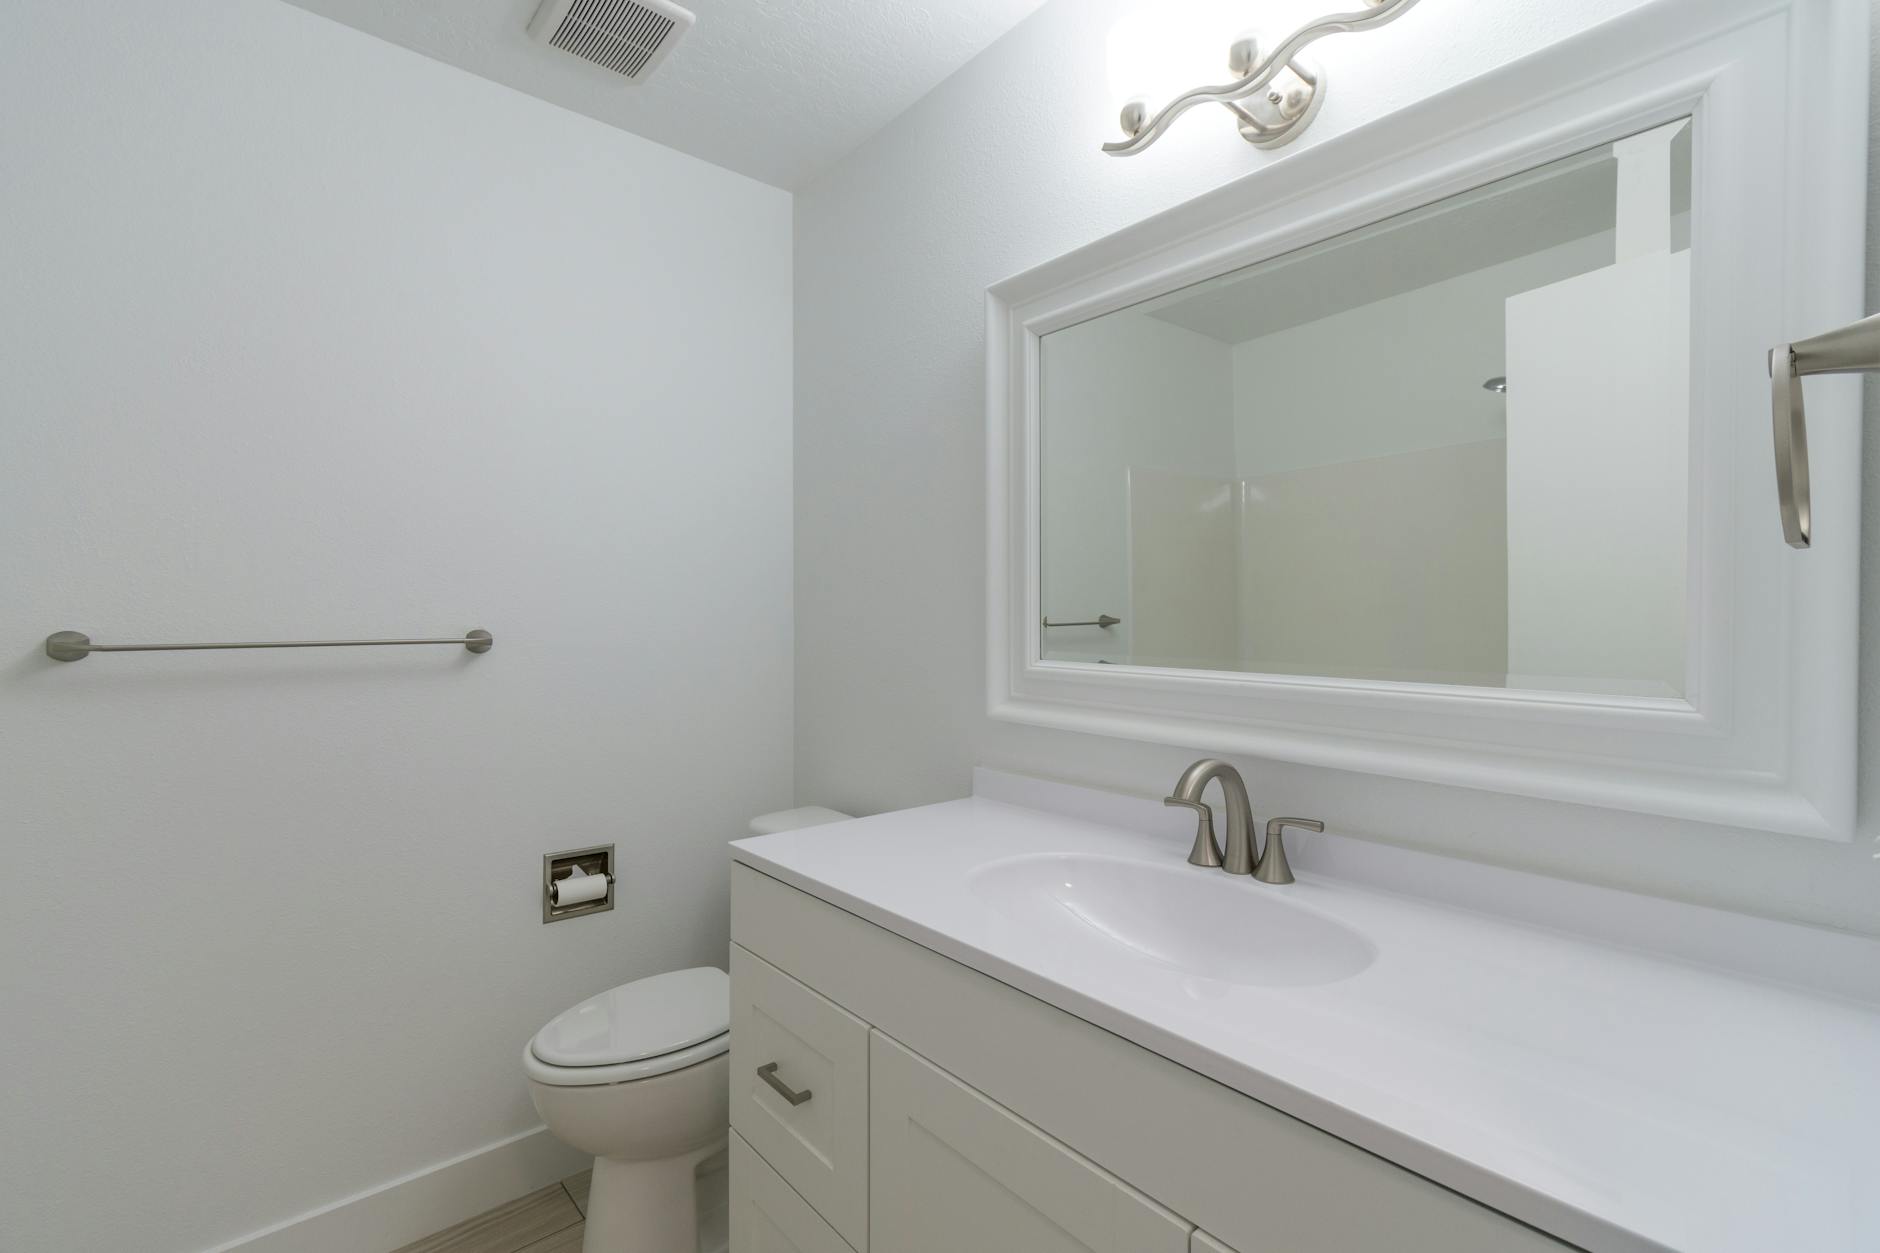
Step 5: Clean and Disinfect Sinks, Faucets, and Countertops
Bathroom sinks accumulate toothpaste residue, soap scum, and splashed water daily. Spray your entire counter surface and sink basin with a disinfectant cleaner and let it dwell for at least two minutes. Meanwhile, soak a paper towel or cloth in white vinegar and wrap it around the base of the faucet and around the handles. This loosens hard water buildup that usually gets ignored during routine cleaning.
After the dwell time, wipe all counter surfaces with a microfiber cloth, scrub the sink basin with a soft brush, and use your grout brush around the drain. Polish faucet handles and fixtures with a dry cloth to remove water marks and restore shine. Check the faucet aerator as well. In Tucson, mineral deposits clog aerators more quickly than in softer-water cities, so unscrewing and soaking it in vinegar every few months keeps water pressure consistent.
If you are wondering how the 10 BEST HOUSE CLEANING SERVICES IN TUCSON, AZ handle countertop sanitation, most professional teams use hospital-grade disinfectants on sinks and counters and follow an established surface-by-surface protocol rather than a single all-purpose spray-and-wipe approach.
Step 6: How to Deep Clean Bathroom Floors
Bathroom floors collect hair, dust, skin cells, and cleaning product residue at an impressive rate. Start by sweeping or vacuuming the floor thoroughly before any wet cleaning, including behind the toilet and in corners where dust accumulates. Moving the toilet brush holder, trash can, and any floor-standing accessories to get the full floor surface is essential.
Mix a floor cleaner appropriate for your tile or grout type with warm water. For ceramic or porcelain tile floors, a pH-neutral cleaner works well and will not strip grout sealer over time. Apply with a mop and scrub grout lines with your grout brush as you work your way from the far corner of the bathroom toward the door. This ensures you do not step back on wet, freshly cleaned sections.
Rinse with clean water and allow the floor to air dry before replacing bath mats. If your tile grout looks stained even after scrubbing, a grout sealer applied after cleaning can protect it going forward and make future deep cleanings faster. Homeowners in Tucson who deal with porous saltillo tile should use a specially formulated saltillo cleaner rather than vinegar, which can damage the finish over time. For a thorough bathroom deep cleaning checklist that also covers Chandler homes, the bathroom deep cleaning Chandler post covers many of the same floor care techniques.
Step 7: Eliminate Odors and Keep Your Bathroom Smelling Fresh
A deep cleaned bathroom should smell as good as it looks. After all surfaces are dry, tackle the sources of odor directly rather than masking them with sprays. The most common odor sources in bathrooms are the toilet base and bolts, drain buildup, and damp bath mats or towels that develop mildew. Each one responds to a different approach.
Pour a cup of baking soda down the drain followed by a cup of white vinegar. Let it fizz for five minutes, then flush with boiling water. This breaks up biofilm inside the drain pipe that creates musty smells even after you have cleaned every visible surface. For the toilet base, spray and wipe the floor around the toilet carefully, paying attention to the caulk seal at the bottom which can harbor bacteria.
For ongoing freshness, consider a few habits between deep cleanings: run the exhaust fan during and for 15 minutes after showers, replace bath mats weekly, and leave the shower door or curtain partially open after use so moisture can escape. The American Lung Association’s indoor air guidance specifically notes that reducing bathroom humidity is one of the most effective ways to prevent mold growth and improve home air quality overall. This is especially relevant in Tucson during the summer monsoon season when indoor humidity spikes. For a Tucson holiday cleaning refresh before guests arrive, adding a bathroom odor-elimination step to your pre-visit checklist makes a noticeable difference.
When to Hire a Professional Bathroom Cleaning Service in Tucson
DIY deep cleaning works well for regular maintenance, but there are situations where a professional team gets better results faster. If you are preparing a home for sale, recovering from a renovation, moving into a new property, or simply have not done a thorough bathroom cleaning in several months, a professional Tucson Home Cleaning Service brings the right products, tools, and experience to restore the room efficiently.
Professional cleaners also follow a structured bathroom cleaning procedure that covers every surface systematically, including areas that are easy to overlook during a DIY clean: the exhaust fan vent cover, the back of the toilet, inside medicine cabinets, and the tracks of sliding shower doors. For ongoing upkeep, a recurring maid service keeps your bathroom in deep-clean condition between scheduled thorough cleanings, so the work required each time is significantly less.
Elite Maids House Cleaning serves Tucson homeowners with background-checked, fully insured cleaning teams who are backed by a reclean-at-no-cost satisfaction guarantee. Every cleaner follows a detailed cleaning checklist designed for Tucson’s specific hard water and climate conditions. You can check out the House Cleaning Service Tucson, AZ – Best Cleaning Company page for service details, pricing, and same-day booking options available seven days a week between 8am and 6pm.
Closing: Book Your Bathroom Deep Clean in Tucson Today
A sparkling, sanitized bathroom is within reach whether you follow this step-by-step guide yourself or bring in a professional team. Tucson homeowners dealing with hard water scale, monsoon-season mildew, or simply a bathroom that has not had a real deep clean in months deserve a room that looks, smells, and functions at its best. If you are ready to skip the scrubbing and hand it off to experts, Professional cleaning in Tucson is just a few clicks away. Book your cleaning online now or contact Elite Maids house cleaning today for a free quote and get your bathroom back to its best.
Frequently Asked Questions
How much is it to deep clean a small bathroom?
Professional deep cleaning for a small bathroom in Tucson typically ranges from $75 to $150 depending on the condition of the space, the products used, and the cleaning company. Standalone bathroom cleanings are sometimes priced as an add-on to a whole-home deep clean, which can make the per-room cost lower. Request an instant online quote for an exact price based on your home’s specifics.
How often should you deep clean a bathroom in Tucson?
Most Tucson homeowners benefit from a full bathroom deep clean every four to six weeks. Tucson’s hard water accelerates mineral scale buildup on fixtures and tile, so waiting longer than six weeks usually means more work per session. High-traffic bathrooms used by multiple people daily may need deep cleaning every two to three weeks.
What is the difference between a regular clean and a bathroom deep clean?
A regular clean covers visible surfaces: wiping counters, a quick toilet scrub, and mopping the floor. A bathroom deep clean goes further by targeting grout, mineral deposits, drain biofilm, exhaust vents, behind the toilet, inside cabinet interiors, and caulk lines. Deep cleaning takes more time and targeted products but produces results that a surface clean cannot match.
What products work best to deep clean a bathroom with hard water?
White vinegar, citric acid-based descalers, and commercial products containing hydrochloric acid are the most effective options for hard water mineral buildup. Baking soda works well as a gentle abrasive for grout. For disinfection, look for EPA Safer Choice-certified products that kill bacteria without introducing harsh chemicals into a small, enclosed space with limited ventilation.
Can I deep clean my bathroom in one day?
Yes. A thorough bathroom deep cleaning typically takes two to four hours depending on bathroom size and how long it has been since the last deep clean. Following a room-by-room checklist and allowing proper dwell time for cleaning products makes the process efficient. If the bathroom is heavily soiled, a professional team can complete the same job in under two hours.
Spring Cleaning Checklist for Salt Lake City Homes (Room by Room)
SHARE:
A spring cleaning checklist for Salt Lake City homes gives you a clear, room-by-room plan to tackle every dusty corner, grimy baseboard, and forgotten shelf after a long Utah winter. Salt Lake City’s dry air and canyon winds push fine dust into homes all season, making a thorough reset especially important. This post walks you through exactly what to clean, how to clean it the right way, and how to get professional help when you want the job done without lifting a finger.
Why Salt Lake City Homes Need a Spring Cleaning Reset Every Year
Winters in Salt Lake City are hard on homes. Inversion events trap particulate matter indoors, heating systems run nonstop, and doors stay shut for months. According to the EPA’s guidance on indoor air quality, indoor air can be two to five times more polluted than outdoor air, and that gap widens after a season of sealed windows and forced-air heat. When spring arrives, a proper spring cleaning routine is not just about appearances. It is about health.
Salt Lake City families deal with specific challenges that homeowners in milder climates skip entirely: inversion dust settling on every surface, tracked-in road salt on entryway floors, and moisture from snowmelt creeping into basements. A standard tidy-up will not cut it. You need a real spring cleaning plan that addresses these regional realities. Elite Maids House Cleaning built its seasonal service around exactly these conditions, and this checklist reflects that real-world experience.
If you want the shortcut, comment “Spring” below and we will send you a free printable Spring Cleaning Checklist you can post on your fridge and work through at your own pace. Keep reading for the full breakdown.
Room-by-Room Spring Cleaning Guide for Every Area of Your Home
A room-by-room spring cleaning approach keeps you from bouncing between spaces and losing momentum. Work top to bottom in each room so dust and debris fall to the floor before you sweep or vacuum. Here is how to move through your home efficiently.
Kitchen Spring Cleaning Tasks
The kitchen collects grease, food residue, and bacteria faster than any other room. Start your kitchen spring cleaning by pulling the refrigerator away from the wall and vacuuming the coils, then wipe the exterior and interior shelves with a food-safe cleaner. Degrease the range hood filter by soaking it in hot water and dish soap for 15 minutes. Wipe down cabinet faces, paying close attention to the area above the stove where grease mist settles. Clean the oven with a baking soda and vinegar paste if you want to avoid harsh fumes. Finish by scrubbing the grout lines between backsplash tiles, wiping the insides of drawers, and sanitizing the trash can inside and out.
Bathroom Deep Clean
Bathrooms need a true deep clean in spring, not just a surface wipe. Scrub tile grout with a stiff brush and a hydrogen peroxide solution. Remove the showerhead and soak it in white vinegar to dissolve limescale buildup, which is common with Salt Lake City’s hard water. Wash the shower curtain and liner in the washing machine. Clean the exhaust fan cover by removing it and rinsing it under warm water. Wipe down every wall, the toilet base, and the area behind the toilet that rarely gets touched during regular cleanings. Replace the toilet wax ring if you notice any movement or leaking odors.
Living Areas and Bedrooms
For living rooms and bedrooms, start at the ceiling: wipe fan blades, dust light fixtures, and clean air vents. Move to walls and windows, washing interior glass and wiping sills where grit collects. Then tackle furniture by moving pieces away from walls to vacuum underneath. Flip and rotate mattresses, wash all bedding including duvet covers and pillow protectors, and wipe down headboards. Good Housekeeping’s cleaning guides consistently recommend dusting blinds and laundering curtains during seasonal deep cleans, steps most people skip during weekly maintenance.
The Three-Towel Baseboard and Trim Cleaning Method
Baseboards, trim, and doors collect more dust and grime than most people realize, and they require a specific approach if you want results that actually last. The three-towel system used by professional cleaners breaks the job into three clean steps. First, dust the surface dry with a microfiber cloth to lift loose debris without smearing it. Second, use a damp towel with your cleaner of choice to scrub away stuck-on grime. Third, use a dry buffing towel to remove moisture and leave the surface streak-free.
This matters in Salt Lake City homes especially because inversion dust is ultrafine and clings to painted surfaces. A single wet wipe just pushes the particles around. The dry-first step is what separates a professional spring cleaning result from a DIY attempt that leaves a gray film behind. Apply this same three-towel approach to door frames, window casings, and cabinet edges. For technique guidance straight from cleaning pros, The Spruce offers solid visual walkthroughs on surface prep and buffing that complement this method well.
When you are done with the trim, do not neglect light switch plates and outlet covers. Remove them, wipe them with a slightly damp cloth, dry them completely, and reinstall. This small step makes painted walls look freshly done without a drop of paint.
Spring Cleaning Checklist: What Professional Cleaners Do That You Might Miss
A professional spring cleaning checklist goes well beyond the basics most homeowners cover. Here is what trained residential cleaners address that the average DIY session misses:
Cleaning inside and above kitchen cabinets where grease and dust layer together
Washing window tracks and sliding door channels with a toothbrush and all-purpose spray
Sanitizing remote controls, light switches, and door handles with disinfectant wipes
Cleaning under and behind large appliances including the washer, dryer, and refrigerator
Scrubbing grout lines on tile floors with a brush rather than a mop head
Wiping the tops of door frames, ceiling fan blades, and crown molding
Descaling faucets and showerheads to address mineral buildup from hard water
Vacuuming HEPA filter vents and return air registers to support indoor air quality
The American Lung Association’s indoor air resources highlight that reducing settled dust in living spaces has a direct impact on respiratory health, especially for children and older adults. A seasonal deep cleaning service addresses the sources of that dust at a structural level rather than just skimming the surface.
For Carpet cleaning Salt Lake City residents should also schedule a professional carpet clean as part of the spring reset. Winter foot traffic embeds salt, sand, and allergens deep into carpet fibers that a standard vacuum cannot extract.
If you want to see the full framework for tackling seasonal cleaning from start to finish, read our ultimate guide to spring cleaning for a deeper dive into every category of seasonal home care.
How Often Should You Schedule Professional House Cleaning in Salt Lake City
Spring cleaning is a once-a-year deep reset, but it works best when it is paired with a regular cleaning schedule throughout the year. One-time deep cleans cannot undo 12 months of buildup, and they are far harder to execute when surfaces have not been maintained in between. For most Salt Lake City households, a recurring maid service on a biweekly schedule keeps the home at a baseline that makes seasonal cleaning manageable.
Homes with pets, young children, or residents with allergies often benefit from weekly visits because dander, crumbs, and tracked-in debris accumulate faster. For lighter maintenance needs, a monthly house cleaning appointment combined with a thorough spring and fall deep clean covers most households well. If you are asking yourself how to find the right cadence, our post on house cleaning frequency in Salt Lake City breaks down the decision by household size, lifestyle, and budget.
Locally, Commercial Cleaning Services in Salt Lake City have seen a noticeable increase in demand for recurring residential packages as more homeowners recognize that consistent cleaning costs less in the long run than corrective deep cleans every few months.
The EPA’s Safer Choice program provides guidance on cleaning products that are effective without introducing harsh chemicals into your home’s air supply, something worth considering when selecting a cleaning team or choosing your own products for in-between sessions.
Eco-Friendly Spring Cleaning Options for Salt Lake City Families
Salt Lake City residents are increasingly asking for eco-friendly spring cleaning options, and for good reason. Many conventional cleaning products release volatile organic compounds (VOCs) into indoor air, which can irritate airways and linger long after the product dries. During spring cleaning when you are opening up windows and refreshing the whole home, it makes sense to choose products that do not undo that fresh-air effort.
Effective eco-friendly alternatives include:
White vinegar diluted in water for glass, tile, and non-porous surfaces
Baking soda as a mild abrasive scrub for sinks, tubs, and grout
Castile soap for floors, counters, and general surface cleaning
Hydrogen peroxide as a disinfectant on hard surfaces where bleach would be too harsh
Essential oil blends like tea tree and lavender added to homemade sprays for natural antimicrobial properties
Elite Maids House Cleaning offers eco-friendly product options for all service visits, including spring deep cleans. If you have family members with sensitivities, young children, or pets, just request green products when booking and the team will bring certified safer-choice formulations instead of conventional cleaners. For a complete seasonal cleaning plan that incorporates these choices, the spring cleaning guide on our site covers product selection room by room.
Deep House Cleaning Salt Lake City: When to Call in the Professionals
There are moments when the scope of spring cleaning goes beyond what a weekend and a few hours of motivation can handle. If you are moving into a new home, recovering from a renovation, hosting a large event, or simply staring at a list that has grown to three pages, a professional Deep house cleaning Salt Lake City service is the practical choice.
Professional spring cleaning teams bring commercial-grade equipment, trained technique, and enough staff to finish a full home in a fraction of the time it takes a solo homeowner. Background-checked, bonded, and insured cleaners also give you peace of mind that the people in your home have been vetted. Elite Maids House Cleaning backs every visit with a reclean-at-no-cost satisfaction guarantee, so if anything is missed, the team comes back and corrects it at no charge.
Booking is straightforward: online scheduling with instant quotes means you can lock in same-day service between 8am and 6pm without a phone call. Salt Lake City homeowners who want the spring reset done right the first time find that a single professional deep clean is worth every penny compared to spending a full weekend on a job that still feels incomplete on Sunday night. Consumer Reports has noted that professional cleaning services produce consistently better results on deep-clean tasks than consumer-grade products and equipment used at home.
Closing: Get Your Free Spring Cleaning Checklist and Book Your Clean Today
Salt Lake City homes deserve a fresh start after every winter, and having the right plan makes all the difference between a productive spring cleaning weekend and an exhausting one that still leaves half the list undone. Comment “Spring” below to get the free printable Spring Cleaning Checklist delivered straight to you. If you would rather hand the whole job to a team that will do it thoroughly, completely, and with a satisfaction guarantee backing every visit, you are in the right place. Whether you need a one-time deep clean, a recurring maid service, or a move-in refresh, the cleaning in salt lake city is one booking away. Contact Elite Maids house cleaning today for a free quote and get your Salt Lake City home cleaner than it has been all year.
Frequently Asked Questions
What is included in a professional spring cleaning checklist?
A professional spring cleaning checklist covers every room top to bottom: ceiling fans, light fixtures, and air vents at the top, then walls, windows, and baseboards, down to floors and grout. It also includes inside appliances, behind furniture, cabinet interiors, and often overlooked spots like door frames, switch plates, and exhaust fans. A thorough spring clean goes well beyond a standard weekly maintenance visit.
How long does a spring cleaning take for a typical Salt Lake City home?
For an average three-bedroom home in Salt Lake City, a thorough spring cleaning takes a solo cleaner six to nine hours. A professional team of two to three can complete the same scope in two to four hours. The time varies based on how much clutter needs to be moved, how long since the last deep clean, and whether carpet cleaning is included in the appointment.
Should I deep clean before or after spring in Salt Lake City?
Late March through April is the ideal window for a spring deep clean in Salt Lake City. By then, the worst inversion events have passed, temperatures are warm enough to open windows for ventilation during cleaning, and you beat the summer dust season that picks up in May and June. Scheduling your spring cleaning before allergy season peaks also helps reduce indoor pollen and allergen loads.
How much does a spring cleaning service cost in Salt Lake City?
Spring cleaning costs in Salt Lake City vary based on home size, current condition, and which add-ons you include such as inside appliances, window interiors, or carpet cleaning. Most homeowners with a two to three bedroom home should expect to invest between $200 and $400 for a comprehensive professional spring deep clean. Booking online with Elite Maids House Cleaning gives you an instant quote without a phone call.
Are eco-friendly cleaning products as effective as conventional ones for spring cleaning?
Yes, for most spring cleaning tasks, eco-friendly products perform comparably to conventional cleaners when used correctly. Vinegar and water handles glass and tile effectively, baking soda tackles abrasive scrubbing needs, and hydrogen peroxide disinfects hard surfaces. For very heavy grease or mold situations, a stronger professional-grade cleaner may be needed. Elite Maids House Cleaning offers EPA Safer Choice-aligned product options on request.
Green Cleaning vs. Traditional Cleaning in Mesa: Real Differences That Matter
SHARE:
Green cleaning and traditional cleaning are not the same thing, and the gap between them is wider than most Mesa homeowners realize. Green cleaning uses plant-based, biodegradable ingredients that are safer for your family and the environment, while traditional cleaning products often rely on synthetic chemicals that get the job done fast but carry real health and air-quality trade-offs. This post breaks down every meaningful difference so you can make a confident choice for your home.
If you are searching for the cleaning in mesa, understanding what goes into a cleaning visit matters just as much as how spotless your floors look afterward. Elite Maids House Cleaning serves Mesa and the surrounding Valley with both eco-friendly and traditional cleaning options, so you get the results you want on terms that work for your household.
1. What Is Green Cleaning and How Does It Differ from Conventional Cleaning?
Green cleaning, at its core, means using products and methods that minimize harm to people, pets, and the planet. Conventional cleaning, by contrast, prioritizes fast-acting chemical power, often using ammonia, chlorine bleach, synthetic fragrances, and other compounds that can linger in your air long after the cleaning crew has packed up.
The term “green cleaning” covers a wide range of approaches: plant-derived surfactants, diluted essential-oil solutions, baking soda and vinegar-based sprays, and certified eco-friendly commercial products. What ties them together is a commitment to avoiding the most harmful chemical classes. The EPA Safer Choice program certifies products that meet strict safety standards for human health and aquatic toxicity, and that certification is a reliable shorthand for what genuinely qualifies as a green cleaning product.
Traditional cleaning products are not automatically dangerous, but the average home cleaner may not read the fine print on labels that warn about skin irritation, respiratory sensitivity, or restricted use in enclosed spaces. Green cleaning alternatives sidestep most of those warnings by design.
2. Key Differences Between Green Cleaning and Traditional Cleaning Products
The real differences between green and traditional cleaning products come down to five things: ingredient sourcing, chemical concentration, residue left behind, fragrance type, and packaging. Here is how they stack up side by side:
Ingredients: Green products use plant-based or mineral-derived compounds. Traditional products often use quaternary ammonium compounds, chlorinated solvents, and petroleum-derived surfactants.
Chemical concentration: Traditional products are frequently more concentrated and faster-acting. Green products may require a bit more dwell time or mechanical scrubbing to match that power on heavy soil.
Residue: Many conventional cleaners leave a chemical film that can transfer to skin or be ingested by young children and pets who touch or lick surfaces. Green formulas generally break down faster and leave minimal residue.
Fragrance: Traditional products often use synthetic fragrances that can trigger asthma and allergies. Eco-friendly cleaning products use natural essential oils or are fragrance-free entirely.
Packaging: Green-certified brands more often use recycled or refillable containers, cutting down on single-use plastic waste that ends up in Arizona landfills.
Mesa families who want a cleaning mesa reviews experience that also checks the eco-friendly box will find that the product differences above translate directly into a noticeable difference in how the home smells and feels after a visit.
3. Health and Environmental Concerns with Traditional Cleaning Products
This is where the green vs. traditional cleaning debate gets serious. Traditional cleaning products are the leading source of volatile organic compounds (VOCs) in residential settings, and according to EPA data on VOCs and indoor air quality, concentrations of many common pollutants are two to five times higher indoors than outside, partly because of household cleaning products.
For Mesa residents, indoor air quality is a year-round concern. Arizona’s hot, dry climate means windows stay closed and air conditioning runs constantly, which traps chemical residues inside longer than they would linger in climates where homes are ventilated more freely. Traditional cleaning sprays, drain cleaners, and disinfectants used in a sealed home can significantly elevate VOC levels.
The American Lung Association’s indoor air resources point out that people with asthma, allergies, or chemical sensitivities are the most vulnerable to cleaning-product fumes, but children and pets absorb more than adults do simply because they spend more time close to the floor where residues settle.
From an environmental angle, traditional cleaning chemicals that go down the drain do not always break down completely before reaching waterways. Phosphates and certain surfactants have been linked to algae overgrowth in freshwater systems. Green alternatives are formulated to biodegrade rapidly, which matters for Arizona’s water table and the Colorado River system that supplies much of the state.
4. Pros of Green Cleaning That Make a Real Case for Switching
Switching to eco-friendly home cleaning is not just about environmental idealism. There are practical, day-to-day benefits that Mesa homeowners notice quickly:
Safer for kids and pets: No harsh residues on countertops, floors, or bathroom surfaces means less exposure for the people and animals who touch everything.
Better for allergy and asthma sufferers: Eliminating synthetic fragrances and high-VOC sprays often reduces symptom flare-ups, especially in Arizona where dry air already irritates respiratory passages.
No strong chemical odor after cleaning: Your home smells clean, not like a hospital corridor. Green cleaning leaves a light, neutral, or naturally scented result.
Surfaces last longer: Strong traditional degreasers and bleach-based sprays can strip sealants, dull natural stone, and degrade grout over time. Plant-based formulas are generally gentler on surfaces.
Reduced packaging waste: Many eco-friendly cleaning lines offer concentrate refills that cut plastic use substantially.
For a practical guide to natural cleaning products you can use between professional visits, our post on green home cleaning products covers what actually works and what is mostly marketing.
5. Sustainability Considerations: What Green Cleaning Actually Means Long-Term
Sustainability in home cleaning is a longer conversation than a single product swap. True eco-friendly cleaning combines the right products with the right tools and habits. Recurring maid service with green products, for example, keeps surfaces consistently clean, which means you never need harsh corrective treatments to remove serious buildup.
Microfiber cloths are a key part of sustainable professional cleaning. According to Good Housekeeping’s cleaning guides, high-quality microfiber removes up to 99% of bacteria from surfaces with water alone, which dramatically reduces the need for chemical disinfectants. If you are curious about the cloth debate, our post on microfiber vs. cotton cloths for cleaning digs into which one actually performs better.
Long-term, choosing green residential cleaning also supports the broader goal of reducing toxic load in your home. Every time a surface is cleaned with a plant-based product instead of a chlorinated one, the cumulative exposure your family faces drops a little. Over months and years, that adds up in a meaningful way, especially for young children whose immune and neurological systems are still developing.
Mesa homeowners who book a deep cleaning service at least twice a year often find they need fewer harsh products in between because the baseline cleanliness is higher. That is a sustainability win that also saves money on cleaning supplies.
6. How Professional Cleaners Approach the Green vs. Traditional Cleaning Decision
Professional cleaners who offer both green and traditional options do not treat it as a binary choice. The honest answer is that the right approach depends on what needs to be cleaned, how dirty it is, and who lives in the home.
A bathroom with mild routine soil can be cleaned just as effectively with plant-based products as with bleach. A heavily soiled grout line or a mold-affected surface may call for a stronger disinfectant, and a trained cleaner knows the difference. The CDC’s guidance on mold in homes specifically addresses when disinfection is necessary versus when physical removal is more important, and professional cleaners follow that kind of science-based thinking rather than defaulting to the strongest product on the shelf.
At Elite Maids House Cleaning, every cleaner is background-checked, bonded, and trained to match the product to the task. That means eco-friendly options where they work fully, and stronger solutions only where the situation genuinely calls for it. You can check out what other Mesa customers say about their experience by looking at Dry cleaners Mesa, AZ reviews and local service comparisons. We also back every single visit with a no-cost reclean guarantee, so if anything is not right, we fix it.
7. How to Choose Between Green Cleaning Services and Traditional Cleaning for Your Home
Choosing between green cleaning services and traditional cleaning for your Mesa home does not have to be complicated. Here is a practical framework:
Who lives in your home? If you have infants, toddlers, elderly family members, pets, or anyone with respiratory conditions, green cleaning is the lower-risk default. The reduced chemical exposure matters more when vulnerable people are present.
What is your cleaning frequency? Homes cleaned weekly or biweekly rarely develop the kind of heavy buildup that makes traditional products feel necessary. Regular house cleaning with eco-friendly products keeps surfaces in good shape without ever needing a chemical reset.
Do you have specific problem areas? Hard water stains are common in Mesa because Arizona has notoriously mineral-rich tap water. Some eco-friendly acidic cleaners handle this well. Severe mold or years of grease buildup may call for a one-time traditional deep clean followed by a green maintenance routine.
What is your budget? Green products sometimes cost more per bottle, but professional services that offer them typically do not charge a large premium. The cleaning services mesa az perception that eco-friendly cleaning costs significantly more is largely a myth when you are booking a recurring service rather than buying retail quantities.
Do you want a certified approach? Look for cleaners who use EPA Safer Choice certified products or can show you the ingredient list on request. Greenwashing is real, and vague labels like “natural” mean nothing without a third-party standard behind them.
You can also book a cleaning visit online and specify your eco-friendly preference at checkout. Our instant quote system makes it easy to see pricing and schedule same-day service without a phone call.
8. Green Cleaning vs. Traditional Cleaning Costs in Mesa: What You Should Expect
One of the most searched questions around this topic is what the cost difference actually looks like. The short answer: in Mesa, you are unlikely to pay more than 5 to 10 percent extra for a green cleaning visit compared to a traditional one, and many services include eco-friendly products at no additional charge.
Where cost differences do appear is in the specialty product tier. Hospital-grade disinfectants or heavy-duty degreasers used for deep cleaning jobs can cost more per application, but those situations are occasional, not routine. For standard recurring residential cleaning services, the pricing gap between green and traditional is genuinely small.
Our internal data from serving Mesa and the broader Valley shows that customers who switch to eco-friendly cleaning rarely switch back. The results are comparable, the home smells better, and the peace of mind for families with children and pets is worth far more than a minor cost difference. For a broader breakdown of what a professional cleaning visit covers and what drives pricing, The Spruce’s cleaning coverage offers a solid consumer-facing reference point.
For anyone approaching a major transition, such as moving into a new Mesa property, an eco-friendly move-in cleaning sets a clean chemical baseline before you bring in furniture and personal items. That is the best possible starting point for a green home cleaning routine going forward.
You can also browse our ultimate guide to spring cleaning for a practical seasonal plan that pairs well with either green or traditional products depending on your preference.
Closing: Making the Right Call for Your Mesa Home
Whether you choose green cleaning, traditional cleaning, or a thoughtful combination of both, what matters most is that the job gets done right by people you can trust. Mesa families deserve a clean home without worrying about what chemicals are left on the countertops where their kids eat breakfast. That is the standard Elite Maids House Cleaning holds itself to every single visit. If you are ready to experience the cleaning services mesa has to offer, with eco-friendly options, guaranteed results, and instant online booking, contact Elite Maids house cleaning today for a free quote and see why we are the most-reviewed residential cleaning team in Arizona.
Frequently Asked Questions
Are green cleaning products as effective as traditional cleaning products?
For routine home cleaning, yes. Plant-based and EPA Safer Choice certified products remove everyday dirt, grease, and bacteria just as effectively as conventional cleaners in most situations. For heavy buildup, mold remediation, or severe disinfection needs, a trained cleaner may recommend a stronger targeted product. The gap in effectiveness is smaller than most people expect for standard residential cleaning tasks.
Is green cleaning more expensive in Mesa?
Not significantly. Most professional cleaning services in Mesa that offer eco-friendly options charge little to no premium for them during a standard recurring visit. Specialty deep-clean treatments can cost slightly more, but for weekly or biweekly home cleaning, the price difference is minimal. Many homeowners find they spend less on retail cleaning supplies when using a professional green service consistently.
What makes a cleaning product genuinely “green” versus just marketed as natural?
The most reliable indicator is third-party certification. The EPA Safer Choice label means the product has been evaluated for human health and environmental safety across its full ingredient list. Terms like “natural,” “plant-based,” or “eco-friendly” on a label without certification are marketing claims, not guarantees. When booking a cleaning service, ask which certifications their products carry.
Can I request green cleaning products for a deep clean or move-in clean?
Yes. Elite Maids House Cleaning offers eco-friendly product options across all service types in Mesa, including deep cleans and move-in or move-out cleaning. Simply note your preference when booking online and it will be accommodated. A green deep clean is a great way to set a safe chemical baseline in a new home before you move in your furniture and family.
Do green cleaning products work on hard water stains common in Mesa?
Mesa’s tap water is high in minerals, so hard water staining on faucets, shower glass, and fixtures is a very common complaint. Citric acid-based and white vinegar-based green cleaners are actually well-suited to dissolving mineral deposits. For severe buildup, a professional cleaner may use a stronger acidic solution, but most routine hard water staining responds well to eco-friendly acidic formulas with proper dwell time.
How to Keep a Clean House: 10 Proven Tips for a Spotless Home
SHARE:
Keeping a clean house comes down to a handful of consistent habits done on a regular schedule. When you build those habits into your weekly routine, clutter and grime stop piling up before they become a bigger problem. The tips below walk through the most effective strategies for maintaining a spotless home, from daily micro-tasks to seasonal deep cleans.
1. Start With a Cleaning Schedule That Actually Works
The single biggest reason homes get out of control is the absence of a consistent house cleaning schedule. Without one, tasks get skipped, forgotten, or pushed to a mythical “later” that never arrives. A realistic schedule splits chores into daily, weekly, and monthly buckets so no single cleaning session becomes a marathon.
A simple framework that works for most households looks like this:
Daily (5-10 minutes): Wipe kitchen counters, load the dishwasher, and do a quick surface reset in high-traffic rooms.
Weekly: Vacuum all floors, mop hard surfaces, clean bathrooms, and change bed linens.
Sticking to this rhythm means your home cleaning routine stays manageable. You spend 15 minutes a day instead of a full Saturday once a month. According to Good Housekeeping’s cleaning guides, maintaining a room-by-room schedule is one of the most reliable ways to reduce overall cleaning time without sacrificing results.
2. Declutter Before You Clean, Every Single Time
Cleaning around clutter is like mopping around furniture that never gets moved. You hit the visible surfaces but leave the actual problem untouched. Before you start any home cleaning session, spend five minutes doing a declutter pass through each room.
Pick up items that belong somewhere else and return them. Put dirty laundry in the hamper. Clear the kitchen counter of items that migrated there from other rooms. This decluttering habit is not optional if you want a truly clean house. It makes every subsequent step faster and the result look dramatically better.
Homes in Arizona’s desert climate face an extra challenge here because dust accumulates faster than in more humid regions. A decluttered surface is far easier to wipe down during your regular house cleaning visits than one buried under stacked mail and coffee mugs.
3. How the Right Cleaning Tools and Products Make Every Job Easier
Trying to keep a clean home with the wrong supplies is genuinely frustrating. A low-quality mop smears grime instead of lifting it. Paper towels on glass leave lint streaks. Investing in a small toolkit of quality cleaning tools pays off every week.
The essentials worth having on hand include:
Microfiber cloths (pack of 12 or more) for dusting, wiping, and polishing without scratching.
A quality vacuum with a HEPA filter, especially important if you have pets or allergy sufferers at home.
A flat-head mop with washable pads for hard floors.
An extendable duster for ceiling fans, light fixtures, and crown molding.
A spray bottle with an all-purpose cleaner for quick countertop and surface jobs.
For products, the EPA Safer Choice program certifies cleaning products that are effective without harsh chemical exposure inside the home. These options are a smart pick for households with children, pets, or anyone sensitive to strong cleaning agents.
4. Clean from Top to Bottom, Back to Front
This is one of the oldest rules in professional house cleaning, and it works because it obeys gravity. Dust and debris fall downward. If you vacuum the floor first and then dust the ceiling fan, you are undoing your own work.
The correct order for cleaning any room is:
Ceiling corners and light fixtures first.
Then shelving, furniture tops, and appliance surfaces.
Then countertops, tabletops, and mid-level surfaces.
Baseboards and floors last.
The same logic applies to moving through the house: start in the farthest room from the exit and work toward the door. That way you never track dirt back over surfaces you already cleaned. Every professional cleaning guide at The Spruce reinforces this sequence because it genuinely cuts total cleaning time.
5. Focus on High-Touch Surfaces for a Truly Hygienic Home
A home can look clean but still harbor the bacteria and viruses that make families sick. High-touch surfaces, meaning the spots everyone touches dozens of times a day, need sanitizing attention beyond a quick wipe.
The highest-priority surfaces include:
Door handles and knobs throughout the house.
Light switches in every room.
The refrigerator handle, microwave touchpad, and oven controls.
Faucet handles in kitchens and bathrooms.
Remote controls, keyboards, and charging cables.
Toilet flush handles and toilet seats.
Sanitizing these surfaces is different from cleaning them. Cleaning removes visible dirt; sanitizing kills pathogens on the surface. For households where someone has been ill, a full home disinfection service is the most thorough way to address every high-contact zone in one session.
The CDC’s guidance on healthy home environments consistently emphasizes that regular sanitizing of shared surfaces meaningfully reduces the spread of illness within households, especially during cold and flu season.
6. Tackle the Kitchen and Bathrooms First
If you only have limited time for house cleaning on any given day, the kitchen and bathrooms are where to concentrate your effort. These two areas carry the highest hygiene risk, accumulate grease and moisture faster than other rooms, and have the most immediate impact on how clean a home feels overall.
In the kitchen, the priorities are:
Wiping down stovetop grates and burners to prevent grease buildup.
Cleaning the inside of the microwave weekly.
Sanitizing the sink and faucet handles.
Wiping cabinet fronts near the stove where grease splatter collects.
In the bathroom, focus on:
Scrubbing the toilet bowl, tank, and seat.
Cleaning the shower and tub walls to prevent soap scum and mildew.
Wiping the vanity and sanitizing the sink and faucet.
Replacing or washing bath mats weekly.
Bathrooms left uncleaned for even a week or two in Arizona’s warm climate can develop mold and mildew in grout lines rapidly. The EPA’s mold resources note that moisture control and regular cleaning are the two most effective strategies for preventing indoor mold growth in residential spaces.
7. Build a Seasonal Deep Clean Into Your Yearly Routine
Even the most diligent weekly cleaning routine cannot reach every corner of your home on a regular basis. A seasonal deep clean fills that gap by addressing the areas that accumulate months of buildup: inside ovens and refrigerators, behind large appliances, inside closets, under furniture, and above cabinets.
Seasonal deep cleaning is also the right time to address tasks like:
Washing windows inside and out.
Cleaning window tracks and door tracks.
Scrubbing grout lines in tile floors and shower walls.
Sanitizing garbage cans and recycling bins.
Cleaning air vents and replacing HVAC filters.
Washing curtains and wiping down blinds.
For a complete room-by-room breakdown of what a thorough seasonal refresh should cover, the ultimate guide to spring cleaning covers every area of the home in detail. Most households benefit from at least one deep clean per season, with additional sessions before and after major events or moves.
8. Use Eco-Friendly Cleaning Products Without Sacrificing Results
There is a widespread assumption that green cleaning products do not clean as well as their chemical-heavy counterparts. That assumption is outdated. Today’s eco-friendly cleaning formulas, particularly those carrying the EPA Safer Choice certification, perform at the same level as conventional products while reducing the chemical load in your indoor environment.
This matters more than many homeowners realize. The EPA’s research on volatile organic compounds shows that many conventional cleaning sprays release VOCs into indoor air at levels that can aggravate respiratory conditions. In sealed Arizona homes running air conditioning for long stretches of the year, indoor air quality deserves real attention.
Simple eco-friendly swaps that make a genuine difference include:
Using white vinegar diluted in water as a streak-free glass cleaner.
Baking soda as a gentle abrasive for scrubbing sinks and tubs.
Castile soap as a base for an all-purpose kitchen and bathroom cleaner.
Microfiber cloths that clean effectively with only water, reducing the need for product altogether.
9. Know When to Hire a Professional House Cleaning Service
Even people who maintain a solid home cleaning routine reach moments when a professional service is the right call. Move-in and move-out cleans, post-renovation cleanup, event preparation, and recovery from a busy season are all situations where a trained, equipped team delivers results that a solo effort cannot match.
Working with trusted Arizona house cleaners means you are not spending your Saturday scrubbing baseboards while a team handles every room efficiently and thoroughly. For families in Phoenix, Mesa, Scottsdale, Chandler, Gilbert, and across the Valley, recurring professional cleaning on a weekly, biweekly, or monthly schedule keeps the home at a baseline that your own daily habits can easily maintain between visits.
When evaluating any cleaning company, look for background-checked cleaners, full insurance and bonding, and a satisfaction guarantee. A company that offers a reclean at no cost if you are not satisfied stands behind their work in a way that means something.
10. Stay Consistent: Small Daily Habits Prevent Big Cleaning Jobs
The hardest part of keeping a clean house is not any individual task. It is consistency. A five-minute kitchen wipe-down each evening prevents a 45-minute scrub session on Sunday. Making the bed each morning keeps a bedroom looking tidy even when nothing else has been touched.
The daily habits that carry the most weight for maintaining a spotless home include:
Wiping the stovetop after every use.
Putting items back where they belong immediately rather than setting them down temporarily.
Rinsing dishes before they sit in the sink overnight.
Doing a five-minute bathroom wipe after showering while everything is already wet and warm.
Sweeping or running a robot vacuum in high-traffic areas daily.
These small acts compound over time. Homes maintained with consistent daily habits require significantly less intensive cleaning when the weekend arrives. That is time back in your schedule for things that actually matter.
If you are ready to skip the scrubbing and let a professional team handle the heavy lifting, Arizona’s most-reviewed house cleaning company is available for same-day bookings, instant online quotes, and recurring service across Phoenix, Scottsdale, Mesa, Chandler, Gilbert, Glendale, Queen Creek, San Tan Valley, Tucson, and Flagstaff. Every cleaner is background-checked, bonded, and insured, and every visit is backed by a satisfaction guarantee. Book your first clean today and get your weekends back.
Most homes benefit from a thorough deep clean two to four times per year, with one major session each season. High-traffic households with children or pets may need one every two months. Between deep cleans, a consistent weekly cleaning routine keeps grime from building up to the point where a full deep clean becomes an all-day project.
What is the fastest way to clean a house?
The fastest approach is to gather all supplies in one caddy so you never backtrack for products, clean top to bottom in each room, work in one direction through the house, and do a declutter pass first. Splitting tasks by room rather than by type saves significant time. For a whole-home speed clean, most 2,000-square-foot homes can be covered in under two hours with this method.
What cleaning tasks do professional house cleaners typically cover?
A standard professional house cleaning service typically covers vacuuming and mopping all floors, cleaning bathrooms including toilets, tubs, and sinks, wiping kitchen counters and appliance exteriors, dusting surfaces and ceiling fans, and emptying trash bins. Deep cleaning add-ons cover inside ovens and refrigerators, baseboards, window interiors, and cabinet interiors.
How do I keep my house clean between professional visits?
The most effective strategy is a daily reset routine: wipe kitchen surfaces after cooking, put items back where they belong each evening, and do a quick bathroom wipe a few times per week. Five to ten minutes of daily maintenance keeps the home looking presentable and makes each professional cleaning session faster and more thorough.
Are eco-friendly cleaning products as effective as regular cleaners?
Yes, for the vast majority of household cleaning tasks. EPA Safer Choice certified products are tested for both safety and performance. Microfiber cloths, diluted white vinegar, baking soda, and plant-based all-purpose sprays handle most surfaces effectively. The one area where you may need a stronger product is heavy mold or mineral deposit buildup, which may require a more targeted treatment.
How to Clean a Coffee Maker with Vinegar in Arvada
SHARE:
To clean a coffee maker with vinegar, fill the water reservoir with equal parts white vinegar and water, run a brew cycle halfway, let it sit for 30 minutes, then complete the cycle. Follow up with two full cycles of plain water to rinse out any residual vinegar taste. This post covers every step in detail, plus tips on how often to clean your machine and what else you can do to keep your kitchen spotless in Arvada.
Why Cleaning Your Coffee Maker with Vinegar Actually Matters
Most people wipe down the outside of their coffee maker and call it clean. The problem is what builds up on the inside over time. Hard water leaves behind limescale deposits that clog the heating element, slow brew times, and make your coffee taste off. Oils from ground coffee also accumulate inside the carafe and along the brew basket, turning bitter and rancid if left too long.
White vinegar is one of the most effective natural descalers available because its acetic acid dissolves mineral buildup without leaving harmful chemical residue behind. According to Good Housekeeping’s cleaning guides, regular descaling with a diluted vinegar solution can extend the life of your appliance by years. That is good news for Arvada homeowners who want to keep their kitchen running well without buying a new machine every few years.
Skipping this step does real damage. Mineral scale insulates the heating element, forcing it to work harder to reach brewing temperature. You end up with lukewarm coffee and a shorter appliance lifespan. Cleaning your coffee maker with vinegar every one to three months solves both problems with a product you almost certainly already have under your sink.
If you want a broader approach to deep cleaning your kitchen appliances, check out this guide on kitchen deep cleaning in Santa Fe for a room-by-room framework you can apply at home.
What You Need Before You Start
Cleaning a coffee maker with vinegar requires almost nothing you would need to buy. Here is a quick list of what to gather before you begin:
Distilled white vinegar (plain household vinegar, not apple cider)
Fresh cold water
A clean dish towel or paper towels
Dish soap and a soft sponge for the removable parts
A small cleaning brush for the brew basket (optional but helpful)
That is it. You do not need a specialty descaling tablet or a commercial cleaning product. The vinegar solution does the heavy lifting on its own. If your machine has a mineral buildup indicator light, this process will reset it once the heating element is fully clear.
One thing worth checking before you start: your machine’s manual. Some manufacturers, particularly those that make single-serve pod brewers, recommend a specific ratio or cycle count. For a standard drip coffee maker, the 50/50 vinegar-to-water ratio is the widely accepted standard covered by sources like The Spruce’s cleaning section.
Step-by-Step: How to Clean a Drip Coffee Maker with Vinegar
Follow these steps in order to clean your drip coffee maker with vinegar thoroughly and safely. This process takes about an hour total, but most of that is hands-off wait time.
Step 1: Empty and Rinse the Machine
Remove any coffee grounds from the brew basket and discard them. Rinse the carafe with warm water to remove old coffee residue. If the carafe has staining, a quick soak in warm soapy water while you run the vinegar cycle handles it easily.
Step 2: Fill the Reservoir with Your Vinegar Solution
Mix equal parts white vinegar and cold water. Pour the mixture into the water reservoir up to its full capacity. Place the empty carafe back on the warming plate and insert a clean paper filter into the brew basket.
Step 3: Run a Half Cycle
Start a normal brew cycle. When the machine has brewed about half of the reservoir, turn the coffee maker off. Let the vinegar solution sit inside the machine for 30 to 60 minutes. This soak time is what allows the acetic acid to break down limescale deposits inside the boiler and along the water lines.
Step 4: Complete the Brew Cycle
Turn the coffee maker back on and let it finish the remaining half of the vinegar-water mixture. Once the cycle is complete, pour the liquid from the carafe down the drain and remove the used paper filter.
Step 5: Run Two Full Water Rinse Cycles
Fill the reservoir with plain cold water to its maximum level and run a complete brew cycle. Discard the water. Repeat this a second time. Two full rinse cycles remove all traces of vinegar so your next pot of coffee tastes clean. Some Arvada residents with older machines or heavy mineral buildup run a third rinse cycle just to be safe.
Step 6: Hand Wash the Removable Parts
While the machine is still warm but not hot, wash the carafe, brew basket, and lid with warm soapy water. A soft sponge handles most residue. For stubborn coffee staining inside the carafe, a paste of baking soda and a little water scrubbed gently with a sponge works well. Rinse everything thoroughly before reassembling.
How Often Should You Clean Your Coffee Maker with Vinegar
The right frequency depends on how often you brew and what kind of water you use. In Arvada, where the water supply comes through municipal treatment and can carry moderate mineral content, buildup can happen faster than people expect.
Daily coffee drinkers: Clean your machine with vinegar every 4 to 6 weeks.
Occasional users (a few times per week): Every 2 to 3 months is sufficient.
Households with hard tap water: Move toward the shorter end of whichever range applies to you.
Signs that your machine needs cleaning sooner than scheduled include longer brew times, coffee that tastes bitter or weak, a gurgling or sputtering sound during brewing, or visible mineral deposits around the water reservoir opening. If your machine has a descaling or clean indicator, trust it.
Consumer Reports notes in its appliance and cleaning coverage that skipping descaling is one of the leading causes of premature coffee maker failure. A few minutes every month or two is a reasonable trade for an appliance that can cost $100 or more to replace.
While you are in that cleaning routine mindset, it is worth checking our ultimate guide to spring cleaning for a full home reset that goes far beyond the kitchen.
Cleaning a Keurig or Single-Serve Coffee Maker with Vinegar
The vinegar descaling method works on single-serve brewers too, but the process is slightly different because there is no traditional carafe or brew basket involved. If you have a Keurig or similar pod machine, here is how to adapt the cleaning steps.
First, remove and hand wash the water reservoir, lid, mug tray, and K-cup holder with warm soapy water. Set them aside to dry. Fill the reservoir with a 50/50 white vinegar and water solution. Place a large mug under the brew head and run the largest cup size available, without inserting a pod. Continue running brew cycles until the reservoir is half empty, then let the machine sit for 30 minutes before finishing.
Once the vinegar solution is fully brewed through, refill the reservoir with plain water and run at least three full rinse cycles. Single-serve machines have more internal tubing and a needle that punctures pods, so they tend to hold onto vinegar taste a bit longer than drip brewers. Three rinse cycles is the minimum.
For Arvada households using a pod-style brewer as part of a busy morning routine, a clean machine makes a real difference. Mineral buildup in a single-serve brewer is more likely to cause visible scaling around the needle and reservoir connection, and it can affect cup temperature noticeably.
When you are in deep-clean mode throughout the kitchen, deep cleaning services from a professional team can take care of the larger tasks while you handle appliance maintenance yourself. For a complete home deep clean checklist, the deep clean checklist for Queen Creek homeowners offers a thorough room-by-room structure that applies equally well to Arvada homes.
If you want a similar deep-dive focused on drip machines in another Arizona community, the coffee maker cleaning guide for Mesa homeowners covers several useful variations on the vinegar method.
Meanwhile, Arvada neighbors looking for reliable Summit cleaning Arvada options for their whole home can find professional crews ready to handle what the vinegar rinse cannot.
Natural Alternatives and When to Use Them
White vinegar is the most accessible and effective household option for descaling a coffee maker, but it is not the only one. Here are a few natural alternatives that Arvada residents sometimes ask about, along with honest guidance on when they make sense.
Baking Soda
Baking soda is a mild abrasive and deodorizer that works well for cleaning the carafe and brew basket but does not descale the internal components effectively. Use it for surface staining, not as a substitute for the vinegar cycle.
Lemon Juice
Diluted lemon juice contains citric acid and can work as a descaler in a pinch. Mix one part lemon juice with two parts water and follow the same cycle process. The downside is that lemon juice leaves a stronger taste residue than vinegar and requires more thorough rinsing.
Commercial Descaling Tablets
Products like Dezcal and similar commercial descalers are formulated specifically for coffee makers and are particularly useful for espresso machines or brewers with brass or aluminum components that can be sensitive to high concentrations of acetic acid. For standard drip machines, the vinegar solution is sufficient and far less expensive.
The EPA Safer Choice program is a useful resource for Arvada homeowners who want to verify which cleaning products are genuinely safer for household use and plumbing systems. Looking for the Safer Choice label on commercial descalers is a quick way to vet them before buying.
The holiday cleaning services offered by Elite Maids are a great complement for when your home needs a professional reset beyond what DIY methods can accomplish.
Keeping the Rest of Your Kitchen Clean in Arvada
Cleaning your coffee maker with vinegar is a satisfying quick win, but it is just one piece of a clean kitchen. In Arvada, where many households keep their homes tidy year-round, pairing DIY appliance maintenance with a regular professional cleaning schedule makes the biggest difference.
Elite Maids House Cleaning is a family-owned residential cleaning team serving homeowners throughout Colorado and Arizona. Every cleaner on the team is background-checked, bonded, and insured. The team backs every visit with a reclean-at-no-cost satisfaction guarantee, so if something is not right, they come back and fix it at no charge.
For Arvada residents who want the convenience of a clean kitchen without spending their Saturday scrubbing, House Cleaning Services in Arvada, Colorado covers recurring weekly, biweekly, and monthly schedules as well as one-time deep cleans. Online booking with instant quotes means you can schedule same-day service between 8am and 6pm without picking up the phone.
Local Clean Queen Arvada searches consistently surface Elite Maids as one of the most-reviewed residential cleaning teams in the area, and that reputation is built on consistent results rather than marketing.
According to the American Lung Association’s indoor air quality guidance, keeping kitchen appliances and surfaces clean directly reduces the indoor pollutants and mold spores that circulate through your home. A clean coffee maker is a small piece of that picture. A professionally cleaned kitchen is a much larger one.
Whether you are in Arvada, the surrounding metro area, or anywhere nearby, having a clean home starts with small habits like descaling your coffee maker and scales up from there. The recurring maid service options from Elite Maids make it easy to keep every room in your home at that same level of clean, week after week.
How much vinegar do you use to clean a coffee maker?
Use equal parts white vinegar and water, filling the reservoir to its maximum capacity with the 50/50 mixture. For most standard drip coffee makers, that means between 6 and 12 cups of liquid total depending on reservoir size. This ratio is strong enough to dissolve mineral scale without damaging internal components.
Can you run just straight vinegar through a coffee maker?
It is not recommended. Undiluted vinegar is more acidic than needed and can be harsh on rubber seals and certain metal components inside the machine over repeated use. The 50/50 dilution with water is the standard that cleaning experts and appliance manufacturers consistently point to for safe and effective descaling.
How do you get the vinegar smell out of a coffee maker after cleaning?
Run at least two full brew cycles with plain cold water after the vinegar cycle is complete. Most drip machines are odor-free after two rinses. If a faint smell persists, a third rinse cycle with fresh water eliminates it. Avoid rushing the rinse step, since residual vinegar taste in your next pot of coffee is the most common complaint about this cleaning method.
How often should you clean your coffee maker with vinegar in Arvada?
For daily coffee drinkers in Arvada, once every four to six weeks is a practical schedule. If you brew only a few times per week, every two to three months is sufficient. Harder tap water accelerates mineral buildup, so households that notice scale deposits around the reservoir or slower brew times should clean more frequently rather than waiting for the scheduled date.
Does cleaning a coffee maker with vinegar actually improve the taste of coffee?
Yes, noticeably so. Mineral scale on the heating element prevents water from reaching the optimal brewing temperature of around 195 to 205 degrees Fahrenheit. Coffee brewed at lower temperatures tends to taste weak or sour. Removing that scale restores proper heat transfer, which directly improves extraction and flavor clarity in the finished cup.
How to Clean a Bathroom: The Ultimate Step-by-Step Guide
SHARE:
Cleaning a bathroom the right way means working top to bottom, letting products dwell before scrubbing, and never skipping the surfaces that harbor the most bacteria. A thorough bathroom cleaning takes 20 to 45 minutes depending on size and soil level. This guide walks you through every step, the best products to use, and pro tips that make the job faster and the results last longer.
1. Gather Your Bathroom Cleaning Supplies Before You Start
Walking back to the cabinet three times mid-clean wastes more time than the cleaning itself. Before you touch a single surface, load a caddy with everything you need. Having the right bathroom cleaning supplies on hand is the difference between a 20-minute job and an all-afternoon ordeal.
Here is what to grab:
All-purpose disinfectant spray for counters, the toilet exterior, and light switches
Shower and tub cleaner designed to cut through soap scum
Glass cleaner for mirrors and any glass shower panels
Microfiber cloths (at least three: one for the toilet, one for other surfaces, one for mirrors)
A toilet brush with stiff bristles
Grout brush or old toothbrush for tile lines
Mop or damp Swiffer pad for floors
Rubber gloves
If you prefer safer, lower-VOC options, look for products that carry the EPA Safer Choice label, which certifies that every ingredient meets strict safety standards. The licensed and insured Arizona maids at Elite Maids House Cleaning use eco-friendly product options on every job, so you always have that choice.
2. Clear the Clutter and Ventilate the Room
Open a window or flip on the exhaust fan before you open a single bottle. Many bathroom cleaners contain chemicals that affect indoor air quality, and ventilation protects you. According to the EPA, volatile organic compounds in cleaning products can reach levels two to five times higher indoors than outside.
Then clear every surface. Pull shampoo bottles, soap dishes, and decor off the counter and out of the shower. Put trash cans outside the door. Shake out any rugs. Cleaning around objects is how grime hides for months. Clearing the space first means zero obstacles when you need to move fast.
3. Apply Cleaning Products and Let Them Dwell
This is the step most people skip, and it is exactly why their bathroom does not look clean even after scrubbing. Dwell time is the window a cleaner needs to actually break down soil and kill pathogens, and skipping it forces you to work harder with the brush.
Here is the correct order for applying your best bathroom cleaner products before any scrubbing begins:
Spray the toilet bowl cleaner inside the rim first so it can run down and soak.
Spray your shower and tub cleaner on walls, the floor of the tub, and any glass panels.
Spray the sink basin and let it sit.
Spray the toilet exterior, including the tank, seat, lid, and base, with disinfectant.
Set a timer for 5 to 10 minutes. Go make coffee. When you come back, those products have done half the work for you, making this the single biggest efficiency tip in any step-by-step bathroom cleaning process.
4. How to Clean a Toilet Step by Step
The toilet is where most people focus their energy, but they often clean it in the wrong order. Here is the correct toilet cleaning process from top to bottom:
Flush to wet the bowl. If there is standing water above normal, the cleaner you applied will dilute. A quick flush first gives you a clean wet surface.
Scrub the bowl. Use a stiff toilet brush to scrub under the rim, around the waterline, and down to the drain hole. Pay special attention to the underside of the rim, where bacteria accumulate in the splash zone.
Flush again to rinse.
Wipe the exterior. Work top to bottom: tank lid, tank sides, handle, toilet seat (top and underside), toilet lid (top and underside), bowl exterior, and finally the base near the floor. Use a separate microfiber cloth from the one you use on sinks.
Do not forget the hinges. The bolts where the seat attaches to the bowl collect residue that many people miss entirely. A cotton swab or old toothbrush gets into those crevices quickly.
For households with hard water, a toilet cleaner that contains citric acid or a mild acid formula dissolves mineral rings far better than scrubbing alone. Cleaning a toilet step by step in this sequence prevents cross-contamination from the dirtiest part (the bowl) to cleaner surfaces.
5. How to Clean a Shower and Bathtub
Soap scum, mildew, and hard water deposits are the three enemies of a clean shower. Each requires a slightly different approach, which is why a single spray-and-rinse method rarely works on a shower that has not been deep cleaned recently.
For soap scum: The shower cleaner you applied during the dwell step should have loosened most of it. Scrub with a non-scratch pad or a stiff brush. For textured tub floors, a grout brush gets into the ridges. Rinse thoroughly.
For mildew on grout and caulk: A paste of baking soda and water applied with a grout brush, left for a few minutes, then scrubbed, removes surface mildew. For persistent mold, a diluted bleach solution (one part bleach to ten parts water) works well on white grout, but test on a hidden spot first. The CDC notes that mold in bathrooms can affect respiratory health, so addressing it promptly matters beyond just appearance.
For glass shower doors: After the initial cleaner rinse, spray with glass cleaner and wipe with a dry microfiber cloth using horizontal strokes on one side and vertical strokes on the other. That way you can immediately tell which side still has streaks.
For shower heads: Fill a plastic bag with white vinegar, tie it around the shower head so the head is submerged, and leave it for 30 minutes to an hour. Remove, run hot water for 30 seconds, and the mineral buildup flushes right out.
If you book a professional bathroom disinfection service, technicians handle mold spots, grout cleaning, and hard water deposits that routine scrubbing cannot fully address.
6. How to Clean a Bathroom Sink and Vanity
Bathroom sinks see toothpaste, makeup, hair product, and soap every single day, and most of that residue builds up on the faucet hardware and around the drain faster than anywhere else on the vanity.
Sink basin: By now your cleaner has been dwelling. Scrub with a microfiber cloth or non-scratch sponge, paying attention to the overflow drain (the small hole near the top of the basin) and the rim around the drain. Rinse thoroughly.
Faucet and handles: Toothpaste splatters and hard water deposits cling to faucet bases. A small amount of all-purpose cleaner on an old toothbrush scrubs around the base of the faucet handles in seconds. Dry with a cloth immediately to prevent water spots from reforming.
Drain: If water is draining slowly, remove the drain stopper (most lift straight out or unscrew) and clean the hair and soap buildup off it. A hair-catching drain cover is a small investment that prevents slow drains from becoming a plumbing call.
Vanity countertop and cabinet fronts: Wipe all countertop surfaces with disinfectant, then dry. Wipe down the exterior of cabinet doors and drawers with a damp cloth. Toothpaste splatters on mirror-level cabinet fronts are more common than people notice.
7. Clean the Bathroom Mirror and Fixtures
Mirrors are cleaned last among vertical surfaces so that any spray mist from the toilet or shower cleaner has settled. Spray glass cleaner directly onto a dry microfiber cloth rather than onto the mirror, which prevents overspray from landing on freshly cleaned surfaces around it.
Wipe in an S-pattern from top to bottom. Check from a side angle under the light to catch any spots you missed. Streak-free mirrors make the entire bathroom look cleaner at a glance, even if nothing else has changed.
While you are at eye level, wipe light switch plates, towel bars, toilet paper holders, and door handles with a disinfectant cloth. These are among the most-touched surfaces in any bathroom and are almost always skipped during routine cleaning. The cleaning editors at Good Housekeeping consistently point out that high-touch hardware is where cross-contamination happens most.
8. How to Deep Clean Bathroom Floors and Baseboards
Bathroom floors collect hair, product residue, and dust at a rate that surprises most homeowners. The correct deep clean bathroom floor sequence: sweep or vacuum first, then mop. Mopping without sweeping first just spreads wet hair and debris around.
For tile floors, use a cleaner appropriate for your grout type. Sealed grout can handle most all-purpose cleaners. Unsealed grout is more porous and benefits from a pH-neutral cleaner to avoid discoloration. Scrub grout lines with a stiff brush on a regular deep clean schedule, not just when they look visibly dark.
Baseboards in bathrooms get overlooked almost universally. Wipe them with a damp microfiber cloth, then dry. Hair and dust cling to the textured paint surface, and over time that buildup becomes obvious.
Allow the floor to dry completely before putting rugs back. Wet rugs on a damp floor create exactly the moisture conditions that encourage mold and mildew between cleanings.
If keeping up with a full bathroom deep clean feels like too much on top of a busy week, booking a professional cleaning online takes less than two minutes and gets a vetted cleaner to your door as soon as the same day.
9. Your Bathroom Cleaning Checklist at a Glance
Use this bathroom cleaning checklist to make sure nothing gets missed. Print it, screenshot it, or just run through it mentally before you put the supplies away.
Ventilation on before you start
Surfaces cleared and trash removed
All cleaners applied and allowed to dwell
Toilet bowl scrubbed and flushed clean
Toilet exterior wiped top to bottom (separate cloth)
Toilet seat hinges cleaned
Shower walls, floor, and door scrubbed and rinsed
Shower head descaled if needed
Grout lines scrubbed
Sink basin and overflow drain cleaned
Faucet and handles scrubbed and dried
Drain cleared of buildup
Vanity countertop wiped and disinfected
Mirror cleaned streak-free
Light switches, towel bars, and door handles disinfected
Floor swept or vacuumed, then mopped
Baseboards wiped
Rugs returned only after floor is dry
Running through a how-to-clean-a-bathroom checklist like this takes the guesswork out of the process and keeps every visit consistent, whether you are doing it yourself or preparing a bathroom before guests arrive.
10. How Often to Clean a Bathroom and Maintain Results Between Cleans
A full bathroom cleaning top to bottom should happen at minimum every two weeks for a household of two or more people. High-traffic bathrooms used daily by multiple people benefit from a weekly clean. Between those sessions, a few two-minute habits keep buildup from compounding:
Squeegee shower walls after every use. This single habit cuts soap scum buildup by roughly half.
Wipe the sink dry after brushing teeth. Water spots and toothpaste harden fast.
Spray the toilet bowl with a quick spritz of cleaner once mid-week and let it sit until the next flush.
Keep a microfiber cloth under the sink for fast mirror and counter wipes.
Run the exhaust fan for 15 to 20 minutes after every shower to reduce the moisture that feeds mold and mildew.
Consistent maintenance between professional or DIY deep cleans is what keeps a bathroom looking clean day to day without a major scrub session every week. Arizona’s most-reviewed house cleaning company offers recurring weekly, biweekly, and monthly service so these deep cleans happen on a schedule you can actually stick to.
Ready to Skip the Scrubbing? Contact Elite Maids House Cleaning
A clean bathroom is not just about appearances. It is about hygiene, comfort, and not spending your weekend with a grout brush. If you would rather hand this off to a professional team that is background-checked, bonded, and backed by a satisfaction guarantee, contact Elite Maids house cleaning today for a free quote. Serving Phoenix, Mesa, Scottsdale, Gilbert, Chandler, Glendale, Queen Creek, San Tan Valley, Tucson, and Flagstaff with same-day availability and instant online booking between 8am and 6pm.
Frequently Asked Questions
What is the best bathroom cleaner for 2026?
The best bathroom cleaner depends on what you are fighting. For general disinfection, a hydrogen-peroxide-based spray handles bacteria and viruses without harsh fumes. For soap scum in showers, a citrus-acid formula or a dedicated soap scum remover outperforms all-purpose sprays. For toilets, a gel cleaner with a thick consistency clings under the rim long enough to actually disinfect. Look for EPA Safer Choice-certified options if indoor air quality or kids are a concern.
How often should you deep clean a bathroom?
Most bathrooms need a full deep clean every one to two weeks, with light maintenance like wiping the sink and squeegeeing the shower done daily or every other day. Households with more people, pets, or heavy traffic should lean toward weekly. If a bathroom has visible mold, hard water buildup, or grout discoloration, a professional deep clean is the faster, more effective starting point before switching to a maintenance routine.
What order should you clean a bathroom in?
Always clean top to bottom and wet before dry. Apply bowl cleaner and shower spray first to maximize dwell time, then clean the mirror, wipe down shelves and the vanity, scrub the toilet exterior, scrub the sink, scrub the shower and tub, then finish with the floor. Cleaning in this sequence prevents dirty water and spray from dripping onto already-clean surfaces below.
How do you remove hard water stains from a bathroom?
White vinegar is the most accessible solution. Soak a cloth in undiluted white vinegar and lay it directly on the stain for 30 to 60 minutes, then scrub and rinse. For faucets, a vinegar-soaked paper towel wrapped around the base works well. Commercial limescale removers with citric or sulfamic acid work faster on heavy buildup. Avoid abrasive scrubbers on chrome or polished fixtures since they cause permanent scratching.
Can you clean a bathroom without bleach?
Yes, and many professionals prefer it. Hydrogen peroxide at a 3 percent concentration disinfects surfaces effectively without the fumes or fabric-bleaching risk of chlorine bleach. Enzyme-based cleaners break down organic matter like hair product residue and soap. For mold on grout, a commercial mold-specific spray that uses hydrogen peroxide or tea tree oil handles most surface mold. Proper ventilation and regular cleaning prevent most situations where bleach would feel necessary.
How to Deep Clean a Kitchen in 30 Minutes in Santa Fe
SHARE:
You can deep clean a kitchen in 30 minutes by working in a specific order: clear surfaces first, then spray everything down at once so cleaners do the soaking while you scrub elsewhere. This method removes grease, bacteria, and grime without wasted motion. The steps below walk you through the exact sequence Santa Fe homeowners use to get a spotless kitchen fast, whether you’re doing a quick reset before guests arrive or following a regular cleaning in Santa Fe routine.
1. Gather Your Supplies Before You Start the Clock
The biggest time-waster in any kitchen deep clean is hunting for supplies mid-task. Before you start the timer, pull everything out: an all-purpose spray, a degreaser, a microfiber cloth, a scrub sponge, baking soda, white vinegar, paper towels, and a trash bag. Having every tool within arm’s reach means you never break momentum.
If you prefer safer, low-VOC products, check the EPA Safer Choice program for certified cleaners that cut grease without harsh fumes. Santa Fe kitchens tend to accumulate cooking residue fast, especially in homes where southwestern flavors and high-heat cooking are part of daily life. Prep your kit, set a timer for 30 minutes, and start at the top of the kitchen and work your way down to the floor.
2. Declutter Countertops and Clear the Sink
Speed-cleaning a kitchen starts with removing visual and physical clutter. Pull everything off the counters, stack dishes in the sink, and throw away any trash or expired items. Do not stop to wash individual dishes yet. This decluttering step takes about two to three minutes but makes every other step faster because you have open surfaces to work with.
A clean kitchen starts with clear surfaces. Once the countertops are bare, you can spray the whole surface in one pass instead of navigating around appliances and mail piles. If you follow a structured cleaning schedule for your home, this declutter habit aligns perfectly with routines like the ones covered in our guide on keeping a clean house every week.
3. Spray Everything Down at Once (This Is the Secret)
The single biggest time-saving trick in a 30-minute kitchen deep clean is spraying all surfaces simultaneously so the cleaner does the work while you move on. Spray the stovetop, countertops, backsplash, sink basin, and the exterior of appliances all at once. Then walk away for two to three minutes and tackle something else.
This dwell time is where the real cleaning happens. Degreasers and all-purpose sprays need contact time to break down grease and stuck-on food. Skipping this step and wiping immediately is why most kitchen cleaning takes longer. According to Good Housekeeping’s cleaning guides, allowing a cleaner to sit for at least 60 seconds on greasy surfaces can cut scrubbing time in half.
4. Scrub the Stovetop and Oven Exterior
After the dwell time, come back to the stovetop first since it typically holds the most stubborn residue. Use your scrub sponge on the grates or burner rings, then wipe with a damp microfiber cloth. For baking soda paste on stuck-on spots, mix two tablespoons of baking soda with a small amount of dish soap and apply directly to the problem area. Let it sit for one minute, then scrub.
Wipe down the oven exterior, including the handle, control knobs, and the area around the burners. If your oven has a glass door with interior grime, that is a separate job for a full deep cleaning service rather than a 30-minute sprint. Focus the 30-minute kitchen deep clean on what guests and family members actually see and touch daily. The Santa Fe climate, dry and dusty for much of the year, means the top of the stove and surrounding surfaces collect a fine layer of particulate even between cooking sessions.
5. Wipe Countertops, Backsplash, and Cabinet Fronts
Now that the spray has done its job, wipe down all the flat surfaces with a clean microfiber cloth. Work in long, straight strokes rather than circles to avoid pushing grime around. Move from the back of the counter toward the edge, sweeping crumbs and residue off the surface as you go.
Pay attention to the backsplash near the stove where grease spatters collect. Wipe the fronts of cabinet doors at the most-touched spots, typically around handles and near the base of the upper cabinets. Cabinet fronts are often skipped during a quick kitchen cleaning, but they hold grease residue that builds up over time. If you want a room-by-room approach to thorough kitchen and home cleaning, the deep clean checklist for your home is a useful reference even for Santa Fe households.
6. Clean the Sink and Faucet
A gleaming sink pulls a whole kitchen together visually. Spray the basin with your all-purpose cleaner or a dab of dish soap and scrub in circular motions. Pay close attention to the drain area and the caulk line where the sink meets the counter, since mold and mildew can develop in those joints. The CDC notes that moisture-prone surfaces in kitchens and bathrooms are common sites for mold growth, making sink cleaning a genuine health task, not just an aesthetic one.
Wipe down the faucet handles and base with a damp cloth. Use an old toothbrush around the base of the faucet where soap scum and mineral deposits collect. In Santa Fe, where the water supply can have higher mineral content, calcium buildup on faucet hardware is especially common. A quick spray of white vinegar on these spots dissolves mineral deposits in about 60 seconds. Rinse with warm water, then dry the faucet with a cloth to prevent water spots.
7. Wipe the Refrigerator Exterior and Handle
The refrigerator exterior is one of the most-touched surfaces in any kitchen, which means it carries fingerprints, food splashes, and bacteria. Wipe down the entire front of the refrigerator with an all-purpose spray and microfiber cloth, focusing on the door handles and dispenser area if you have one.
Do not open the refrigerator for an interior clean during your 30-minute sprint. Interior refrigerator cleaning belongs in a more thorough session, like a one-time deep clean or periodic holiday cleaning before family gatherings. For the 30-minute kitchen deep clean, the exterior wipe-down is enough to keep the appliance looking maintained and prevent grime from transferring to your hands every time you reach for the handle.
8. Sweep and Mop the Floor to Finish Strong
Floors go last, always. Everything you scrub and wipe above the floor sends debris downward, so sweeping before wiping countertops means sweeping twice. Spend two to three minutes sweeping corners, under the toe-kick space below cabinets, and the area directly in front of the stove where crumbs concentrate.
Follow with a damp mop or a spray-and-wipe system for a hard floor. You do not need a full bucket-and-mop setup for a 30-minute kitchen deep clean. A flat mop head with a reusable microfiber pad cleans a standard kitchen floor in under four minutes. Indoor air quality improves when floor cleaning is consistent, since kitchen floors hold food particles and allergens that get stirred into the air. The American Lung Association recommends regular cleaning of high-traffic floors as part of a healthy indoor environment strategy.
9. Tackle Microwave and Small Appliance Exteriors
With your floors drying, use the final few minutes on the microwave interior and small appliance exteriors. For the microwave, place a bowl of water with a few tablespoons of white vinegar inside and microwave it for two minutes. The steam loosens splattered food so you can wipe the interior clean with a single swipe of a damp cloth. Wipe the exterior, button panel, and handle.
Wipe the exterior of your toaster, coffee maker, and any other small appliances sitting on the counter. These collect crumbs, oil mist, and dust that make a kitchen look dirtier than it is. A fast wipe with a lightly damp microfiber cloth takes 20 seconds per appliance. If you want deeper help with kitchen cleaning or a full professional clean for your Santa Fe home, professional cleaning services can cover every surface, including the spots a 30-minute session can’t reach.
10. When a 30-Minute Deep Clean Is Not Enough
A 30-minute kitchen deep clean is a powerful reset, but it is not a substitute for periodic professional cleaning. If your kitchen has not had a thorough clean in several weeks, if grease has built up behind the stove, or if cabinet interiors need attention, a proper disinfection service is the right call. This is especially true before major events, after a renovation, or when moving into a new home.
Elite Maids House Cleaning brings background-checked, insured, and five-star-rated cleaners to homes throughout the region. Every visit is backed by a reclean-at-no-cost satisfaction guarantee, so you never have to worry about a job left half done. If you want to extend the results of your 30-minute kitchen deep clean, a recurring maid service on a weekly or biweekly schedule keeps surfaces consistently clean so 30 minutes genuinely does the job every time. For more kitchen-specific techniques similar to what works in the high desert climate of Santa Fe, see our step-by-step post on kitchen deep cleaning in Flagstaff, which covers many of the same challenges. According to Real Simple’s cleaning advice, consistent maintenance cleaning between professional visits is the most effective strategy for keeping a kitchen genuinely clean, not just tidy.
If your kitchen needs more than a quick 30-minute reset, or if you would rather spend your weekend doing anything other than scrubbing, reach out to the team that Santa Fe homeowners trust. Contact Elite Maids House Cleaning in Santa Fe today for a free quote and get your kitchen, and your whole home, back to spotless without lifting a sponge.
Frequently Asked Questions
Can you really deep clean a kitchen in 30 minutes?
Yes, if you follow the right sequence. The key is spraying all surfaces at once so the cleaner does the work while you move to the next task. Working top-to-bottom and saving floors for last prevents double-cleaning. You will cover countertops, appliance exteriors, the sink, stovetop, and floors in about 30 minutes with focused effort and the right supplies ready before you start.
What is the best cleaner to use for a quick kitchen deep clean?
An all-purpose degreaser handles the majority of kitchen grime including stovetop residue, cabinet fronts, and countertops. For tough grease, a paste of baking soda and dish soap works without scratching. White vinegar in water is effective for mineral deposits on faucets and microwave interiors. For eco-conscious households, the EPA Safer Choice label identifies products that cut grease without harsh chemicals or strong fumes.
How do I deep clean a kitchen without chemicals?
White vinegar, baking soda, and dish soap handle most kitchen cleaning tasks without conventional chemicals. A baking soda paste scrubs the stovetop and sink. Vinegar dissolved in water cuts grease on appliance exteriors and glass surfaces. Steam cleaning with a microwave-safe bowl of hot water and vinegar loosens interior grime in minutes. These methods are effective, low-cost, and safe for households with children or pets.
How often should I deep clean my kitchen?
A light clean after every cooking session keeps surfaces manageable. A 30-minute deep clean of the kitchen once a week prevents grease and grime from building up to a point where scrubbing becomes necessary. A true professional-level deep clean, covering interior appliances, cabinet interiors, and behind-appliance spaces, is worth scheduling every one to three months depending on how heavily the kitchen is used.
What areas do most people forget during a kitchen deep clean?
The most commonly skipped areas are the backsplash above the stovetop, the top of the refrigerator, the area around the base of the faucet, cabinet door edges and handles, and the exterior of the range hood or vent. These surfaces collect grease and dust quickly but are easy to wipe down in under a minute each once you build them into your regular kitchen cleaning routine.
The Ultimate Deep Clean Checklist for Your Home in Queen Creek
SHARE:
A thorough deep clean checklist covers every surface, corner, and hidden area in your home that routine tidying misses. In Queen Creek, where desert dust and heat push grime into vents, grout lines, and appliance seals, a structured room-by-room approach is the only way to reset your home to truly clean. This post walks through every step, from the kitchen to the bedroom closet, so you know exactly what a professional-grade deep clean looks like.
1. What Is a Deep Clean and Why Queen Creek Homes Need One
A deep cleaning goes far beyond wiping counters and running a vacuum. It targets the buildup that accumulates over weeks or months: grease behind the stove, mineral deposits on faucets, dust layered on ceiling fan blades, and mildew creeping into tile grout. In Queen Creek, the combination of fine Arizona desert dust and intense heat means that dirt settles into every seam faster than it does in cooler, wetter climates. Pollen counts spike seasonally, and if your HVAC is circulating dusty air, that particulate lands on every shelf and upholstered surface in the house. According to the EPA’s indoor air quality guidance, indoor air can be two to five times more polluted than outdoor air, largely because of trapped dust, pet dander, and chemical residue from cleaning products. A thorough deep clean is one of the most direct ways to reduce that burden. For Queen Creek homeowners, scheduling a one-time deep clean at least twice a year, or before a move, after a renovation, or ahead of the holidays, is not optional maintenance. It is foundational to a healthy home.
2. Kitchen Deep Cleaning Checklist: The Hardest Room in the House
The kitchen earns its reputation as the most labor-intensive room on any deep clean house checklist. Grease aerosolizes every time you cook, and it settles on cabinet faces, the range hood interior, and the backsplash in layers you barely notice until they build up over months. Start your kitchen deep clean by pulling the refrigerator and stove away from the wall to clean behind and beneath them. Check the drip pans under burners, clean the oven interior using the self-clean cycle or a baking soda paste, and wipe down the inside of the microwave, including the ceiling and the turntable beneath the plate. Descale the coffee maker by running a cycle with white vinegar, then two rinse cycles of plain water. Wipe all cabinet faces and handles with a degreaser, clean the inside of cabinets and drawers, and discard expired pantry items. Scrub the sink basin and descale the faucet aerator by soaking it in white vinegar. Sanitize the garbage disposal by grinding ice cubes and salt, then flushing with lemon halves. For a full room-by-room kitchen strategy, our kitchen cleaning checklist breaks down every step in detail. The kitchen deep cleaning checklist should also include wiping the exhaust fan filter, cleaning the dishwasher door gasket, and scrubbing the grout between backsplash tiles. Do not skip the refrigerator coils; dusty coils make the unit work harder and cost more to run. According to Good Housekeeping’s cleaning guides, cleaning refrigerator coils annually can extend appliance life and reduce energy consumption noticeably.
3. Bathroom Deep Clean Checklist: Targeting Mold, Scale, and Hidden Grime
Bathrooms are where mold and mineral scale compete for territory, and both win if you let them. A proper bathroom deep cleaning checklist starts at the top: scrub the exhaust fan cover, which collects a surprising amount of lint and dust that then circulates through the room. Descale the showerhead by filling a plastic bag with white vinegar, securing it over the head with a rubber band, and letting it soak for at least an hour. Scrub the grout in the shower and on the floor tiles using a stiff brush; for stubborn mold, a paste of baking soda and hydrogen peroxide works without harsh fumes. The CDC notes that mold in homes can cause respiratory symptoms, especially in people with allergies or asthma, so treating it promptly during each deep clean is important. Clean the toilet inside the bowl, under the rim, around the base, and behind the tank. Wipe the entire vanity, including the inside of drawers and cabinets, and discard expired or unused personal care products, makeup, and medications. Polish mirrors, clean the light fixture covers, and scrub the floor and baseboard edges where soap residue and hair accumulate. Bathroom deep cleaning is also when you should caulk any cracked seams around the tub or shower base to prevent moisture from getting behind the wall. A complete deep cleaning house checklist treats the bathroom as a sanitation priority, not just a cosmetic one.
4. Bedroom Deep Cleaning Checklist: From the Mattress to the Closet
Most people underestimate how much a bedroom accumulates between deep cleans. A solid bedroom deep cleaning checklist starts with stripping the bed completely: wash the mattress cover, pillowcases, sheets, duvet cover, and the duvet or comforter itself if it fits your machine. Flip or rotate the mattress, then vacuum its surface using the upholstery attachment to remove dust mites and dead skin cells. Dust every surface from the ceiling down: fan blades, light fixtures, the tops of the headboard and wardrobe, window sills, and baseboards. Clean the inside of the closet, wiping shelves, reorganizing items, and vacuuming the closet floor. Wash or shake out any rugs in the room. Clean windows inside and out, including the tracks and frame, which gather a surprising amount of grit in Queen Creek’s dusty conditions. Wipe down all furniture surfaces and hardware, and vacuum upholstered pieces like chairs or benches. The American Lung Association recommends washing bedding in hot water regularly and vacuuming mattresses to reduce allergen exposure, a step that matters even more in a high-dust desert environment. Your bedroom deep cleaning checklist is also the right time to check under the bed: that zone is a magnet for dust bunnies, lost socks, and anything else that has rolled or slid out of sight over the months.
5. Living Room and Common Area Deep Clean: Upholstery, Vents, and Overlooked Spots
Living rooms and common areas tend to accumulate surface clutter, which tricks homeowners into thinking they are cleaner than they are. A deep cleaning apartment checklist or home checklist for these spaces should go well beneath the surface. Start by vacuuming all upholstered furniture, including beneath and behind cushions. Spot-clean any stains on fabric using an appropriate upholstery cleaner. Wipe down all hard surfaces: coffee tables, shelving units, entertainment centers, and decorative items. Dust blinds or clean curtains, which trap dust and allergens at every pleat. Clean the inside of any fireplace or clean around any gas insert; if you use a wood-burning fireplace, this is essential before heating season. Vacuum all air vents and returns throughout the house during this phase. The EPA’s mold resources remind homeowners that poor ventilation combined with dust buildup creates the conditions mold needs to establish itself. Clean baseboards, door frames, light switches, and wall plates, which are touched constantly but rarely wiped down. Vacuum and then mop hard floors, paying attention to edges and corners. For Queen Creek homes with tile throughout, grout cleaning in the common areas deserves its own dedicated effort. If you want a room-by-room template you can print or save, our checklist for deep cleaning every room gives you a ready-to-use breakdown. If you want to see how this checklist adapts to a specific home style, our deep cleaning checklist for Chandler bungalows shows how room size and layout affect the process.
6. Deep Cleaning for Appliances, Vents, and the Spots You Always Skip
Every deep clean house checklist has a section that most people skip because these tasks are not visually obvious until they are very overdue. In Queen Creek, desert air amplifies the need to stay on top of these areas. Washer and dryer: wipe the inside of the washer drum and clean the door gasket on front-loaders, where mold thrives in the folds. Clean the lint trap housing on the dryer by vacuuming out the slot behind the filter, and check that the dryer vent hose is clear. Dishwasher: remove and clean the filter basket at the bottom, wipe the door gasket, and run an empty cycle with a dishwasher cleaner or a cup of white vinegar on the top rack. HVAC vents: unscrew vent covers and wipe them down; vacuum the duct opening as far as your vacuum hose can reach. If you use a HEPA filter in your vacuum, this step genuinely captures fine particulate rather than redistributing it. Water heater area: wipe down the exterior and check for any corrosion or mineral buildup around the base. Garage entry and laundry room: these are dust and dirt traps that rarely get full attention. Wipe walls, clean the floor, and organize shelves. Consumer Reports consistently notes that appliance maintenance, including cleaning, significantly extends the lifespan of washers, dryers, and refrigerators. Treating these tasks as part of your professional deep cleaning checklist rather than an afterthought pays off in both air quality and appliance longevity. This is also when to schedule a holiday cleaning if your home hosts guests, since post-holiday grime compounds quickly if you let it sit.
Running through a deep clean house checklist on your own is absolutely doable. But there are situations where hiring a professional house cleaning service in Queen Creek saves you time, energy, and frustration. Move-in and move out cleaning in Queen Creek is the clearest example. When a lease ends or a home sale closes, the scope of what needs to happen, cleaning inside cabinets, appliances, closets, and every surface, goes far beyond what most homeowners can manage alongside packing and logistics. Post-renovation cleaning is another case: construction dust infiltrates every crevice, and without professional equipment, it recirculates for weeks. Seasonal deep cleans before summer or the holidays are a third scenario. Elite Maids maid service teams bring their own professional-grade supplies, use eco-friendly product options, and back every visit with a reclean-at-no-cost guarantee. Every cleaner is background-checked, bonded, and fully insured, which matters when you are letting someone into your home. For Queen Creek residents curious about pricing, you can check Cleaning in queen creek prices directly on the site and get an instant quote without picking up the phone. Elite Maids House Cleaning offers same-day scheduling between 8am and 6pm and serves Queen Creek as part of its broader coverage across Arizona’s Valley communities. Whether you want a one-time thorough cleaning or ongoing weekly or biweekly service, a professional team handles the scope, speed, and detail level that a solo effort rarely matches.
8. Building a Deep Clean Schedule That Actually Sticks
The biggest mistake homeowners make with a deep cleaning house checklist is treating it as a single event rather than a recurring system. The right cadence depends on your household. Homes with pets or young children need a full deep clean every two to three months. A two-person household with no pets can often stretch to every four to six months. Regardless of frequency, breaking the checklist into zones rather than attempting the entire home in one session makes the process far more manageable. Dedicate one weekend morning to the kitchen, another to bathrooms, another to bedrooms, and so on. A deep cleaning checklist template helps enormously here: print or save a version for each room and check off tasks as you go so nothing slips through. For a printed or downloadable version of the full checklist, our post on the ultimate deep clean checklist for your home gives you a complete template you can use immediately. If you live in an apartment or condo in Queen Creek, the scope differs slightly since you are working with less square footage and shared ventilation systems. Our apartment cleaning service handles those unique needs, including compliance with any move-out standards your landlord requires. Real Simple’s cleaning guides recommend tying deep clean tasks to seasonal anchors, like the start of fall and the end of winter, so they become a habit rather than an afterthought. The goal is a home that never gets so far behind that catching up feels impossible. And when it does start to feel overwhelming, that is exactly when a professional deep cleaning service in Queen Creek is worth every penny. Scheduling through our online booking page takes under two minutes and gives you an instant quote, so there is no excuse to put it off.
Ready to Deep Clean Your Queen Creek Home? Here Is How to Get Started
Whether you tackle the checklist yourself or hand it off to a professional team, the most important step is starting. Queen Creek homes deal with a unique combination of desert dust, heat, and seasonal allergens that make regular deep cleans more than a luxury. They protect your family’s health, preserve your home’s surfaces, and keep your space genuinely comfortable. If you are ready to skip the scrubbing and let professionals handle it, Cheapest cleaning in queen creek options are available on our site with instant online quotes. Contact Elite Maids house cleaning today for a free quote and find out why Queen Creek families trust us to give them their weekends back, visit after visit, with a satisfaction guarantee that means we are not done until you are happy.
Frequently Asked Questions
What is included in a deep clean for a house?
A deep clean for a house includes everything in a standard clean plus the areas that get skipped in regular maintenance: inside appliances, behind and beneath furniture, inside cabinets and drawers, grout scrubbing, descaling faucets and showerheads, cleaning vents and fan blades, washing baseboards, and sanitizing high-touch surfaces throughout. It is a top-to-bottom reset of the entire home rather than a surface-level refresh.
What should be included in a deep cleaning checklist?
A deep cleaning checklist should include room-specific tasks for the kitchen, bathrooms, bedrooms, living areas, and utility spaces. Kitchen tasks cover the oven interior, refrigerator coils, and cabinet faces. Bathrooms need grout scrubbing, showerhead descaling, and mold checks. Bedrooms include mattress vacuuming and closet cleaning. Common areas require vent cleaning, upholstery vacuuming, and baseboard wiping. Appliances and overlooked zones complete the list.
What is included in a deep clean of your home?
A deep clean of your home goes beyond surface cleaning to address hidden buildup, sanitation, and detail work throughout every room. This includes washing bedding, cleaning inside the refrigerator and oven, scrubbing tile grout, descaling plumbing fixtures, vacuuming mattresses and upholstery, cleaning light fixtures and fan blades, wiping all cabinet interiors, and disinfecting high-touch areas like door handles, light switches, and remote controls.
How often should Queen Creek homes be deep cleaned?
Most Queen Creek homes benefit from a professional deep clean every three to four months because of the region’s high dust levels and seasonal pollen. Households with pets, young children, or allergy sufferers may need deep cleaning every six to eight weeks. At minimum, scheduling a thorough deep clean twice a year keeps desert grime, mineral buildup, and indoor allergens from reaching levels that affect air quality and surface condition.
Is it worth hiring a professional deep cleaning service in Queen Creek?
For most homeowners, yes. A professional deep cleaning service brings commercial-grade equipment, trained techniques, and consistent checklists that cover areas a DIY approach often misses. In Queen Creek specifically, where desert dust and heat accelerate grime buildup, professionals deliver a more thorough result in less time. Backed by a satisfaction guarantee and eco-friendly product options, a professional team gives you a genuinely clean home without sacrificing your weekend.
How to Deal with Cluttered Countertops in Queen Creek Homes
SHARE:
Dealing with cluttered countertops means clearing surfaces of items that do not belong, organizing what remains into logical zones, and building habits that keep the clutter from coming back. In Queen Creek homes, where open-concept kitchens and busy family schedules collide, countertop clutter is one of the most common complaints homeowners have. This guide walks through practical, step-by-step strategies to reclaim your surfaces and keep them clean for good.
If you live in Queen Creek, you already know how quickly a kitchen counter can go from spotless to completely buried. Between the mail, the kids’ school papers, the coffee maker, the air fryer, the vitamins, and the random items that land there because they have nowhere else to go, countertops take the brunt of daily life. The good news is that with a clear process, you can get those surfaces under control and actually keep them that way. Whether you are managing this on your own or you have been searching for cleaning queen creek arizona, this post covers both approaches so you can choose what works for your household.
1. Why Cluttered Countertops Are More Than Just an Eyesore
Cluttered countertops are not just a visual problem. When surfaces pile up with appliances, paperwork, and miscellaneous items, they create hidden hygiene issues that most homeowners overlook. Food crumbs and residue trapped under small appliances attract pests. Moisture from coffee makers or dish drying racks gets sealed under clutter and becomes a breeding ground for mold and mildew, which the EPA links to respiratory issues and allergic reactions.
Beyond health, countertop clutter makes cleaning harder. A professional cleaner cannot properly sanitize a surface that is buried under a dozen objects. The clutter prevents disinfectants from reaching the countertop material directly, which means bacteria and food residue linger even after a wipe-down. Messy countertops also raise stress levels. Research consistently shows that visual disorder increases mental fatigue and anxiety in household members, particularly in the kitchen where families spend so much time. In short, a cluttered countertop is a cleaning problem, a health problem, and a mental wellness problem all at once.
2. Do a Full Countertop Purge Before You Organize Anything
The single biggest mistake people make when trying to deal with cluttered countertops is organizing without purging first. You cannot create a clean, functional surface by rearranging clutter. You have to remove everything from the counter completely, set it on the kitchen table or floor, and then make deliberate decisions about what earns back its spot.
Go through every item using three categories: keep on the counter, store elsewhere, or donate and discard. An item earns a spot on the counter only if you use it every single day. The toaster? Probably stays. The bread maker you used twice in three years? It needs to go to a cabinet or a donation pile. The pile of mail and permission slips? Those need a dedicated home somewhere that is not the counter. Be ruthless here. Every item you allow back onto the surface is a commitment to working around it during cleaning. Once you have cleared everything, wipe the bare countertop down thoroughly before anything goes back. This is also a great moment to schedule a deep cleaning service if grime, grease, or staining has built up under the clutter over time.
3. Set Up Countertop Zones That Match How You Actually Cook
Once your countertops are clear, the next step is to organize what stays into intentional zones. Countertop zone organization is the practice of grouping items by function so that your counter works with your routine instead of against it. Think of it like a workstation: each zone has a purpose, and nothing lives in a zone unless it serves that purpose.
Common zones in a Queen Creek kitchen might include a coffee and beverage zone near the outlet closest to the refrigerator, a prep zone near the sink with a cutting board and knife block, and a small appliance zone for the toaster or microwave if it does not fit in a cabinet. The key to making zones work is strict boundaries. Items from the coffee zone do not migrate to the prep zone. When you finish using something, it goes back to its zone rather than landing wherever there is empty space. Zones also make countertop cleaning faster because a cleaner knows exactly what to move, wipe under, and replace in the right order. If you book recurring maid service with Elite Maids House Cleaning, your cleaner will work around your zones efficiently and consistently visit after visit.
4. Use Cabinet Space More Aggressively to Free Up Surfaces
Most Queen Creek homeowners are not using their cabinet space to its full potential. This leaves items sitting on the counter that could easily live somewhere else. Aggressive cabinet organization is one of the fastest ways to clear cluttered countertops without buying a single organizational product.
Start by pulling everything out of your upper and lower cabinets. You will almost certainly find items you forgot you owned, multiples of the same thing, and products that have expired. Consolidating and editing your cabinet contents typically frees up one or two full shelves, which is enough space to move most of the small appliances currently living on your counter. Vertical space is almost always underused. Adding a second shelf riser inside a cabinet can double the usable storage in that cabinet. Pull-out drawer organizers mounted inside lower cabinet doors give you bonus storage for cleaning supplies, plastic wrap, and foil so those boxes stop taking up counter real estate. When your cabinets actually work for your lifestyle, your countertops stop being a dumping ground because there is a clear home for everything.
5. Create a Command Station Somewhere Other Than the Kitchen Counter
One of the most persistent sources of kitchen counter clutter is paperwork: mail, school forms, bills, coupons, and lists. These items land on the counter because there is no better designated spot for them. The fix is to create a household command station in a different location, such as a hallway cabinet, a wall-mounted organizer in the laundry room, or a small desk area in the living space.
A command station does not have to be elaborate. It just needs a spot for incoming mail, a spot for outgoing mail, a small calendar or whiteboard, and a place to charge phones and devices. Moving device charging off the counter alone eliminates a tangle of cables and chargers that accumulates over time. For families in Queen Creek with school-aged kids, adding labeled folders or slots for each child’s papers makes a significant difference. When your command station is set up and everyone in the household knows to use it, the kitchen counter stops being the default landing zone for life’s administrative chaos. For more ideas on household organization and cleaning habits, resources like Good Housekeeping’s cleaning section offer reliable, tested guidance.
6. Adopt a Daily Countertop Reset Habit to Prevent Re-Cluttering
Clearing cluttered countertops is only half the work. The other half is staying consistent so they do not pile back up within a week. The most effective strategy is a daily countertop reset: a five-minute habit at the end of each day where you clear, wipe, and reset every surface to its baseline state.
A countertop reset is not a deep clean. It is a quick pass where everything gets returned to its zone or its home, crumbs get wiped up, and the surface gets a fast spray-and-wipe with an all-purpose cleaner. Done every night before bed, this habit prevents the slow accumulation that leads to clutter chaos. It also makes the kitchen genuinely welcoming every morning, which research highlighted by The Spruce suggests has a measurable positive impact on morning routines and overall household mood. If you struggle to build this habit on your own, having a professional cleaning team visit regularly acts as a natural reset point that motivates daily upkeep between visits. Many Queen Creek families find that once they start house cleaning visits on a biweekly schedule, they naturally keep their counters cleaner between appointments because they do not want the cleaner to arrive to a mess.
7. Choose Countertop-Friendly Cleaning Products That Do Not Add to the Clutter
Here is an irony most homeowners miss: the cleaning products meant to keep countertops clean are often part of the clutter problem. A collection of spray bottles, paper towel rolls, dish soap, and scrubbers sitting on the counter adds visual noise and takes up usable workspace. Keeping your cleaning supply footprint small is part of keeping countertops clear.
Simplify down to one all-purpose spray cleaner that is safe for your countertop material, stored under the sink rather than on the counter, and one small dish soap dispenser near the sink. For households with granite, quartz, or marble surfaces common in Queen Creek homes, make sure the cleaner is pH-neutral to avoid etching or dulling the finish. The EPA Safer Choice program certifies cleaning products that are effective and safer for indoor surfaces, which is a helpful filter when you are choosing what to stock under your sink. A good rule: if a cleaning product has not been used in two weeks, it does not belong on the counter. Store it below the sink or in a cleaning caddy that stays tucked away. This applies to hand soap dispensers too. One dispensed pump on the counter is enough. Three different soaps and a lotion bottle is clutter.
8. Know When to Call in a Professional Cleaning Team
Sometimes countertop clutter is a symptom of a bigger cleaning backlog. When grease has built up behind the stove, grime is caked under appliances, and every surface in the kitchen needs attention beyond a surface wipe, this is the moment to bring in professionals. A deep clean from a trained team resets your home to a baseline that is nearly impossible to achieve with weekend spot-cleaning.
Elite Maids House Cleaning serves Queen Creek families with thorough deep cleans that address what daily surface cleaning misses: the grime between appliances, the grease buildup under cabinet lips, the residue that collects in the seams where the counter meets the backsplash. Every cleaner on the team is background-checked, bonded, and fully insured, and every visit is backed by a reclean-at-no-cost satisfaction guarantee. You can book a cleaning online and get an instant quote without picking up the phone. Same-day appointments are available between 8am and 6pm for Queen Creek residents who need help quickly. For households preparing for a move, the team also handles move out cleaning in Queen Creek so you leave the property spotless and ready for inspection. Check current cleaning in Queen Creek prices to find the right service level for your home and budget.
9. Tackle Countertop Clutter Room by Room, Not All at Once
If the idea of clearing every cluttered surface in your home at once feels overwhelming, break the project into room-by-room sessions. Addressing countertop clutter room by room keeps the task manageable and lets you build momentum with quick wins before tackling harder spaces.
Start with the kitchen, since it is usually the highest-traffic surface and the one that affects daily life most. Once the kitchen counters are clear and organized, move to the bathroom vanity counters, which tend to collect makeup, hair tools, skincare products, and random items that never found a permanent home. After the bathrooms, tackle the laundry room counter if you have one, followed by any entryway or mudroom surfaces. Working through one room at a time, even spending just thirty minutes per session, makes steady progress without the exhaustion of an all-day marathon declutter. Consumer Reports consistently recommends incremental cleaning and organization strategies over large single-effort sessions for long-term results. Each room you finish gives you a model to maintain, which makes keeping the next room clear feel more intuitive.
10. Get the Whole Household Involved in Keeping Counters Clear
One person cannot maintain clear countertops alone if the rest of the household is not on board. Getting everyone involved in the countertop clutter solution is not just helpful, it is essential for long-term success. This means setting clear household expectations, not just asking nicely once and hoping for the best.
Start with a short household conversation about what belongs on the counter and what does not. Show everyone where items now live, whether that is a new cabinet spot, a command station, or a basket in the pantry. For children, make the rules visual: a labeled bin or basket in an easy-to-reach spot eliminates the excuse that they did not know where to put something. For adults, removing the temptation to drop things on the counter is more effective than willpower. If the counter is clear and clean, people are naturally more reluctant to mess it up. A cluttered counter invites more clutter. A clean counter maintains itself better than you might expect. Pair household habits with regular professional cleaning visits and the combination is hard to beat. Professional cleaning services from Elite Maids House Cleaning give your household a clean slate on a reliable schedule so the habits you are building have a strong foundation to work from.
11. Maintain the Progress with a Recurring Cleaning Schedule
The final piece of the countertop clutter puzzle is maintaining what you have worked to achieve. This means committing to a recurring cleaning schedule that keeps surfaces sanitized, surfaces from re-accumulating clutter, and your home feeling genuinely clean rather than just tidied on the surface.
A recurring cleaning schedule works on two levels. First, your own daily and weekly habits: the five-minute evening reset, a weekly wipe-down of all surfaces, and a monthly review of what has crept back onto the counters. Second, a professional cleaning visit on a cadence that matches your household’s needs. Weekly cleaning works well for large families or households with pets. Biweekly cleaning is the most popular choice among Queen Creek homeowners and gives most families the right balance of cleanliness and cost. Monthly deep cleaning visits are a great fit for couples or single-person households where clutter and grime build up more slowly. The American Lung Association recommends keeping indoor surfaces, including countertops, clean and dry as a baseline measure for maintaining healthy indoor air quality, a reminder that regular cleaning is not optional for healthy homes. Building a recurring professional visit into your schedule is the easiest way to ensure countertops and all other surfaces get the attention they need on a reliable timetable.
Closing: Reclaim Your Queen Creek Countertops for Good
Cluttered countertops are a solvable problem. With a full purge, intentional zone organization, smarter cabinet use, daily reset habits, and the right professional help when you need it, your Queen Creek home can have clean, clear surfaces that actually stay that way. You do not have to figure it all out at once. Pick one strategy from this list and start today. The results build on each other quickly. When you are ready for professional help that goes beyond what daily habits can handle, cleaning in Queen Creek Arizona is exactly what Elite Maids House Cleaning does best. Contact Elite Maids house cleaning today for a free quote and find out how quickly a professional team can transform your home from cluttered to completely clean.
Frequently Asked Questions
What is the fastest way to deal with cluttered countertops?
The fastest method is a full surface clear: remove everything from the counter, wipe the surface clean, then return only items you use every single day. This takes about fifteen minutes per counter and gives you an immediate visual reset. Pair it with a quick five-minute nightly reset habit to prevent clutter from building back up within a few days.
How do I keep countertops clutter-free with a busy family in Queen Creek?
The key is removing the temptation to dump items on the counter by giving everything a designated home elsewhere. Set up a household command station for mail and papers, assign labeled storage for each family member’s belongings, and run a five-minute countertop reset before bed each night. A recurring professional cleaning visit also helps reset surfaces on a reliable schedule.
Should I hire a professional cleaner to help with countertop clutter?
A professional cleaner will not organize your belongings for you, but a deep cleaning service is the right call when grease, grime, and residue have built up under the clutter over time. Once a professional team restores the surface to a clean baseline, it is far easier to maintain. Elite Maids House Cleaning offers deep cleans and recurring visits for Queen Creek homeowners on flexible weekly, biweekly, and monthly schedules.
What items should never stay on a kitchen countertop?
Any item you use less than once a day generally does not belong on the counter. Common offenders include bread makers, blenders used occasionally, mail and paperwork, phone chargers, excess cleaning products, decorative items that collect dust, and multiples of anything. If it does not earn its square footage through daily use, it belongs in a cabinet, drawer, or another room entirely.
How often should countertops be professionally cleaned?
For most Queen Creek households, a biweekly professional cleaning covers countertops and all other surfaces on a schedule that prevents serious buildup. Busy households with kids or pets benefit from weekly service. At minimum, a thorough deep clean once or twice a year is recommended to address buildup under appliances and in surface seams that daily wiping never reaches.
Airbnb Cleaning Checklist for Tempe Hosts: Don't Miss a Spot
SHARE:
A solid Airbnb cleaning checklist for Tempe hosts covers every room, surface, and hidden corner between guest stays. Working through a written, room-by-room list keeps your turnover consistent, protects your five-star rating, and ensures nothing gets skipped when time is tight. This post breaks down exactly what should be on that list, how professional cleaners approach it, and where to get help when you need it.
Why a Room-by-Room Airbnb Cleaning Checklist Matters in Tempe
Running a short-term rental in Tempe means competing with hundreds of other listings near Arizona State University, Tempe Town Lake, and Mill Avenue. Guests staying in Tempe have options, and a single negative review about cleanliness can cost you weeks of bookings. A room-by-room Airbnb cleaning checklist is the one tool that turns a rushed turnover into a repeatable, professional-level result every single time.
When your cleaning crew walks in after a checkout, they should not be guessing what to do next. A written checklist eliminates the guesswork. It also means that whether you are doing the turnover yourself or handing it off to a hired team, the standard never drops. According to Good Housekeeping’s cleaning guidance, consistent routines are the single biggest factor separating homes that feel clean from homes that actually are clean.
Hosts in Tempe who use structured checklists also catch things that tired eyes miss: the smudge on the sliding door, the hair on the bathroom floor, the crumbs in the couch cushions. Those small details are exactly what guests photograph and mention in reviews.
Living Room and Common Area Cleaning Checklist
The living room sets the first impression. Your turnover checklist for this space should go far beyond a quick vacuum. Here is what a thorough common-area clean looks like:
Dust all surfaces, including shelves, picture frames, and TV stands
Wipe down light switches and door handles with a disinfectant
Wipe skirting boards and baseboards
Clean the TV screen with a microfiber cloth
Vacuum the sofa, including under and behind cushions
Check cushions for stains and spot-treat as needed
Wipe the coffee table and any side tables
Empty and reline all trash cans
Vacuum and mop hard floors, or vacuum carpet thoroughly
Check windows and glass doors for fingerprints and smudges
Straighten decor and ensure remotes are in place and working
This level of detail in your Airbnb cleaning routine is what separates a five-star listing from a three-star one. If you need a reference point for what professional-grade cleaning looks like in a Tempe home, check out this post on Airbnb cleaning in Mesa for a comparable room-by-room breakdown you can adapt.
Kitchen Cleaning Checklist for Airbnb Turnovers
The kitchen is the room guests use most and inspect hardest. Your Airbnb cleaning checklist for the kitchen should be the longest and most detailed section of the whole document. Work top to bottom so you are not dropping crumbs onto surfaces you already cleaned.
Wipe down all cabinet fronts and drawer handles
Clean the stovetop, burner grates, and control knobs
Clean inside the oven if there is any residue or splatter
Wipe out the microwave inside and out
Wipe down the refrigerator exterior and all handles
Check inside the refrigerator and remove any food left by previous guests
Clean and sanitize countertops
Scrub the sink and polish the faucet
Run the dishwasher or hand-wash and dry any dishes, then reset them neatly
Wipe down the coffee maker and any other small appliances
Empty the trash and replace the bag
Sweep and mop the floor, paying attention to corners and under appliances
It is also worth paying attention to indoor air quality in rental kitchens. Cooking grease and food odors can linger in fabrics and ventilation. The EPA’s indoor air quality guidelines note that proper ventilation and regular surface cleaning significantly reduce airborne contaminants inside homes, which matters especially in a space guests are cooking in.
Bathroom Cleaning Checklist for Short-Term Rentals
Guests judge bathrooms harshly, and rightfully so. A bathroom turnover checklist for your Tempe Airbnb should cover every touchpoint a guest will make contact with during their stay.
Scrub the toilet inside and out, including the base and behind the seat
Clean and disinfect the sink bowl, faucet, and handles
Scrub the shower and bathtub, including grout lines and drain covers
Wipe down the showerhead and remove any mineral buildup
Clean the mirror with a streak-free glass cleaner
Wipe the light fixtures and exhaust fan cover
Wipe light switches and door handles
Mop the floor and get into the corners
Restock toiletries: soap, shampoo, conditioner, and toilet paper
Replace towels with fresh, laundered sets
Empty the trash and replace the liner
Mold is a real concern in bathrooms, especially in Arizona where shower humidity clashes with the dry outdoor air and causes moisture to settle in grout. EPA guidance on mold prevention recommends keeping bathroom surfaces dry between uses and using mold-resistant cleaning products regularly. This is especially relevant for Tempe hosts with back-to-back bookings who cannot afford to let moisture sit.
Bedroom Cleaning Checklist Between Guest Stays
Bedrooms carry the most intimate expectations of any room in your rental. Guests should walk in and feel like no one has ever slept there before. Your bedroom Airbnb cleaning checklist should include:
Strip all bedding, including mattress protectors
Launder sheets, pillowcases, duvet covers, and protectors on a hot wash
Remake the bed with fresh linens, pulled tight at the corners
Flip or rotate the mattress if needed
Dust all surfaces: nightstands, dresser, headboard, and lamps
Wipe light switches, door handles, and any remote controls
Check under the bed for forgotten items or dust buildup
Clean mirrors and any glass surfaces
Vacuum carpets or mop hard floors
Check the closet for guest belongings, hangers, and clean it if needed
Empty the trash and replace the liner
Hosts in Tempe managing multiple bedrooms should assign a specific cleaner to each room rather than having one person move between rooms. This accountability approach is something that professional maid service crews use to eliminate the chance of a room getting only half-cleaned.
Deep Cleaning Tasks Your Airbnb Checklist Should Include Monthly
Beyond the standard turnover clean, your Tempe Airbnb needs a thorough deep cleaning on a regular schedule. Monthly or quarterly tasks that often get missed in a quick turnover include:
Wipe down all baseboards and skirting boards throughout the property
Clean inside all kitchen appliances, including behind the refrigerator
Descale the coffee maker and showerhead
Wash all windows inside and out
Vacuum mattresses before adding fresh protectors
Clean the oven with a proper degreaser
Wipe down ceiling fans and air vents
Sanitize all trash cans inside and out
Spot-clean walls and switch plates throughout the home
Launder throws, extra blankets, and decorative pillow covers
This level of periodic attention is what a professional deep cleaning service is designed for. Rather than adding monthly deep cleans to your already stretched turnover schedule, many Tempe Airbnb hosts bring in a professional team once a month to handle the heavy work while they focus on guest communication and bookings.
If you want a detailed breakdown of how hosts in neighboring cities approach this, the Airbnb cleaning checklist for Gilbert hosts covers the same deep-clean priorities in a comparable Arizona market.
Hosts who go the extra mile on periodic cleaning also protect their property’s air quality. The American Lung Association’s indoor air guidance connects clean air vents, dust-free surfaces, and regular deep cleaning directly to healthier indoor environments, which is a real selling point for guests with allergies or sensitivities.
Hiring a Professional Airbnb Cleaning Service in Tempe
At some point, managing turnover cleaning yourself stops making sense. If you have more than two bookings per week, a cleaning crew that knows your property, follows your checklist, and shows up on time every single time is worth every penny. Elite Maids House Cleaning serves Tempe hosts with professional Airbnb cleaning, house cleaning services, move-in cleaning, and recurring maintenance cleans designed specifically for short-term rental properties.
Every cleaner on the Elite Maids team is background-checked, bonded, insured, and five-star rated. The company backs every visit with a no-cost reclean guarantee, so if something gets missed, it gets fixed without an argument. You can book a cleaning online and get an instant quote without picking up the phone, with same-day availability between 8am and 6pm.
For Tempe hosts who want consistent, professional results between every guest stay, handing the cleaning to a dedicated team is the move that protects your rating and gives you your time back. If you also want ideas for keeping your rental spotless for special event bookings, the holiday cleaning service is worth bookmarking for peak season.
Real Simple’s cleaning experts consistently point out that outsourcing recurring cleaning tasks to professionals is one of the most effective ways to reduce stress for property owners, which lines up with what Tempe Airbnb hosts report after their first professional turnover clean.
An Airbnb cleaning checklist should cover every room in the property, working top to bottom within each space. This includes dusting all surfaces, wiping light switches and door handles, scrubbing the bathroom, sanitizing the kitchen, laundering all bedding, vacuuming or mopping floors, restocking supplies, and emptying all trash cans. A written, room-by-room list keeps every turnover consistent regardless of who does the cleaning.
How long does an Airbnb turnover clean take?
For a typical one-bedroom or two-bedroom Airbnb in Tempe, a thorough turnover clean takes between one and a half to three hours depending on the size of the property and the condition guests left it in. Larger properties or those requiring a deeper clean after a long stay can take four or more hours. Professional cleaning crews often work faster because they split tasks between team members.
How often should an Airbnb get a deep clean?
Most Airbnb properties in Tempe benefit from a full deep cleaning at least once a month, in addition to the standard turnover clean between guests. Monthly deep cleans cover items that get missed during a quick turnover: baseboards, inside appliances, ceiling fans, air vents, mattresses, and windows. High-traffic rentals near Arizona State University may need deep cleaning more frequently.
Should I hire a professional cleaning service for my Airbnb?
If you have more than a couple of bookings per week, hiring a professional cleaning service is almost always worth it. A professional team brings consistent results, uses proper disinfectants, and follows a structured checklist every time. In a competitive market like Tempe, where guest expectations are high and reviews are public, consistent professional cleaning directly protects your rating and your income.
What cleaning products are safe to use in an Airbnb rental?
For an Airbnb rental, it is smart to use products that are effective but do not leave strong chemical odors for incoming guests. The EPA’s Safer Choice program certifies cleaning products that perform well without harsh ingredients. Eco-friendly options are a good fit for short-term rentals because they reduce residual smells and are less likely to irritate guests with sensitivities or allergies.