How to Keep a Clean House: 10 Proven Tips for a Spotless Home
SHARE:
Keeping a clean house comes down to a handful of consistent habits done on a regular schedule. When you build those habits into your weekly routine, clutter and grime stop piling up before they become a bigger problem. The tips below walk through the most effective strategies for maintaining a spotless home, from daily micro-tasks to seasonal deep cleans.
1. Start With a Cleaning Schedule That Actually Works
The single biggest reason homes get out of control is the absence of a consistent house cleaning schedule. Without one, tasks get skipped, forgotten, or pushed to a mythical “later” that never arrives. A realistic schedule splits chores into daily, weekly, and monthly buckets so no single cleaning session becomes a marathon.
A simple framework that works for most households looks like this:
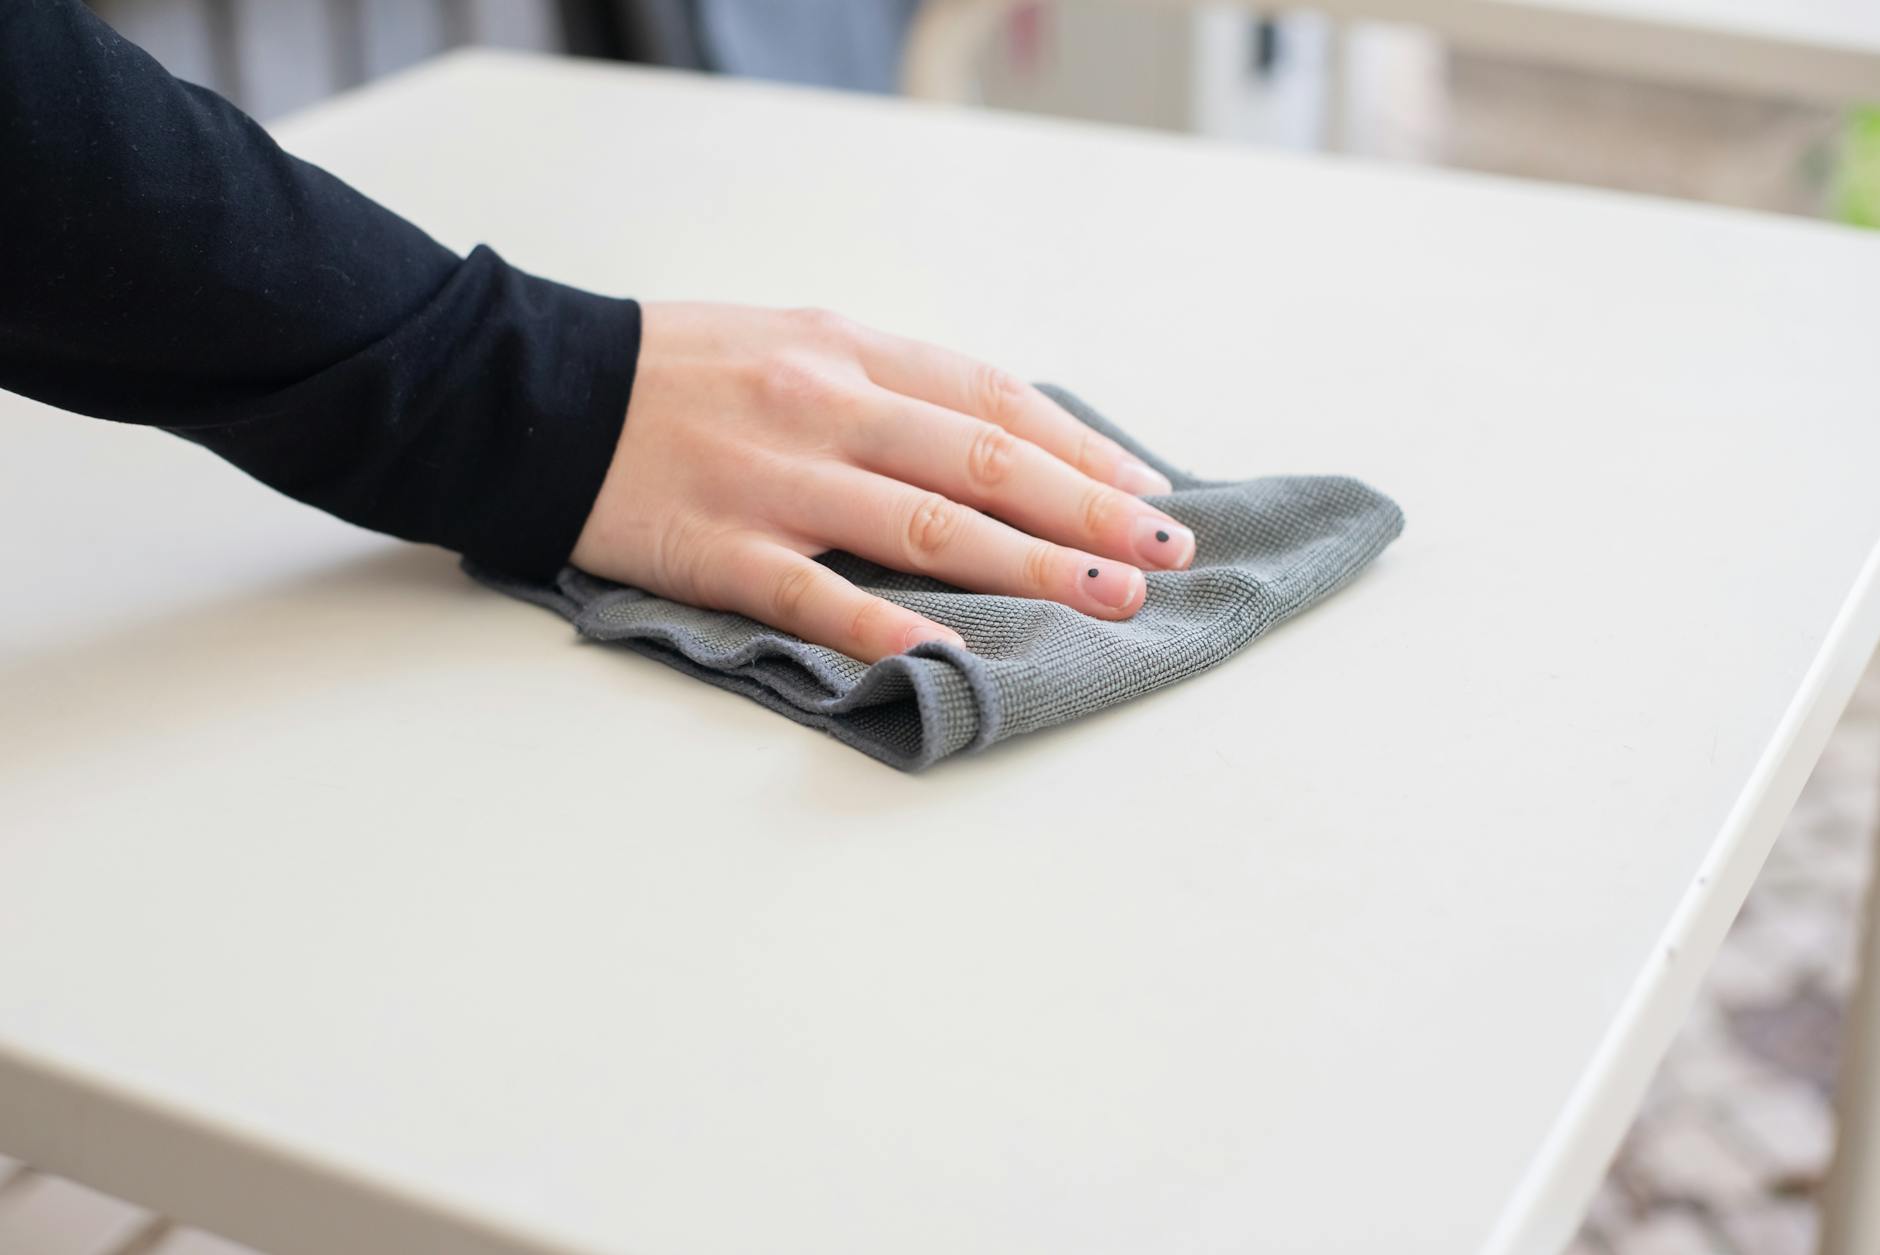
Daily (5-10 minutes): Wipe kitchen counters, load the dishwasher, and do a quick surface reset in high-traffic rooms.
Weekly: Vacuum all floors, mop hard surfaces, clean bathrooms, and change bed linens.
Sticking to this rhythm means your home cleaning routine stays manageable. You spend 15 minutes a day instead of a full Saturday once a month. According to Good Housekeeping’s cleaning guides, maintaining a room-by-room schedule is one of the most reliable ways to reduce overall cleaning time without sacrificing results.
2. Declutter Before You Clean, Every Single Time
Cleaning around clutter is like mopping around furniture that never gets moved. You hit the visible surfaces but leave the actual problem untouched. Before you start any home cleaning session, spend five minutes doing a declutter pass through each room.
Pick up items that belong somewhere else and return them. Put dirty laundry in the hamper. Clear the kitchen counter of items that migrated there from other rooms. This decluttering habit is not optional if you want a truly clean house. It makes every subsequent step faster and the result look dramatically better.
Homes in Arizona’s desert climate face an extra challenge here because dust accumulates faster than in more humid regions. A decluttered surface is far easier to wipe down during your regular house cleaning visits than one buried under stacked mail and coffee mugs.
3. How the Right Cleaning Tools and Products Make Every Job Easier
Trying to keep a clean home with the wrong supplies is genuinely frustrating. A low-quality mop smears grime instead of lifting it. Paper towels on glass leave lint streaks. Investing in a small toolkit of quality cleaning tools pays off every week.
The essentials worth having on hand include:
Microfiber cloths (pack of 12 or more) for dusting, wiping, and polishing without scratching.
A quality vacuum with a HEPA filter, especially important if you have pets or allergy sufferers at home.
A flat-head mop with washable pads for hard floors.
An extendable duster for ceiling fans, light fixtures, and crown molding.
A spray bottle with an all-purpose cleaner for quick countertop and surface jobs.
For products, the EPA Safer Choice program certifies cleaning products that are effective without harsh chemical exposure inside the home. These options are a smart pick for households with children, pets, or anyone sensitive to strong cleaning agents.
4. Clean from Top to Bottom, Back to Front
This is one of the oldest rules in professional house cleaning, and it works because it obeys gravity. Dust and debris fall downward. If you vacuum the floor first and then dust the ceiling fan, you are undoing your own work.
The correct order for cleaning any room is:
Ceiling corners and light fixtures first.
Then shelving, furniture tops, and appliance surfaces.
Then countertops, tabletops, and mid-level surfaces.
Baseboards and floors last.
The same logic applies to moving through the house: start in the farthest room from the exit and work toward the door. That way you never track dirt back over surfaces you already cleaned. Every professional cleaning guide at The Spruce reinforces this sequence because it genuinely cuts total cleaning time.
5. Focus on High-Touch Surfaces for a Truly Hygienic Home
A home can look clean but still harbor the bacteria and viruses that make families sick. High-touch surfaces, meaning the spots everyone touches dozens of times a day, need sanitizing attention beyond a quick wipe.
The highest-priority surfaces include:
Door handles and knobs throughout the house.
Light switches in every room.
The refrigerator handle, microwave touchpad, and oven controls.
Faucet handles in kitchens and bathrooms.
Remote controls, keyboards, and charging cables.
Toilet flush handles and toilet seats.
Sanitizing these surfaces is different from cleaning them. Cleaning removes visible dirt; sanitizing kills pathogens on the surface. For households where someone has been ill, a full home disinfection service is the most thorough way to address every high-contact zone in one session.
The CDC’s guidance on healthy home environments consistently emphasizes that regular sanitizing of shared surfaces meaningfully reduces the spread of illness within households, especially during cold and flu season.
6. Tackle the Kitchen and Bathrooms First
If you only have limited time for house cleaning on any given day, the kitchen and bathrooms are where to concentrate your effort. These two areas carry the highest hygiene risk, accumulate grease and moisture faster than other rooms, and have the most immediate impact on how clean a home feels overall.
In the kitchen, the priorities are:
Wiping down stovetop grates and burners to prevent grease buildup.
Cleaning the inside of the microwave weekly.
Sanitizing the sink and faucet handles.
Wiping cabinet fronts near the stove where grease splatter collects.
In the bathroom, focus on:
Scrubbing the toilet bowl, tank, and seat.
Cleaning the shower and tub walls to prevent soap scum and mildew.
Wiping the vanity and sanitizing the sink and faucet.
Replacing or washing bath mats weekly.
Bathrooms left uncleaned for even a week or two in Arizona’s warm climate can develop mold and mildew in grout lines rapidly. The EPA’s mold resources note that moisture control and regular cleaning are the two most effective strategies for preventing indoor mold growth in residential spaces.
7. Build a Seasonal Deep Clean Into Your Yearly Routine
Even the most diligent weekly cleaning routine cannot reach every corner of your home on a regular basis. A seasonal deep clean fills that gap by addressing the areas that accumulate months of buildup: inside ovens and refrigerators, behind large appliances, inside closets, under furniture, and above cabinets.
Seasonal deep cleaning is also the right time to address tasks like:
Washing windows inside and out.
Cleaning window tracks and door tracks.
Scrubbing grout lines in tile floors and shower walls.
Sanitizing garbage cans and recycling bins.
Cleaning air vents and replacing HVAC filters.
Washing curtains and wiping down blinds.
For a complete room-by-room breakdown of what a thorough seasonal refresh should cover, the ultimate guide to spring cleaning covers every area of the home in detail. Most households benefit from at least one deep clean per season, with additional sessions before and after major events or moves.
8. Use Eco-Friendly Cleaning Products Without Sacrificing Results
There is a widespread assumption that green cleaning products do not clean as well as their chemical-heavy counterparts. That assumption is outdated. Today’s eco-friendly cleaning formulas, particularly those carrying the EPA Safer Choice certification, perform at the same level as conventional products while reducing the chemical load in your indoor environment.
This matters more than many homeowners realize. The EPA’s research on volatile organic compounds shows that many conventional cleaning sprays release VOCs into indoor air at levels that can aggravate respiratory conditions. In sealed Arizona homes running air conditioning for long stretches of the year, indoor air quality deserves real attention.
Simple eco-friendly swaps that make a genuine difference include:
Using white vinegar diluted in water as a streak-free glass cleaner.
Baking soda as a gentle abrasive for scrubbing sinks and tubs.
Castile soap as a base for an all-purpose kitchen and bathroom cleaner.
Microfiber cloths that clean effectively with only water, reducing the need for product altogether.
9. Know When to Hire a Professional House Cleaning Service
Even people who maintain a solid home cleaning routine reach moments when a professional service is the right call. Move-in and move-out cleans, post-renovation cleanup, event preparation, and recovery from a busy season are all situations where a trained, equipped team delivers results that a solo effort cannot match.
Working with trusted Arizona house cleaners means you are not spending your Saturday scrubbing baseboards while a team handles every room efficiently and thoroughly. For families in Phoenix, Mesa, Scottsdale, Chandler, Gilbert, and across the Valley, recurring professional cleaning on a weekly, biweekly, or monthly schedule keeps the home at a baseline that your own daily habits can easily maintain between visits.
When evaluating any cleaning company, look for background-checked cleaners, full insurance and bonding, and a satisfaction guarantee. A company that offers a reclean at no cost if you are not satisfied stands behind their work in a way that means something.
10. Stay Consistent: Small Daily Habits Prevent Big Cleaning Jobs
The hardest part of keeping a clean house is not any individual task. It is consistency. A five-minute kitchen wipe-down each evening prevents a 45-minute scrub session on Sunday. Making the bed each morning keeps a bedroom looking tidy even when nothing else has been touched.
The daily habits that carry the most weight for maintaining a spotless home include:
Wiping the stovetop after every use.
Putting items back where they belong immediately rather than setting them down temporarily.
Rinsing dishes before they sit in the sink overnight.
Doing a five-minute bathroom wipe after showering while everything is already wet and warm.
Sweeping or running a robot vacuum in high-traffic areas daily.
These small acts compound over time. Homes maintained with consistent daily habits require significantly less intensive cleaning when the weekend arrives. That is time back in your schedule for things that actually matter.
If you are ready to skip the scrubbing and let a professional team handle the heavy lifting, Arizona’s most-reviewed house cleaning company is available for same-day bookings, instant online quotes, and recurring service across Phoenix, Scottsdale, Mesa, Chandler, Gilbert, Glendale, Queen Creek, San Tan Valley, Tucson, and Flagstaff. Every cleaner is background-checked, bonded, and insured, and every visit is backed by a satisfaction guarantee. Book your first clean today and get your weekends back.
Most homes benefit from a thorough deep clean two to four times per year, with one major session each season. High-traffic households with children or pets may need one every two months. Between deep cleans, a consistent weekly cleaning routine keeps grime from building up to the point where a full deep clean becomes an all-day project.
What is the fastest way to clean a house?
The fastest approach is to gather all supplies in one caddy so you never backtrack for products, clean top to bottom in each room, work in one direction through the house, and do a declutter pass first. Splitting tasks by room rather than by type saves significant time. For a whole-home speed clean, most 2,000-square-foot homes can be covered in under two hours with this method.
What cleaning tasks do professional house cleaners typically cover?
A standard professional house cleaning service typically covers vacuuming and mopping all floors, cleaning bathrooms including toilets, tubs, and sinks, wiping kitchen counters and appliance exteriors, dusting surfaces and ceiling fans, and emptying trash bins. Deep cleaning add-ons cover inside ovens and refrigerators, baseboards, window interiors, and cabinet interiors.
How do I keep my house clean between professional visits?
The most effective strategy is a daily reset routine: wipe kitchen surfaces after cooking, put items back where they belong each evening, and do a quick bathroom wipe a few times per week. Five to ten minutes of daily maintenance keeps the home looking presentable and makes each professional cleaning session faster and more thorough.
Are eco-friendly cleaning products as effective as regular cleaners?
Yes, for the vast majority of household cleaning tasks. EPA Safer Choice certified products are tested for both safety and performance. Microfiber cloths, diluted white vinegar, baking soda, and plant-based all-purpose sprays handle most surfaces effectively. The one area where you may need a stronger product is heavy mold or mineral deposit buildup, which may require a more targeted treatment.
How to Keep a Clean House Every Week: 10 Simple Habits That Actually Work
SHARE:
Keeping a clean house every week comes down to a handful of repeatable habits, not marathon weekend scrub sessions. The secret is spreading small tasks across each day so no single room ever falls too far behind. This guide walks through 10 proven weekly house cleaning habits, the tools and products that make them faster, and when to call in a professional house cleaning service in Arizona to handle the deep work.
1. What Does Keeping a Clean House Every Week Actually Require?
Maintaining a consistently clean home week after week requires a system, not just motivation. Most homeowners who struggle with weekly house cleaning are trying to do everything at once on Saturday morning, which means the job feels overwhelming before it even starts. A realistic weekly cleaning routine breaks the work into daily 10-to-15-minute windows so clutter, dust, and grime never compound into a multi-hour project.
Research from organizations like the American Lung Association consistently shows that dust, pet dander, and airborne particles build up quickly in residential spaces, making regular surface cleaning a genuine health priority, not just an aesthetic one. When you maintain a weekly home cleaning schedule, you are actively reducing allergen load in the air your family breathes.
The habits below are built around the way real households operate, with realistic time estimates and clear priorities so you always know what matters most on any given day.
2. Start With a Daily Declutter Routine
Before any surface can be wiped, swept, or vacuumed, flat surfaces need to be clear. A daily declutter habit, even five minutes before bed, is the single biggest lever for making your home look and feel clean on a consistent basis. Pick a “home” for every recurring item: mail, shoes, backpacks, charging cables, and remote controls are the usual offenders.
Use a small basket in each main room as a temporary landing zone for misplaced items.
Do a one-room reset each evening instead of trying to tackle the whole house at once.
Keep a donation box in a closet so clutter has an exit route before it multiplies.
A tidy home is not the same as a clean home, but decluttering every day makes every other cleaning task faster because you spend zero time moving things out of the way before you can actually clean.
3. Build a Weekly Cleaning Schedule by Room
A structured weekly cleaning schedule is the backbone of a consistently clean house. Assigning specific rooms or tasks to specific days prevents the all-or-nothing trap and keeps the total time per day manageable. Here is a reliable framework that works for most three-to-four bedroom homes:
Monday: Wipe kitchen counters, appliance fronts, and stovetop. Empty trash cans throughout the house.
Tuesday: Vacuum living areas and hallways.
Wednesday: Clean bathrooms, sinks, toilets, mirrors, and floors.
Thursday: Dust all surfaces, ceiling fans, and baseboards.
Friday: Mop hard floors in kitchen, bathrooms, and entryways.
Saturday: Change bed linens and wash laundry.
Sunday: Reset and prep for the week.
This room-by-room cleaning plan keeps each session under 20 minutes and means you are never staring down a full-house disaster. According to Good Housekeeping’s cleaning resources, consistency over intensity is what separates homes that always look presentable from those that cycle between chaos and panic-cleaning before guests arrive.
4. Use the Right Cleaning Products for Each Surface
Using the wrong cleaner on the wrong surface either leaves residue behind or, worse, damages the finish. Part of building a sustainable home cleaning routine is stocking a short list of versatile, effective products so you are not hunting under the sink every time you need to wipe something down.
Core products for a weekly house cleaning kit:
All-purpose spray: Works on counters, appliances, cabinet doors, and most hard surfaces.
Microfiber cloths: Pick up dust and bacteria without scratching, and they are washable and reusable.
Toilet bowl cleaner: Dedicated formula prevents mineral buildup and kills bacteria more effectively than an all-purpose spray.
Glass cleaner: Streak-free formula for mirrors, windows, and glass cooktops.
Floor cleaner matched to your floor type: Hardwood, tile, and laminate each have specific pH requirements.
If you prefer to reduce chemical exposure in your home, look for products that carry the EPA Safer Choice certification, which means every ingredient has been reviewed for human and environmental safety. Elite Maids House Cleaning offers eco-friendly product options for clients who want effective cleaning without harsh chemical residue.
5. Master High-Traffic Areas With a Kitchen Cleaning Routine
The kitchen generates more mess per square foot than any other room in the house. Grease, crumbs, spills, and food odors accumulate fast, and if the kitchen cleaning routine slips for even a few days, the room can feel dirty no matter what else you do. A nightly three-minute kitchen reset: wipe the stovetop, clear the sink, and wipe the counters, pays massive dividends by Monday morning.
Weekly kitchen cleaning tasks that often get skipped:
Wipe the inside of the microwave every week, not just when something explodes in it.
Pull the toaster out and empty the crumb tray.
Wipe cabinet handles and appliance knobs, which collect more bacteria than most surfaces.
Clean the garbage disposal by dropping in ice cubes and a handful of coarse salt, then running cold water.
Sanitize the kitchen sink, including the drain lip and faucet base.
For deeper kitchen tasks like degreasing range hoods, cleaning oven interiors, and scrubbing grout lines, holiday cleaning services are a smart way to handle those jobs before major gatherings without adding hours to your personal schedule.
6. Keep Bathrooms Clean With a 10-Minute Weekly Reset
Bathrooms are the room guests notice most, and they are also the room most homeowners dread cleaning. The good news: a bathroom that gets a quick 10-minute weekly cleaning almost never needs a deep scrub. Soap scum, hard water spots, and mildew form gradually, so catching them early means they wipe off with minimal effort instead of requiring serious scrubbing.
Weekly bathroom cleaning checklist:
Spray the toilet bowl, let it sit, then scrub and flush.
Wipe the exterior of the toilet including the tank, lid, seat, and base.
Spray and wipe the sink and faucet.
Wipe the mirror with glass cleaner.
Spray the shower walls and tub, let dwell for two minutes, wipe, and rinse.
Mop or scrub the floor last so any drips get cleaned up automatically.
If you notice mold forming in the grout or caulk lines, address it immediately. The CDC notes that mold in residential bathrooms can contribute to respiratory irritation and allergic reactions, particularly in children and older adults. A professional deep clean can remove established mold from grout far more effectively than over-the-counter sprays.
7. Dust and Vacuum on a Reliable Schedule
Dust accumulates whether you can see it or not, and in Arizona’s dry desert climate, it builds up faster than in most parts of the country. A regular dusting and vacuuming schedule is one of the most impactful things you can do for indoor air quality as well as the visible cleanliness of a room.
Dusting tips that actually remove dust instead of just moving it:
Dust top-to-bottom: ceiling fans first, then shelves, then furniture, then baseboards, then vacuum last.
Use a damp microfiber cloth on hard surfaces so dust clings instead of floating into the air.
Vacuum upholstered furniture at least every two weeks, especially in homes with pets.
Change HVAC filters on schedule, as a clogged filter recirculates dust back into every room.
Arizona homeowners deal with unique challenges around dust and particulate matter. If you want to see how keeping on top of indoor air quality connects to your cleaning routine, see how Elite Maids House Cleaning can help with recurring cleaning plans designed specifically for Valley homes.
8. Tackle Seasonal Deep Cleaning Before It Becomes a Crisis
No weekly house cleaning routine, no matter how consistent, replaces the need for periodic deep cleaning. Seasonal deep cleaning targets areas that simply do not get addressed in weekly maintenance: inside ovens, behind appliances, under furniture, inside windows, and inside closets. If these areas are skipped for a full year, the buildup becomes a project rather than a task.
The most effective approach is to schedule a seasonal deep clean at the start of each quarter and build it into your calendar the same way you would a dentist appointment. If you want a structured starting point, the ultimate guide to spring cleaning covers exactly which tasks matter most and in what order to tackle them efficiently.
Common seasonal deep cleaning tasks:
Clean inside the refrigerator, including the drawers and door gaskets.
Wash windows inside and out.
Deep clean carpets with extraction cleaning or professional service.
Wipe down all baseboards, door frames, and light switch plates.
Clean behind and underneath major appliances.
Declutter and reorganize pantry, linen closets, and garage storage.
9. Involve Every Person in the Household
A weekly home cleaning routine only holds together when the entire household contributes. One person cannot maintain a clean house for a family of four indefinitely without burning out. Assigning age-appropriate tasks to every household member, including children, reduces the total load and builds habits that stick into adulthood.
Practical ways to distribute cleaning responsibilities:
Post a visible chore chart so expectations are clear and no one has to be reminded verbally each week.
Make beds a personal responsibility for every person who sleeps in one.
Assign dish duty by rotation so the kitchen is never one person’s burden.
Let kids own one room: their bedroom plus one shared task like vacuuming the hallway or taking out the trash.
When everyone contributes to the baseline maintenance, the household cleaning routine becomes sustainable rather than a source of ongoing friction.
10. Know When to Hire a Professional House Cleaning Service
There are times when a weekly cleaning habit is not enough, and recognizing those moments saves a lot of frustration. Moving into a new home, recovering from a renovation, preparing for a major event, or simply reaching a point where life is too busy to keep up are all valid reasons to bring in a professional cleaning team.
A Arizona maid service like Elite Maids House Cleaning handles the full scope of residential cleaning, from recurring weekly and biweekly visits to one-time deep cleans and move-in or move-out cleaning. Every cleaner is background-checked, bonded, and fully insured, and every visit is backed by a reclean-at-no-cost guarantee. For Arizona homeowners in Phoenix, Mesa, Scottsdale, Gilbert, Chandler, Glendale, Queen Creek, San Tan Valley, Tucson, and Flagstaff, same-day booking is available online between 8am and 6pm with an instant quote.
Hiring professionals does not mean giving up on your own habits. It means handling the heavy-lift cleaning so your daily and weekly routines stay manageable and you actually reclaim your weekends.
Ready for a Cleaner Home Without the Stress?
Building consistent weekly house cleaning habits takes time, but the payoff is a home that always feels welcoming, a healthier indoor environment for your family, and less stress every single day. Whether you are fine-tuning your own routine or looking for expert help to handle the work, Elite Maids House Cleaning is ready to step in. Contact Elite Maids house cleaning today for a free quote and find out how simple it is to schedule recurring cleaning, a one-time deep clean, or anything in between.
Frequently Asked Questions
How long does it take to clean a house each week?
For an average three-bedroom home, a thorough weekly cleaning takes between one and three hours depending on the number of bathrooms, the size of the kitchen, and how much daily tidying happens between sessions. Spreading tasks across the week, rather than doing everything at once, keeps each session to about 15 to 20 minutes per day.
What should I clean every week versus every month?
Weekly tasks include vacuuming, mopping high-traffic floors, wiping kitchen counters and stovetops, cleaning bathrooms, and changing bed linens. Monthly tasks include dusting ceiling fans, wiping baseboards, cleaning inside the microwave thoroughly, and washing windows. Seasonal tasks like deep cleaning the oven and refrigerator belong on a quarterly schedule.
What is the easiest way to keep a clean house with kids?
Assign age-appropriate chores to children starting around age four or five, keep clutter contained with designated storage bins in each room, and do a five-minute family reset each evening before bed. Lowering the bar for “clean enough” during busy weeks, while maintaining the non-negotiables like kitchen sanitation and bathroom hygiene, also helps prevent burnout.
How often should I deep clean my house?
Most households benefit from a thorough deep clean two to four times per year, timed around seasonal changes. High-use homes with pets, young children, or allergy sufferers may benefit from more frequent deep cleaning. A professional deep clean every quarter ensures that the areas missed by routine cleaning, like grout, appliances, and behind furniture, never reach a crisis level.
Is it worth hiring a cleaning service for a weekly cleaning routine?
For many households, yes. A professional cleaning service handles the time-consuming tasks consistently, which frees up several hours per week. It also means the cleaning is done to a higher standard than most people achieve on their own. Recurring cleaning plans from services like Elite Maids are often more affordable per visit than a one-time deep clean and keep the home at a level where your own daily habits stay easy to maintain.
Realistic Cleaning Routines for Busy Moms: 10 Strategies That Actually Work
SHARE:
A realistic cleaning routine for busy moms breaks the home into small, manageable tasks spread across the week rather than tackling everything at once. The key is matching your schedule to your energy, not to an impossible Pinterest standard. This post walks through 10 practical strategies, a simple daily framework, and a weekly rhythm any working mom can follow without burning out.
1. Assess Your Home Before You Build a Cleaning Schedule
Before you write a single chore on a list, walk through every room with fresh eyes. Not every space in your house gets equally dirty. The kitchen and bathrooms take the most abuse in a family home, while a spare bedroom might only need attention once a month. A good house cleaning schedule for busy moms starts with an honest picture of what actually needs to happen, not what a generic checklist says.
Write down the rooms you have, how quickly each one gets messy, and roughly how long each task takes. A realistic time estimate is more motivating than an aspirational one. If wiping the stovetop realistically takes three minutes, put three minutes on the list. When you know your home’s real rhythm, you can build a cleaning schedule that fits instead of one you abandon after two weeks.
List every room and its dirtiest hotspots
Note which spaces require daily attention versus weekly
Flag seasonal tasks like refrigerator coils and window tracks for a separate list
Identify spaces kids or pets trash fastest so you can tackle them more often
2. Create a Simple Daily Cleaning Routine for Busy Moms
The most sustainable daily cleaning routine for busy moms is one that takes under 20 minutes total. Pick three to five non-negotiable micro-tasks that prevent your home from spiraling: wiping the kitchen counter, doing one load of laundry, and a quick bathroom sink wipe-down. That is it. These daily anchors keep mess from compounding so your weekly cleaning sessions stay short.
According to Real Simple, consistency beats intensity every time. A five-minute countertop wipe every evening does more to maintain a clean home than one exhausting three-hour blitz on Saturday. When the daily habit is small enough that you barely notice it, you actually do it.
Here is a simple daily framework to start with:
Morning (5 min): Make beds, start a load of laundry
After dinner (10 min): Wipe counters, load the dishwasher, sweep the kitchen floor
Before bed (5 min): Quick toy pickup, sink rinse, transfer laundry to dryer
That is 20 minutes across the whole day. Most busy moms can find that even on the worst Tuesday. If you want a ready-made version you can print and post on the fridge, check out our printable cleaning schedule for working moms built for real family homes.
3. Build a Weekly Cleaning Schedule That Does Not Overwhelm You
A weekly cleaning schedule for busy moms assigns one or two rooms or tasks per day instead of cleaning the whole house in a single session. Monday might be bathrooms. Tuesday is vacuuming. Wednesday is mopping and trash. When each day has a clear, limited focus, the work feels doable and the house stays reasonably clean all week.
The zone-cleaning method works especially well for this approach. Divide your home into five zones roughly matching the five weekdays. Each day you spend 15 to 30 minutes on that zone. By Friday the whole house has been touched. A free cleaning schedule for working moms does not need to be elaborate. A sticky note on the fridge with the day’s zone written on it is enough to keep you on track.
Sample weekly layout:
Monday: Bathrooms (toilets, sinks, mirrors)
Tuesday: Bedrooms (vacuum, dust surfaces)
Wednesday: Kitchen deep wipe-down (appliance fronts, inside microwave)
Thursday: Living areas (vacuum, wipe tables, tidy common spaces)
Friday: Floors throughout, take out trash
Weekend: Catch up anything missed, no new tasks added
If you live in the San Tan Valley area and want this broken down even further by family size, our local guide on house cleaning schedules for busy parents is a helpful starting point.
4. Involve the Kids With an Organized Chore Chart
A mom doing all the cleaning alone is not a realistic cleaning system. It is a one-person operation that burns out fast. Getting kids involved with an organized chore chart is one of the highest-leverage moves a busy mom can make. Even a three-year-old can put toys in a bin. A seven-year-old can unload the silverware. A ten-year-old can scrub a toilet.
A chore chart does not need to be color-coded and laminated (though a free printable version certainly helps). The goal is clear expectations: each child knows which tasks belong to them, when they are due, and what done actually looks like. Tie age-appropriate chores to a small reward system if motivation flags. When cleaning is a household responsibility shared by everyone who makes the mess, the burden on mom drops significantly.
Ages 3 to 5: pick up toys, put dirty clothes in hamper, wipe spills with a cloth
Ages 6 to 9: set and clear the table, feed pets, dust low surfaces
Ages 10 to 13: vacuum a room, clean their own bathroom, help with laundry
Ages 14 and up: mow grass, mop floors, cook one meal per week
5. Find Ways to Save Time With the Right Cleaning Products
The products you use have a direct impact on how long cleaning takes. An all-purpose spray that works on counters, sinks, and appliances cuts down the number of products you need to grab and switch between. Microfiber cloths clean faster and trap more dust than paper towels. A good squeegee on glass shower walls prevents soap scum buildup so your weekly scrub takes half as long.
If you have young children at home, it is worth choosing products certified under the EPA Safer Choice program, which flags cleaning products formulated to be safer for people and the environment without sacrificing performance. You save time and you do not have to worry about what your toddler touched two minutes after you sprayed.
A few product swaps that save real time:
Dishwasher tablets for scrubbing toilets (drop one in overnight)
A steam mop for tile floors instead of a bucket and mop
Pump-dispensed dish soap next to the bathroom sink for quick rinse-downs
Reusable spray bottles with diluted multi-surface cleaner in every bathroom
6. Use the “Reset” Strategy Instead of Deep Cleaning Every Day
One of the most realistic cleaning tips for working moms is to stop thinking in terms of deep cleaning and start thinking in terms of resetting. A reset is not about making things perfect. It is about returning every room to its usable baseline: dishes off the counter, toys in the bin, couch cushions straight, lights off.
A 10-minute family reset before bedtime, with everyone contributing, prevents the slow drift that turns a manageable home into an overwhelming one. This is especially effective on busy weeknights when a full clean is impossible. You are not deep cleaning the kitchen. You are just returning it to the state it was in this morning. That mental reframe makes it easier to start and easier to finish.
Save deep cleans for a monthly or seasonal session. When those bigger sessions roll around, resources like Good Housekeeping’s cleaning guides offer thorough room-by-room checklists. Or, for a genuinely thorough twice-yearly refresh, consider booking a professional spring cleaning service to reset the whole house at once.
7. Tackle Laundry With a Simple One-Load-a-Day Rule
Laundry is the chore that never ends in a family home, and it becomes a monster when ignored for several days. The simplest laundry strategy for busy moms is also the most unsexy: start one load every morning, move it to the dryer before lunch, and fold it before dinner. One load a day keeps the pile from growing into a weekend-ruining mountain.
Assign laundry baskets by person rather than by color. When a basket is full, that person’s load gets run. Kids old enough to carry a basket can also learn to fold their own clothes and put them away. The less laundry touches your hands, the more time you get back.
Wash on a timer so a load finishes when you wake up
Fold immediately after the dryer stops to skip ironing most items
Keep a mesh bag in each bathroom for delicates so they are already sorted
Do sheets and towels on a set day (Sunday works for many families) so it never becomes a backlog
8. Build a Monthly Deep Cleaning Checklist for Busy Households
Daily and weekly tasks handle the surface mess. A monthly deep cleaning checklist for busy households handles the things that get missed in the rush. Think baseboards, ceiling fans, window sills, refrigerator shelves, and the inside of the oven. These areas do not need attention every week, but neglecting them for months lets grime and allergens build up.
The American Lung Association notes that indoor air quality is directly affected by dust, mold, and household pollutants. Regular deeper cleaning reduces the accumulation of these irritants, which matters especially in Arizona where dust and allergens are already high. A monthly checklist does not have to be long. Even six to eight tasks tackled on the first Saturday of the month makes a meaningful difference.
Monthly deep cleaning targets to add to your checklist:
Wipe down baseboards and door frames
Clean ceiling fans and light fixtures
Descale faucets and showerheads
Vacuum couch cushions and under furniture
Wipe down the inside of the microwave and oven
Clean the refrigerator shelves and door seals
Scrub bathroom grout
Wipe light switches, doorknobs, and remote controls
For the holidays specifically, a holiday deep cleaning before guests arrive covers every one of these areas and more so you can actually enjoy the season instead of scrambling to clean the guest bathroom at 10 pm.
9. Know When to Ask for Help: Scheduling Professional House Cleaning
A realistic cleaning routine for working moms includes knowing your limits. There will be seasons of life, new babies, work deadlines, school crises, and weeks where the house just does not get cleaned. That is not failure. That is life. The smartest thing a busy mom can do is build a backup plan before she needs it.
Scheduling a recurring cleaning service every two or four weeks means your home gets a thorough, professional reset on a reliable schedule regardless of what else is happening. The team at Elite Maids House Cleaning serves families across Phoenix, Mesa, Scottsdale, Gilbert, Chandler, Glendale, Queen Creek, San Tan Valley, Tucson, and Flagstaff with recurring weekly, biweekly, and monthly cleans. Every cleaner is background-checked, bonded, and fully insured, and every visit is backed by a reclean-at-no-cost guarantee.
10. Print Your Schedule and Put It Where You Will See It
A cleaning schedule that lives only in your head or buried in a phone app is a cleaning schedule you will forget. Print it. Post it on the fridge, the bathroom mirror, or the inside of a kitchen cabinet. A free printable cleaning schedule for working moms does not need to be fancy. A typed table printed on regular paper works just as well as a beautifully designed PDF. The goal is a visual trigger that reminds you and your family what today’s task is without any mental effort.
A realistic cleaning routines for busy moms printable usually has three sections: the daily non-negotiables, the weekly zone list, and the monthly deep-clean checklist. Having all three on one page means you never have to wonder what comes next. Laminate it if your household is hard on paper, and keep a dry-erase marker nearby to check things off.
Once your routine is posted and running, revisit it every season. Life changes: a new school schedule, a new baby, a new job. A cleaning schedule that worked in spring might need adjustment by fall. Treat it as a living document, not a permanent law.
Ready to Reclaim Your Weekends?
You do not have to do this alone. Even the most organized cleaning routine hits a wall sometimes, and that is exactly when a professional service earns its keep. Whether you need a one-time deep clean to get back to baseline or a recurring biweekly visit that keeps the house consistently clean, Arizona house cleaning service from Elite Maids makes it simple. Book online in minutes, get an instant quote, and choose a time between 8 am and 6 pm that fits your schedule. Contact Elite Maids House Cleaning today for a free quote and get your weekends back starting this week.
Frequently Asked Questions
What is a realistic cleaning schedule for a busy mom?
A realistic cleaning schedule for a busy mom keeps daily tasks under 20 minutes by focusing on high-traffic areas like the kitchen and bathrooms. Assign one zone or room per weekday, reserve a monthly session for deeper tasks, and give kids age-appropriate chores. Consistency with small daily habits does more than occasional marathon cleaning sessions.
How do working moms keep their house clean?
Working moms keep their homes clean by stacking small habits onto existing routines, wiping counters after dinner, running one laundry load each morning, and doing a 10-minute family reset before bed. Zone cleaning on weekdays prevents any single day from becoming overwhelming. Many working moms also schedule a recurring professional cleaning every two to four weeks as their maintenance backup.
Where can I find a free printable cleaning schedule for working moms?
A free printable cleaning schedule for working moms typically includes a daily task list, a weekly zone breakdown, and a monthly deep-clean checklist on a single page. You can build your own in a simple word processor and print it at home, or check our local guides linked throughout this post for ready-made versions designed for Arizona families.
How often should a busy household deep clean?
Most busy households benefit from a light monthly deep clean targeting baseboards, ceiling fans, appliance interiors, and grout. A more thorough whole-home deep clean works well twice a year, often tied to spring and the holiday season. Hiring a professional service for those bigger sessions saves hours and ensures nothing gets skipped.
What daily chores make the biggest difference in a family home?
The daily chores with the highest impact are wiping kitchen counters after meals, running the dishwasher overnight, doing one load of laundry, and a quick bathroom sink wipe. These four tasks take roughly 15 to 20 minutes combined and prevent the gradual buildup that makes weekend cleaning feel impossible. Everything else is secondary to keeping these habits consistent.
Simple Cleaning Habits for an Easier Small Home in 2026
SHARE:
Building simple cleaning habits for a small home means doing a little, consistently, rather than facing one massive weekend overhaul. Small spaces get cluttered and grimy faster than large ones because every item and every spill is immediately visible. This post walks through the daily, weekly, and seasonal routines that actually work in compact living spaces, plus when to call in a professional house cleaning service so you can reclaim your time.
Why Consistent Small-Home Cleaning Habits Matter More Than Marathon Sessions
In a small home, mess compounds quickly. A single counter covered in mail, a bathroom sink ringed with toothpaste, or a kitchen floor dotted with crumbs looks ten times worse than it would in a larger space because there is nowhere for clutter to hide. Consistent cleaning habits for small spaces prevent that snowball effect entirely. Instead of spending an entire Saturday scrubbing and sorting, you spend five to ten minutes a day keeping surfaces reset, and the space always feels livable.
The psychology behind this is straightforward. According to Real Simple, short bursts of maintenance cleaning reduce the mental load of housekeeping far more than infrequent deep cleans do. When a small home is tidy, it feels bigger, calmer, and more functional. When it is not, even one messy corner can make the whole space feel chaotic. Building a routine around consistent upkeep is the single biggest shift compact-living households can make.
If you want a proven framework for staying on top of things week after week, the guide to weekly house cleaning habits on this blog lays out a practical system you can follow starting today.
Daily Cleaning Routines for Small Spaces That Take Under 15 Minutes
A daily cleaning routine for a small space does not need to be elaborate. The goal is to reset the home every single day so that tasks never pile up. Here are the non-negotiable daily habits that make the biggest difference:
Make the bed immediately after waking up. In a small bedroom, an unmade bed is the dominant visual and it makes the whole room look messy. This takes 90 seconds.
Wipe kitchen surfaces after every meal. Counters, the stovetop, and the sink should be wiped down while you are already in the kitchen. Fresh grease and food residue come off in seconds; dried residue from yesterday takes serious effort.
Clean spills straight away. A fresh spill on a countertop, floor, or fabric surface is always easier to remove than a dried, set stain. Keep a microfiber cloth within reach in every room.
Do a five-minute evening reset. Before bed, walk through every room and return items to their designated spots. In a small home, this takes five minutes at most and makes the next morning feel completely different.
Wipe bathroom surfaces daily. A quick pass over the sink, faucet, and mirror with a damp cloth keeps the bathroom presentable without a dedicated weekly scrub session.
Sweep or vacuum high-traffic areas. In compact homes, foot-traffic areas like the entry, kitchen, and hallway accumulate dirt fast. A 90-second sweep keeps floors looking clean between full mop sessions.
These small-home daily tasks take under 15 minutes combined. They are the backbone of any maintenance routine for a compact space.
Laundry Habits That Prevent Overwhelming Piles in Small Homes
Laundry is one of the fastest ways a small home spirals into chaos. A single basket of unfolded clothes can occupy a significant percentage of available floor or surface space in a studio or one-bedroom unit. The solution is to do laundry little and often rather than saving it for one large load at the end of the week.
Aim to run one small load every two to three days. Fold and put away items the moment the dryer cycle finishes. Letting clean laundry sit in a basket creates a second task (folding) on top of the first (washing), and in a small home, that basket will inevitably migrate to a chair, bed corner, or couch until it becomes invisible background noise.
A few habits that help:
Use a single, appropriately sized hamper rather than multiple overflow baskets. When it is full, it is time to wash.
Sort laundry before you toss it in the hamper, not on laundry day. A two-compartment hamper handles this automatically.
Hang clothing that is worn but not dirty immediately after taking it off. Over-the-door hooks work well in small bedrooms where closet space is tight.
Staying on top of laundry is one of the simplest maintenance routines for small spaces, and it has an outsized impact on how clean and organized a compact home actually feels.
Weekly Cleaning Tasks for Small Apartments and Compact Homes
Daily habits keep a small home presentable, but weekly cleaning tasks handle the dirt and bacteria that accumulate beneath the surface. For compact spaces, a weekly cleaning schedule should cover these core areas:
Bathroom deep clean. Scrub the toilet, disinfect the sink and faucet, clean the tub or shower walls, and mop the floor. The bathroom disinfection service guide on this blog covers the step-by-step process for a thorough result.
Kitchen floors and appliances. Mop the kitchen floor, wipe down appliance exteriors, clean the microwave interior, and pull out small appliances to wipe the surfaces underneath them.
Vacuuming all soft surfaces. Rugs, upholstered furniture, and fabric headboards trap dust, pet hair, and allergens. Weekly vacuuming keeps indoor air quality healthier, which matters particularly in small spaces where ventilation can be limited. The EPA’s indoor air quality guidelines confirm that regular vacuuming with a HEPA filter helps reduce airborne particles significantly.
Dusting all surfaces. In a small home, every horizontal surface collects dust at the same rate as a large home. Dust shelves, windowsills, baseboards, ceiling fan blades, and light fixtures on a weekly cycle.
Changing bed linens. Fresh sheets weekly are a hygiene baseline, not a luxury. Bed linens collect sweat, skin cells, and dust mites rapidly.
If you want to make these weekly tasks faster and more effective, choosing the right cleaning products matters. For households with sensitivities or young children, pairing your weekly routine with hypoallergenic cleaning supplies reduces irritants without sacrificing cleaning power.
Decluttering Strategies That Make Cleaning a Small Home Faster
Cleaning and clutter are inseparable in a small home. You cannot clean a surface that is buried under items, and in a compact space, even a modest amount of excess stuff creates a cluttered environment. Regular decluttering is a cleaning habit, not a separate organizational project.
The most effective decluttering strategy for small homes is the one-in, one-out rule: every time a new item enters the home, something else leaves it. This keeps possessions from gradually accumulating past what the space can comfortably hold.
Beyond that rule, build two decluttering habits into your routine:
Weekly surface clear. Once a week, during your standard cleaning session, clear every horizontal surface completely and only return items that genuinely belong there. Everything else gets put away or donated.
Monthly pass through closets and storage. Once a month, spend 15 minutes going through one closet, drawer, or storage area. Donate or discard anything that has not been used in the past few months.
When surfaces are clear, cleaning is dramatically faster. Wiping a bare countertop takes 20 seconds. Wiping around 14 items sitting on that countertop takes several minutes and often means those items never get cleaned underneath. Decluttering is one of the most underrated small-home cleaning tips available.
Small homes have less air volume than large ones, which means cleaning products with harsh chemicals concentrate indoors faster. Volatile organic compounds released by conventional sprays, bleach products, and synthetic fragrance can linger in a compact space long after cleaning is finished. According to the EPA’s research on VOCs and indoor air quality, exposure to these compounds is significantly higher indoors than outdoors and can cause short-term respiratory irritation as well as longer-term health effects.
Switching to eco-friendly cleaning products for small homes is a practical choice, not just an environmental one. Look for products that carry the EPA Safer Choice certification, which means every ingredient has been screened for safety to human health and the environment. These products clean effectively without filling a small space with chemical fumes.
A few eco-friendly product swaps worth making:
Replace synthetic all-purpose sprays with plant-based alternatives for daily surface wiping.
Use white vinegar diluted with water as a glass and mirror cleaner. It cuts through grime and streaks without any residual odor once dry.
Choose fragrance-free laundry detergents. Synthetic fragrance in laundry products is one of the most common household VOC sources.
Use microfiber cloths instead of disposable paper towels. They clean effectively with water alone on most surfaces and reduce both chemical use and waste.
The spring cleaning guide on this blog also covers eco-friendly product choices for a full home reset.
When to Schedule a Professional Deep Clean for Your Small Home
Daily and weekly habits keep a small home clean on the surface, but they do not replace a periodic professional deep clean. Over time, dirt, bacteria, mold spores, and allergens accumulate in areas that routine maintenance simply does not reach: grout lines, behind appliances, inside oven cavities, along baseboards, inside window tracks, and under furniture.
A professional deep cleaning service goes beyond surface cleaning to address these hidden areas systematically. For small homes, a deep clean is typically recommended every three to four months, or at key transition points: before or after a move, ahead of a holiday gathering, or at the start of a new season.
Signs that your small home is ready for a professional deep clean include:
Persistent odors that do not clear with regular cleaning
Visible buildup in grout or tile that a standard scrub does not remove
Allergy symptoms that worsen at home despite regular vacuuming
A general sense that surfaces are not coming fully clean no matter how much you wipe them
The home disinfection services offered by the trusted cleaning team at Elite Maids House Cleaning are designed exactly for these situations. Every cleaner is background-checked, bonded, and fully insured, and the service is backed by a reclean-at-no-cost satisfaction guarantee. For Arizona homeowners in Phoenix, Mesa, Scottsdale, Chandler, Gilbert, and beyond, this kind of scheduled deep clean slots in perfectly alongside a strong daily maintenance routine.
Good daily habits protect the results of each professional visit, and each professional visit resets the baseline so your daily habits stay effective. The two approaches work together, not against each other.
If you want to take the effort out of keeping your compact home consistently clean, contact Elite Maids house cleaning today for a free quote. Online booking with instant quotes lets you schedule same-day service between 8am and 6pm without a single phone call, serving families across Arizona’s Valley communities and beyond.
Frequently Asked Questions
How do you keep a small home clean with a busy schedule?
The most effective approach is to build short daily habits rather than saving cleaning for one long session. A five-minute morning reset, wiping kitchen surfaces after each meal, and a quick bathroom wipe-down each evening take under 15 minutes combined. Pair these with a weekly 30-minute cleaning session and a recurring professional cleaning visit for a fully manageable routine.
How often should you deep clean a small apartment?
A small apartment benefits from a professional deep clean every three to four months. Between those sessions, weekly cleaning tasks like scrubbing the bathroom, mopping floors, and vacuuming soft surfaces handle ongoing maintenance. If you have pets, allergies, or high foot traffic, moving to a quarterly or even monthly deep clean schedule makes sense.
What are the most important daily cleaning habits for small spaces?
The habits with the highest impact in small spaces are making the bed each morning, wiping kitchen counters and the stovetop after every meal, cleaning up spills immediately, doing a five-minute evening reset to return items to their places, and doing a quick daily wipe of bathroom surfaces. These five habits take under 15 minutes and keep the space consistently presentable.
Is it better to clean a little every day or do one big clean each week?
Cleaning a little every day is far more effective in small homes. Daily habits prevent mess from compounding, which is the primary problem in compact spaces where clutter and grime are immediately visible. One large weekly clean can supplement daily habits but works poorly as the only cleaning strategy because it allows five to six days of buildup between sessions.
What eco-friendly cleaning products work well in small homes?
Plant-based all-purpose sprays, diluted white vinegar for glass surfaces, fragrance-free laundry detergents, and microfiber cloths are all strong choices. Look for EPA Safer Choice certified products to confirm every ingredient has been screened for safety. These options reduce VOC concentration in small spaces where chemical fumes build up faster than in larger homes.
Wood Floor Cleaning Tips: How to Clean Hardwood Floors the Right Way
SHARE:
The best way to clean hardwood floors is to sweep or vacuum daily to remove grit, then mop lightly with a pH-neutral cleaner and a barely damp mop. Excess moisture is the number-one enemy of wood. This guide covers everything from routine hardwood floor maintenance to deep cleaning floors that haven’t been touched in years, plus the products and mistakes worth knowing about.
How to Clean Hardwood Floors: A Step-by-Step Method That Actually Works
Cleaning hardwood floors properly is less about elbow grease and more about using the right tools in the right order. The goal when cleaning wood floors is to lift dirt without pushing moisture into the grain. Follow these steps and you’ll protect your investment every single time.
Step 1: Dry Clean First
Before any liquid touches the surface, dry-clean the floor thoroughly. Use a microfiber dust mop or a soft-bristle broom to sweep debris toward the center of the room, then collect it. A vacuum with a hardwood floor setting (no rotating beater bar) works even better because it pulls fine particles out of the grooves between planks. Vacuuming hardwood floors at least three times a week in high-traffic homes prevents grit from acting like sandpaper underfoot.
Step 2: Spot-Treat Stains Before Mopping
Address spills and scuffs before reaching for the mop. A small amount of Bona Hardwood Floor Cleaner sprayed directly onto a microfiber cloth and rubbed gently over the stain will lift most marks without over-wetting the wood. For tougher heel marks, a tiny dab of mineral spirits on a clean cloth works well. Always rub with the grain, not against it.
Step 3: Damp Mop with a pH-Neutral Cleaner
Fill a spray bottle with a hardwood-safe, pH-neutral cleaner. Spray a small section of floor, then immediately wipe with a barely wrung-out microfiber mop. Never pour liquid directly onto wood flooring. Work backward toward the door so you’re not stepping on cleaned sections. The floor should be dry to the touch within a minute or two. If it stays wet longer, the mop is too saturated.
According to Good Housekeeping’s cleaning guides, using a spray mop system rather than a traditional bucket-and-mop setup dramatically reduces the risk of moisture damage on hardwood surfaces.
How to Clean Hardwood Floors with a Vacuum or Broom
Most hardwood floor damage happens between mopping sessions, not during them. Dry cleaning wood floors consistently is the single most protective habit a homeowner can build. Whether you use a broom or a vacuum on your hardwood floors, the technique matters as much as the tool.
When sweeping hardwood floors, use a microfiber dust mop rather than a traditional corn-bristle broom. Corn bristles can scatter fine dust rather than capture it, and that dust settles right back into the grain. Microfiber traps particles electrostatically and holds them until you shake or wash the pad.
If vacuuming hardwood floors is your preference, always switch to the hard-floor setting. The rotating brush roll on carpet mode is aggressive enough to scratch a finished surface over time. A canister vacuum with a felt-bottomed floor attachment is the safest option. Pay special attention to the perimeter of each room, where dust and pet hair collect along baseboards.
Aim to sweep or vacuum high-traffic hardwood areas at least every other day. Entryways, kitchens, and hallways collect grit faster than you’d expect, especially in Arizona homes where fine desert sand tracks in easily. Book a recurring clean so professional dry-cleaning and mopping of your hard floors stays on a reliable schedule.
How to Deep Clean Wooden Floors That Haven’t Been Cleaned in Years
If your hardwood floors have years of built-up grime, old wax residue, or a dull film that mopping doesn’t shift, a standard maintenance clean won’t cut it. Deep cleaning wooden floors in this condition requires a more deliberate process.
Start by vacuuming thoroughly, including along every baseboard and in every corner. Then apply a concentrated hardwood floor cleaner rated for deep cleaning, following the manufacturer’s dilution instructions precisely. Apply with a microfiber mop in small sections, allowing the solution to sit for 30 to 60 seconds to break down accumulated soil before wiping it away.
For floors with old wax or oil buildup, a dedicated wax stripper formulated for wood floors is necessary before you can deep clean effectively. Apply the stripper with a scrubbing pad rated for hardwood (not steel wool, which leaves metal fibers behind), then wipe clean. Repeat on stubborn patches.
After a full deep clean of hardwood flooring that’s been neglected, it’s worth inspecting for surface damage. Scratches and dull areas that appear after stripping old residue may need light screening and a fresh coat of finish from a flooring professional. Deep cleaning hardwood floors brings them back to life, but it also reveals exactly what the buildup was hiding.
If this sounds like more than a weekend project, the team at Elite Maids House Cleaning handles deep clean appointments across Phoenix, Mesa, Scottsdale, Gilbert, Chandler, Glendale, and beyond. Every clean is backed by a reclean-at-no-cost guarantee.
What to Use to Clean Wood Floors: Products That Are Safe and Effective
Choosing the right product to clean hardwood floors is where many homeowners go wrong. The wood floor cleaning product you use should be pH-neutral, residue-free, and formulated specifically for finished hardwood. Here’s what works and what doesn’t.
Products That Work Well on Hardwood
Bona Hardwood Floor Cleaner: One of the most widely recommended products for cleaning hardwood floors. It dries fast, leaves no film, and is safe for all factory-finished hardwood. It also carries the EPA Safer Choice certification, meaning its ingredients have been reviewed for human and environmental safety.
pH-neutral dish soap diluted in water: A few drops in a spray bottle of water makes a gentle spot cleaner for small messes. Don’t use it for whole-floor mopping.
Manufacturer-approved cleaners: If your floors are under warranty, check which cleaners the flooring brand recommends. Using anything else can void the warranty.
What Not to Use on Hardwood Floors
Vinegar and water: Cleaning hardwood floors with vinegar is a common tip you’ll see repeated everywhere, but it’s problematic over time. Vinegar is acidic and can break down the polyurethane finish with repeated use, leaving floors cloudy and vulnerable. A one-time emergency use is unlikely to cause damage, but routine hardwood floor cleaning with vinegar is a mistake.
Steam mops: The heat and moisture output from a steam mop can warp wood planks and damage the finish. Keep steam mops for tile and sealed stone.
Oil-based soaps (like Murphy Oil Soap on finished floors): These leave a residue that dulls the finish over time and makes the floor sticky.
Abrasive scrubbers: Anything that scratches the finish opens the wood up to moisture and staining.
As Real Simple’s cleaning editors note, less is more when it comes to hardwood. A barely damp mop and a quality pH-neutral cleaner beats any heavy-duty solution that promises a showroom shine in one pass.
How to Revitalize Hardwood Floors That Look Dull or Scratched
Even clean hardwood floors can look tired if the finish has worn thin or the surface has accumulated micro-scratches from foot traffic and furniture. Revitalizing hardwood floors doesn’t always mean a full refinish, which is expensive and disruptive. There are intermediate steps worth trying first.
Hardwood Floor Refresher Products
Products like Bona Hardwood Floor Refresher or similar floor restorers fill in micro-scratches and add a thin protective coat that restores gloss. Apply with a clean applicator pad in thin, even coats. The key with revitalizing hardwood floors this way is patience: thin coats that dry completely between applications produce a far better result than heavy coats that streak and peel.
Buffing and Light Screening
If refresher products don’t produce the result you want, a rental floor buffer with a fine abrasive screen can lightly scuff the existing finish to prepare it for a new topcoat. This is called screening or recoating. It removes surface scratches without sanding all the way through the finish to bare wood. Recoating hardwood floors every few years extends the life of the finish significantly and is far less invasive than a full sand-and-refinish job.
When to Call a Flooring Professional
Deep gouges, cupping (where plank edges are higher than their centers, often caused by moisture), or finish that has worn through to bare wood in multiple spots all indicate the floor needs professional sanding and refinishing. At that point, no cleaning product or refresher will fix the problem.
How to Maintain Hardwood Floors and Protect Them Long-Term
Maintaining hardwood floors consistently is far cheaper than repairing or replacing them. The habits below protect wood floors from the daily wear that shortens their life.
Use Entry Mats and Area Rugs
Place high-quality doormats at every exterior entry and area rugs in high-traffic zones like hallways and in front of the kitchen sink. Mats capture the grit and moisture that would otherwise grind into the finish. In Arizona, the fine silica sand that blows through the Valley is particularly abrasive on wood floor finishes.
Protect Legs on Furniture
Felt pads under every chair and table leg prevent scratching when furniture shifts. Check and replace these pads seasonally since they wear down and collect grit themselves, at which point they become the scratching agent rather than the protector.
Control Indoor Humidity
Wood is a hygroscopic material, meaning it absorbs and releases moisture from the air. Extremely dry indoor air (common in Arizona winters) can cause planks to shrink and gap. Overly humid air causes swelling and cupping. The recommended indoor relative humidity for hardwood floors is generally between 35% and 55%. Running a humidifier in winter and keeping air conditioning moderate in summer helps maintain this range.
Clean Up Spills Immediately
Even small spills left sitting for several minutes can penetrate a worn finish and raise the wood grain. Keep a clean microfiber cloth accessible in the kitchen and any room with hardwood flooring so spills are wiped up fast.
Schedule Professional Deep Cleans Periodically
Routine home cleaning keeps floors looking good day to day, but periodic professional cleaning removes the embedded dirt that home tools miss. If you’re already using recurring house cleaning Arizona residents rely on through Elite Maids, ask about adding hardwood floor attention to your regular service plan. Our eco-friendly product options are safe for finished hardwood and the people who walk on it.
For a broader look at whole-home cleaning habits that protect your investment, our ultimate guide to spring cleaning walks through a room-by-room approach that pairs perfectly with a hardwood floor refresh.
Eco-Friendly Wood Floor Cleaning Options for Healthier Indoor Air
Many conventional floor cleaning products contain volatile organic compounds that off-gas into your home’s air after application. According to the EPA’s guidance on VOCs and indoor air quality, indoor VOC levels can be two to five times higher than outdoor levels, and cleaning products are a significant source. Choosing eco-friendly cleaning products for your hardwood floors reduces this exposure without sacrificing results.
Look for hardwood floor cleaners that carry third-party certifications like the EPA Safer Choice label or are plant-derived and free of synthetic fragrances. Concentrated formulas that you dilute yourself also reduce plastic waste and are often more economical per use than ready-to-use sprays.
Eco-friendly cleaning options for wood floors are no longer niche. Mainstream products like Bona’s free-and-simple formula and several private-label options at major retailers now meet both performance and safety standards. If you’re working with an eco-friendly cleaning service Arizona homeowners trust, confirm which specific products they use and whether those products are appropriate for your floor’s finish type.
For households with children, pets, or family members with respiratory sensitivities, this isn’t a minor consideration. The American Lung Association identifies indoor air pollution as a genuine health concern, and reducing chemical load from cleaning products is one of the most accessible ways to improve the air your family breathes every day.
If you’re ready to have your hardwood floors cleaned by professionals who take product safety seriously, schedule a house cleaning appointment online with Elite Maids today. Our Arizona teams are background-checked, fully insured, and carry eco-friendly product options at no extra charge.
Closing: Get Hardwood Floors That Look Clean Every Day
Consistently clean hardwood floors come down to a simple rhythm: dry clean often, damp mop sparingly with the right product, address spills immediately, and schedule a deeper clean periodically. Every step you take to protect the finish extends the life of the floor by years. If you want expert hands on your hardwood floors without lifting a finger, contact Elite Maids house cleaning today for a free quote. We serve Phoenix, Mesa, Scottsdale, Gilbert, Chandler, Glendale, Queen Creek, San Tan Valley, Tucson, and Flagstaff, and we back every visit with a reclean-at-no-cost satisfaction guarantee.
Frequently Asked Questions
What are the common mistakes when cleaning hardwood?
The most common mistakes when cleaning hardwood floors are using too much water, mopping with vinegar regularly, using a steam mop, and applying oil-based soaps that leave residue. Over-wetting is the most damaging: moisture seeps between planks, swells the wood, and eventually causes warping or cupping. Always use a barely damp mop and a cleaner designed specifically for finished hardwood.
What is the best thing to use to clean wood floors?
A pH-neutral, residue-free cleaner paired with a microfiber mop is the safest and most effective combination for cleaning wood floors. Bona Hardwood Floor Cleaner is widely recommended because it dries quickly, leaves no film, and carries EPA Safer Choice certification. Avoid multi-purpose floor cleaners not specifically labeled safe for hardwood, as they can dull or damage the finish over time.
Can you clean hardwood floors with vinegar?
Vinegar is not recommended for routine hardwood floor cleaning. Its acidity can gradually degrade the polyurethane finish, leaving floors cloudy and more vulnerable to moisture. One accidental exposure is unlikely to cause visible damage, but using a vinegar-and-water solution as your regular wood floor cleaner will shorten the life of the finish noticeably over months and years.
How do you deep clean hardwood floors that haven’t been cleaned in years?
Start with a thorough vacuum to remove loose debris, then apply a concentrated hardwood floor cleaner in small sections, letting it dwell briefly before wiping clean. If there is old wax or oil buildup, use a dedicated hardwood wax stripper first. After deep cleaning hardwood floors that have been neglected, inspect for surface damage that may require professional screening and recoating to fully restore.
How often should hardwood floors be professionally cleaned?
Most hardwood floors benefit from professional cleaning two to four times per year, depending on foot traffic, pets, and local conditions. In Arizona, fine desert sand makes more frequent professional attention worthwhile. Between professional visits, dry cleaning every two to three days and light damp mopping weekly keeps hardwood floors in good condition and reduces how much work each professional clean needs to do.
Quick Cleaning Hacks and Decluttering Tips for Busy Moms
SHARE:
The fastest cleaning hacks for busy moms combine a consistent daily reset routine with smart decluttering strategies that shrink the mess before it starts. When your schedule is packed, working in short focused bursts beats marathon weekend sessions every time. This post breaks down room-by-room tactics, product shortcuts, and organizing habits that keep your home cleaner with far less effort.
Why Quick Cleaning Routines Actually Work for Busy Families
The biggest myth about keeping a clean house is that it requires long, uninterrupted blocks of time. For moms running kids to school, managing work, and cooking dinner, that kind of time simply does not exist on most days. What does work is a quick cleaning routine built around small, repeatable habits that stack up over the week.
Think of it this way: five minutes of wiping down the bathroom sink every morning takes zero mental energy after a few weeks. A two-minute toy sweep before bedtime means Saturday does not become a four-hour rescue mission. These micro-habits are the backbone of every effective cleaning routine for busy moms, and research backs it up. Real Simple’s cleaning guides consistently show that shorter, daily tasks maintain a cleaner home than occasional deep-cleaning blitzes.
To build a quick cleaning routine that actually sticks, start with these non-negotiables:
Make the bed every morning, even if nothing else gets done. Visual order in one room resets your mental state for the day.
Run the dishwasher every night so mornings do not start with a sink full of last night’s dishes.
Do one load of laundry start to finish, not three loads that sit in the dryer for a week.
Wipe kitchen counters after every meal prep session, not just at the end of the day.
Spend ten minutes before bed doing a whole-house reset: shoes to the closet, bags to their hooks, toys to their bins.
Once these habits run on autopilot, the house stays at a baseline level of clean without a heroic effort. That is exactly where you want to be as a busy mom managing a full household.
Room-by-Room Speed Cleaning Tips That Save Real Time
Speed cleaning tips are most effective when they are tailored to specific rooms rather than applied as a generic system. Every room in your home has its own mess patterns, and a targeted approach cuts cleaning time dramatically compared to wandering from space to space with a spray bottle.
Kitchen: The kitchen is the highest-traffic room in most homes, which means it gets dirty fastest and benefits most from quick cleaning strategies. Keep a microfiber cloth hanging inside a cabinet door so wiping the counters takes five seconds, not the time it takes to hunt down supplies. Fill a small spray bottle with diluted white vinegar solution and park it right on the counter for instant spot cleaning. Every morning, swipe the stovetop before grease has a chance to harden.
Bathrooms: Bathrooms feel overwhelming because they involve so many surfaces in a small space. Flip the script by keeping a daily shower spray on the shower shelf. A quick spritz after each shower prevents soap scum from building up, eliminating the need for a scrubbing session most weeks. Keep a toilet brush and a small container of baking soda right next to the toilet for a 60-second swish whenever things look dingy.
Living areas: Clutter accumulates in living rooms faster than dirt does. A basket near the couch corrals remote controls, chargers, and small toys so the room looks picked up even when it is not technically clean. Vacuum only the high-traffic paths mid-week and save the full-room pass for your scheduled cleaning day.
Kids’ rooms: Involve the kids in a nightly reset. Assign a specific bin for each category of toy and make returning things to those bins part of the bedtime routine. When kids own the reset, you stop being the one doing it.
Decluttering Strategies That Make Cleaning Faster Every Single Day
Decluttering and cleaning are not the same thing, but they are deeply connected. The more items sitting on surfaces, the longer every cleaning session takes. Effective decluttering strategies reduce the physical burden of cleaning by removing the objects that gather dust, block vacuuming, and create visual chaos in the first place.
The most practical decluttering method for busy moms is the one-in, one-out rule: every time a new item enters the house, one item leaves. This is especially powerful for kids’ toys and clothing. It keeps the total volume of stuff flat without requiring a massive seasonal overhaul.
For faster results, run a ten-minute declutter sweep once a week using these decluttering tips:
Grab a laundry basket and walk through each room collecting anything that does not belong there. Sort it in one central spot afterward.
Check the kitchen counter specifically. Countertop clutter is the biggest single factor that makes kitchens look messy even after they’ve been wiped down.
Pull one drawer or cabinet per week and remove anything broken, expired, or unused. Spread across a month, this handles the whole kitchen without a weekend-long project.
Keep a donation box in the closet. When it fills, drop it off. No scheduling, no big decision-making sessions.
Decluttering your home regularly also makes professional cleaning visits far more effective. When a cleaning team arrives at a clutter-free home, every minute is spent actually cleaning surfaces rather than working around piles. Families who use recurring house cleaning Arizona services consistently report that their homes stay cleaner longer between visits because the decluttering habit that supports professional cleaning also supports their own daily maintenance.
Eco-Friendly Cleaning Products Worth Keeping on Hand
Choosing eco-friendly cleaning products is not just a feel-good decision. It has real health implications for the kids and pets spending the most time close to floors and surfaces. The EPA Safer Choice program certifies cleaning products that are safer for human health and the environment, and more of these options are available today than ever before.
For a basic green cleaning kit that handles most messes in a busy household, stock these essentials:
White vinegar: cuts grease, dissolves mineral deposits, and deodorizes surfaces without harsh fumes.
Baking soda: gentle abrasive for sinks and tubs, eliminates odors in carpets and trash cans.
Castile soap: plant-based, concentrated, and effective on floors, counters, and even laundry.
Microfiber cloths: trap dust and bacteria with water alone, reducing your reliance on spray cleaners across the board.
EPA Safer Choice certified multi-surface spray: for times when you need something stronger than a DIY solution without reaching for a product loaded with harsh VOCs.
It is worth being aware that many conventional cleaning sprays release volatile organic compounds (VOCs) that affect indoor air quality, particularly in poorly ventilated bathrooms and kitchens. Switching even a few products to safer alternatives makes a measurable difference in the air your family breathes daily.
When the deep clean goes beyond what a spray bottle can handle, professional home disinfection services provide a thorough, product-safe option that does not require you to research chemical compatibility or ventilate rooms for hours afterward.
Time-Saving Cleaning Hacks Using Everyday Household Items
You do not need a cabinet full of specialty products to clean your home efficiently. Some of the most effective time-saving cleaning hacks use items already sitting in your kitchen or bathroom. These shortcuts are especially useful on weekdays when you need a quick fix, not a full cleaning session.
Shower steam trick: After a hot shower, use the steam to your advantage. Wipe down the mirror and walls with a dry microfiber cloth while they are warm. Soap scum and toothpaste splatter wipe off in seconds when surfaces are heated.
Pillowcase dusting: Slide a clean pillowcase over ceiling fan blades and pull it back. Dust falls into the case instead of onto your furniture and floor. One pass, no mess.
Lemon and salt for cutting boards: Sprinkle coarse salt on a wooden cutting board and rub with a halved lemon. It deodorizes, sanitizes, and removes staining without soaking the wood.
Dryer sheet baseboards: Wipe baseboards with a used dryer sheet. It cleans the surface and leaves a light anti-static coating that repels dust for weeks.
Rubbing alcohol for stainless steel: A few drops on a microfiber cloth removes fingerprints from stainless steel appliances faster than any specialty product.
Dish soap for carpet stains: Blot the stain, apply a few drops of dish soap mixed with warm water, blot again from the outside in. Do not scrub. This handles most organic stains before they set.
These practical cleaning shortcuts for moms work precisely because they require no extra shopping trip, no specialized knowledge, and almost no time. The best hack is always the one you will actually use on a Tuesday morning.
Organizing Your Cleaning Supplies for Maximum Efficiency
Even the best cleaning hacks fall apart if your supplies are scattered across three closets and the garage. Organizing cleaning supplies well is a one-time investment that saves minutes on every single cleaning session going forward. When everything is in one logical place, you stop wasting time searching and start actually cleaning.
The most effective supply organization system for a busy household uses a caddy approach. Keep one caddy stocked with everything needed for bathrooms and another for the kitchen. Store them under the respective sinks so the supplies are already where the mess is. You should be able to grab and go without moving anything else out of the way.
For a well-stocked cleaning caddy, include:
One all-purpose spray (eco-friendly preferred)
One glass cleaner
Microfiber cloths in two colors: one for toilets, one for everything else
Scrubbing sponge or brush
Small roll of paper towels for genuinely gross messes
Gloves
Keep your vacuum accessible, not buried behind sports equipment. If getting to the vacuum takes more than 30 seconds, it will not get used for spot jobs. A cordless stick vacuum parked in a visible corner lowers the friction enough that quick daily passes actually happen.
When you know your regular routine is covered but life is throwing too much at you right now, same-day house cleaning Arizona is available for exactly those moments. No phone call required, no advance planning, just online booking with an instant quote.
When to Call in Professional House Cleaning Help
Quick cleaning hacks and daily habits handle everyday maintenance beautifully, but there are times when professional house cleaning is the smarter move. Knowing when to call in help is not a failure of the system; it is the system working correctly. Your time has value, and spending it on a deep scrub of grout lines or a post-event disaster zone is rarely the best use of a Saturday.
Consider booking professional cleaning services for busy moms when:
The house needs a reset after a season of extra activity, holidays, or illness. A professional holiday cleaning service handles the heavy lifting before or after guests arrive so you are not spending the holiday itself scrubbing baseboards.
You are moving in or out and need a thorough top-to-bottom clean that goes beyond what daily habits cover.
The family has been sick and you want a full disinfection pass on high-touch surfaces throughout the house.
You hit a stretch where work, kids, or life simply took over and the house has fallen behind your baseline. A single professional visit resets everything so your quick daily habits can do their job again.
A recurring cleaning schedule is the most popular solution for busy families because it removes the decision entirely. Knowing a professional team arrives every two weeks means your daily routine only needs to maintain, not deep clean. That is a fundamentally different and much lighter load. Elite Maids House Cleaning serves Phoenix, Mesa, Scottsdale, Gilbert, Chandler, Glendale, Queen Creek, San Tan Valley, Tucson, and Flagstaff with background-checked, fully insured cleaners backed by a satisfaction guarantee. Every visit is backed by a no-cost reclean policy, so there is no risk in trying it.
If you are ready to stop spending your weekends cleaning and start actually enjoying them, contact Elite Maids house cleaning today for a free quote and see how simple it is to get your home professionally cleaned on your schedule.
Frequently Asked Questions
What are the best quick cleaning hacks for busy moms with small kids?
The most effective quick cleaning hacks for moms with small kids are ones that prevent mess rather than react to it. Use daily shower spray to eliminate tub scrubbing, keep a laundry basket in every room for fast pick-ups, and involve kids in a nightly toy reset. Working in focused five to ten minute bursts beats saving everything for the weekend.
How do I declutter my house fast when I have no time?
Grab a laundry basket and do one fast sweep through the main living areas, collecting anything out of place. Sort it later. Then focus on visible flat surfaces like counters and coffee tables first, since clearing those creates the biggest visual impact for the least effort. Running a ten-minute declutter session once a week keeps the volume of clutter manageable long term.
How often should a busy family deep clean their home?
Most families benefit from a thorough deep clean two to four times per year, with lighter maintenance cleaning handled weekly or biweekly in between. Homes with kids, pets, or allergy sufferers often need more frequent attention on floors, upholstery, and bathrooms. A professional deep clean before and after the holiday season is a smart baseline for most households.
Are eco-friendly cleaning products actually effective for everyday messes?
Yes, for the vast majority of everyday household messes, eco-friendly cleaning products perform just as well as conventional ones. White vinegar, baking soda, castile soap, and EPA Safer Choice certified sprays handle grease, bacteria, and general grime effectively. The main trade-off is that some natural options require slightly more dwell time on stubborn stains, but they are safe for kids and pets from the moment surfaces dry.
What is the fastest way to clean a house before guests arrive?
Focus on the rooms guests will actually see and use: the entryway, living room, kitchen, and guest bathroom. Wipe visible surfaces, vacuum main traffic areas, clean the toilet and sink, and take out any trash. Declutter flat surfaces first since they drive the first impression. If you need a full clean with very little notice, same-day professional cleaning services are available and can be booked online in minutes.
5 Places to Clean Before Guests Arrive for Stress-Free Hosting
SHARE:
Before guests arrive, focus your cleaning energy on the entryway, guest bathroom, kitchen surfaces, living room, and any spare bedroom or sleeping area. These five zones create the strongest first impressions and directly shape how comfortable your home feels to visitors. The rest of this post walks through each spot with practical, fast-action tips so you can host with confidence every time.
1. Why Cleaning Before Guests Arrive Actually Matters
You do not need to scrub every corner of the house before company shows up. What you do need is a focused plan that targets the spots your guests will actually see, touch, and use. Cleaning your home before guests arrive is less about perfection and more about creating a feeling: fresh air, clear surfaces, and a space that says, “we were ready for you.”
According to Good Housekeeping’s cleaning experts, the areas that matter most to visitors are the ones tied to basic comfort: a clean bathroom, an uncluttered kitchen, and a living space that does not smell stale. Guests rarely inspect baseboards or the inside of your pantry. They notice smells, visible grime, and clutter on shared surfaces.
If your schedule is tight, a fast home cleaning before guests arrive does not have to mean cutting corners. It means being strategic about where your 60 or 90 minutes goes. The five areas below are that strategy.
2. Clean Your Entryway: The First Impression Zone
Your entryway sets the tone for everything that follows. When a guest steps through your front door, they form an opinion about your home within seconds. Cleaning this spot before guests arrive takes ten minutes and pays off the entire evening.
Sweep or vacuum the floor. Dirt, dust, and tracked-in debris are immediately visible on tile and hardwood. A quick pass with a broom or vacuum removes the obvious.
Wipe the front door handle and light switch. These are the highest-touch surfaces in any entry zone. A disinfectant wipe is all it takes. If you want to go a step further, consider a home disinfection service for high-traffic areas before a larger gathering.
Clear shoes, bags, and clutter. A catch-all basket works well if you need a fast solution. Move anything that does not belong in the entry to a closet or a back room.
Add a fresh-smelling element. A candle, a small plant, or even a plug-in air freshener near the door signals cleanliness before guests see anything else.
Your entryway prep before hosting does not need to be elaborate. The goal is simple: no dirt underfoot, no clutter at eye level, and a handle that does not feel grimy when your guest reaches for it.
3. Scrub the Guest Bathroom: The Room That Gets Judged Most
Ask any host what room causes the most pre-party anxiety and the answer is almost always the bathroom. Cleaning the guest bathroom before visitors arrive is non-negotiable, and it is also the room where you get the biggest return on 15 minutes of work.
Here is a quick checklist for getting your guest bathroom guest-ready:
Scrub the toilet bowl and wipe down the seat, lid, and base. This is the one spot guests notice even when they are trying not to. Use a disinfecting cleaner and do not skip the base and the flush handle.
Clean the sink and faucet. Toothpaste splatters, soap residue, and water spots on chrome faucets are some of the most common forgotten spots guests silently notice.
Wipe down the mirror. Streaky mirrors and dried water spots make a bathroom feel neglected even when everything else is clean.
Replace or fold the hand towels. Fresh hand towels signal effort. Fold them neatly or hang a clean set so guests have something presentable to use.
Empty the trash can. A full wastebasket is one of the forgotten declutter spots most hosts skip. Empty it and add a fresh liner.
Spray a light air freshener or light a small candle. Bathroom air quality matters. The EPA’s indoor air quality guidance reinforces that ventilation and odor control in small enclosed spaces directly affect how comfortable people feel in a home.
If you are hosting overnight guests, add travel-sized soap, shampoo, and a fresh roll of toilet paper with a spare visible nearby. These small additions elevate a basic clean bathroom into a genuinely welcoming one.
4. Wipe Down Kitchen Surfaces Before Company Arrives
The kitchen is the social heart of most homes. Even when you are not cooking for guests, they will walk through, lean on the counter, and glance at the stove. Cleaning kitchen surfaces before guests arrive takes around 20 minutes and covers most of what visitors actually see.
Focus on these areas when preparing your kitchen for guests:
Countertops. Wipe every counter with an all-purpose cleaner. Move appliances, wipe under them, and push them back. Crumbs and grease rings under the toaster or coffee maker are common forgotten spots that guests notice up close.
Stovetop. Baked-on grease and food splatter make even a tidy kitchen look uncared for. A kitchen degreaser applied for a few minutes before wiping removes most buildup quickly.
Sink and faucet. Rinse away any dishes, scrub the basin, and dry the faucet so it shines. A clean sink does more visual work in a kitchen than almost anything else.
Refrigerator door handle. One of the highest-touch surfaces in the kitchen and consistently one of the most overlooked spots to clean before a gathering. A quick wipe with a disinfecting cloth handles it.
Floors. Sweep or dry-mop the kitchen floor. Food debris on a kitchen floor is immediately noticeable, especially if guests are barefoot.
If you are short on time, prioritize counters and the sink. Those two surfaces shape how clean your kitchen feels more than anything else. For a deeper clean that goes beyond prep, a professional kitchen disinfection service from a deep cleaning service Arizona team can handle the grime that builds up over time and is hard to tackle in a pre-party rush.
5. Tidy the Living Room: Declutter Before You Dust
The living room is where guests spend most of their time, which means it needs to look and smell clean even if it is not spotless. Cleaning your living room before guests come over follows a simple rule: declutter first, then clean. Trying to dust and vacuum around clutter wastes time and produces poor results.
Here is a fast living room clean sequence:
Pick up and clear surfaces. Remote controls, mail, magazines, charging cables, kids’ toys, gather anything that does not belong and move it to another room or a designated basket. This single step transforms how a room looks.
Fluff and straighten cushions and throws. Rumpled pillows and tangled blankets make a room feel messy even when floors and surfaces are clean. Thirty seconds of straightening makes a visible difference.
Dust visible surfaces. Coffee tables, shelving, and TV stands collect dust quickly. Use a microfiber cloth to wipe them down. Work top to bottom so any falling dust gets vacuumed up afterward.
Vacuum or sweep the floors. Focus on high-traffic paths and under the coffee table. You do not need to move every piece of furniture, just hit the visible zones.
Address odors. Pet smells, stale food odors, and dusty fabric all contribute to how a room feels. Open a window if weather allows, or use a fabric refresher on upholstery. The American Lung Association notes that good indoor air circulation reduces the buildup of airborne particles that contribute to stale-smelling rooms.
If you have young children, you may also have baby toys, plastic play sets, or fabric items scattered around. A fast wipe-down of hard toys with a child-safe cleaner keeps the space tidy and hygienic at the same time. Things like wooden blocks and rubber teethers can be wiped with a damp cloth and mild soap before guests arrive without any extra fuss.
6. Freshen the Guest Bedroom or Sleeping Area
If any of your guests are staying overnight, the bedroom they sleep in becomes one of the most important rooms in the house. Cleaning the guest bedroom before visitors arrive does not require stripping wallpaper or reorganizing closets. It requires fresh linens, a clear surface, and a welcoming smell.
Wash and change the bedding. Fresh sheets and pillowcases are the single most impactful thing you can do for an overnight guest. If you cannot wash them in time, at minimum fluff the pillows and smooth the comforter.
Clear the nightstand. Remove personal items and leave a clear surface where guests can put their phone, a glass of water, and their own belongings.
Dust and vacuum. Run a quick pass with a microfiber cloth over surfaces and vacuum the floor, especially under the bed where dust collects fast.
Make space in the closet. Move some hanging items to one side and clear a small area so guests have somewhere to hang a coat or a bag.
Check the room for smells. Closed rooms get stale quickly, especially in Arizona where homes stay sealed against the heat. Open the window or run the ceiling fan for an hour before guests arrive.
7. Fast Cleaning Tips to Tackle Forgotten Spots Before a Party
Once the five main areas are handled, there is usually a little time left to address the forgotten cleaning spots that guests notice even if they never say anything. These are the spots that separate a house that looks clean from one that actually feels clean.
Light switches and door handles throughout the house. These are touched constantly and almost never cleaned. A quick wipe with a disinfecting cloth takes two minutes and removes visible grime and bacteria.
The front of your stainless steel appliances. Fingerprints on a fridge or dishwasher front are a quiet signal of neglect. A stainless steel cleaner or a damp microfiber cloth restores the shine fast.
Baseboards in main areas. You do not need to do the whole house. Just wipe the baseboards in the entryway, bathroom, and living room with a damp cloth.
Mirrors in the entryway and hallway. Streaky mirrors are one of the most-noticed forgotten spots in any home. A glass cleaner and a lint-free cloth makes them disappear as a problem.
The outside of the trash cans. People open cabinet doors. A quick wipe on the cabinet front or the exterior of a freestanding bin removes visible residue.
If you want a comprehensive checklist that covers all of these forgotten spots for a specific area, the pre-guest cleaning checklist for Flagstaff homes is a solid room-by-room reference that works for any Arizona household.
8. Surface Tidy vs. Deep Clean: Which Do You Actually Need Before Guests?
There is a real difference between a surface tidy and a deep clean, and knowing which one applies to your situation saves you both time and stress. Cleaning your home before guests arrive at a surface level means tackling visible grime, odors, and clutter in the high-traffic areas covered above. A deep clean goes further: grout lines, inside appliances, under furniture, behind toilets, and inside cabinetry.
For most casual hosting situations, a focused surface clean of the five key areas is entirely sufficient. Where a deep clean makes sense is when:
Guests are staying for multiple nights and will use most rooms in the house.
You have not had a thorough cleaning in several weeks.
You are hosting a larger gathering where guests will move through the whole home.
You want your home to feel genuinely fresh rather than just presentable.
The honest answer for most families is that a professional cleaning service delivers a level of cleanliness that a fast pre-guest tidy cannot match, and it removes the stress of doing it yourself entirely. According to Real Simple’s cleaning coverage, hiring a professional cleaning team before a gathering is one of the most consistent stress-reduction strategies for hosts who want to actually enjoy their own events.
Closing: Let Elite Maids Do the Pre-Party Cleaning for You
Knowing which five spots to clean before guests arrive gives you a clear action plan, but sometimes the best action is handing the job to someone else. When your schedule is full or when you want your home to be genuinely clean rather than just presentable, Elite Maids House Cleaning has you covered across Phoenix, Mesa, Scottsdale, Gilbert, Chandler, Glendale, Queen Creek, San Tan Valley, Tucson, and Flagstaff. Every cleaner is background-checked, fully insured, and backed by a reclean-at-no-cost satisfaction guarantee. You can book a same-day cleaning online and get an instant quote without a phone call. Ready to host without the hustle? Contact Elite Maids house cleaning Arizona for a free quote and let our team take care of every corner before your guests walk through the door.
Frequently Asked Questions
What one thing should I clean before guests arrive?
If you only have time for one thing, clean the guest bathroom. Specifically, scrub the toilet bowl, wipe down the sink and faucet, replace the hand towels, and empty the trash. Guests use the bathroom in almost every visit, and it is the room that forms the most lasting impression. A clean bathroom signals that the whole home is cared for, even if other areas are not perfect.
What are the 5 points of cleanliness?
The five core points of cleanliness in a home context are: visible surface cleanliness (no dust, grime, or residue), odor control (fresh air, no stale or pet smells), clutter removal (clear surfaces and floors), sanitation of high-touch areas (handles, switches, faucets), and fresh textiles (clean towels, linens, and upholstery). Together, these five points create the perception and reality of a clean home.
What forgotten spots should I declutter before guests arrive?
The most commonly overlooked declutter spots include: the entryway shoe pile, mail and papers on kitchen counters, charging cables on side tables, the bathroom countertop, the area beside and under the coffee table, and any flat surface near the front door. Clearing these spots takes under ten minutes and dramatically changes how organized and welcoming your home feels to anyone walking in for the first time.
How long does it take to clean a house before guests arrive?
A focused pre-guest cleaning of the five key areas, entryway, bathroom, kitchen, living room, and guest bedroom, typically takes 60 to 90 minutes for most homes. If you are working from a checklist and avoiding distractions, you can get through the high-priority spots in under an hour. Larger homes or homes that have not been cleaned recently may take two to three hours for a thorough pass.
Should I hire a cleaning service before hosting guests?
Hiring a professional cleaning service before a gathering is worth it when you are short on time, hosting overnight guests, or want your home to feel genuinely deep-cleaned rather than surface-tidied. Services like Elite Maids House Cleaning offer same-day bookings across Arizona, so you can schedule a professional clean even when notice is short. It eliminates pre-party stress and lets you focus on the hosting itself.
8 Cleaning Mistakes Experts Say Are Making Your Home Dirtier
SHARE:
The most common cleaning mistakes that make your home dirtier include using too much product, wiping surfaces with a dirty cloth, and confusing cleaning with disinfecting. These habits feel productive but they spread bacteria, leave residue, and grind grime deeper into surfaces. This post walks through eight specific errors and how to fix each one.
1. Using Too Much Cleaning Product
More product does not mean more clean. This is one of the most widespread cleaning mistakes homeowners make, and it backfires in a predictable way. When you overload a surface with spray cleaner, dish soap, or floor solution, the excess product does not rinse away cleanly. It sits on the surface and attracts dust, pet hair, and grime like a magnet.
Over time, surfaces treated with too much cleaner develop a sticky, dull film. Countertops look smeared even after you wipe them. Floors feel tacky an hour after mopping. Shower tiles look cloudy despite regular scrubbing. The culprit is almost always product buildup, not a lack of effort.
According to Good Housekeeping, most spray cleaners are formulated to work with a light, even coat. A two-second spray across a standard countertop is usually enough. For floors, follow the dilution ratio on the label rather than free-pouring into your mop bucket. Using concentrated cleaning solution at the wrong strength is one of the fastest ways to leave your home looking worse than before you started.
The fix is simple: use less, wipe thoroughly, and buff dry when needed. If you notice residue, a second pass with a clean, damp cloth will strip it away without adding more product.
2. Using One Cloth for Every Cleaning Job
One dirty cloth dragged across your whole house is not cleaning. It is relocating bacteria from one surface to another. This mistake is so common that professional cleaners consider it one of the top ways homeowners unknowingly spread germs around their homes.
Think about the route a single cloth travels during a typical cleaning session: toilet exterior, sink faucet, bathroom counter, kitchen counter, dining table. Each surface it touches after the first is now contaminated with whatever it picked up earlier. Using the same cloth for every cleaning job transfers fecal-oral pathogens from bathroom surfaces to food-prep areas, which is a genuine hygiene risk.
The professional standard is to use a color-coded microfiber system. Assign one color to bathrooms, a different color to kitchens, and another to general living areas. Wash cloths after every use in hot water. If you do not want to invest in a full microfiber set, at minimum keep bathroom cloths completely separate from kitchen cloths and never mix them.
A single-cloth cleaning habit also means you are wiping soiled surfaces with a rag that is already saturated with grime. A dirty cloth cannot absorb more dirt. It can only push it around. Swap cloths frequently during any cleaning session, even when you are working within the same room.
3. Ignoring Soap Residue on Surfaces
Soap residue is one of the sneakiest cleaning mistakes because it looks invisible at first. But left on countertops, shower walls, sinks, and stovetops, dried soap residue creates a film that collects grease, dust, and mineral deposits faster than a clean surface would.
The problem shows up most in bathrooms and kitchens. Bar soap scum on shower walls bonds with hard water minerals and calcium to form a crust that gets harder to remove the longer it sits. On kitchen counters, dish soap or all-purpose cleaner that is not fully rinsed away leaves a streaky haze that feels clean to the touch but looks dirty in natural light.
For bathroom surfaces and fixtures, use a squeegee after each shower to remove soap and water before residue can dry. For countertops, follow any cleaner with a wipe-down using a damp cloth with plain water, then buff dry with a dry cloth. For stovetops, check out our guide on kitchen deep cleaning in San Tan Valley for a room-by-room rinse routine that eliminates buildup for good.
Ignoring soap residue also affects grout lines. Soap film works into porous grout and creates a yellowed, dingy appearance that scrubbing alone cannot fix. A proper rinse step after every clean is the only way to prevent it from accumulating.
4. Cleaning with a Dry Cloth Instead of a Damp One
Wiping surfaces with a dry cloth is one of those cleaning habits that feels right but does the opposite of what you want. A dry cloth does not capture dust. It sends it airborne, where it floats for several minutes before settling back onto every surface you just wiped.
This is especially problematic on wood furniture, shelving, and electronics. Dry-cloth dusting with a dry rag or a used paper towel pushes particles off the surface without trapping them. If you are sneezing while you clean, this is likely why.
A slightly damp microfiber cloth is the right tool for almost every hard surface. The moisture helps the fibers trap particles instead of scattering them. For wood furniture, wring the cloth so it is barely damp, not wet. For electronics and screens, use a dry microfiber specifically designed for that purpose, but finish with a light pass to pick up what the dry wipe displaced.
The EPA’s guidance on indoor air quality notes that airborne particles are a significant contributor to poor indoor air. Dry dusting that suspends particles repeatedly throughout the week makes indoor air quality measurably worse, especially for households with allergy sufferers or children. Switching to damp-cloth cleaning is one of the simplest ways to reduce airborne particulates in your home.
5. Using a Blunt or Wrong Tool for Tight Spaces
Tight spaces collect a disproportionate share of a home’s dirt and grime, and the wrong cleaning tool for tight spaces will either skip over buildup entirely or push it deeper in. Using a blunt tool for narrow gaps and edges is one of the cleaning mistakes that pros flag most often when they walk into a home that gets cleaned regularly but never feels truly clean.
The problem areas are consistent: grout lines between tiles, the seal around faucets, the track of sliding doors and windows, the gap between the stove and the counter, the edges of baseboards, and the tight corners of showers. A standard sponge or flat mop cannot reach any of these areas effectively. A blunt tool pressed into a tight corner smears dirt rather than lifting it.
Effective tools for tight spaces include: an old toothbrush or a grout brush for tile lines and fixture seals, a flat-head screwdriver wrapped in a damp cloth for door tracks, a detail-tip vacuum attachment for window sills and baseboards, and a flexible crevice brush for the stove-counter gap. For bathroom tile and grout specifically, check out our bathroom cleaning tips for Scottsdale homeowners for targeted tool recommendations.
Having the right tool available matters less than actually using it. Build a five-minute tight-space routine into your cleaning schedule once a week and those areas will never reach the point where they require serious scrubbing to recover.
6. Reusing Dirty Mop Water
Reusing dirty mop water is the floor-cleaning equivalent of washing your dishes in the dishwater left over from last night’s pots. By the second pass across a room, your mop water is a murky soup of dissolved dirt, cleaning product residue, and bacteria. Every stroke after that point is depositing that mixture back onto your floors rather than lifting grime away.
Floors mopped with dirty water dry to a dull, grimy finish. The smell lingers. High-traffic areas like hallways and kitchen entries look worse after mopping than they did before. This is the reused dirty mop water problem, and it is one of the most common reasons mopped floors feel and look unclean even right after a session.
The solution is to change your mop water more often than feels necessary. For a standard home, start with two buckets of water: one with your diluted cleaning solution, one with plain rinse water. Wring into the clean solution bucket, mop a section, then rinse the mop head in the rinse bucket before repeating. Change both buckets when the rinse water turns visibly cloudy.
If you use a spin mop with a single bucket, empty and refill it at the halfway point of any floor larger than a standard bathroom. Microfiber mop heads that are pre-dampened rather than bucket-dipped avoid the dirty-water problem entirely and are worth the switch for most households.
7. Thinking That Cleaning and Disinfecting Are the Same Thing
Cleaning and disinfecting are two different processes, and confusing cleaning with disinfecting leaves your home sanitized in appearance only. This is one of the cleaning mistakes that matters most from a health standpoint, especially in households with young children, elderly family members, or anyone with a compromised immune system.
Cleaning removes visible dirt, grease, and grime from surfaces. It reduces the number of germs present but does not kill them. Disinfecting uses chemicals that kill bacteria and viruses on contact, but it only works effectively on a surface that has already been cleaned. Applying a disinfectant to a greasy stovetop or a dusty countertop without cleaning first significantly reduces the disinfectant’s ability to kill pathogens because organic matter blocks contact with the surface.
The correct sequence is always: clean first, then disinfect. For high-touch surfaces like door handles, light switches, toilet flush levers, and faucet handles, a dedicated disinfection service goes beyond what a standard wipe-down delivers. The EPA’s Safer Choice program lists disinfectants that are effective against common household pathogens while being safer for families and pets, which is a useful reference when choosing products.
During cold and flu season or after illness in the home, the clean-then-disinfect sequence on all high-contact surfaces should be non-negotiable. It is also the standard professionals use during any thorough deep clean.
8. Mixing Cleaning Products
Mixing cleaning products is not just ineffective. In some combinations it is genuinely dangerous. This is the cleaning mistake that surprises most people because the logic of combining two powerful cleaners to make something stronger feels intuitive. It is wrong, and in certain cases it can produce toxic fumes.
The most common dangerous combination is bleach and ammonia, which produces chloramine gas. Bleach and vinegar produce chlorine gas. Hydrogen peroxide mixed with vinegar creates peracetic acid, which is corrosive to skin and airways. These are not theoretical risks. They are real chemical reactions that happen in enclosed spaces like bathrooms with poor ventilation.
Beyond the safety hazard, mixing cleaning products often neutralizes both. Bleach mixed with an acid-based cleaner like vinegar renders the bleach ineffective before the mixture ever touches a surface. You are doing more work, spending more product, and getting less clean.
The EPA’s research on volatile organic compounds and indoor air quality highlights that cleaning products used improperly are a significant source of indoor VOCs, and mixing products amplifies that risk. Use one product at a time. Rinse surfaces between different products if you need to switch. Keep bleach-based products in a completely separate storage area from acid-based cleaners.
If you are planning a thorough seasonal clean and want a professional team that knows exactly which products to use safely and in what order, our holiday cleaning service covers every room with professional-grade products used correctly. For Arizona homeowners doing their own spring reset, the spring cleaning service in Chandler is another resource worth bookmarking.
Bonus: Neglecting the Garbage Disposal and Dishwasher
Two appliances that homeowners almost universally forget to clean are the garbage disposal and the dishwasher. Both get used daily to process food waste, and both can become significant odor sources if ignored.
For the garbage disposal, grinding ice cubes weekly breaks up grease and debris on the blades. Following that with a halved lemon eliminates odor. A baking soda and vinegar flush monthly keeps the drain line clear. For the dishwasher, pull the filter out monthly, rinse it under hot water, and run an empty cycle with a cup of white vinegar on the top rack. These two steps take less than ten minutes combined and prevent two of the most stubborn household odors.
Bonus: Rubbing a Carpet Stain Instead of Blotting It
Rubbing a carpet stain is the fastest way to make it permanent. The friction pushes the staining agent deeper into the carpet fibers and spreads it laterally, turning a small spot into a larger one. It also damages the fiber structure of the carpet, creating a fuzzy, matted area that catches future dirt even after the stain is gone.
The correct method is to blot from the outside edge of the stain inward using a clean, dry white cloth. Apply light pressure and lift. Repeat with a fresh section of cloth until no more color transfers. Then apply your cleaning solution, let it dwell briefly, and blot again. Never scrub. Patience and a clean cloth are more effective than effort and elbow grease here.
Working with a Arizona cleaning company like Elite Maids means you get a team that avoids every single one of these mistakes on every visit. Our cleaners use color-coded microfiber systems, proper dilution ratios, and the correct tools for every surface and tight space in your home. If you want your home genuinely clean rather than just rearranged, professional cleaning makes the difference.
Frequently Asked Questions
What are the most common cleaning mistakes people make at home?
The most common cleaning mistakes are using too much product (which leaves sticky residue), using one cloth across every surface (which spreads bacteria), confusing cleaning with disinfecting, and mopping with dirty water. Each of these habits makes surfaces dirtier over time rather than cleaner, even when effort and frequency are high.
Does using more cleaning product mean a surface gets cleaner?
No. Using too much cleaning product leaves a residue film on surfaces that attracts dust and grime faster than a clean surface would. Most cleaners are formulated to work with a light application. More product means more buildup, not a better result. Follow label dilution instructions and wipe with a damp cloth to remove any excess.
Is it safe to mix bleach and vinegar when cleaning?
No. Mixing bleach and vinegar produces chlorine gas, which is a respiratory irritant and potentially dangerous in enclosed spaces with poor ventilation. Never mix different cleaning products. Use one product at a time, rinse the surface between products if needed, and store bleach-based cleaners separately from acid-based ones like vinegar.
What is the difference between cleaning and disinfecting?
Cleaning removes visible dirt and reduces the number of germs on a surface. Disinfecting kills bacteria and viruses using chemicals, but it only works effectively on an already-cleaned surface. The correct sequence is always clean first, then disinfect. Applying a disinfectant to a dirty surface significantly reduces how well it kills pathogens.
How often should I change my mop water?
Change your mop water at least once per room, or whenever the water becomes visibly cloudy. For larger open-plan spaces, change it at the halfway point. Using two buckets, one with cleaning solution and one for rinsing, extends how long your water stays effective. Dirty mop water spreads grime rather than removing it.
Ready to stop the cycle of cleaning mistakes that leave your home looking less clean than it should? Contact Elite Maids house cleaning today for a free quote and let Arizona’s most-reviewed residential cleaning team handle it right, every time.
Does Bleach Really Disinfect? The Truth About Bleach and Killing Germs
SHARE:
Yes, bleach really does disinfect, but only when it is used correctly. Sodium hypochlorite, the active ingredient in household bleach, destroys bacteria, viruses, and fungi by breaking down their cell structures. The catch is that dilution ratio, contact time, and surface prep all determine whether bleach actually works. This post covers everything you need to know to use bleach safely and effectively.
1. Does Bleach Disinfect Surfaces, or Just Clean Them?
Bleach disinfects, but it does not clean. That distinction matters more than most people realize. Disinfecting means killing pathogens on a surface. Cleaning means removing dirt, grease, and debris. Bleach is very good at the first job and practically useless at the second. If you spray bleach onto a grimy countertop, the organic matter in the grime actually neutralizes the active ingredient before it can kill anything.
So does bleach disinfect dirty surfaces? Not reliably. For bleach to work as a true disinfectant, you must clean the surface first with soap and water, rinse it, and then apply your bleach solution. Skip that step, and you are not really disinfecting at all. The question of whether bleach disinfects or sanitizes also comes up a lot. Sanitizing reduces bacteria to a safe level. Disinfecting eliminates nearly all pathogens. Bleach, at the right concentration, does the latter.
According to Good Housekeeping, bleach solutions are among the most effective disinfectants available for household use when applied correctly. The key phrase there is “applied correctly.”
2. How Long Does It Take for Bleach to Kill Bacteria and Viruses
Contact time is everything. Most people spray bleach and wipe it off within seconds. That defeats the entire purpose. For bleach to actually kill bacteria, the surface needs to stay visibly wet with the bleach solution for at least one minute. For harder-to-kill pathogens, you need longer contact time, sometimes up to ten minutes.
How long does it take for bleach to kill viruses? It depends on the virus. Enveloped viruses like the flu or coronaviruses are easier to destroy and typically require one to three minutes of wet contact time. Non-enveloped viruses are tougher and may need up to ten minutes. The label on your bleach bottle will list specific contact times for specific pathogens. Read it. Most people never do.
The bottom line on kill time: spray, walk away, come back, then wipe. That extra wait is the difference between a surface that is disinfected and one that is just wet.
3. How Much Bleach to Water Ratio for Disinfecting
Getting the bleach-to-water ratio right is one of the most misunderstood parts of using bleach as a disinfectant. More is not better. Too strong a solution can damage surfaces, leave residue, and create unnecessary fume exposure. Too weak, and it will not disinfect at all.
For general household disinfecting, the standard ratio is about 1,000 ppm (parts per million) of sodium hypochlorite. With a standard 6% household bleach, that translates to roughly 4 teaspoons (about 20 ml) per 1 liter of water. For tougher jobs involving blood or bodily fluids, a stronger 5,000 ppm solution is recommended, which is about 1/3 cup per liter of water.
How much bleach to 1 liter of water for disinfecting is a question worth memorizing: for everyday surface disinfection, 4 teaspoons per liter is the standard. Always use cool or lukewarm water. Hot water accelerates the breakdown of the active ingredient and makes your solution less effective, not more.
Mix fresh bleach solution each time you clean. Bleach degrades quickly once diluted, losing potency within 24 hours.
4. Is Bleach a Disinfectant or Antiseptic?
This is a question that confuses a lot of people. Bleach is a disinfectant, not an antiseptic. The difference comes down to where it is intended to be used. Disinfectants are formulated for use on hard, non-living surfaces like countertops, toilets, and floors. Antiseptics are formulated for use on living tissue, like skin or wounds.
Is bleach a disinfectant you can use on skin? No, and you should not try. Household bleach at typical concentrations will irritate and damage skin. There are diluted, medically supervised bleach baths used in some dermatological settings, but that is a completely different application handled by healthcare professionals. For home cleaning purposes, bleach belongs on your surfaces, not on your body.
If you are looking for a surface disinfectant that is registered with the EPA and proven to kill specific pathogens, bleach-based products are on the EPA Safer Choice lists when formulated and labeled appropriately. Always check the EPA registration number on your product label.
5. Does Bleach Kill Viruses and Mold?
Yes on both counts, with important caveats. Bleach kills viruses, including most of the common household pathogens you worry about: influenza, norovirus, rhinovirus, and others. This is one of the reasons bleach solutions were widely recommended for surface disinfection during respiratory illness outbreaks. Does bleach kill viruses reliably? Yes, at proper concentration and with adequate contact time.
For mold, bleach is more complicated. It kills surface mold on hard, non-porous surfaces like tile or sealed counters. It is not effective at penetrating porous materials like drywall, wood, or grout. For those surfaces, bleach may remove visible mold staining without actually killing the mold roots embedded deeper in the material. The CDC guidance on mold in homes notes that porous materials with mold often need to be replaced rather than treated with surface solutions.
If you spot mold on tile or glass, a properly diluted bleach solution can handle it. If mold is growing on drywall, wood paneling, or caulk that has started to break down, surface bleaching is not a real fix.
6. Is Cleaning With Bleach Harmful to Your Health?
Bleach is effective, but it comes with real health trade-offs worth understanding. The fumes from bleach, particularly chlorine gas released during use, can irritate your eyes, nose, throat, and lungs. In poorly ventilated spaces, even routine bleach cleaning can trigger respiratory irritation, especially in people with asthma or other lung conditions. The American Lung Association specifically flags bleach-based cleaners as a concern for indoor air quality.
Is cleaning with bleach harmful if you mix it with other products? Absolutely, and this is one of the most dangerous mistakes homeowners make. Never mix bleach with ammonia (found in many glass cleaners), vinegar, rubbing alcohol, or any other household cleaner. These combinations produce toxic gases that can cause serious respiratory damage or worse. Bleach plus ammonia creates chloramine vapors. Bleach plus vinegar releases chlorine gas. Neither belongs in your lungs.
To reduce harm when using bleach:
Open windows and run exhaust fans while cleaning
Wear rubber gloves and eye protection
Never mix bleach with any other cleaner
Store bleach in its original container, away from heat and sunlight
Rinse surfaces with plain water after disinfecting if food contact is possible
If you are looking for effective cleaning that avoids harsh chemical exposure, a professional house cleaning service in Arizona like Elite Maids offers eco-friendly product options that skip bleach entirely without sacrificing results.
7. How to Safely Disinfect With Bleach Step by Step
Knowing that bleach works is only useful if you apply it correctly. Here is the right process for safe and effective disinfection at home:
Step 1: Pre-clean the surface. Remove all visible dirt, grease, and debris with soap and water. Rinse and let the surface dry slightly.
Step 2: Mix your bleach solution fresh. Use 4 teaspoons of standard 6% household bleach per 1 liter of cool water for general disinfection.
Step 3: Ventilate the area. Open windows or run fans before you start.
Step 4: Apply and wait. Apply the bleach solution to the surface and let it sit wet for at least one to ten minutes depending on the pathogen and what the product label specifies.
Step 5: Rinse food-contact surfaces. Kitchen counters, cutting boards, and similar surfaces should be rinsed with plain water after the contact time is up.
Step 6: Dispose and wash up. Pour out any remaining solution after 24 hours. Wash your hands thoroughly after handling bleach, even if you wore gloves.
For high-touch areas like light switches, doorknobs, and bathroom fixtures, regular disinfection using this process provides real protection. If you want professional-grade results without managing the process yourself, you can book a cleaning online today and let trained cleaners handle the hard work.
8. When Bleach Is Not the Right Choice for Disinfecting
Bleach is genuinely powerful, but there are surfaces and situations where it is the wrong tool entirely. Understanding these limits helps you avoid damage and wasted effort.
Bleach will damage or discolor:
Natural stone surfaces like marble, granite, and travertine
Hardwood and laminate floors
Colored grout (it bleaches it unevenly)
Fabrics and upholstery
Metals that are not stainless steel
Painted walls (it strips paint finish over time)
For these surfaces, you are better off with pH-neutral cleaners, hydrogen peroxide solutions, or EPA-registered disinfectant sprays formulated for the material. A bonded and insured Arizona cleaning team knows which products are safe on which surfaces, which is one of the real advantages of hiring professionals over guessing with bleach on expensive finishes.
Bleach also loses effectiveness over time. A bottle sitting in a hot garage loses significant potency within three to six months of opening. Using old bleach to disinfect gives you a false sense of security without the actual kill power.
9. Eco-Friendly Alternatives That Still Disinfect Effectively
If the fumes, surface damage risk, or environmental concerns around bleach have you looking for alternatives, you have real options that actually work. Several non-bleach disinfectants are EPA-registered and proven effective against bacteria and viruses.
Strong alternatives include:
Hydrogen peroxide (3%): Kills bacteria and some viruses on hard surfaces. Safer fume profile than bleach and gentler on many surfaces.
Isopropyl alcohol (70%): Effective against bacteria and enveloped viruses. Evaporates quickly and leaves no residue.
Quaternary ammonium compounds (quats): Found in many commercial disinfectants, effective on a broad range of pathogens and safer for most surfaces.
Accelerated hydrogen peroxide products: Newer formulations that combine hydrogen peroxide with surfactants for broad-spectrum disinfection at lower concentrations.
None of these are miracle products either. They all require proper dilution, clean surfaces, and adequate contact time, just like bleach. The difference is that they tend to be gentler on surfaces and easier on indoor air quality. If you need a deep sanitizing clean before a holiday gathering or a family event, our team can handle it with the right products for every surface in your home. Check out our holiday cleaning services for a professional option that covers every room.
10. The Bottom Line on Whether Bleach Really Works as a Disinfectant
Bleach is one of the most effective and most misused disinfectants in the average home. It genuinely kills bacteria, viruses, and mold on hard non-porous surfaces when it is diluted correctly, applied to a pre-cleaned surface, and given enough contact time. The myths that trip people up are assuming it works on dirty surfaces, that more concentration means more power, and that any wet application counts as disinfecting.
The truth is simpler: bleach works when you follow the rules. Pre-clean, mix properly, wait for contact time, ventilate the space, and never mix it with other cleaners. Use it on the right surfaces and skip it on stone, wood, and fabric. If those variables feel like too much to manage, or if you want the job done right without the chemical exposure, a professional cleaning team is the more reliable option.
Get a Professionally Disinfected Home Today
Whether you want expert help picking the right products or just want to hand the whole job to someone who does this every day, Elite Maids House Cleaning is ready. We serve Phoenix, Mesa, Scottsdale, Gilbert, Chandler, Glendale, Queen Creek, San Tan Valley, Tucson, and Flagstaff with recurring cleans, deep cleans, move-in and move-out cleanings, and event cleanings. Every cleaner is background-checked, bonded, insured, and backed by our no-cost reclean guarantee. Contact Elite Maids house cleaning today for a free quote and book same-day service in minutes online.
Frequently Asked Questions
Is bleach good for gum disease?
Household bleach is not appropriate for treating gum disease and should never be used in the mouth. Some dentists prescribe highly diluted, medically supervised bleach rinses for specific periodontal conditions, but these are formulated differently from household cleaning bleach and used only under clinical guidance. Using household bleach orally is dangerous and can cause serious chemical burns.
Does bleach disinfect or sanitize?
Bleach does both, depending on concentration. At lower concentrations it sanitizes, reducing bacteria to safe levels. At standard household disinfecting concentrations (around 1,000 ppm), it disinfects, meaning it kills nearly all bacteria and many viruses on hard non-porous surfaces. The key is proper dilution, pre-cleaning the surface, and allowing sufficient contact time before wiping.
How long does it take for bleach to kill bacteria?
Most bacteria are killed within one to three minutes of contact with a properly diluted bleach solution on a pre-cleaned surface. Harder-to-kill pathogens may require up to ten minutes of wet contact time. The surface must remain visibly wet with the bleach solution for the entire contact period. Wiping immediately after application does not give bleach time to work.
How much bleach per liter of water for disinfecting?
For standard household surface disinfection, use approximately 4 teaspoons (about 20 ml) of 6% household bleach per 1 liter of cool water. This produces a roughly 1,000 ppm solution, which is effective against most common household pathogens. Always mix a fresh solution before each use, as diluted bleach loses its potency within 24 hours, especially in warm conditions.
Is cleaning with bleach harmful to indoor air quality?
Yes, bleach fumes can harm indoor air quality and irritate the eyes, nose, throat, and lungs, particularly in poorly ventilated spaces. People with asthma or respiratory sensitivities are especially at risk. Always open windows, run fans, wear gloves and eye protection, and never mix bleach with ammonia, vinegar, or other cleaners. Toxic gas can form instantly from those combinations.
Most cleaning advice you find online falls into one of two camps: things you already know, or things that sound clever but make zero difference when you actually try them. If you have spent any time scrubbing a stubborn soap scum ring or fighting grease on a stovetop, you know that not every so-called shortcut lives up to the hype. The good news is that there are proven cleaning hacks that really do cut your time and effort in half. These are the same tricks that professional cleaners rely on day after day, and once you build them into your routine, keeping a clean home gets a lot easier. Whether you are maintaining a spotless kitchen or tackling a full weekend clean, these practical house cleaning tips will change the way you approach the job. For households where time is short, a deep cleaning service Arizona families trust can also step in and handle the heavy lifting so you do not have to.
Start With a Cleaning System That Saves Time
The biggest mistake most people make is cleaning room by room with no consistent method. You end up doubling back, recontaminating surfaces you already wiped, and spending twice as long as you need to. A reliable cleaning system fixes all of that.
The rule professional cleaners live by is simple: clean top to bottom, back to front, and dry before wet. Start at ceiling fans and high shelves, then work your way down to counters and floors. Move from the farthest corner of the room toward the door so you never step on a freshly mopped floor. Dry dusting before any liquid products are introduced means grime gets removed rather than smeared into a paste.
This systematic approach to house cleaning is not just a time-saver. It also makes sure nothing gets missed. Once you train yourself to follow the same sequence every time, cleaning becomes almost automatic. If you want to see what a thorough system looks like applied to a busy family home, check out these home cleaning tips for parents that build on the same framework.
Use the Right Dwell Time for Cleaning Products
This is one of the most overlooked cleaning hacks, and it is completely free to use. Most people spray a surface and wipe it immediately. That is not how cleaning products are designed to work.
Disinfectants, bathroom cleaners, and mold removers all need contact time to break down bacteria, soap scum, and stains. For most disinfectants, that means leaving the product on the surface for at least 30 seconds to two minutes before wiping. For tough soap scum, five to ten minutes of dwell time can cut your scrubbing effort by 70 percent. According to the EPA Safer Choice program, using cleaning products correctly, including respecting contact times, maximizes their effectiveness while reducing the amount of product you need to use.
The practical hack here is to spray your bathroom surfaces first, then go do something else in another room, then come back and wipe. The product does the work while you do yours. This approach is especially useful in bathrooms and kitchens where mineral buildup and grease need a little time to loosen before they will release from a surface.
When you need results that go beyond surface cleaning, a professional disinfection service can handle bacteria and pathogens with commercial-grade products and proper technique that most DIY efforts cannot match.
Remove Soap Scum and Hard Water Stains Without Scrubbing
Soap scum and hard water deposits are the two things Arizona homeowners deal with constantly thanks to the region’s mineral-heavy water supply. Scrubbing them off with brute force works eventually, but it is slow, tiring, and can scratch surfaces over time.
The smarter approach is to use chemistry instead of elbow grease. White vinegar is mildly acidic and dissolves mineral deposits when given time to work. Soak a paper towel in undiluted white vinegar, press it against a hard water stain on a faucet or showerhead, and leave it for 20 to 30 minutes. The calcium and lime deposits release without any significant scrubbing. For soap scum on glass shower doors, a paste made from baking soda and dish soap applied with a non-scratch sponge cuts through buildup quickly.
One important note: never use vinegar on natural stone surfaces like marble or travertine. The acid will etch the surface permanently. Stick to pH-neutral stone cleaners for those materials. For stubborn cases, a professional with the right products will handle soap scum and hard water stains safely without risking damage to your fixtures.
Choosing products wisely also matters for indoor air quality. The EPA notes that VOCs from cleaning products can affect indoor air, which is a good reason to prefer gentler, lower-VOC options like vinegar and baking soda where they are effective.
Clean Kitchen Grease Fast With Dish Soap and Hot Water
Grease on kitchen surfaces is stubborn because it bonds to itself and to other surfaces when it cools. The key to cutting through kitchen grease quickly is using a degreaser that can break those bonds without requiring excessive scrubbing.
Plain dish soap is a highly effective kitchen degreaser that most people overlook because it seems too simple. Add a few drops to a bowl of hot water, dip a microfiber cloth, wring it out well, and wipe down cabinet faces, range hood surfaces, and stovetop areas. The surfactants in dish soap are specifically designed to lift grease and suspend it in water so it can be wiped away. For caked-on grease, a paste of baking soda mixed with a small amount of dish soap applied directly to the grease and left for five minutes will lift even old buildup.
Professional house cleaners often recommend doing a quick wipe of stovetop and range hood surfaces after every cooking session before grease has a chance to harden. A 60-second wipe while the stove is still slightly warm takes almost no effort and prevents the 20-minute scrub session later. For a full list of products worth keeping in your cleaning kit, this guide to cleaning products worth buying covers the essentials that actually deliver results.
Microfiber Cloths Are the Only Cleaning Cloths Worth Using
Paper towels and cotton rags have their place, but if you want to clean smarter, microfiber cloths are the single biggest upgrade you can make to your cleaning toolkit. They are not just marketing. The physics behind them actually work.
Microfiber is made of fibers far thinner than a human hair, and those fibers create an enormous surface area that traps dust, bacteria, and grime rather than just pushing it around. Studies have shown that microfiber can remove up to 99 percent of bacteria from surfaces using only water, which is a significant advantage over traditional cotton rags. For dry dusting, microfiber generates a static charge that attracts particles and holds them in the cloth instead of releasing them back into the air.
Use separate color-coded microfiber cloths for bathrooms versus kitchens to avoid cross-contamination. Wash them in hot water without fabric softener, which clogs the fibers and ruins their effectiveness. A quality set of microfiber cloths will last hundreds of washes if cared for correctly, making them one of the most cost-effective cleaning tools available. Our five-star Arizona cleaners rely on microfiber almost exclusively for surface cleaning precisely because of how thoroughly it picks up and holds contaminants.
Tackle Bathroom Mold and Mildew Before It Spreads
Mold in bathrooms is not just an aesthetic problem. It can affect air quality and, left unchecked, spread to areas that are much harder to clean. The smart move is to deal with it early using proven techniques that prevent regrowth rather than just masking the problem.
A spray bottle filled with undiluted white vinegar is one of the most effective tools for surface bathroom mold. Spray directly onto grout lines, caulk edges, and tile corners, allow it to sit for one hour, then scrub with a stiff-bristled brush and rinse. For more persistent mold growth, a diluted bleach solution works well on non-porous surfaces, but never mix bleach with vinegar or any other cleaner. The CDC advises using protective gloves and ventilating the space when working with bleach-based products.
Prevention is the real hack here. Running your bathroom exhaust fan during and for 20 minutes after every shower removes the humidity that mold needs to grow. Squeegeeing glass shower doors after each use takes 15 seconds and dramatically reduces moisture buildup on surfaces. If mold has moved into grout, caulk, or behind tiles, a professional deep cleaning done regularly is far more effective than reactive scrubbing after the problem has grown. For a broader look at avoiding common mistakes that lead to issues like mold buildup, read this guide on house cleaning mistakes homeowners make.
Speed Clean Your Whole House in Under an Hour
A speed clean is different from a deep clean. The goal is not perfection. The goal is to make your home look and feel clean as quickly as possible, which is exactly what you need before guests arrive or after a busy week.
The fastest whole-house cleaning routine follows a few rules. First, set a timer for each room and stick to it. Five minutes per bedroom, eight minutes for bathrooms, ten for the kitchen. When the timer goes off, you move on regardless. Second, carry everything you need in a caddy so you never leave a room to retrieve a product. Third, focus on surfaces that get noticed first: countertops, mirrors, toilets, and floors. Nobody checks baseboards when they walk in the door.
Vacuuming takes priority over mopping during a speed clean because it removes visible debris faster. Save mopping for days when you have more time. Fluffing couch cushions, straightening throw pillows, and wiping down the kitchen sink all contribute heavily to the perception of a clean home with minimal time investment. These quick cleaning hacks for a tidy home are especially useful if you have a consistent schedule but need to cover high-traffic areas in between professional visits. For families managing busy schedules, these quick cleaning tips for busy households offer a practical system worth bookmarking.
Build a Weekly Cleaning Routine That Sticks
Every cleaning hack in the world is only as useful as the routine it lives inside. Sporadic marathon cleaning sessions are exhausting and ineffective compared to a consistent weekly cleaning routine that spreads tasks across manageable daily chunks.
The most sustainable approach is task batching by day. Mondays handle laundry. Tuesdays focus on bathrooms. Wednesdays take care of vacuuming. Thursdays cover kitchen surfaces. Fridays do a quick whole-home reset. This kind of house cleaning schedule means no single day is overwhelming, and nothing goes neglected long enough to become a major project. Keeping a cleaning caddy stocked and placed somewhere central removes the friction of getting started, which is where most routines fall apart.
Consistency also means you maintain results rather than constantly trying to recover from a backlog. Homes that are cleaned on a regular schedule stay cleaner because problems are caught early and buildup never accumulates to the point where it takes serious effort to remove. If maintaining that kind of routine feels out of reach, a recurring professional cleaning on a weekly, biweekly, or monthly schedule handles the heavy work for you and keeps your home at a baseline that is easy to maintain between visits.
Putting these cleaning hacks to work in your home will make a real difference, but sometimes life simply gets in the way. When you need a clean home without the time or energy to do it yourself, house cleaning service in Arizona from Elite Maids is ready to help. Contact Elite Maids House Cleaning today for a free quote and get same-day service scheduled online in minutes, backed by a reclean guarantee so you always get the results you expect.