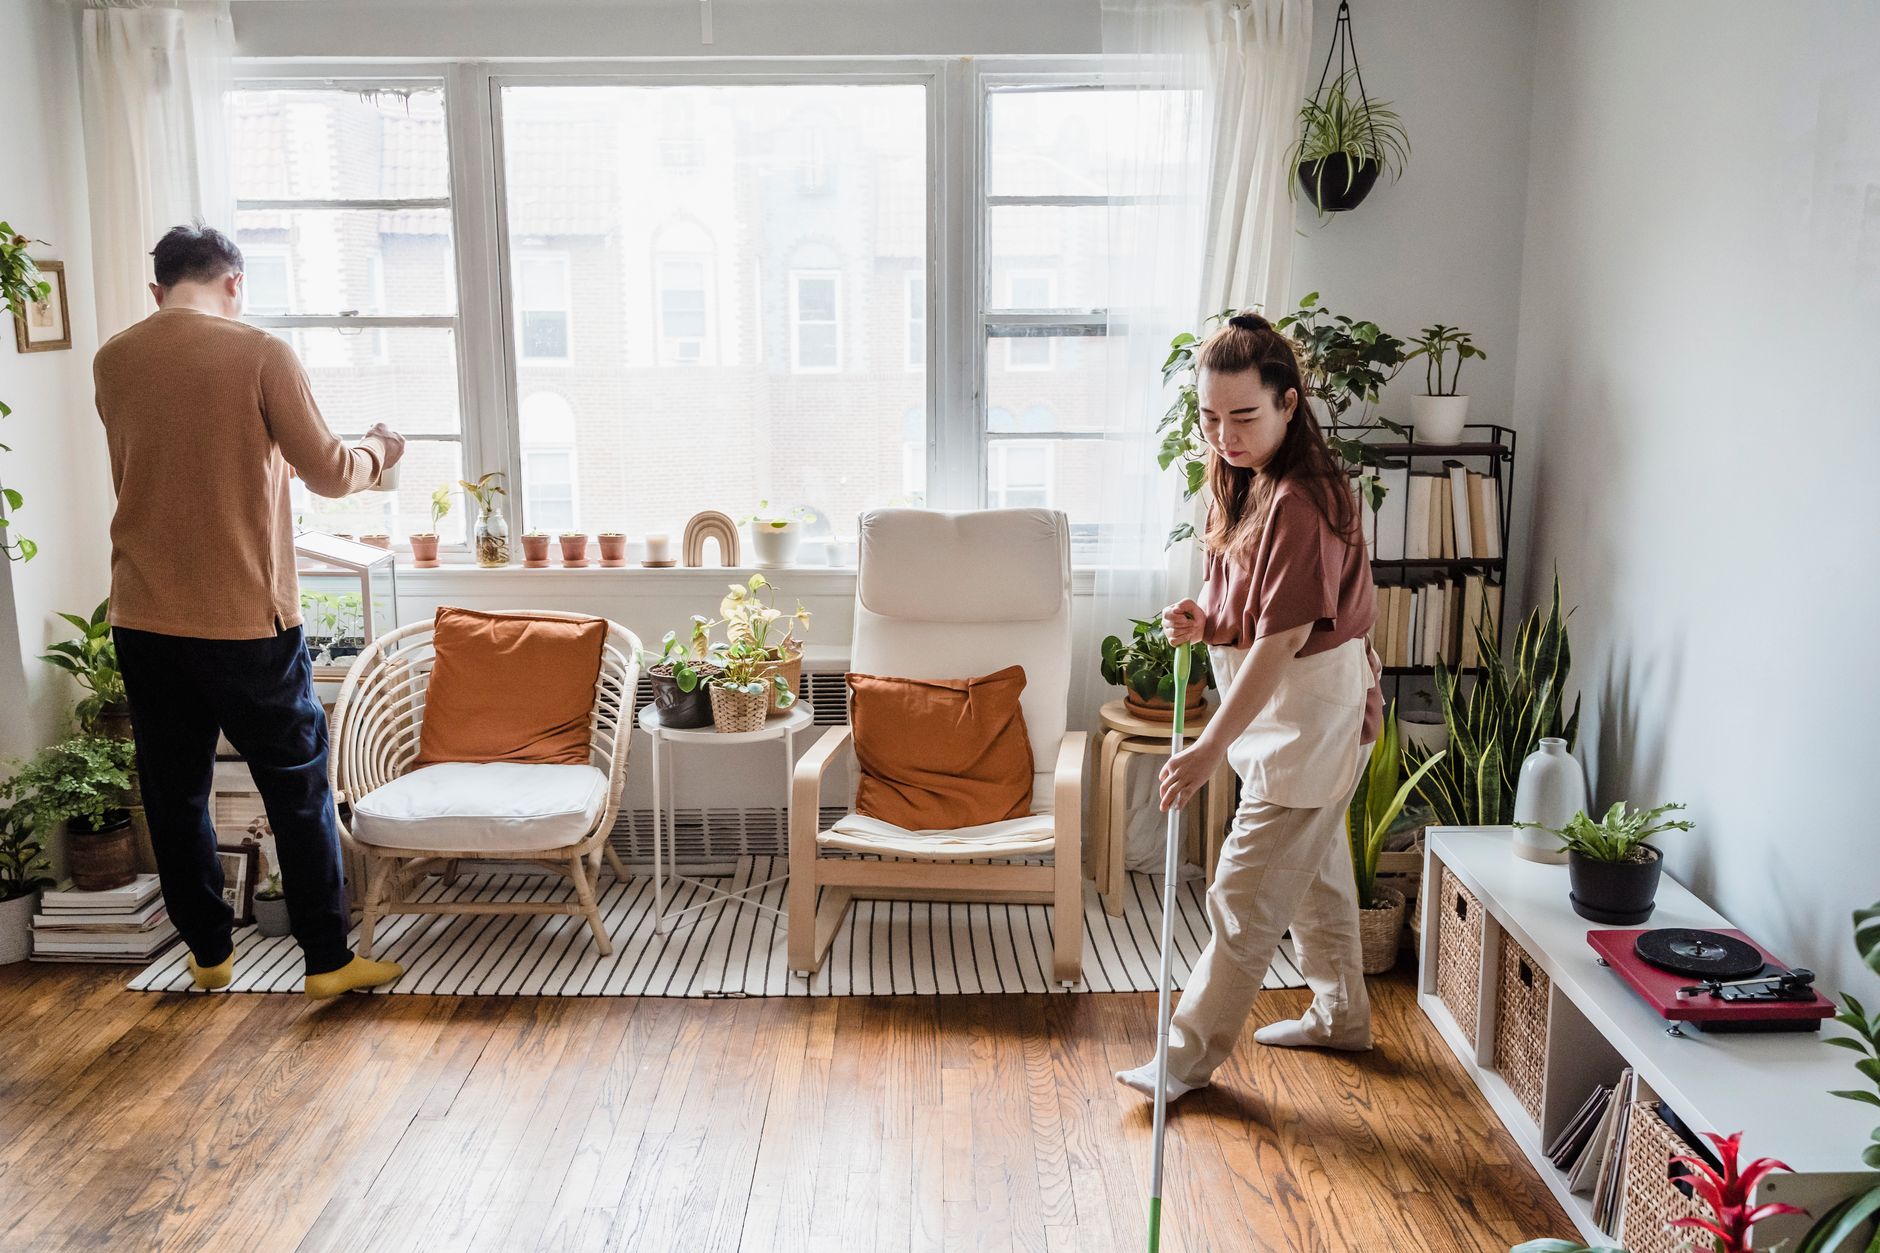
Natural Cleaning Solutions for Every Room of Your Home
SHARE:
Natural cleaning solutions work throughout your entire home using a handful of safe, inexpensive ingredients you likely already own. White vinegar, baking soda, castile soap, and essential oils can replace a cabinet full of harsh chemical products. This guide walks room by room through the most effective homemade cleaners, smart techniques, and pro tips that actually get the job done.
1. The Natural Cleaning Supplies You Should Always Have on Hand
Before you mix a single recipe, stock your cleaning closet with the right base ingredients. A minimalist natural cleaning supply kit covers almost every surface in your home without cluttering your shelves with single-use products. Arizona’s most-reviewed house cleaning company recommends keeping these core items stocked at all times:
Distilled white vinegar – A mild acetic acid solution that cuts grease, dissolves mineral deposits, and disinfects non-porous surfaces.
Baking soda – A gentle abrasive and natural deodorizer that scrubs without scratching.
Castile soap – A plant-based, biodegradable soap concentrate safe for skin, surfaces, and drains.
Hydrogen peroxide (3%): A safer alternative to chlorine bleach for disinfecting and brightening surfaces.
Rubbing alcohol (isopropyl, 70%): Fast-evaporating disinfectant ideal for glass, electronics, and stainless steel.
Essential oils – Tea tree, lavender, and lemon oils add antimicrobial properties and a fresh scent.
Spray bottles and glass jars: Store homemade cleaners safely and label them clearly.
Microfiber cloths: These lift and trap dust and bacteria without any cleanser at all on many surfaces.
According to the EPA Safer Choice program, products using plant-derived ingredients and low-VOC formulations reduce indoor air pollution and are safer for people, pets, and the environment. Stocking these natural cleaning supplies gives you a foundation for DIY natural cleaning products that rival anything on a store shelf.
If you want a deeper look at rated store-bought options to complement your homemade kit, check out this roundup of household cleaning products that our team has vetted.
2. Whole-Home Tasks to Tackle Before Cleaning Room by Room
Some natural cleaning tasks apply to the whole house rather than one specific room. Tackling these whole-home chores first makes every room-by-room step faster and more effective. Think of this as your pre-cleaning ritual before the room-specific natural solutions kick in.
Declutter before you clean: Move objects off surfaces so your homemade cleaners can reach every inch.
Open windows: Ventilating your home while you clean dilutes any fumes from vinegar or alcohol and brings fresh air in. The EPA’s indoor air quality guidelines consistently highlight ventilation as a first-line defense against indoor pollutants.
Dust top to bottom: Use a damp microfiber cloth to capture dust from ceiling fans, light fixtures, and upper shelves before vacuuming floors. This prevents dust from re-settling on surfaces you already cleaned.
Make a simple all-purpose natural cleaner: Mix 1 cup water, 1 cup white vinegar, 15 drops of tea tree oil, and 10 drops of lemon essential oil in a spray bottle. This one homemade cleaning solution covers counters, cabinet fronts, light switches, and door handles throughout the house.
Deodorize with baking soda: Sprinkle baking soda on upholstered furniture, let it sit for 15 minutes, then vacuum it up. It neutralizes odors without masking them with synthetic fragrance.
Vacuum or sweep all floors before mopping: Picking up loose debris before wet-cleaning keeps your mop water cleaner and your floors looking better.
These whole-house tasks create the conditions for your natural cleaning recipes to work at peak performance in every room.
3. Natural Cleaning Solutions for the Kitchen
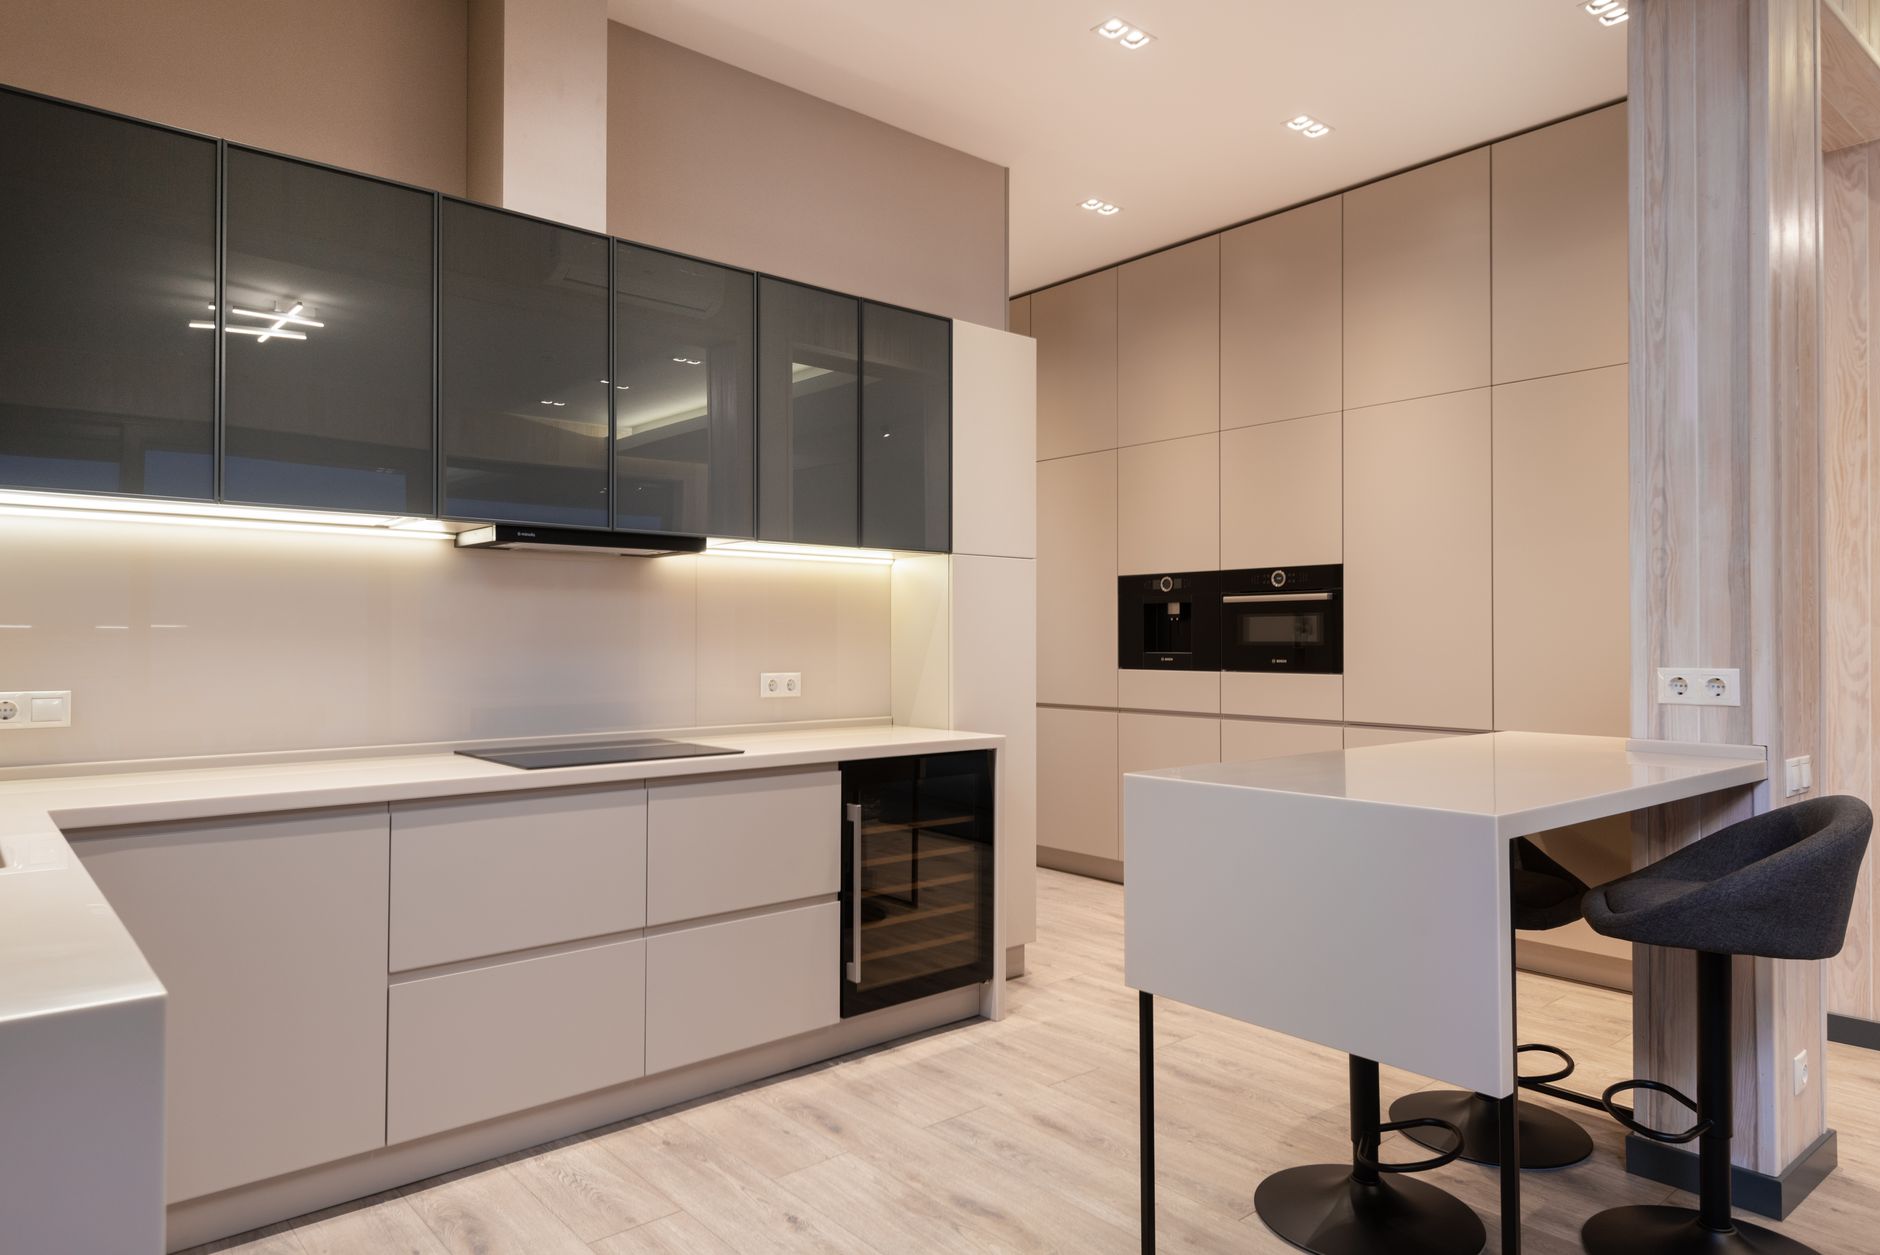
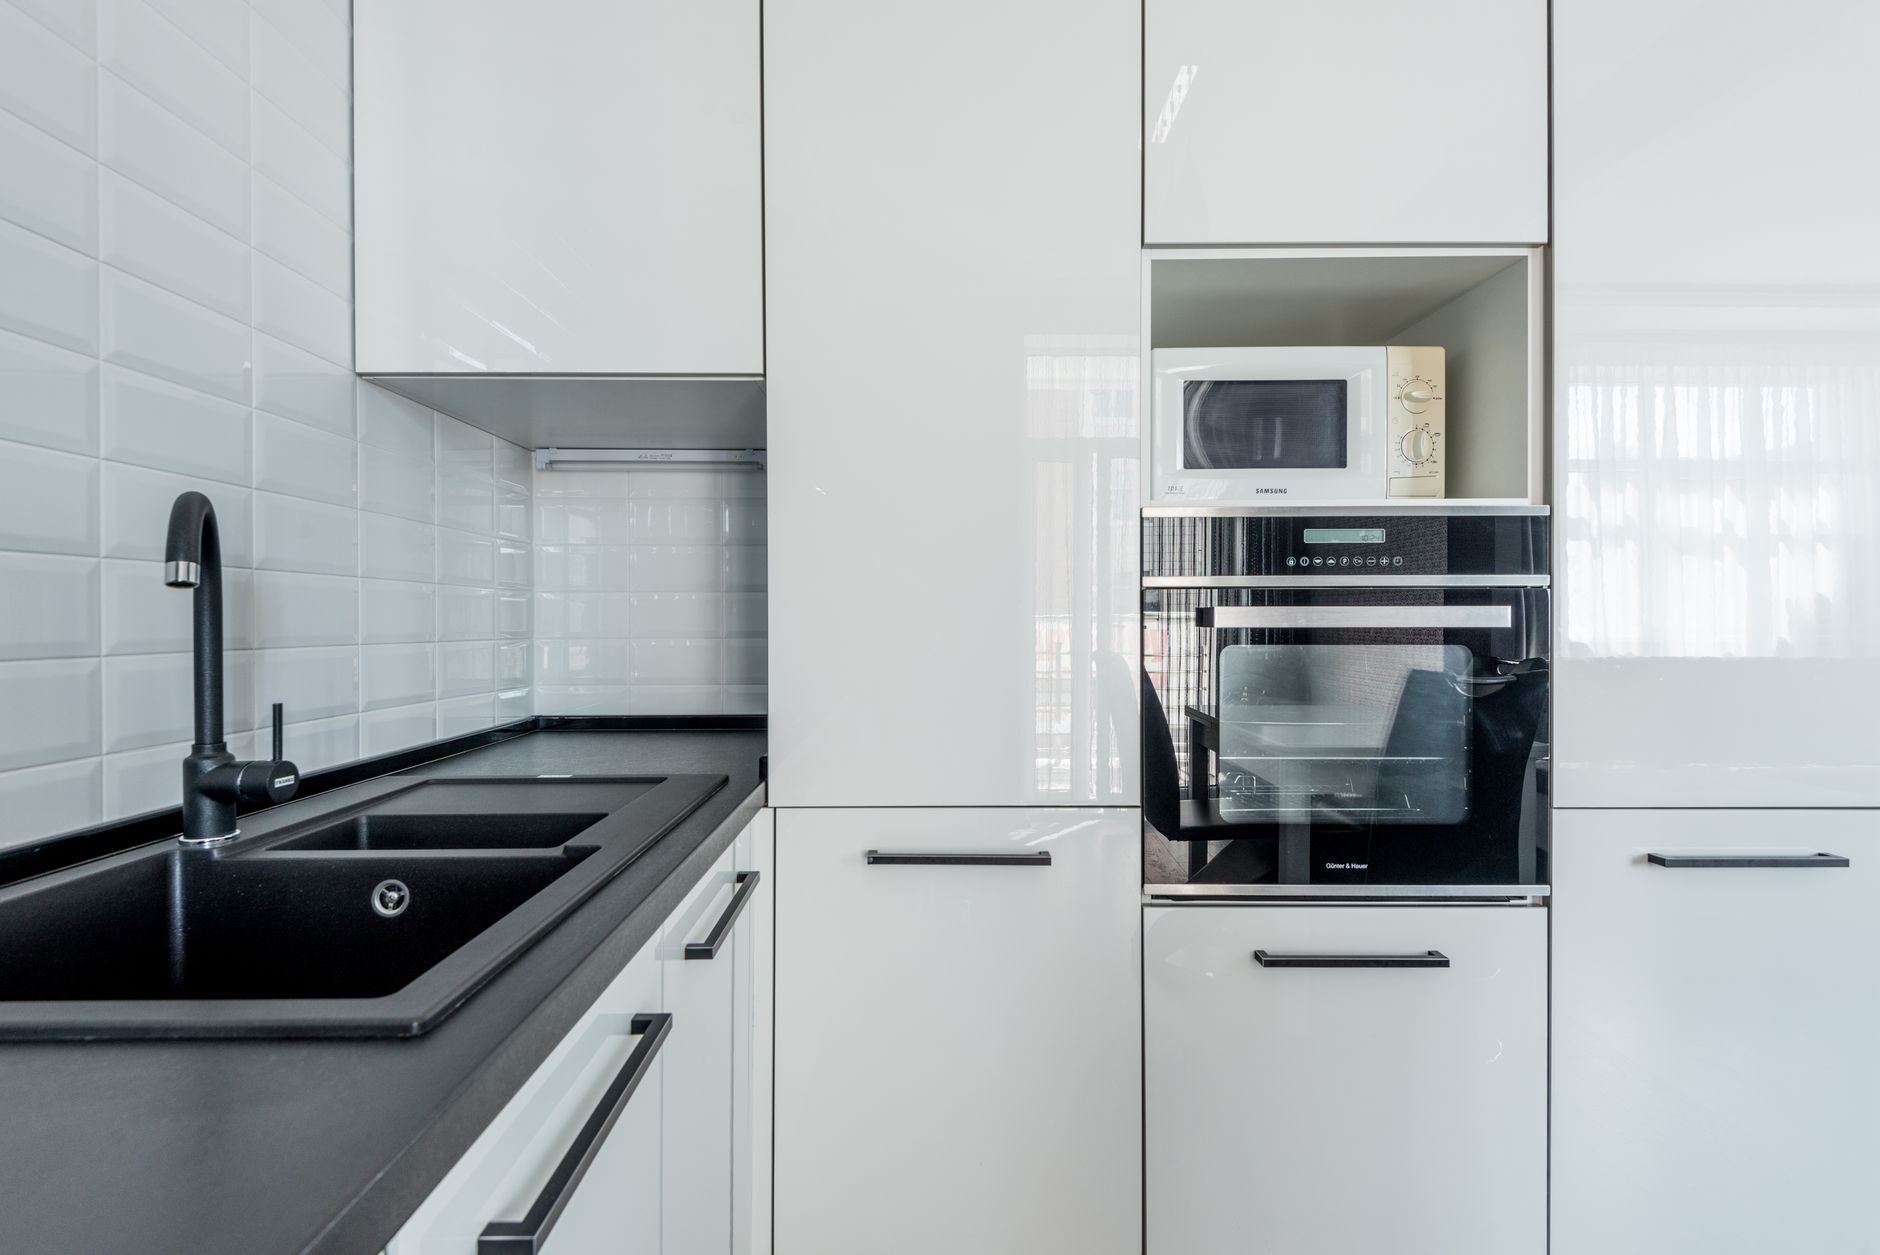
The kitchen is where natural cleaning solutions do some of their heaviest lifting. Grease, food residue, and bacteria make this the most demanding room in the house. The good news is that homemade kitchen cleaners made from pantry staples handle almost every challenge you will face.
Countertops and Backsplash
Spray your all-purpose vinegar cleaner directly onto stone or tile countertops, let it sit for 60 seconds, and wipe with a microfiber cloth. For natural stone like marble or granite, skip the vinegar since acid can etch the surface. Use a few drops of castile soap in warm water instead. For stubborn grime on grout or tile backsplash, apply a thick paste of baking soda and water, scrub with a soft brush, and rinse clean.
Sink and Drain
Pour half a cup of baking soda down the drain, follow with half a cup of white vinegar, and cover the drain for five minutes while the fizzing action breaks up buildup. Flush with a kettle of boiling water. For the sink basin itself, sprinkle baking soda, scrub with a damp sponge, and rinse. A few drops of tea tree oil in the final rinse keeps odor-causing bacteria at bay.
Oven and Stovetop
Mix baking soda with just enough water to form a spreadable paste. Apply it to the inside of a cool oven, avoiding the heating elements, and let it sit overnight. In the morning, wipe out the paste with a damp cloth and spray any remaining residue with vinegar. The resulting fizz loosens baked-on grease. For gas or electric stovetops, the same baking soda paste cuts through cooked-on spills without scratching.
Refrigerator
Wipe shelves and drawers with a solution of 1 tablespoon baking soda per quart of warm water. This natural fridge cleaner deodorizes as it cleans. Leave an open box of baking soda inside to absorb ongoing food odors between cleanings.
For kitchens that need a thorough reset beyond daily upkeep, a professional holiday cleaning service can cover every corner from top to bottom.
4. Natural Cleaning Solutions for the Bathroom
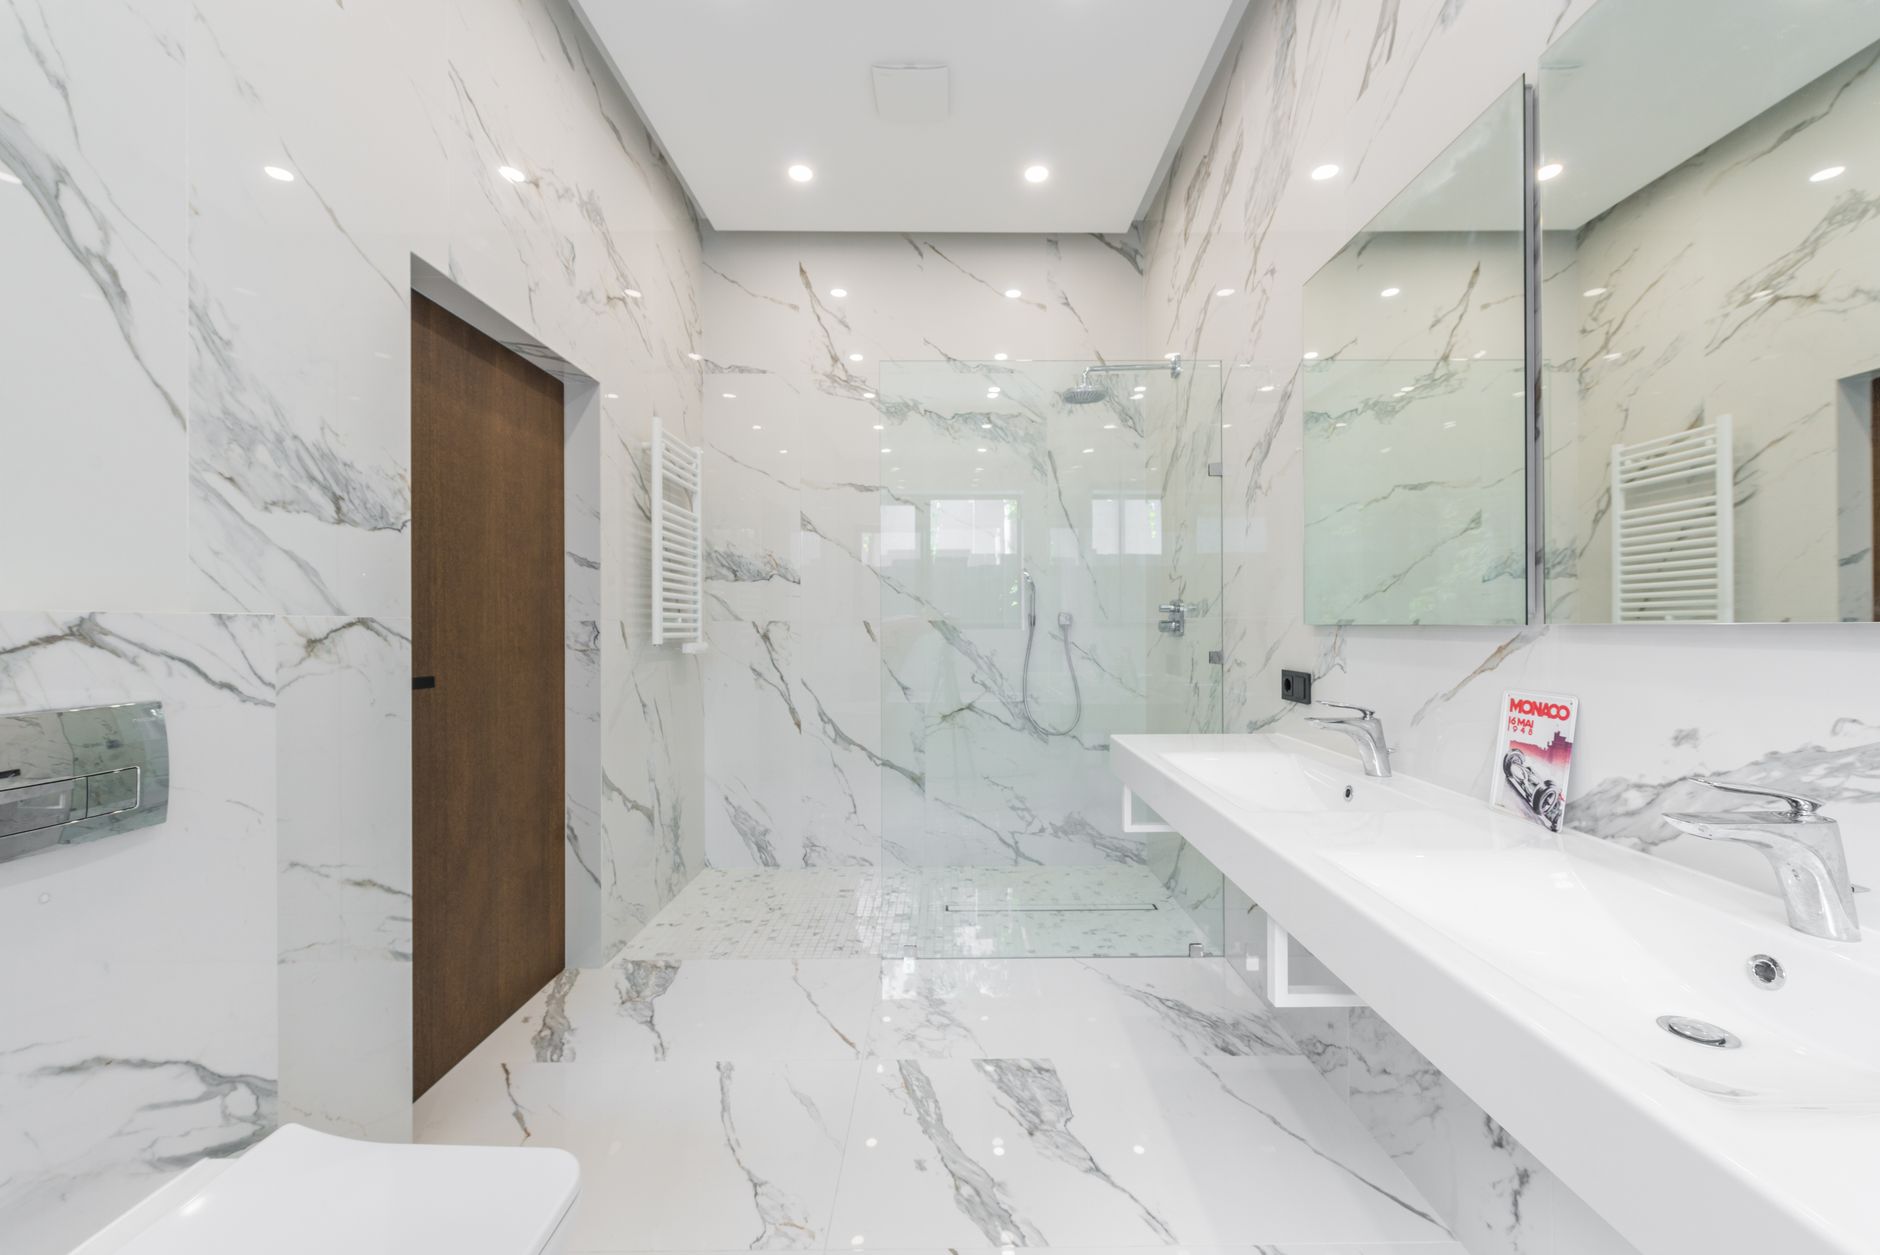
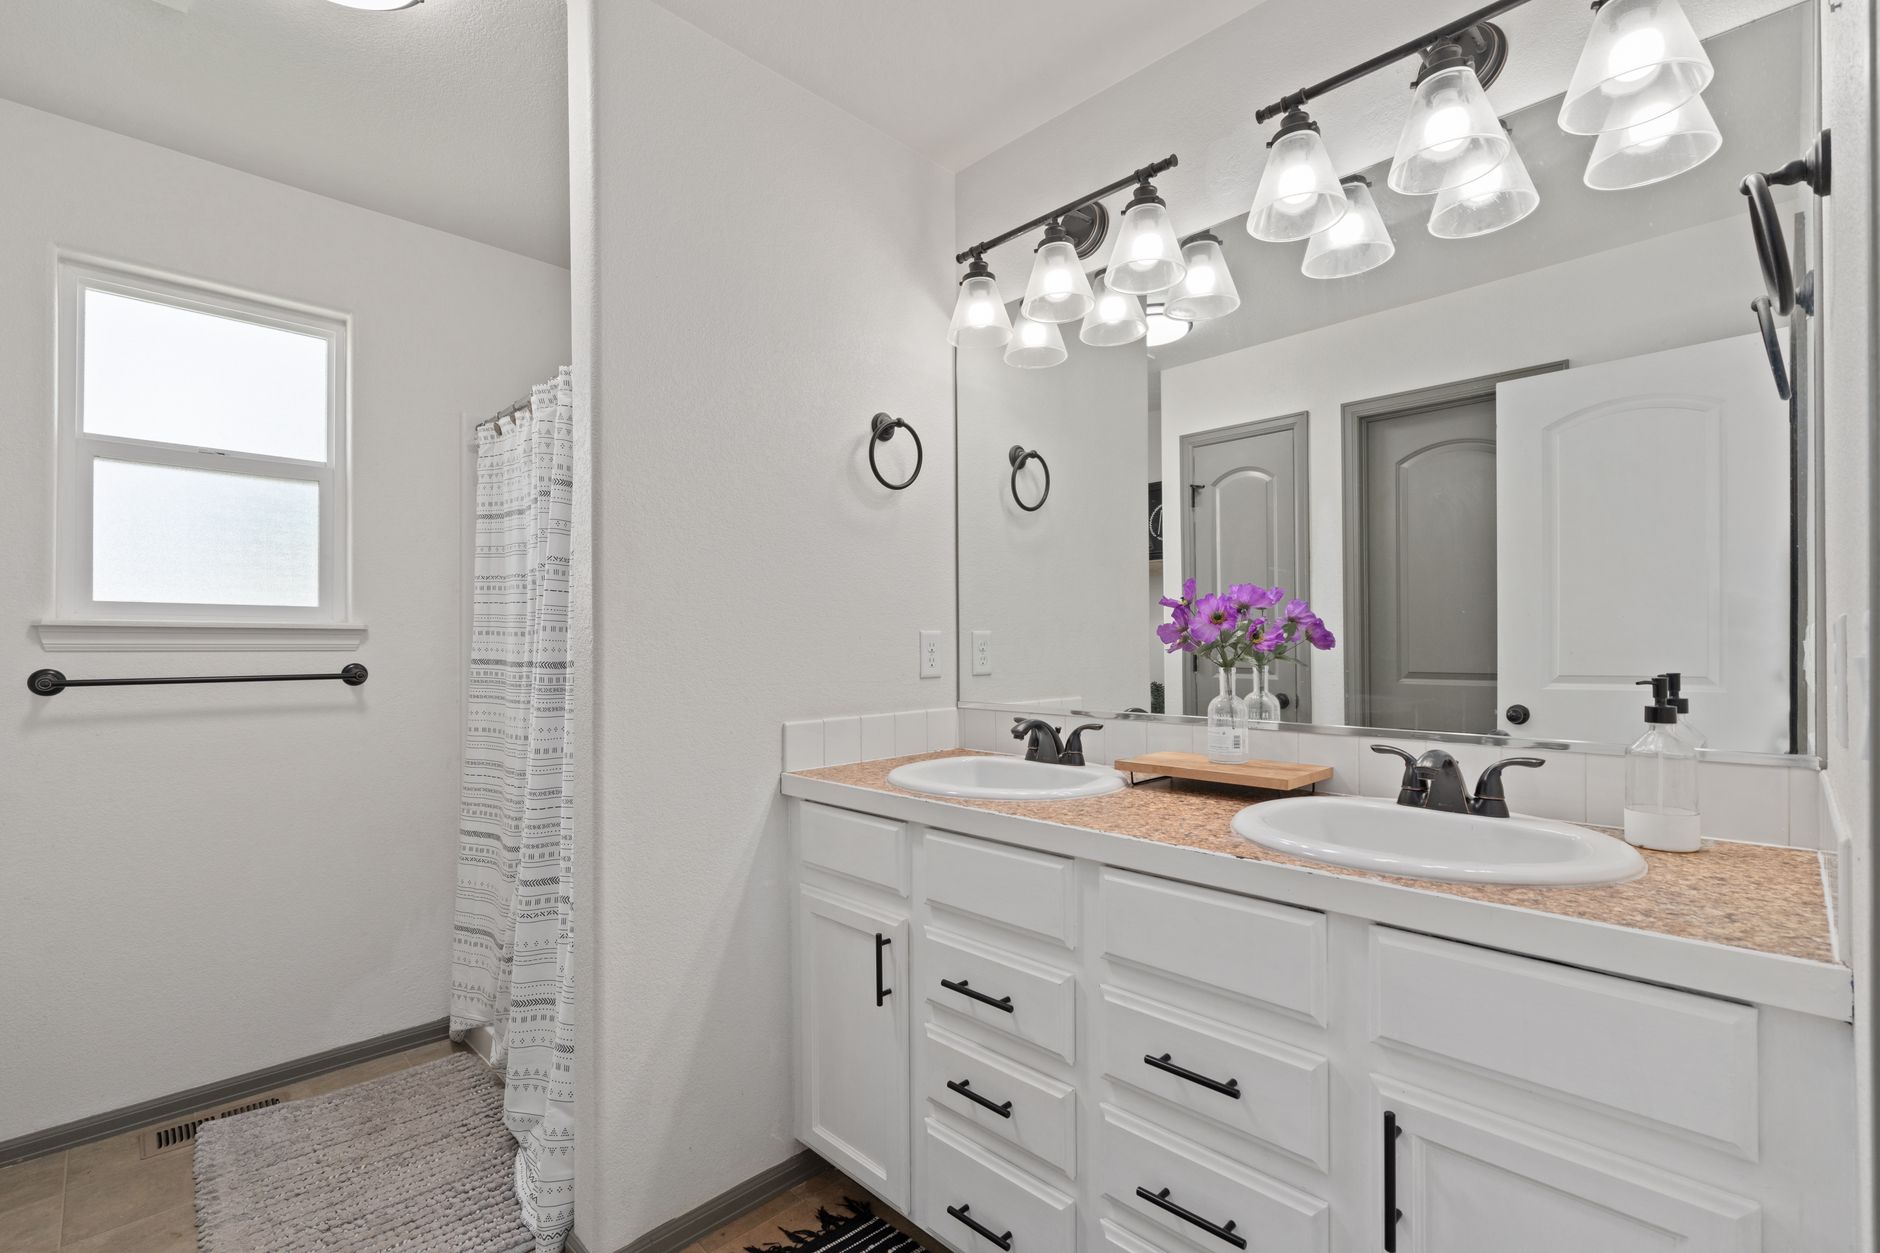
The bathroom is the room where people worry most about hygiene, and it’s also the room where natural cleaning solutions for bathrooms shine brightest. Mold, soap scum, hard water stains, and bacteria are all vulnerable to the right homemade cleaner.
Toilet
Sprinkle half a cup of baking soda into the bowl, add half a cup of white vinegar, and let the fizzing work for 10 minutes. Scrub with a toilet brush and flush. For exterior surfaces including the tank, seat, and base, spray with hydrogen peroxide, wait 60 seconds, and wipe clean. Hydrogen peroxide is a proven disinfectant and a safer alternative to bleach for this natural cleaning solution for the bathroom.
Shower and Tub
Mix equal parts dish soap (or castile soap) and white vinegar in a spray bottle. Spray generously on soap scum and hard water deposits, let it sit for 10-15 minutes, then scrub and rinse. For stubborn mildew grout, apply undiluted hydrogen peroxide, let it dwell for 10 minutes, and scrub with a stiff brush. The CDC notes that keeping surfaces dry between uses is the single most effective way to prevent mold growth in bathrooms.
Sink and Faucets
Rub cut lemon halves over chrome faucets to remove hard water spots and mineral deposits. Follow with a dry microfiber cloth for a streak-free shine. For the sink basin, a baking soda paste scrubs out stains without scratching porcelain or composite materials.
Mirrors and Glass
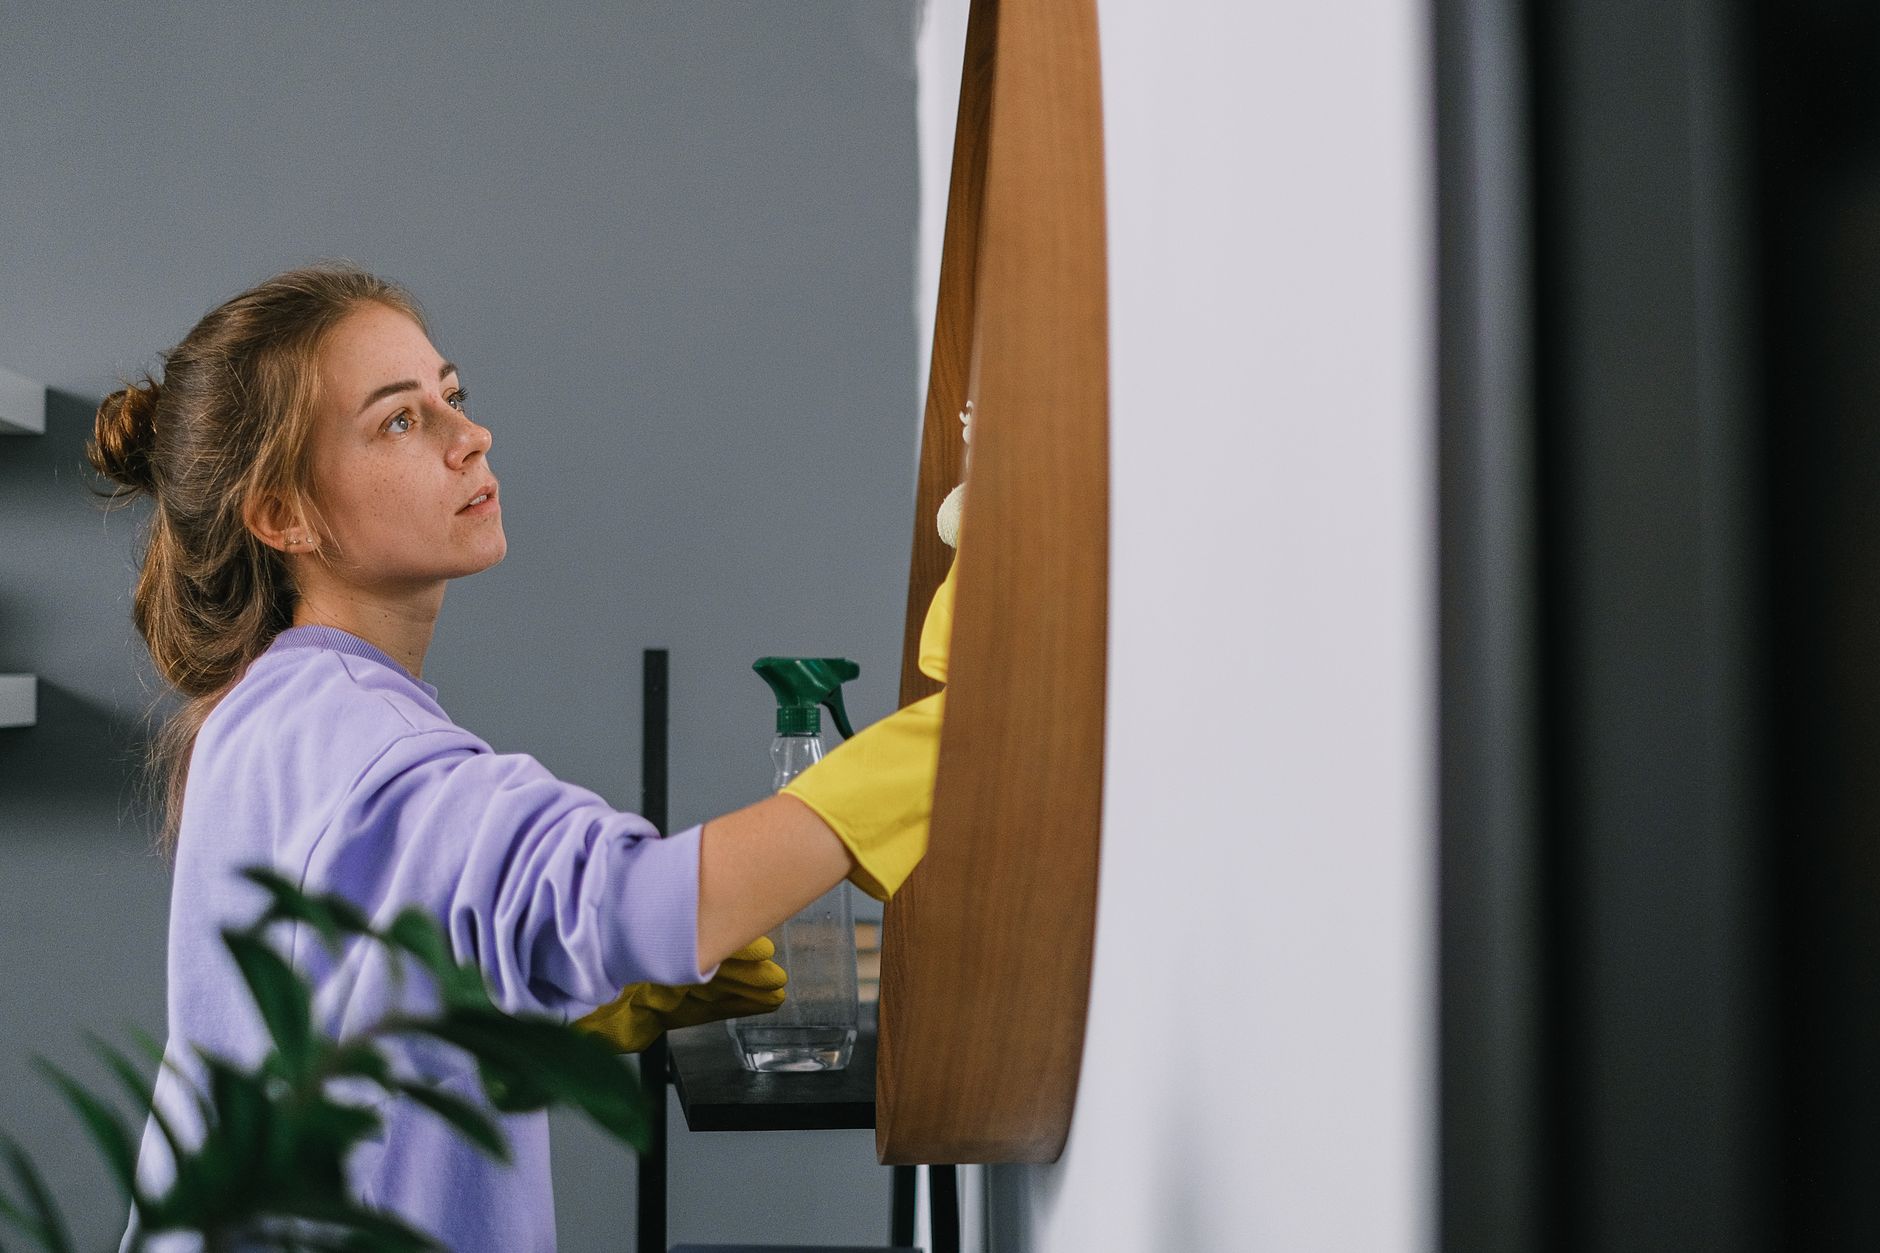
Combine 1 cup water, 1 cup rubbing alcohol, and 1 tablespoon white vinegar in a spray bottle. This DIY glass cleaner leaves bathroom mirrors streak-free without the blue dye of commercial products. Wipe with a lint-free microfiber cloth in an S-pattern rather than circular motions to avoid streaks.
If mold or mildew has taken hold in hard-to-reach areas, professional disinfection services offer a deeper level of sanitation that natural DIY methods may not fully address on their own.
5. Natural Cleaning Solutions for the Living Room and Common Areas
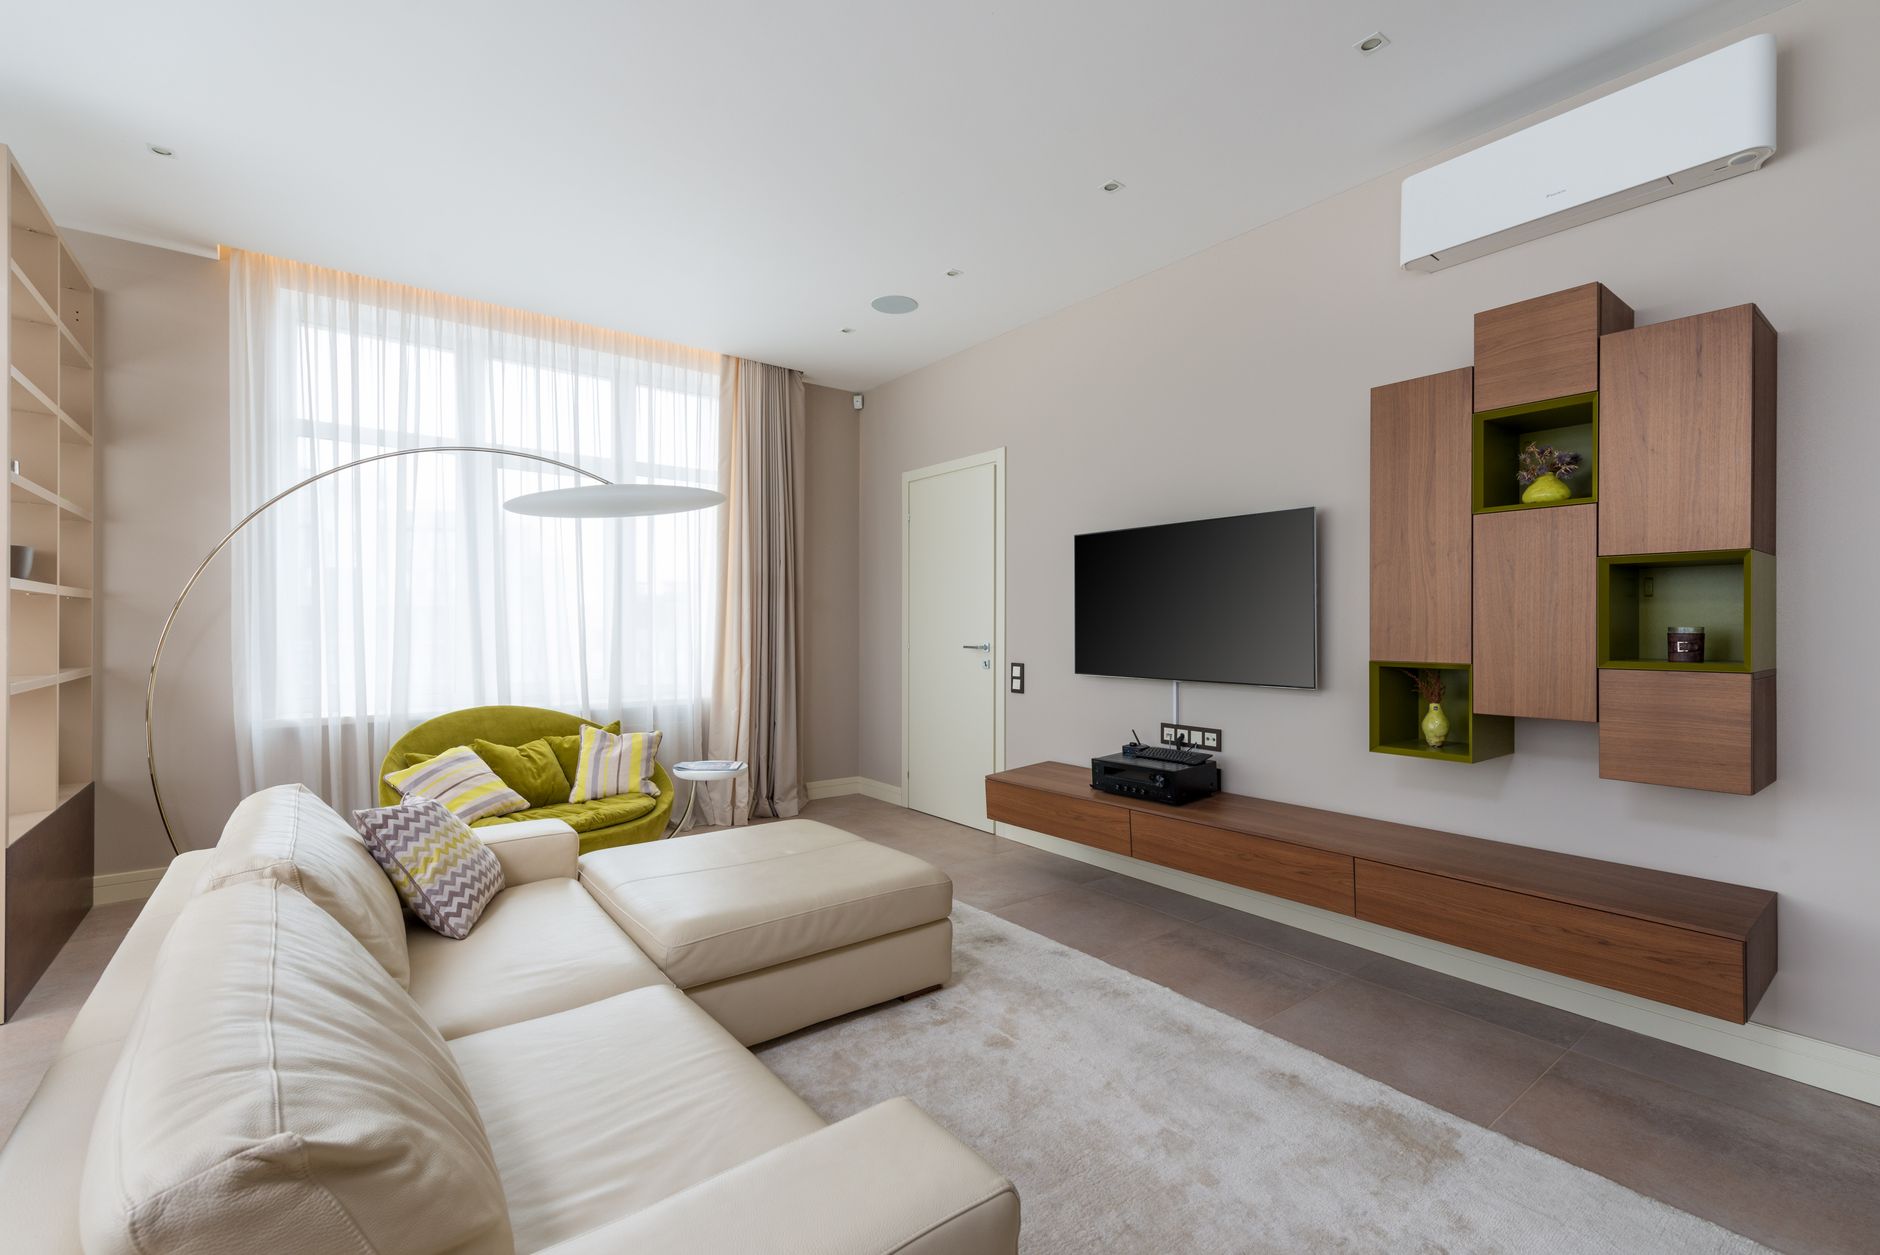
Living rooms collect dust, pet dander, and fingerprints but rarely deal with the heavy grime of kitchens and bathrooms. That means gentler natural cleaning solutions work perfectly here, protecting furniture finishes and fabrics while keeping the air fresh.
Upholstered Furniture
Check the care tag on your sofa first. For fabric labeled “W” (water-safe), mix 1 teaspoon of castile soap with 1 cup of warm water. Lightly dampen a cloth, blot stains rather than rubbing, and let air dry. Follow with a baking soda deodorizing treatment as described in the whole-home section above.
Wood Furniture and Shelving
Mix 1/4 cup olive oil with 1/4 cup white vinegar and 20 drops of lemon essential oil. Shake well and apply a small amount to a soft cloth, then buff into wood surfaces. This DIY wood polish cleans, conditions, and adds a gentle shine without synthetic wax.
Windows and Glass Tables
The same alcohol-vinegar glass cleaner from the bathroom section works perfectly here. Spray lightly and wipe with a microfiber cloth or crumpled newspaper for a streak-free finish on windows, glass tabletops, and picture frames.
Electronics and Remotes
Dampen a microfiber cloth with rubbing alcohol (never spray directly onto electronics) and wipe down remotes, gaming controllers, and keyboard surfaces. Alcohol evaporates quickly and kills germs without moisture damage.
For living spaces that benefit from a seasonal refresh, our team published a full set of summer heat-safe cleaning tips that pair perfectly with a natural cleaning approach.
6. Natural Cleaning Solutions for the Bedroom
Bedrooms need cleaning attention that most people skip: mattresses, pillows, and carpets harbor dust mites and allergens that affect sleep quality and respiratory health. Natural cleaning methods for the bedroom focus on deodorizing and sanitizing without introducing synthetic fragrances that can disrupt sleep.
Mattress
Strip the bed and sprinkle a generous layer of baking soda across the entire mattress surface. Add 10 drops of lavender essential oil to the baking soda before applying for an extra deodorizing and calming effect. Let it sit for at least one hour (longer is better), then vacuum thoroughly with the upholstery attachment. According to the American Lung Association, regular mattress cleaning reduces allergen exposure, which is especially important for asthma and allergy sufferers.
Pillows and Linens
Wash pillows and duvet covers in hot water with half a cup of white vinegar as a natural fabric softener and deodorizer in place of commercial softener. For pillowcases and sheets, add a quarter cup of baking soda to your regular detergent load to boost brightness and odor removal.
Carpets and Rugs
For spot stains on carpet, mix 1 tablespoon of castile soap with 2 cups of cold water. Blot the stain with a clean cloth dampened in this solution, working from the outside in. Follow with a cold water rinse and blot dry. Never scrub carpet stains as scrubbing spreads the stain and damages fibers.
Closets and Drawers
Wipe closet shelves and drawer interiors with your all-purpose vinegar spray to kill mildew spores. Tuck cedar blocks or small muslin bags filled with dried lavender into corners to repel moths and keep fabrics smelling fresh naturally.
7. Natural Cleaning Solutions for Floors Throughout Your Home
Floors take more abuse than any other surface in the house, and the cleaning method matters enormously depending on the material. These natural floor cleaning solutions are safe for most floor types and gentle enough for homes with children and pets.
Hardwood Floors
Avoid the temptation to mop hardwood with straight vinegar or excessive water. Instead, mix half a cup of white vinegar with a gallon of warm water and barely dampen your mop. Work in the direction of the grain and dry immediately with a fan or open windows. This homemade hardwood floor cleaner removes grime without warping or dulling the finish.
Tile and Grout
Mix half a cup of baking soda with a quarter cup of castile soap and enough water to make a thick paste. Apply to grout lines with an old toothbrush, scrub, and rinse. For large tiled areas, mop with a solution of half a cup of white vinegar per gallon of water, adding a few drops of tea tree oil for added antimicrobial action.
Laminate Floors
Laminate is sensitive to moisture. Use a spray bottle to mist one section at a time with a solution of 1 cup water, 1 cup rubbing alcohol, and 1 cup white vinegar, then wipe immediately with a barely damp microfiber mop. This natural laminate floor cleaner dries almost instantly and leaves no residue.
Carpet Freshening
Between deep cleans, scatter baking soda across carpet surfaces before bed. In the morning, vacuum it up. The baking soda absorbs pet odors, cooking smells, and general staleness overnight. For a scented version, blend 1 cup baking soda with 20 drops of your preferred essential oil before application.
8. Daily Habits That Keep Your Home Cleaner Naturally
The best natural cleaning routine is one that prevents messes from building up in the first place. Six simple daily habits reduce the frequency of deep cleaning and make your homemade natural cleaners go further between sessions.
Wipe kitchen surfaces after every meal: A quick pass with your all-purpose vinegar spray after cooking takes 60 seconds and prevents grease from hardening into a scrubbing challenge.
Squeegee shower walls after every use: Removing water from shower tiles and glass after each shower cuts soap scum and mildew growth dramatically without any cleaner at all.
Do one load of laundry per day: Keeping up with laundry prevents the pile-up that leads to mold growth in hampers and overwhelmed washing machine sessions.
Sweep or vacuum high-traffic areas daily: Five minutes with a broom or vacuum in the kitchen and entry hall keeps tracked-in dirt from spreading through the house.
Put items back in their place before bed: Clutter hides surfaces that need cleaning and makes weekly cleaning sessions take twice as long.
Air out your home for 10 minutes each morning: Opening windows and doors briefly flushes stale air and reduces the buildup of volatile organic compounds (VOCs) from common household products, even natural ones.
These six habits, paired with a solid natural cleaning products DIY routine, dramatically reduce the time and effort you spend on weekly and monthly cleaning. If you want to compare eco-conscious ingredient options, the guide to green cleaning ingredients covers a broad spectrum of safe choices.
9. What Professionals Use to Make Your Home Smell Fresh Naturally
One of the most common questions homeowners ask professional cleaners is how to make a house smell good without chemical air fresheners or synthetic sprays. The answer lies in eliminating odor sources rather than masking them, then adding natural scents that are genuinely pleasant and safe.
Simmer pots: Fill a small saucepan with water, sliced citrus peels, cinnamon sticks, and a few cloves. Simmer on low heat and your home fills with a warm, clean aroma within minutes. Add water as needed and never leave unattended.
Baking soda + essential oil absorbers: Fill small open jars with baking soda and add 10-15 drops of essential oil. Place one in closets, bathrooms, and by the trash. Replace monthly.
White vinegar odor removal: Set out a bowl of white vinegar in a room with a strong odor (smoke, pets, cooking). The vinegar absorbs odor molecules from the air. The vinegar smell itself dissipates within an hour, taking the bad odor with it.
Linen spray: Mix 1 cup of water with 2 tablespoons of rubbing alcohol and 20 drops of lavender or eucalyptus essential oil. Mist onto curtains, pillows, and upholstery for a clean, fresh scent.
Regular trash maintenance: Sprinkle baking soda in the bottom of trash cans before inserting a fresh bag. Wipe the interior of cans weekly with the all-purpose vinegar cleaner.
Activated charcoal bags:Activated charcoal absorbs odors, moisture, and airborne pollutants naturally. Place bags in closets, cars, and damp basements. Recharge them monthly by leaving them in direct sunlight for a few hours.
The bonded and insured Arizona cleaning team at Elite Maids uses plant-based, low-fragrance products to leave homes smelling genuinely clean, not just perfumed. The difference is noticeable.
10. When Natural Cleaners Are Not Enough: Knowing When to Call a Professional
Natural cleaning solutions handle the majority of everyday household cleaning beautifully. But there are situations where DIY natural cleaning products simply cannot substitute for professional equipment and expertise.
Heavy mold infestations: Surface mold on tile or grout responds well to hydrogen peroxide and tea tree oil. But mold that has penetrated drywall, subfloor, or structural material requires professional remediation. The EPA’s mold guidelines recommend calling a professional any time mold covers more than 10 square feet.
Move-in or move-out cleaning: Rental agreements and home sale transactions often require a level of cleanliness that goes beyond normal maintenance. A professional deep clean ensures deposits are returned and inspections pass.
Post-event or post-construction cleanup: Celebrations, renovations, and construction projects leave behind debris, grout dust, and surface damage that require specialized cleaning tools.
Recurring deep cleaning: Even the most dedicated natural cleaner benefits from a scheduled professional visit. Weekly or biweekly professional cleaning tackles the accumulated grime in areas like baseboards, grout, appliance interiors, and vents that daily routines cannot reach.
Time constraints: Natural cleaning methods often require longer dwell times than chemical alternatives. If your schedule does not allow for the extra time, a professional service using eco-friendly products gets the same result in a fraction of the time.
The deep cleaning task checklist we put together shows exactly what a professional cleans on a full deep cleaning visit, which is a useful benchmark for assessing what your regular routine might be missing.
Bring in the Professionals When You Need a Hand
Natural cleaning solutions are powerful, practical, and safe for your home and family. But no matter how diligent your DIY natural cleaning products routine, there comes a time when every home needs a professional reset. If you are ready to reclaim your weekends without sacrificing a clean home, contact Elite Maids house cleaning today for a free quote. Our background-checked, five-star rated team serves Phoenix, Mesa, Scottsdale, Gilbert, Chandler, Glendale, Queen Creek, San Tan Valley, Tucson, and Flagstaff with eco-friendly options, instant online quotes, and a reclean-at-no-cost satisfaction guarantee. Book same-day service online right now and let us handle the deep work so you can enjoy the home you already keep beautifully.
Frequently Asked Questions
What is the best homemade cleaner for everything?
The most versatile homemade cleaner is a mix of equal parts distilled white vinegar and water with 15-20 drops of tea tree or lemon essential oil in a spray bottle. This natural cleaning solution sanitizes, cuts grease, and deodorizes on countertops, cabinet fronts, sinks, appliance exteriors, and most hard surfaces. Avoid it on natural stone and bare cast iron.
What are 6 things I can do every day to keep my house clean?
Wipe kitchen surfaces after every meal, squeegee your shower walls after each use, run one load of laundry daily, sweep high-traffic floors for five minutes, return items to their proper place before bed, and air out your home for ten minutes each morning. These six habits prevent buildup and make weekly deep cleaning much faster and easier.
What do housekeepers use to make a house smell good?
Professional housekeepers focus on eliminating odor sources first rather than masking them. Common natural methods include baking soda and essential oil jars placed in closets and bathrooms, simmer pots with citrus and spices, white vinegar left in a bowl to absorb airborne odor molecules, and linen sprays made from water, alcohol, and essential oils. Ventilation and regular trash maintenance also play a major role.
What are some natural products I can use to clean my house?
White vinegar, baking soda, castile soap, hydrogen peroxide (3%), rubbing alcohol, lemon juice, and essential oils like tea tree, lavender, and lemon are the core natural cleaning products DIY enthusiasts rely on. Each tackles different challenges: vinegar for mineral deposits and bacteria, baking soda for abrasion and odor, hydrogen peroxide for disinfecting, and castile soap for general grease-cutting across every room.
What's the First Thing You Clean Before Guests Arrive?
SHARE:
The first thing most people clean before guests arrive is the bathroom, specifically the toilet, sink, and mirror. Guests will always find the bathroom, and a sparkling one signals a clean, cared-for home no matter what else is going on. This post walks through the full pre-guest cleaning order, room by room, so you can host with confidence every time.
Why Cleaning Before Guests Arrive Starts in the Bathroom
Every hosting expert will tell you the same thing: the bathroom makes or breaks a guest’s impression of your home. It does not matter how spotless your living room looks. If a visitor walks into a grimy bathroom, that is the detail they will remember. Pre-guest bathroom cleaning is the single highest-return task you can do in the least amount of time.
Start with the toilet. Scrub the bowl with a toilet brush and cleaner, wipe down the tank, lid, seat (top and underside), and base. Guests notice the underside of the toilet seat more than you would expect. Then move to the sink: scrub the basin, clean the faucet handles, and wipe down the counter. Finish with the mirror using a streak-free glass cleaner so it looks sharp under bathroom lighting.
Once those three surfaces are done, hang a fresh hand towel, refill the soap dispenser, and replace the toilet paper roll. These small details cost under two minutes and make the entire bathroom feel hotel-ready. Cleaning the bathroom before guests arrive is not just about hygiene. According to Good Housekeeping, the bathroom is consistently ranked the room guests judge most quickly, which is exactly why it earns top priority on any pre-guest cleaning checklist.
The Entry and Living Room: Your Home’s First Impression
After the bathroom, shift your attention to the entryway and living room. These are the spaces guests see the moment they walk through the door, and first impressions form within seconds. Tidying up before company comes means getting clutter off visible surfaces before anything else.
Clear the entryway of shoes, bags, and mail piles. Wipe down the front door handle and any glass panels on the door. Sweep or vacuum the entry rug. Then move into the living room: fluff couch cushions, fold or put away throws, and remove any personal clutter from coffee tables and shelves. A quick dust across tabletops and a fast vacuum of the main traffic areas finishes the job.
Notice that you are not deep cleaning here. You are editing. The goal when getting your home guest-ready fast is to create visual order, not to scrub every baseboard. Guests standing in your living room are looking at surfaces at eye level, not checking behind furniture. Spend your time where eyes naturally land.
For a full, step-by-step approach to getting every room ready before visitors show up, the pre-guest home cleaning checklist on our blog covers all ten moves in the right order.
Kitchen Cleaning Before Company: What to Prioritize
The kitchen can feel overwhelming before guests arrive, especially if you have been cooking. The key is to prioritize visible surfaces over everything else. Wipe down countertops first. Then clean the stovetop, which is often splattered and impossible to hide. Load dirty dishes into the dishwasher and run it. Wipe the exterior of appliances and clean the sink last, since that is what guests see if they wander into the kitchen.
Kitchen cleaning before company does not mean scrubbing the inside of your oven. Unless guests are opening your oven, focus on what is visible at a standing height: counter clutter, the stovetop, the sink, and the fridge exterior if it is visible from the main space. Spray counters with an all-purpose cleaner and wipe in one direction to avoid cross-contaminating crumbs to clean areas.
If you are entertaining and need a more thorough kitchen reset, a home disinfection service before the event can handle every surface, appliance exterior, and high-touch area so you are not stressed about what you missed. The EPA Safer Choice program also provides guidance on which household cleaners are effective without harsh chemical exposure, which matters when you have people coming into your kitchen space.
Quick Pre-Guest Cleaning: The Speed Strategy That Actually Works
When you have thirty minutes or less before guests arrive, you need a speed-cleaning approach, not a perfection approach. Quick pre-guest cleaning is all about sequencing: work top to bottom, clean to dirty, and far room to near the front door.
Here is the order that makes the fastest visible impact:
Bathroom first (toilet, sink, mirror, fresh towel)
Living room second (clutter edit, cushion fluff, quick vacuum)
Kitchen third (counters, sink, stovetop wipe)
Entry and hallway last (sweep, wipe door handle)
Working in this sequence means even if you run out of time, the rooms guests are most likely to use are already done. The bedrooms and office can stay closed. Speed cleaning for guests is about ruthless triage, not perfection. Grab a laundry basket and do a single sweep of each room, dropping clutter into it and stashing it in a closet. It sounds simple because it is, and it works every single time.
High-Touch Surfaces Nobody Thinks to Clean Before Visitors Come
Most people wipe counters and vacuum floors before guests arrive, but the surfaces guests actually touch most often go completely uncleaned. High-touch surfaces before visitors come include light switches, door handles, cabinet pulls, TV remotes, and the refrigerator handle. These spots carry bacteria and visible fingerprints that undercut an otherwise clean-looking home.
A microfiber cloth with an all-purpose spray takes about five minutes to wipe down every high-contact surface in the kitchen, bathrooms, and living areas. That five minutes does more for the actual hygiene of your space than ten minutes of re-vacuuming a floor. The cleaning experts at Real Simple consistently highlight high-touch surfaces as the most under-cleaned areas in the average household.
If you are prepping for a larger gathering or a holiday visit, consider scheduling a professional disinfection cleaning service to cover every high-contact zone throughout the entire home. This is especially useful when elderly guests or young children will be visiting.
Scent and Air Quality: The Invisible Part of a Clean Home
Cleaning for guests is not only visual. The way your home smells is the very first sensory signal guests register before they even look around. If a home smells stale, musty, or like last night’s dinner, no amount of surface wiping changes that first impression.
Take the trash out before guests arrive, every single time. Open windows briefly to cycle fresh air through the space if weather allows. Simmer a pot of water with citrus peels and cinnamon for a natural scent that does not overwhelm the way synthetic air fresheners can. If you have pets, hit fabric surfaces like the couch and rugs with a fabric deodorizer spray before guests arrive.
Indoor air quality matters beyond just smell. The EPA’s indoor air quality guidelines explain how dust, pet dander, and volatile organic compounds (VOCs) in cleaning products can affect the air inside your home. This is another reason to choose gentler, fragrance-free cleaners when freshening up before a visit, especially if any guests have respiratory sensitivities.
The American Lung Association’s indoor air resources are worth reviewing if you regularly host large gatherings or have guests with asthma. Good air quality inside your home is part of a genuinely clean environment, not just a clean-looking one.
When to Call a Professional Cleaning Service Before an Event
There are times when a wipe-down and a quick vacuum are simply not enough. If you are hosting a holiday gathering, a birthday party, a family reunion, or any event where your home will be under serious scrutiny, a professional cleaning service before the event is the smartest move you can make.
A professional team handles everything you would otherwise rush through: baseboards, ceiling fans, behind appliances, inside the microwave, grout lines in the bathroom, and all those forgotten corners. You get to spend your energy on food, decorations, and actually enjoying the hosting experience rather than scrubbing showers at midnight.
The bonded and insured Arizona cleaning team at Elite Maids House Cleaning offers event cleaning packages designed specifically for this scenario. Every cleaner is background-checked, five-star rated, and backed by a reclean-at-no-cost satisfaction guarantee. You can book online in minutes with an instant quote, and same-day appointments are available between 8am and 6pm across Phoenix, Scottsdale, Mesa, Chandler, Gilbert, Glendale, Queen Creek, San Tan Valley, Tucson, and Flagstaff.
For a comprehensive seasonal reset before a big hosting season, the ultimate guide to spring cleaning is a great companion resource for planning your full home refresh from top to bottom.
Also, if you want the complete list of the five most impactful spaces to address, the post on stress-free pre-guest cleaning areas is a quick, practical read before your next gathering.
No matter how much notice you have before visitors show up, knowing where to start makes all the difference. A clean bathroom, a tidy entry, wiped counters, and fresh air go further than a panicked whole-house scrub with no strategy. When you need backup, the team at Elite Maids House Cleaning is ready to handle the hard work so you can focus on being the host. Contact Elite Maids house cleaning today for a free quote and let Arizona’s most-reviewed residential cleaning team get your home guest-ready on your schedule.
Frequently Asked Questions
What should I clean first when guests are coming over?
Start with the bathroom every time. Clean the toilet bowl and seat, scrub the sink, wipe the mirror, hang a fresh hand towel, and refill soap. Guests will always use the bathroom, and a clean one signals a well-kept home instantly. Once that is done, move to the living room and entry, then the kitchen counters and sink.
How do I quickly clean my house before guests arrive?
Use the bathroom-first, top-to-bottom sequence: bathroom, living room, kitchen, entryway. Do a clutter sweep with a laundry basket and stash it in a closed room. Focus on surfaces at eye level, wipe counters and high-touch spots like light switches and door handles, then vacuum only the main traffic areas. Thirty minutes done right beats two hours of unfocused scrubbing.
What are the most important rooms to clean before company comes?
The bathroom, living room, and kitchen are the three rooms that matter most before company arrives. Guests will use all three, and those are the spaces where cleanliness (or the lack of it) is most visible. Bedrooms and home offices can stay closed if you are short on time without anyone noticing.
How do I make my home smell clean before guests arrive?
Take out the trash, open windows briefly if weather allows, and deodorize fabric surfaces like the couch and rugs. Simmer a pot of water with citrus and cinnamon for a natural, welcoming scent. Avoid heavy synthetic air fresheners, which can feel overwhelming. Cleaning the source of odors (trash, pet areas, bathroom) matters more than masking them with sprays.
Should I hire a professional cleaner before a big event or party?
Yes, especially for larger gatherings like holidays, reunions, or parties where your entire home will be in use. A professional cleaning team covers the deep details: grout, baseboards, ceiling fans, appliance exteriors, and all the spots that get skipped during a quick clean. It frees you up to prepare food and decor without spending the day before your event on your hands and knees scrubbing.
What's the First Thing You Clean Before Guests Arrive?
SHARE:
The first thing most people clean before guests arrive is the bathroom. It’s the room guests will almost certainly use, and a dirty bathroom signals that nothing else in the home is clean either. From there, the smartest pre-guest cleaning order moves to the entryway, kitchen, and living areas. This post walks you through the full sequence, room by room, so you never scramble again.
Why the Bathroom Is the First Room to Clean Before Company Comes
Ask ten people what they clean before guests arrive, and nine of them will say the bathroom first. That instinct is right. The bathroom is a high-traffic, high-scrutiny space. A guest who walks into a sparkling living room will still leave with a bad impression if the toilet is ringed or the sink is crusty. Cleaning this room first, while your energy is highest, guarantees it gets the attention it deserves.
Start with the toilet. Spray the bowl with a disinfecting cleaner, let it sit, then scrub and flush. Wipe down the outside of the tank, the seat, the lid, and the base. People touch all of these surfaces, and smears and fingerprints are easy to miss if you rush. Next, tackle the sink and counter. Remove everything, wipe the surface down with an all-purpose cleaner, scrub the basin and faucet, and replace only what belongs there. A clear counter reads as clean even if the grout isn’t perfect.
The mirror is your secret weapon. A streak-free mirror makes the whole bathroom look bigger and brighter in seconds. Use a glass cleaner and a microfiber cloth, and wipe in an S-pattern rather than circles to avoid streaks. Finish by mopping or wiping the floor, replacing the hand towel with a fresh one, and setting out a new bar of soap or refilling the dispenser. According to Good Housekeeping’s cleaning experts, fresh towels and soap are the two details guests notice most in a bathroom, and they cost almost nothing to swap out.
If you have two bathrooms and limited time, always prioritize the one guests will use over the one in your master suite. And if the thought of deep-scrubbing grout and tile before every gathering sounds exhausting, check out this guide on pre-guest home cleaning priorities so you know exactly where to focus your effort.
The Entryway: The First Impression That Sets the Tone
After the bathroom, the entryway is the next room to address before guests arrive. It’s the literal first thing your guests see when they walk through the door, and a cluttered, dusty entryway creates a subconscious negative impression before they’ve even taken their shoes off.
Sweep or vacuum the floor. If you have a mat or rug at the front door, shake it out or run a lint roller over it. Wipe down the door handle and light switch plates with a disinfecting wipe. These high-touch surfaces are easy to overlook but carry a lot of bacteria. Straighten shoes, hang up any jackets draped over chairs, and clear the console table or bench of mail, keys, and random clutter.
If you have a coat closet near the entry, resist the urge to stuff everything inside and close the door. Guests will likely ask to hang their coats, and an avalanche of clutter is more embarrassing than anything you were trying to hide. Take three minutes to clear a few hangers so there’s room for guests’ belongings.
Scent matters in the entryway too. A faint, pleasant smell from a candle, a diffuser, or simply fresh air tells guests the home is clean before they see a single surface. Just keep it subtle. A heavy fragrance can be just as off-putting as no fragrance at all. For a broader checklist on getting ready for company, the home cleaning checklist before guests arrive covers every room with specific tasks and time estimates.
How to Quickly Clean the Kitchen Before Guests Come Over
The kitchen is the heart of most gatherings, and guests tend to drift there whether you invite them to or not. Cleaning the kitchen before guests come over doesn’t mean a full scrub-down of every appliance. It means targeting the surfaces guests will actually see and touch.
Clear the counters first. Put away the toaster, the coffee maker, the mail, the fruit bowl, and anything else that doesn’t need to be out. A clear counter visually expands the kitchen and makes the whole room look tidier instantly. Wipe every counter surface down with an all-purpose spray. Don’t forget the backsplash behind the stove, which tends to collect splatter.
Wipe down the stovetop and the front of the oven, refrigerator, and dishwasher. These are the surfaces guests stand next to while talking to you, and greasy fingerprints on stainless steel are visible from across the room. A few passes with a damp microfiber cloth keeps them looking sharp without a full appliance deep clean.
Load the dishwasher with any dishes in the sink and run it, or wash and dry them by hand. An empty sink looks clean even when the rest of the kitchen isn’t perfect. If you’re planning food, do this step before you start cooking so you have a clean workspace and aren’t scrambling at the last minute.
Finally, sweep or vacuum the kitchen floor and do a quick mop if there are visible spots. Sticky floors undercut everything else you’ve done. If eco-friendly products are important to you, look for cleaners certified through the EPA’s Safer Choice program, which evaluates cleaning products for safety without sacrificing cleaning power. A good eco-friendly cleaning service Arizona homeowners trust will always use products from this kind of vetted list.
Living Room Cleaning Tips for Last-Minute Guest Prep
The living room is where guests spend most of their time, which means it needs to look pulled together even if it isn’t perfectly clean. Fortunately, last-minute living room cleaning is more about visual order than deep scrubbing.
Start by decluttering every surface: coffee table, side tables, shelves, and the floor. Toss throw blankets over the back of the couch or fold them neatly. Fluff the pillows. Take anything that doesn’t belong in the room and move it to a bedroom or closet for now.
Vacuum the rug and the couch cushions if there’s pet hair or visible debris. Dust visible surfaces with a damp cloth or a microfiber duster. Dust the TV screen, the entertainment stand, the coffee table, and any shelves at eye level. Baseboards and ceiling fans can wait unless they’re noticeably dirty.
For quick living room cleaning before company arrives, the 10-minute rule works well: set a timer, move through the room systematically, and don’t get sidetracked by tasks that won’t be noticed. Focus on what’s visible from where guests will sit, not on what’s behind the TV or under the couch. For a faster, more structured approach, this guide on fast home cleaning before guests breaks down a room-by-room speed plan.
Open a window if the weather allows. Fresh air moves out cooking smells, pet odors, and the general stuffiness that accumulates in a closed-up home. The EPA’s indoor air quality guidelines emphasize ventilation as one of the simplest ways to improve the air inside your home, and it costs nothing.
Forgotten Spots Most People Miss When Cleaning for Guests
Even experienced hosts have a few spots they consistently overlook when cleaning before visitors show up. These are the surfaces that guests notice because they’re unexpected, not because they’re hunting for dirt.
Light switches and door handles: These are among the most touched surfaces in any home and are almost never wiped down during a quick clean. A single disinfecting wipe over every switch plate and door handle takes under two minutes for an entire house.
The inside of the microwave: If food is being served and guests pop something in the microwave, they’ll see splattered food on the walls and ceiling. Fill a microwave-safe bowl with water and a few tablespoons of white vinegar, heat on high for three minutes, and then wipe the interior clean. The steam does most of the work.
Trash cans: An overflowing trash can in the kitchen or bathroom is one of the most noticeable cleaning oversights. Empty them all before guests arrive and replace the liners.
The area around the front door: Cobwebs in the corners of the doorframe, a dirty mat, or dead leaves blown onto the porch are visible before guests even enter. A 60-second sweep of the exterior entry makes a real difference.
Countertop appliance fronts: The fronts of the coffee maker, toaster, and blender pick up grease and dust and look noticeably grimy in daylight. A quick wipe with a damp cloth handles it in seconds.
For a deeper look at the spots that consistently get skipped, the overlooked home cleaning spots before guests post digs into exactly what most people miss and how to fix it fast.
When you don’t have time to catch every forgotten corner yourself, a professional house cleaning service can handle everything from top to bottom so you can focus on the hosting, not the scrubbing.
How to Prioritize Cleaning When You’re Short on Time
Pre-guest cleaning when you’re short on time is a skill, and it comes down to triage. You can’t do everything, so you focus on what matters most and let the rest go. This mindset shift alone removes most of the panic from last-minute hosting.
The priority order for a quick clean before company comes over is: bathroom first, entryway second, kitchen third, living areas fourth. Everything else, including bedrooms guests won’t see, the garage, the laundry room, and behind furniture, gets skipped entirely. Give yourself permission to close those doors.
Break the available time into chunks. If you have 30 minutes, spend 10 in the bathroom, five in the entryway, 10 in the kitchen, and five in the living room. If you have 60 minutes, add a pass through the floors and a wipe-down of the guest bedroom if someone will be staying over.
If you have recurring guests, like a weekly dinner party or monthly family gathering, consider scheduling a recurring cleaning visit before those events. A recurring house cleaning booking the day before an event means you’re never starting from zero when guests are on their way. That’s exactly how Elite Maids clients use our weekly and biweekly service: to keep the baseline high so last-minute prep takes minutes, not hours.
For Arizona hosts who need help fast, same-day house cleaning Arizona is available through Elite Maids with online booking between 8am and 6pm, no phone call required. Instant quotes mean there’s no waiting around wondering what it costs.
When to Call a Professional Cleaner Before an Event
Sometimes the gathering is big enough, or the home is messy enough, that a quick self-clean before guests arrive won’t cut it. That’s exactly when calling a professional cleaning team before an event makes sense, and it’s more practical than most people expect.
Event cleanings are a specific service designed around hosting. Unlike a standard recurring visit, an event clean focuses on the rooms guests will use, the surfaces they’ll touch, and the overall impression the home makes. It can also include tasks most homeowners skip: cleaning inside the microwave, wiping down cabinet fronts, cleaning baseboards, scrubbing the guest bathroom thoroughly, and mopping all hard floors to a streak-free finish.
If you’ve been searching for a spring cleaning service to reset the home before a big seasonal gathering, this is also the right time to consider a full deep clean. A deep clean gets into all the areas a standard visit skips, so your home isn’t just surface-clean but genuinely fresh from top to bottom.
According to Real Simple’s cleaning editors, the best hosting strategy isn’t cleaning harder the day of an event but maintaining a cleaner baseline throughout the month so pre-event prep is minimal. A professional service makes that easy without consuming your weekends.
Elite Maids serves Phoenix, Mesa, Scottsdale, Gilbert, Chandler, Glendale, Queen Creek, San Tan Valley, Tucson, and Flagstaff. Every cleaner is background-checked, bonded, and insured, and every visit is backed by a reclean-at-no-cost guarantee. Getting your home guest-ready is a call or a few clicks away.
When your next event is on the calendar and the to-do list feels long, let us take cleaning off your plate entirely. Book a house cleaning online and get an instant quote with no commitment required.
Whether you’re hosting a casual dinner or a full holiday gathering, you deserve to enjoy the event instead of spending the day before it with rubber gloves on. Contact Elite Maids house cleaning Arizona today for a free quote and find out how easy it is to hand off the hard part.
Frequently Asked Questions
What should I clean first before guests arrive?
Clean the bathroom first. It’s the room guests will definitely use, and a clean bathroom sets the expectation that your whole home is well-kept. After the bathroom, move to the entryway, then the kitchen, then the living room. This order prioritizes what guests notice most and works whether you have 20 minutes or two hours.
How do I clean my house fast before guests arrive?
Use a triage approach: skip rooms guests won’t enter, close those doors, and focus every minute on visible, high-traffic areas. Set a timer for each room, work top to bottom and front to back, and don’t get distracted by deep-cleaning tasks. Decluttering surfaces has the biggest visual impact per minute of any cleaning task.
What do guests notice most when they visit your home?
Guests notice the bathroom condition, the smell of the home, the state of the kitchen sink and counters, and the overall visual order of the living room. A clean-smelling home with clear surfaces reads as tidy even if the deeper cleaning isn’t perfect. Fresh towels, an empty sink, and no trash overflow cover most of what guests actually register.
How do I get my house ready for guests overnight?
If guests are staying over, add the guest bedroom and guest bathroom to your cleaning list with higher priority. Fresh sheets, cleared nightstand and dresser surfaces, an empty drawer or two for clothes, and a clean guest bathroom with fresh towels and soap are the essentials. Guests in overnight situations are more observant about bedrooms than visitors who stay only a few hours.
Is it worth hiring a cleaner before a party or gathering?
Yes, especially for larger gatherings or events that matter to you. A professional clean before a party means you start with a genuinely clean home, not just a surface-tidy one. It also frees your time for planning, cooking, and setting up rather than scrubbing. Many Arizona homeowners schedule an event clean through Elite Maids the day before a gathering and consider it one of the best hosting decisions they make.
10 Things to Do Before Guests Arrive (So Your Home Looks Effortlessly Clean)
SHARE:
The best thing to do before guests arrive is to focus on the high-visibility spots that create a strong first impression fast. A clean kitchen, clear surfaces, and fresh-smelling spaces signal a well-kept home in seconds. This list walks through 10 practical pre-guest cleaning habits, from the sink to the bathroom, that take the stress out of last-minute hosting.
1. Wash All Pots, Pans, and Dishes Beforehand
Nothing kills the mood of a dinner party faster than a stack of dirty pots and pans in the sink. Before guests arrive, do a full wash-up of every dish, pot, and utensil that has been used in the past 24 hours. If you’ve been cooking prep ahead of time, this can feel like a never-ending cycle, but getting through it before your guests walk in the door makes the rest of the kitchen feel cleaner by default.
Washing pots and pans beforehand also gives you a clean slate to work with when the actual cooking happens. You’ll have counter space, you’ll know where everything is, and you won’t be scrambling to find a clean colander while guests are standing in your kitchen. This is one of those pre-guest cleaning habits that pays off three times: before, during, and after the event.
According to Good Housekeeping’s cleaning team, the kitchen is almost always the first room guests judge, even when the party is in the living room. Keep that in mind when you’re deciding where to spend your 30 minutes of pre-arrival cleaning time.
2. Empty Every Trash Can in the House
Empty trash cans before guests arrive. This sounds simple, but it is one of the most skipped steps in any pre-guest cleaning checklist. A full kitchen trash can will start to smell the moment you fire up the stove. A bathroom trash can that overflows sends a very clear message about how often the space gets attention.
Walk through every room and swap out liners before anyone shows up. This includes the kitchen, bathrooms, office, and any bedroom a guest might use. Fresh liners also mean you can toss napkins, bottle caps, and food packaging during the party without worrying about overflow. Emptying trash cans before guests arrive is one of those pre-party cleaning tasks that takes five minutes but makes a two-hour impression.
3. Clear the Kitchen Sink: 15 Minutes to a Cleaner Look
A clear kitchen sink is one of the single biggest visual upgrades you can make in under 15 minutes. Clearing out the sink before guests arrive removes clutter, eliminates odor risk, and makes the entire kitchen look more organized. This is true even if the rest of the kitchen is not perfectly spotless.
Start by moving anything sitting in or around the sink, rinsing it if needed, and either putting it away or stacking it in the dishwasher. Then give the sink basin a quick scrub with a mild cleaner, wipe down the faucet handle, and dry the surrounding counter. Clearing the kitchen sink takes about 15 minutes from start to finish, and the result looks like you spent an hour cleaning. It’s one of the fastest pre-guest cleaning tricks that actually works.
If you want a deeper clean that goes beyond the surface, professional disinfection services can tackle the bacteria that a quick wipe-down misses, especially around sink drains and faucets where moisture creates ideal conditions for germ buildup.
4. Empty the Dish Rack and Run the Dishwasher
A full dish rack sitting on the counter signals “we haven’t finished cleaning yet.” Even if the dishes are perfectly clean, a crowded rack looks messy. Empty it, put everything away, and give yourself a clean counter to work with before guests arrive.
At the same time, run and empty the dishwasher if it has dirty dishes in it. A loaded dishwasher that hasn’t run means you’ll have nowhere to put dishes during or after the meal. Running the dishwasher before guests show up, and then emptying it, gives you a full empty machine ready to absorb cleanup during and after the party. This single habit can cut post-party kitchen cleanup time in half.
If you host regularly, consider making “run and empty the dishwasher” a standing task on your pre-guest cleaning checklist, just like wiping down the stove. Guests who are always welcomed back tend to notice the small things, and a spotless kitchen is always one of them.
5. Wipe Down Counters, Stovetop, and High-Touch Surfaces
After dishes are handled, shift your attention to surfaces. Wipe down every kitchen counter, the stovetop, the microwave handle, and the refrigerator handle. These are the high-touch surfaces guests will encounter during a meal, and they’re also the ones most likely to carry grease, crumbs, and residue from cooking prep.
Use a microfiber cloth with an all-purpose cleaner for counters, and a degreaser for the stovetop if you’ve been cooking. According to EPA Safer Choice, choosing cleaners that carry the Safer Choice label means you’re using products that have been evaluated for human health and environmental safety, a smart move when you’re hosting guests with unknown sensitivities.
Extend the wipe-down to the bathroom, specifically the faucet handle, toilet flush lever, light switches, and door handles. These surfaces get touched constantly during a gathering and rarely get cleaned during a standard quick tidy. Wiping down high-touch surfaces before guests arrive is a pre-party cleaning step that goes beyond appearance and protects your guests’ health.
6. Refresh Bathrooms From Top to Bottom
The bathroom is the one room every guest will use. It deserves dedicated attention before anyone shows up. Start at the top: wipe down any shelving or light fixtures that have collected dust. Move to the mirror (streak-free glass cleaner and a microfiber cloth), then the sink and faucet, then the toilet, and finally the floor.
Replace the hand towel with a fresh one. Put out a full soap dispenser or a new bar of soap. Empty the trash can, and add a new liner. If you have a toilet brush tucked behind the toilet, make sure it looks clean too. Details like this are noticed more than you think.
The bathroom refresh is one of the most important things to do before company arrives, and it’s also one of the areas where a recurring professional cleaning makes the biggest difference. Home cleaning experts who come weekly or biweekly keep bathrooms at a baseline level of clean that makes the pre-guest refresh a 10-minute job instead of a 45-minute ordeal.
7. Clear Clutter from Entryways and Living Areas
Guests form their first impression of your home within seconds of walking through the door. The entryway sets the tone. Clear shoes, bags, mail, and anything else that has accumulated near the front door before guests arrive. If you have a coat closet, make space so guests can hang their things without awkward shuffling.
In the living room, do a lap with a laundry basket. Anything that doesn’t belong goes in the basket, which then goes out of sight. Fluff the couch cushions, fold any throw blankets, and remove items from coffee table surfaces except for intentional decor. Clearing clutter from living areas before guests arrive is the single fastest way to make a space look cleaner without actually cleaning it.
This is also a good moment to think about what guests might need on hand. A basket with extra napkins, a few phone chargers, and a candle within reach signals a thoughtful host. Think of it as staging the space for comfort, not just appearance.
8. Get Food Storage Containers Ready Ahead of Time
One of the smartest pre-guest preparation habits has nothing to do with scrubbing, but it makes cleanup dramatically easier. Set out to-go containers before the meal so that sending leftovers home with guests is a quick and organized process rather than a chaotic search through your kitchen cabinets.
Even better, serve food in containers that double as food storage. Dishes that go straight from oven to table to fridge in the same container cut down on the number of pots and pans you have to wash after the party. This approach, pairing smart serving choices with pre-guest prep, is one of the 12 habits of guests who are always invited back, and it’s a hosting habit that reduces the overall cleaning burden before and after an event.
If you regularly host gatherings and want the post-event cleanup to go smoothly, consider holiday cleaning services that handle the deep work after the celebration so you can spend time with family instead of scrubbing pans.
9. Handle Floors and Entryway Mats
Floors are often the last thing people think about before guests arrive and the first thing guests notice when they walk in. Give the entryway a quick sweep or vacuum, shake out the front door mat, and do a fast sweep or vacuum of the main living areas and kitchen.
If you have hard floors and a mop handy, a quick damp mop in the kitchen and bathroom makes a noticeable difference. For carpeted areas, a single pass with the vacuum picks up pet hair, crumbs, and debris that would otherwise get ground in during a gathering.
The question of whether it is rude to ask guests to remove their shoes is one that comes up often in hosting conversations. Regardless of your preference, having a clean mat and a small basket or tray for shoes near the entry removes the awkwardness and keeps floors cleaner throughout the event without a word being said.
10. Do a Final Walk-Through With Fresh Eyes
Once the main tasks are done, spend five minutes doing a final walk-through of your home before guests arrive. Walk through every room that guests will use and look at it the way they will see it, from the doorway, as a first impression. This is the step where you catch the things you missed: a dish towel draped over the wrong hook, a smudge on the bathroom mirror, a light left off that makes a room feel dim.
The walk-through is also the time to light a candle or turn on a diffuser so the home smells as clean as it looks. Smell is one of the most immediate signals of a clean home, and EPA indoor air quality guidance notes that ventilation plays a key role in maintaining a healthy, fresh-smelling indoor environment. Open a window if weather allows, even for 10 minutes before guests arrive.
For ongoing peace of mind, recurring house cleaning Arizona homeowners rely on means your home never gets far from guest-ready. When a professional team handles the deep work on a regular schedule, your pre-guest checklist shrinks from 90 minutes to 20.
Frequently Asked Questions
What should I clean first before guests arrive?
Start with the kitchen sink and counters, then move to the bathroom. These two rooms get the most scrutiny from guests and have the most impact on the overall impression of your home. Once those are handled, clear clutter from the entryway and living areas. A targeted 30-minute clean in those three zones covers the majority of what guests will see and use.
How long does it take to clean a house before guests arrive?
A solid pre-guest clean of the key areas, kitchen, bathrooms, living spaces, and entryway, takes between 30 and 90 minutes depending on the starting condition of the home. Homes that get regular professional cleaning typically need only 20 to 30 minutes of tidying before guests arrive because the deep work is already done.
What things should I have on hand for guests?
Fresh hand towels, a full soap dispenser, extra toilet paper, and a clean trash can liner in the bathroom are essentials. In the living area, extra blankets and phone chargers are appreciated. In the kitchen, having to-go containers ready so guests can take home leftovers is a thoughtful touch that reduces cleanup time too.
Is it rude to ask guests to remove their shoes?
It depends on your household norms and how you frame the request. A small basket or tray near the door with a friendly sign is a low-pressure way to invite guests to remove shoes without making it feel like a rule. Many guests appreciate the cue, and it keeps your freshly cleaned floors looking good throughout the event.
How do I keep my home consistently guest-ready without spending hours cleaning?
A recurring cleaning schedule is the most reliable answer. Weekly or biweekly professional cleaning keeps every room at a baseline level that only needs light tidying before guests arrive. Elite Maids House Cleaning offers weekly, biweekly, and monthly recurring visits across Arizona’s Valley communities, so you can stay guest-ready year-round without the marathon clean sessions.
If hosting feels like a workout in cleaning prep every time, it may be time to change your system, not just your schedule. Contact Elite Maids house cleaning today for a free quote and find out how a recurring cleaning plan can keep your home guest-ready every day of the week, not just the hours before company arrives. Learn more at Elite Maids House Cleaning and book your first visit online in minutes with an instant quote, no phone call required.
Vacuum vs. Broom: When to Use Each for Cleaner Floors
SHARE:
Use a vacuum when you need to pull fine dust, allergens, and debris from carpet, rugs, or hard floors without scattering particles into the air. Reach for a broom when you want quick, quiet cleanup of larger visible debris on hard surfaces. Both tools have a place in a smart cleaning routine, and the rest of this guide breaks down exactly when each one wins.
Vacuum vs. Broom: Understanding the Core Difference
The vacuum versus broom debate comes down to one fundamental question: do you want to contain debris or move it? A vacuum cleaner uses suction to pull dirt into a sealed chamber, trapping fine particles, pet dander, and allergens so they never re-enter the air you breathe. A broom sweeps debris into a pile you collect with a dustpan, which works well for large crumbs and grit but inevitably stirs up the finer dust that settles back onto surfaces, countertops, and furniture.
When you choose between a vacuum and a broom, you are really choosing between thoroughness and speed. Vacuuming picks up what you cannot see. Sweeping with a broom handles what you can. For a truly clean home, both tools belong in your arsenal, but knowing which one to grab first makes a real difference in the quality of your results.
According to the EPA’s indoor air quality guidance, fine particulate matter inside the home is a significant contributor to poor air quality, and vacuuming with a HEPA-filtered machine is one of the most effective ways to reduce that load. Sweeping alone simply cannot accomplish the same result because the act of brushing the floor launches fine particles back into suspension.
When to Use a Vacuum: The Right Situations for Suction
Choosing to vacuum makes the most sense in these situations:
Carpets and rugs: A broom is useless on pile surfaces. Vacuuming is the only practical way to extract embedded dirt, pet hair, and dust from carpet fibers. Run the vacuum slowly and make overlapping passes to pull debris from deep in the pile.
Allergy households: If anyone in your home suffers from dust mite allergies, pet dander sensitivity, or asthma, use a vacuum with a HEPA filter on hard floors as well as carpets. The American Lung Association recommends HEPA-filtered vacuuming as a frontline strategy for reducing indoor allergen levels.
After cooking or heavy foot traffic: Fine flour, dried spices, and tracked-in soil are all microscopic enough to become airborne when swept. Vacuuming contains them instantly.
Under furniture and in corners: Vacuum attachments, especially crevice tools and brush heads, reach underneath sofas, inside cabinet toe kicks, and along baseboards far more effectively than a broom bristle.
Pet-owner homes: Pet hair wraps around broom bristles and is difficult to collect cleanly. Suction lifts hair off the floor and deposits it directly into the bin.
Before mopping: Always vacuum hard floors before you mop. A broom can leave behind fine grit that scratches wood or tile when you drag a wet mop over it.
The rule of thumb for when to use a vacuum: if the debris is fine, fibrous, or microscopic, suction wins every time. Using a vacuum on hard floors might feel like overkill, but it produces measurably cleaner results than sweeping alone.
When to Use a Broom: The Right Situations for Sweeping
Despite the vacuum’s advantages in thoroughness, there are plenty of situations where reaching for a broom is the smarter move:
Large debris on hard floors: Broken crackers, cereal, pasta, or potting soil are bulky enough that a broom gathers them faster than a vacuum’s suction port can pull them in. Sweeping that pile into a dustpan takes seconds.
Outdoor spaces: Patios, garages, driveways, and entryways call for a push broom or an angled broom. These surfaces are not places you would take a household vacuum.
Quiet hours: Vacuums are loud. Early morning cleanups, nap time, or late-night spills are all situations where a broom lets you tidy up without waking anyone.
Quick pre-party sweep: When guests arrive in 10 minutes and the kitchen floor has crumbs, a broom is faster to deploy, maneuver, and put away than a full vacuum setup.
Delicate hard floors: Certain antique or hand-scraped hardwood floors can scratch from a vacuum’s beater bar. A soft-bristle broom with fine fibers is gentler for a quick pass.
No power access: Power outages, outdoor cleanups away from outlets, or areas without nearby electrical access all favor the broom.
Using a broom is ideal for visible, chunky messes that need to be moved fast. Think of sweeping as triage: it handles the obvious debris so you can decide whether the situation warrants following up with a vacuum or a mop.
Best Flooring Types for Vacuuming vs. Sweeping
Not all floors respond the same way to each tool, and understanding which flooring type suits vacuuming versus sweeping helps you clean smarter without damaging your surfaces.
Hardwood and Engineered Wood
Both tools work on wood floors, but with caveats. Use a broom with soft, fine-angled bristles for a quick pass. For deeper cleaning, use a vacuum set to “hard floor” mode with the beater bar turned off. Spinning brush rolls on hardwood can leave micro-scratches over time. The goal when choosing between vacuuming and sweeping on wood is surface protection first, thoroughness second.
Tile and Stone
Tile handles both tools well. A broom moves large debris efficiently, while a vacuum excels at pulling dust and grit from grout lines, which bristles tend to skip over. If your tile floors have textured grout, vacuuming is the clear winner for thorough cleaning.
Carpet and Area Rugs
Carpet is a vacuum-only zone. No broom can clean carpet pile. For area rugs, a rubber broom can lift hair from low-pile rugs in a pinch, but regular vacuuming is the only method that pulls embedded debris from deeper fibers.
Laminate
Laminate is sensitive to moisture and scratching. A soft broom is gentle and safe for quick passes. When you vacuum laminate, turn off the beater bar and use a soft floor head attachment. Either way, follow up with a dry or barely damp microfiber mop for the cleanest result.
Vinyl and LVP
Luxury vinyl plank and standard vinyl both handle vacuuming easily. Choose a vacuum setting without a spinning brush roll to avoid scuffing the surface coating. Sweeping with a microfiber-tipped broom also works beautifully on vinyl for everyday dust and debris.
How Vacuuming Affects Indoor Air Quality
One of the most overlooked reasons to prefer vacuuming over sweeping on interior floors is the impact each method has on the air your family breathes. Every time you sweep, you temporarily improve the floor’s appearance while redistributing fine particles into the breathing zone. Those particles settle back within 20 to 30 minutes, landing on surfaces you may not clean as frequently.
Vacuuming, especially with a sealed-system HEPA vacuum, captures particles as small as 0.3 microns, including dust mite debris, mold spores, pollen, and pet allergens. This matters particularly for households with children, elderly residents, or anyone with respiratory conditions. The EPA’s Safer Choice program emphasizes that reducing indoor pollutants through better cleaning practices, including upgraded vacuuming habits, contributes meaningfully to a healthier home environment.
If you are managing a home where deep sanitization is a priority, pairing regular vacuuming with professional home disinfection services takes your indoor environment to a level that routine sweeping simply cannot reach. That combination addresses both visible soil and the microscopic layer of contaminants living on surfaces throughout your home.
Building a Smarter Floor Cleaning Routine
The most effective floor cleaning routine does not treat the vacuum and broom as rivals. It uses them in sequence based on the task at hand. Here is a practical framework that professional cleaners use:
Daily: Spot sweep kitchen and high-traffic hard floors with a broom or dry microfiber mop to manage crumbs and visible debris between deeper cleans.
Two to three times per week: Vacuum carpets, rugs, and any hard floors where fine dust accumulates. Pay special attention to entryways, hallways, and living areas.
Weekly: Vacuum all flooring types thoroughly, including under furniture and along baseboards. Follow up hard floors with a damp mop after vacuuming.
Seasonally: Pull furniture away from walls and vacuum the areas beneath. Wash rugs and vacuum both sides of area rugs. If you host gatherings during the holiday season, schedule a professional holiday home cleaning to handle the full home before or after the event.
This kind of structured routine prevents the buildup that makes cleaning feel overwhelming. When you sweep daily and vacuum regularly, you spend less time on each session because you are never starting from scratch.
For families in Arizona who want professional-grade results without the time investment, get a free house cleaning quote and see how Elite Maids can handle the heavy lifting on a recurring schedule that fits your life.
Choosing the Right Vacuum or Broom for Your Home
Not all vacuums or brooms are created equal, and picking the right tool for your specific flooring situation prevents damage and improves results. Here is what to look for when selecting each type:
Choosing a Vacuum
HEPA filter: Essential for allergy households. Captures fine particles that standard filters release back into the air.
Adjustable height and suction: Lets you transition from carpet to hard floors without switching machines.
Beater bar on/off switch: Protects hardwood and laminate while still giving you the power you need on carpet.
Canister vs. upright: Canisters maneuver more easily around furniture and stairs. Uprights cover large carpeted areas faster. Cordless stick vacuums offer convenience for quick passes on hard floors.
Choosing a Broom
Angled vs. straight bristles: Angled brooms reach corners and edges more precisely. Straight push brooms cover wide open areas efficiently.
Soft vs. stiff bristles: Soft flagged bristles capture fine dust on smooth floors. Stiff bristles work better for outdoor surfaces and rough concrete.
Microfiber broom heads: A microfiber dust mop-style broom traps fine dust on hard floors instead of just pushing it around, giving you results closer to vacuuming without a cord.
Rubber brooms: Excellent for pulling pet hair from low-pile carpet and upholstery when a vacuum is not available.
The right combination of tools, a quality vacuum with HEPA filtration paired with a soft-bristle angled broom, covers virtually every floor type in a typical Arizona home. According to Good Housekeeping’s cleaning guides, investing in the right cleaning tools is one of the highest-leverage changes you can make to the quality and speed of your cleaning routine.
If you want the job done right without spending your weekend comparing bristle types, Arizona’s most-reviewed house cleaning company brings professional-grade equipment and trained cleaners to every visit.
Whether you prefer to clean on your own schedule or hand the job off to professionals, knowing when to use a vacuum versus a broom puts you in control of a cleaner, healthier home. Ready to skip the debate entirely? Contact Elite Maids house cleaning today for a free quote and let Arizona’s most trusted residential cleaning team handle every floor in your home, every time.
Frequently Asked Questions
Is it better to vacuum or sweep hardwood floors?
Vacuuming is generally better for hardwood floors because it captures fine dust without scattering it into the air. Use a vacuum with the beater bar turned off and a soft floor head. A soft-bristle broom works well for quick passes between vacuum sessions, but for thorough cleaning, suction is more effective and leaves less residue behind.
Does sweeping with a broom spread dust around the room?
Yes, sweeping a broom across hard floors does stir up fine dust and lighter particles, sending them airborne for 20 to 30 minutes before they resettle. For allergy-prone households or homes with young children, vacuuming with a HEPA filter is a significantly better option for interior floors because it captures those fine particles rather than redistributing them.
How often should you vacuum versus sweep?
A quick sweep of kitchen and high-traffic floors can happen daily to manage visible crumbs and debris. Full vacuuming of carpets should happen two to three times per week, while hard floors benefit from a vacuum pass at least once a week. In homes with pets or allergy sufferers, vacuum all floors every two to three days for the best results.
Can you vacuum instead of sweeping before mopping?
Absolutely, and it is actually the preferred method. Vacuuming before mopping picks up fine grit and debris that a broom might miss or scatter. Dragging a wet mop over unswept or poorly swept floors can scratch surfaces and push loose soil into a muddy film. Vacuuming first gives you a cleaner, safer surface to mop.
What is the best tool for cleaning floors with pet hair?
A vacuum with strong suction and a motorized brush roll is the most effective tool for homes with pet hair. Pet hair clings to broom bristles and is difficult to collect neatly. Rubber brooms are a useful secondary option for lifting hair from low-pile rugs or upholstery, but for full-home cleaning, a dedicated pet vacuum outperforms any broom.
I've Been a Professional House Cleaner for 18 Years in Glendale: Here Are My Best Before & After Secrets
SHARE:
After 18 years of professional house cleaning in Glendale and across the Valley, I’ve seen just about every type of mess a home can hold. The difference between a so-so clean and a jaw-dropping before-and-after result comes down to a repeatable system, the right products, and knowing which spots most cleaners skip. This post walks through the exact methods, habits, and hard-won lessons that produce those dramatic transformations you see in real before-and-after cleaning photos.
What 18 Years of Professional House Cleaning in Glendale Taught Me
When I started cleaning homes in Glendale, I thought speed was everything. It took a few years to realize that a fast clean nobody notices is worth less than a slightly slower clean that makes a homeowner gasp when they walk through the door. The secret is working a proven checklist from top to bottom, room by room, without skipping the details that separate a surface wipe-down from a true deep clean.
Glendale homes, especially in neighborhoods closer to the Westgate Entertainment District and Luke Air Force Base, collect a specific kind of dust and desert grime. The dry climate means fine particulate matter settles on every horizontal surface. EPA guidance on indoor air quality confirms that dust accumulation indoors is a genuine health concern, not just an aesthetic one. That context changes how you approach cleaning. You’re not just making things look good. You’re improving the air a family breathes every day.
Over nearly two decades, I’ve also learned that the products matter as much as the technique. Harsh chemicals can leave residue, damage finishes, and fill a home with fumes. That’s why I gravitated toward EPA Safer Choice certified products whenever possible. They work, they’re safer for kids and pets, and clients always appreciate not walking into a chemical fog after a cleaning visit. Recurring maid service clients in Glendale have told me their allergy symptoms improved once we switched to greener product options. That kind of feedback never gets old.
The biggest mindset shift for any aspiring professional house cleaner is treating every room like it has an audience. Imagine someone is about to photograph the space for a magazine spread. What would they notice? That’s your target. Work toward that standard on every visit, and before-and-after results take care of themselves.
The Professional House Cleaning Checklist That Produces Dramatic Before & Afters
A solid professional cleaning checklist is the foundation of consistent results. Without one, even experienced cleaners miss spots. With one, a new hire can produce results that rival a veteran. Here’s the framework I’ve refined over 18 years, broken down by zone.
Kitchens: Where Before & Afters Are Most Dramatic
Kitchens generate the most visible transformations. Grease builds up on cabinet faces, backsplashes, and the tops of the refrigerator in layers most homeowners don’t notice until someone else points it out. My approach: degrease cabinet fronts with a diluted dish-soap solution before touching countertops. That prevents drips from contaminating surfaces you’ve already cleaned. Then work the backsplash, the stovetop, and the inside of the microwave. Finish with countertops, the sink, and finally the floor. The sequence matters as much as the effort. Real Simple’s cleaning experts back up the top-to-bottom, back-to-front approach for exactly this reason.
Bathrooms: Professional Cleaning Tips That Actually Work
Professional cleaning tips for bathrooms almost always start with one step that amateurs skip: let the cleaner sit. Spray the toilet bowl, the tub, and tile grout with the appropriate cleaner and walk away for five minutes. By the time you come back, the chemistry has done half the work. Scrubbing immediately after spraying wastes product and effort. This dwell-time habit alone accounts for most of the difference between a mediocre bathroom clean and one that sparkles in photos. Glendale’s hard water leaves calcium deposits around faucets and showerheads, so a white vinegar soak on fixtures for 10 minutes is a simple house cleaning hack that dissolves mineral buildup without scratching chrome. According to The Spruce’s cleaning guides, regular descaling extends fixture life and keeps bathrooms looking professionally maintained between visits.
Living Areas and Bedrooms: Cleaning Fast and Professionally
Knowing how to clean a house fast and professionally in living areas means mastering a “S-pattern” dusting stroke. Move your microfiber cloth in a consistent S-shape across surfaces so you’re pushing dust toward you rather than redistributing it. Microfiber is not optional here. A cotton rag just moves dust around. A quality microfiber cloth traps particles at the fiber level, which is why professional cleaners swear by them. Dust ceiling fans and light fixtures before vacuuming floors, because what falls gets captured at the end. Vacuum upholstered furniture using the crevice tool along seams and under cushions. Those are the spots that show up in before-and-after photos when they’re finally addressed.
For clients who want to know how to maintain a clean home between our professional visits, I always recommend a short daily reset rather than a long weekend session. Check out this guide on maintaining a clean home between professional cleanings for a practical routine that keeps things manageable.
House Cleaning Hacks and Tips I Use Every Single Day
After 18 years, certain house cleaning hacks and tips become second nature. These are the ones I reach for constantly because they work every time.
The pillowcase trick for ceiling fans: Slip an old pillowcase over each fan blade and pull it back. The pillowcase catches all the dust instead of raining it onto the furniture below. Simple, fast, and the before-and-after difference on the floor alone is remarkable.
Baking soda on carpet odors: Sprinkle baking soda liberally on carpet, let it sit for 15 minutes, then vacuum. It neutralizes odors without masking them with fragrance. Glendale homes with pets benefit from this trick between deep cleans.
Two-bucket mopping: One bucket holds clean solution, one holds rinse water. Never dip a dirty mop head back into clean solution. This single habit eliminates the “dirty mop smell” that lingers after mopping and makes floors look dingy even right after cleaning.
Dish soap on baseboards: A thin layer of car wax or furniture polish on clean baseboards makes future dust slide right off. It’s a 10-minute investment that cuts your next baseboard cleaning time in half.
Toothbrush for grout and faucet bases: No professional cleaning tip list is complete without this. A dedicated old toothbrush reaches the tight curve where fixtures meet countertops, and the base of faucets where gunk concentrates. It’s the detail that clients photograph in their before-and-afters.
These tips and tricks for cleaning your house consistently are what separate a passable clean from a professional-grade result. None of them require expensive equipment. They require attention and a repeatable system.
What House Cleaners Want You to Know Before Your First Appointment
This is the section I wish every client read before booking. What house cleaners want you to know isn’t complicated, but it changes the outcome of every cleaning visit.
Decluttering before we arrive doubles the value of the clean. When surfaces are covered in items that need to be moved before we can clean underneath them, time that could go toward scrubbing tile grout goes toward shuffling objects. Even a 10-minute tidy before your cleaner arrives produces a noticeably better result. It also protects your belongings, because a professional cleaner who has to guess where items belong will place them somewhere logical but possibly not where you’d prefer.
Communicate your priorities upfront. Every home has a “most important room.” Tell your cleaner which one it is. In Glendale, I’ve worked in homes where the master bathroom was the absolute priority and others where the kitchen was the heart of everything. Knowing that shapes how we allocate time and energy across the visit.
A deep cleaning service before recurring maintenance is almost always worth it. A standard maintenance clean assumes a baseline of cleanliness. If a home hasn’t had a professional clean in months or has never had one, a one-time deep clean first resets everything to that baseline. After that, recurring visits maintain the result rather than trying to play catch-up every time. Glendale clients who start with a deep clean consistently rate their ongoing service higher because the maintenance clean can focus on what actually needs attention.
For anyone wondering what to expect before guests come over, I put together a detailed breakdown in this post about things to always clean before guests come over, which covers the spots that make the biggest impression on visitors.
Curious about how other Glendale residents are thinking about home cleaning? The Cleaning person? : r/glendale conversation captures real questions from local homeowners and shows just how universal these concerns are.
How to Deep Clean a House Professionally: Room-by-Room Strategy
Knowing how to deep clean a house professionally is different from knowing how to maintain it. A deep clean reaches the places a maintenance visit intentionally skips because they don’t need weekly attention. Here’s how a true professional approaches it room by room.
Kitchen deep clean: Empty the refrigerator and wipe every shelf and drawer with a food-safe cleaner. Clean inside the oven, including the racks. Degrease the range hood filter. Pull the refrigerator and stove out from the wall and clean behind and underneath them. Wipe inside cabinet interiors. These are the elements that transform a kitchen in before-and-after photos because homeowners rarely see or address them.
Bathroom deep clean: Remove everything from the shower or tub surround and clean the shelves, caddies, and walls individually. Clean behind and around the toilet base. Address grout with a grout brush and targeted cleaner. Wipe down the entire vanity interior. The CDC’s guidance on mold in homes makes a strong case for regular grout and tile cleaning in bathrooms, where moisture creates conditions for mold growth. Deep cleaning disrupts that cycle before it becomes a health issue.
Bedrooms and living areas deep clean: Move furniture and vacuum underneath. Wipe baseboards, door frames, and window sills with a damp cloth. Clean light switch plates and outlet covers, which accumulate skin oils and grime invisibly over time. Wipe down ceiling fan blades individually. Vacuum mattresses using the upholstery attachment. These are the details that never make it into a standard clean but define what “really clean” feels like.
If you want a full seasonal reset, our ultimate guide to spring cleaning walks through a comprehensive top-to-bottom approach designed to work alongside a professional cleaning visit.
If you’re searching for Dry cleaners in glendale ca, you’ll find that most residents are making the same discovery: hiring a consistent residential cleaning team delivers far more value than sporadic deep-clean attempts done solo. The right service partner makes all the difference for Glendale homeowners who want that before-and-after result every single visit.
How to Be a Good Professional House Cleaner: The Habits That Matter Most
People often ask me how to be a professional house cleaner and what it actually takes beyond knowing which products to use. The answer is almost entirely about systems and habits, not talent.
Carry your own professional-grade supplies. Relying on whatever the client has under the sink produces inconsistent results. A professional brings a caddy with known, reliable products, at least three different microfiber cloths designated for different surfaces (bathrooms, kitchens, general), and multiple scrubbing tools. This professionalism is part of why Consumer Reports consistently recommends hiring professionals over DIY for whole-home cleans. The tools and products gap between a homeowner and a professional is substantial.
Time yourself and build room benchmarks. A professional cleaner knows roughly how long a 200-square-foot bathroom should take. When a room is running over, you immediately know something is wrong: either the room is in worse shape than assessed, or your technique needs adjustment. This self-awareness is how to be a good domestic cleaner at any experience level.
Communicate after every visit. Leave a note, send a message, or ask directly: “Was there anything I missed or should focus on next time?” This closes the feedback loop that separates one-time cleaners from long-term service relationships. The cleaners who build loyal client bases in Glendale are almost always the ones who ask good questions and listen to the answers.
For more before-and-after insights from across the Valley, our post about professional house cleaning in Tucson covers similar transformations in a different Arizona climate and offers techniques that translate directly to Glendale homes.
You can check transparent Us cleaning services pricing and service details, and see how Cleaning in glendale prices compare so you know exactly what to expect before you book. There are no surprises.
Why Glendale Homeowners Trust Elite Maids House Cleaning
Elite Maids House Cleaning is a family-owned company and the most-reviewed residential cleaning team in Arizona. Every cleaner is background-checked, bonded, and fully insured. The team offers recurring weekly, biweekly, and monthly home cleaning, as well as holiday cleaning for the busy seasons when Glendale families host gatherings and need a home that looks its absolute best. Online booking with instant quotes means Glendale residents can schedule same-day service between 8am and 6pm without picking up the phone.
Every visit is backed by a reclean-at-no-cost satisfaction guarantee. If something was missed, the team comes back and fixes it at no charge. That confidence comes from 18 years of refining systems, training professionals who care, and treating every home in Glendale like the before-and-after photos matter. Because they do. Visit the New Era Cleaning service page to see everything available for Glendale homeowners.
Fifty dollars an hour sits at the lower end of professional house cleaning rates in the Phoenix metro area, including Glendale. Rates typically range from $50 to $90 per hour depending on the cleaner’s experience, whether the company is insured and bonded, and the type of clean required. A standard maintenance visit costs less per hour than a deep clean or move-out clean. Always confirm what’s included before comparing hourly rates across providers.
How much should I charge to clean a 2000 sq ft house?
A 2,000-square-foot home in Glendale typically costs between $150 and $280 for a standard maintenance clean, and between $250 and $400 or more for a deep clean. Pricing depends on the number of bathrooms, the home’s current condition, and whether it’s a one-time or recurring booking. Recurring clients almost always pay less per visit than one-time bookings because ongoing maintenance requires less effort than resetting a heavily soiled home.
How much do 2 hours of cleaning cost?
Two hours of professional house cleaning in the Glendale area generally costs between $100 and $160 depending on the company and scope of work. Two hours is usually sufficient for a small apartment or a targeted clean of specific rooms, but it’s not enough time for a full deep clean of a larger home. Get an instant quote online to see exactly what two hours of service covers for your specific space before booking.
What is the 20 minute rule of cleaning?
The 20-minute rule is a simple daily habit where you set a timer and clean as much as you can in 20 focused minutes rather than waiting for a full cleaning session. Professional cleaners recommend it to clients who want to maintain a tidy home between scheduled service visits. Focusing on high-traffic areas like the kitchen and bathrooms during those 20 minutes keeps buildup manageable and makes each professional cleaning visit more effective.
How to Get Rid of Pet Hair in San Tan Valley: 4 Tips for Cleaning Up Dog and Cat Hair
SHARE:
Getting rid of pet hair at home starts with a few targeted tools and habits: a damp sponge for furniture, a FurLifter or rubber brush for upholstery, a microfiber mop for hard floors, and a quality vacuum with a pet-hair attachment for carpets. These four methods tackle pet hair on every surface in your home. The tips below break down exactly how to use each one and when to call in professional backup so your cleaning san tan valley cost is always money well spent.
If you share your home in San Tan Valley with a dog, a cat, or both, you already know the struggle. Hair ends up on the sofa, on your work clothes, in the washing machine, and somehow in the refrigerator. Pet owners here deal with a dry, high-heat Arizona climate that keeps fur static-charged and clinging to every surface. The good news: with the right approach you can reduce pet hair to a manageable level and keep your home looking clean between professional visits. Elite Maids House Cleaning put together this guide specifically for San Tan Valley pet owners who are sick of dog hair everywhere and ready for a real solution.
1. Get Rid of Pet Hair on Furniture With a Damp Sponge
One of the simplest and cheapest ways to remove pet hair from upholstered furniture is a damp sponge. Wet a standard kitchen sponge, wring it out so it is barely moist, then run it across your couch cushions, armchairs, and ottomans in firm, overlapping strokes. The moisture creates just enough tack to pull loose fur into clumps you can pick up by hand or vacuum away. This trick works on microfiber, cotton canvas, and most woven fabrics.
The science is straightforward: pet hair clings to fabric because of static electricity. A slightly damp surface neutralizes that charge, so the hair releases instead of clinging deeper into the weave. Good Housekeeping regularly recommends this approach as a go-to home remedy for removing dog hair from clothes and upholstery without spending money on specialty products. For pet hair on clothes specifically, run a damp rubber glove over the fabric before tossing items in the wash. It pulls hair off in seconds and keeps your washing machine from clogging with fur.
San Tan Valley pet owners dealing with cat hair on clothes before work will find this method particularly useful: keep a small damp sponge on the bathroom counter and do a quick swipe before heading out the door. It takes ten seconds and saves your lint roller budget.
2. Pick Up Pet Hair With a FurLifter or Rubber Brush
A FurLifter is a reusable pet hair removal tool with a self-cleaning base. Unlike disposable lint rollers, it uses a fine electrostatic rubber surface that attracts and collects fur in one direction, then deposits it into the base when you retract it. No sticky sheets to run out of, no waste, and it works on both pet hair on furniture and pet hair on clothes.
Rubber brushes follow the same principle: rubber creates friction against fabric, which bunches fur into rolls you can lift away. Run the brush in short, firm strokes across your couch, car seats, or throw rugs. This is one of the most effective ways to deal with cat hair on clothes and dog hair on any woven surface. According to Consumer Reports, rubber-tipped pet hair removal tools consistently outperform tape-based rollers on upholstery and carpeted stairs.
Keep one of these tools near your front door in San Tan Valley homes where pets have free run of the furniture. A 30-second brush-down before guests arrive keeps embarrassment at bay and reduces the amount of pet hair that migrates into the rest of your home.
3. Use a Microfiber Mop for Pet Hair on Hardwood Floors
Pet hair on hardwood or tile floors is a different challenge than fur on fabric. Brooms tend to scatter light hair rather than capturing it, and standard dust mops miss the fine undercoat that builds up along baseboards. A microfiber mop is the right tool here. The split fibers create millions of tiny hooks that grab and hold pet hair, dander, and the fine desert dust that blows through San Tan Valley homes.
Dry microfiber mopping should happen daily if you have a heavy shedder. Work in an S-pattern across the floor so you are always pushing hair toward a single collection point rather than pushing it into the next room. Once the pad is full, shake it into a trash bag outside rather than inside, otherwise the fur just becomes airborne again. Wash microfiber pads regularly because packed-in pet hair reduces their effectiveness fast.
For a deeper clean of your hard floors, pair the dry mop pass with a slightly damp microfiber pass using a pet-safe cleaning solution. This picks up dander, which is a significant indoor air quality concern according to the American Lung Association. Pet dander is a known asthma and allergy trigger, so managing it consistently is about more than appearances. If you want a thorough, professionally handled result, a deep cleaning from a trained crew covers baseboards, floor vents, and under furniture where dander accumulates most.
4. Vacuum Smarter to Remove Dog and Cat Hair From Carpet
Vacuuming is the backbone of any pet hair removal strategy, but not all vacuuming is equal. Standard vacuums often push fine pet hair deeper into carpet fibers rather than extracting it. To actually remove dog and cat hair from carpet, you need a vacuum with strong suction, a motorized brush roll, and ideally a HEPA filter to trap fine dander particles instead of recirculating them through the air.
Vacuum carpets and rugs in two directions: first with the grain, then against it. Going against the pile loosens embedded fur that a single-direction pass misses. Pay extra attention to the edges of rooms and under furniture, where pet hair collects undisturbed. Vacuum upholstered furniture attachments are also worth using on sofas and pet beds weekly.
For the washing machine problem many San Tan Valley pet owners face: before washing pet-hair-covered laundry, run items through a 10-minute dryer cycle on low heat with a dryer sheet. The heat loosens the hair and the dryer sheet reduces static. The fur ends up in the lint trap rather than clogging your machine. Clean that lint trap after every pet-laundry cycle. The Real Simple cleaning team recommends this dryer-first method as one of the most reliable home remedies for removing dog hair from clothes before washing.
If your vacuum schedule has slipped or the carpets feel overdue, a deep cleaning service that includes carpet vacuuming, baseboard wiping, and vent cleaning can reset your whole home.
5. Control Pet Hair in the House With Grooming and Diet
The single most effective way to control dog hair in the house is to reduce how much hair your pet sheds. Regular grooming, ideally outside, dramatically cuts the volume of fur that ends up indoors. For dogs, brush at least three times a week and consider a professional groom every four to six weeks during heavy shedding seasons. For cats, a de-shedding brush used twice a week can reduce loose hair by more than half.
Diet also plays a bigger role than most pet owners realize. Pets deficient in omega-3 fatty acids tend to shed more and have drier coats that produce more airborne dander. Talk to your vet about a diet or supplement change if shedding seems excessive. This is not just about how to reduce cat hair in the home aesthetically; managing dander means better indoor air quality for the whole household.
In San Tan Valley, where summers push temperatures past 110 degrees, pets shed more aggressively as they regulate their body temperature. Build your grooming routine around the seasonal calendar, ramping it up in spring and early summer before peak shedding hits. Pair consistent grooming with a recurring maid service so the fur that does get indoors is addressed on a regular schedule before it builds up.
6. Hair-Proof Your Home With Smart Furniture and Layout Choices
Some furniture fabrics are magnets for pet hair. Velvet, chenille, and rough-textured weaves trap hair deeply and are very difficult to clean. If you are shopping for new furniture in your San Tan Valley home and you have pets, choose leather, faux leather, microfiber, or tightly woven synthetic fabrics. These surfaces hold hair on top rather than embedding it, so wiping or vacuuming picks it up easily.
Throw covers and washable slipcovers on the cushions your pet uses most. Wash them weekly on hot with a cup of white vinegar in the rinse cycle: the vinegar loosens hair and acts as a natural fabric softener, reducing static cling that attracts more fur. The Spruce notes that vinegar is one of the most underrated home tools for reducing pet hair adhesion on washable fabrics.
Area rugs in high-traffic pet zones should have low pile so they are easier to vacuum and shake out. Avoid shag or high-loop rugs entirely if you want to keep pet hair manageable. For natural cleaning solutions that are safe for homes with pets and kids, check out our post on eco-friendly home cleaning products that work without harsh chemicals.
7. Pull Pet Hair Out of the Air With the Right Filters
Pet dander and fine hair particles stay suspended in the air far longer than visible fur that settles on surfaces. The EPA’s indoor air quality guidelines identify pet dander as one of the primary biological pollutants affecting home air quality. If you are sneezing, dealing with itchy eyes, or noticing a musty smell in a pet-heavy room, airborne dander is likely a factor.
The most practical fix is to upgrade your HVAC filter to a MERV 11 or MERV 13 rating, which captures particles as small as dander and fine pet hair. Change filters every 30 to 45 days if you have multiple pets, rather than the standard 90-day recommendation for pet-free homes. Add a standalone HEPA air purifier in the rooms where your pets spend the most time.
Also vacuum your air vents and return registers regularly. Pet hair accumulates on vent covers and gets pulled into the ductwork, then redistributes throughout your home every time the HVAC cycles. A thorough cleaning of vents is part of every deep clean in San Tan Valley that Elite Maids House Cleaning provides. Considering how often the AC runs here, clean vents make a real difference in both air quality and how quickly pet hair reaccumulates on freshly cleaned surfaces.
8. Establish a Weekly Cleaning Routine to Stay Ahead of Pet Hair
The biggest mistake pet owners make is cleaning reactively, waiting until pet hair is visibly out of control before doing anything about it. By that point, fur is embedded in carpet, packed into corners, and clinging to every upholstered surface. A consistent weekly cleaning routine keeps hair from ever reaching that stage.
Here is a simple weekly framework for San Tan Valley households with pets:
Daily: Dry microfiber mop of all hard floors and a quick sponge or FurLifter pass over the sofa.
Twice a week: Brush your pet outside, wash any pet throws or covers.
Weekly: Vacuum all carpets in two directions, wipe down baseboards, clean vent covers, and wash pet bedding on hot.
Monthly: Wash curtains and area rugs, clean under furniture, and replace HVAC filters.
If keeping up with this schedule is a challenge alongside work and family, a professional house cleaning on a recurring schedule means the deep work is always handled. For help figuring out whether weekly, biweekly, or monthly visits make the most sense for your household, our guide on choosing the right cleaning schedule walks through the factors that matter most.
9. Know When to Call a Professional Cleaner for Pet Hair Buildup
There is a point where DIY pet hair removal hits its limit. When fur is ground into carpet backing, when dander has built up inside furniture cushion seams, when baseboards are caked in hair and dust, and when the whole home just has that unmistakable pet smell, it is time for a professional reset.
A professional deep cleaning service goes well beyond what a homeowner can do with consumer tools. Trained cleaners work systematically through every room, reaching under and behind furniture, scrubbing baseboards, cleaning vent covers, and sanitizing surfaces where dander and hair accumulate. For pet owners in San Tan Valley, booking a periodic deep clean, even once a quarter, dramatically reduces the baseline level of pet hair and dander that your regular routine has to manage. For a full room-by-room checklist of what a deep clean covers, our whole-house deep cleaning checklist is a helpful reference.
If you are preparing to move out of a pet-friendly rental in San Tan Valley, a move-out cleaning that specifically addresses pet hair and odor on carpets, walls, and floors can be the difference between getting your deposit back and losing it. Elite Maids House Cleaning handles exactly these situations for San Tan Valley renters and homeowners every week.
You can book your cleaning online in minutes with an instant quote and same-day availability from 8am to 6pm. No phone call required.
Closing: Get a Clean, Pet-Hair-Free Home in San Tan Valley
Managing pet hair in a San Tan Valley home is absolutely doable with the right tools, a consistent routine, and professional help when things pile up. The tips above cover every surface and every scenario, from quick daily maintenance to a full seasonal reset. cleaning services san tan valley are closer than you think, and the results speak for themselves. Every cleaner at Elite Maids House Cleaning is background-checked, five-star rated, bonded, and fully insured, and every visit is backed by a reclean-at-no-cost satisfaction guarantee.
Ready to stop fighting pet hair on your own? Reach out to our team through house cleaners San Tan Valley and contact Elite Maids House Cleaning today for a free quote. You deserve a clean home, and your pets do too.
Frequently Asked Questions
What do detailers use to remove pet hair?
Auto detailers most commonly use rubber drag brushes, pumice stones, and compressed air to lift embedded pet hair from car upholstery and carpet. A rubber brush creates static friction that clumps the hair for easy removal. Some detailers also use a spray bottle of water to dampen fabric before brushing, which reduces static and makes the hair release more easily from tightly woven fibers.
Does vinegar get rid of pet hair?
Vinegar does not remove pet hair on its own, but it helps significantly in the laundry. Adding half a cup of white vinegar to the rinse cycle reduces static cling in fabrics, which causes pet hair to release rather than stick. It also acts as a natural fabric softener. For surfaces, a diluted vinegar spray can reduce static on upholstery so follow-up wiping or vacuuming picks up more hair in a single pass.
How to get pet hair off everything?
The most effective multi-surface approach combines a few tools: a damp rubber glove or sponge for upholstery and clothes, a microfiber mop for hard floors, a HEPA vacuum with a motorized brush roll for carpet, and a FurLifter or rubber brush for quick touch-ups throughout the day. For clothes before washing, run them through a 10-minute dryer cycle on low first to loosen embedded hair, then wash normally.
What pulls pet hair out of the air?
HEPA air purifiers are the most effective devices for capturing airborne pet dander and fine hair particles. A true HEPA filter traps particles down to 0.3 microns, which covers dander and the finest fur fibers. Upgrading your HVAC filter to a MERV 11 or MERV 13 rating also captures airborne pet particles every time your system cycles. Changing filters every 30 to 45 days in a multi-pet home keeps this protection working consistently.
Before guests arrive, focus on six key areas: the entryway, kitchen, bathrooms, high-touch surfaces, guest rooms or common spaces, and floors. These are the spots guests notice most, and tackling them in the right order makes your home feel genuinely welcoming. The sections below walk through exactly what to clean in each area so you can host with confidence.
Whether you’re hosting a dinner party, a holiday gathering, or just a friend stopping by, getting your home guest-ready doesn’t have to mean a full weekend overhaul. If you’re looking for a professional house cleaning service in Arizona to handle the heavy lifting, Elite Maids House Cleaning has you covered. But if you’re doing it yourself, this checklist will make sure you hit every spot that actually matters.
1. The Entryway: Your Home’s First Impression
The entryway sets the tone for everything that follows. It’s the first thing guests see when they walk through the door, and a cluttered or dirty entryway instantly signals that the rest of the home might not be much better. Cleaning your entryway before guests arrive is one of the highest-impact things you can do in the least amount of time.
Start by clearing the floor of shoes, bags, and anything that’s just sitting there waiting to be put somewhere else. Wipe down the front door itself, inside and out. Fingerprints, smudges, and dust collect on door frames and handles constantly, and guests physically touch the door handle before they even step inside. Sweep or vacuum the entryway floor, and if you have a doormat, shake it out or replace it if it’s past saving.
Wipe down the door handle, door frame, and light switch plate
2. The Kitchen: The Room Guests Always Wander Into
No matter what kind of gathering you’re hosting, guests end up in the kitchen. It’s just the nature of entertaining. That makes the kitchen one of the most important rooms to clean before guests arrive. People notice smells, sticky countertops, and a sink full of dishes, even when they’re trying to be polite about it.
Wash any pots, pans, and dishes beforehand so you’re not stacking dirty cookware on top of each other while trying to entertain. Clear the counters as much as possible. A clutter-free counter reads as clean even if you haven’t scrubbed it yet, but go ahead and wipe it down with an all-purpose cleaner. Pay special attention to the stovetop and the area around the sink, both of which collect grease and food residue fast.
Empty the trash can before guests arrive. This is one of the most overlooked steps in the whole cleaning-house-for-guests process, but a half-full or full trash can often has an odor that spreads through the kitchen and adjoining rooms. Replace the bag so the can is fresh.
Wash or load all dishes and put away any drying rack items
Wipe down countertops, the stovetop, and the backsplash
Empty and reline the trash can
Clear the sink and wipe it dry
Wipe down appliance fronts (fridge, microwave, dishwasher)
Sweep or mop the kitchen floor
For a broader seasonal reset of the kitchen and the whole house, the ultimate guide to spring cleaning covers a complete top-to-bottom approach you can apply any time of year.
3. Bathrooms: The Room That Makes or Breaks the Visit
Bathrooms are where guest opinions of your home get formed. A dirty bathroom is memorable in the worst way. Cleaning your bathroom before guests come over doesn’t take as long as you think, especially if you focus on what guests actually see and touch rather than trying to do a full deep clean every time.
Scrub the toilet, including the base and the back, and wipe down the seat. Spray and wipe the sink and faucet handles. Clean the mirror. Replace the hand towel with a fresh one if it’s been hanging there a while. Put out a new roll of toilet paper and make sure there’s a spare visible so guests don’t have to go hunting. If you have a shower or tub that might be visible, give the exterior a quick wipe even if you’re not cleaning the whole thing.
Pay attention to the floor. Hair and dust collect around the base of the toilet and along the wall corners. A quick sweep and mop makes a big difference. And if your bathroom has any tendency toward mildew, especially in humid climates or monsoon season here in Arizona, make sure there’s no visible mold on grout or caulk. The EPA’s guidance on mold is clear that bathroom surfaces are one of the most common spots for mold growth in residential homes.
Scrub and wipe down the toilet, including the base
Clean the sink and faucet handles
Wipe the mirror
Replace hand towels and set out fresh toilet paper
Sweep and mop the floor
Empty the bathroom trash can
If your bathroom needs more than a quick wipe-down, our home disinfection services go well beyond the surface to sanitize the areas guests come into contact with most.
4. High-Touch Surfaces: What Guests Notice and Touch Most
High-touch surfaces are exactly what they sound like: the spots in your home that get touched over and over throughout the day. These areas accumulate germs, fingerprints, and grime faster than anywhere else, and they’re often completely forgotten in a pre-guest cleaning routine. Cleaning high-contact surfaces before guests arrive is a quick task that makes the whole home feel cleaner and more hygienic.
Work through each room and look for the things everyone touches. Light switches, door handles, cabinet pulls, remote controls, stair railings, and countertop edges all fall into this category. A microfiber cloth dampened with an all-purpose cleaner moves fast through these spots. According to Good Housekeeping’s cleaning experts, most people skip these surfaces entirely during routine cleaning, which means they can go weeks without being wiped down.
Light switches in every room guests will use
Door handles and knobs throughout the main living areas
Cabinet pulls in the kitchen and bathroom
TV remotes and shared devices
Stair railings if your home has stairs
Chair backs and armrests
If you’re short on time and want to cover these surfaces thoroughly, a Phoenix Valley house cleaning team can move through all of these spots in a fraction of the time it takes on your own.
5. Guest Rooms and Common Living Spaces: Where Guests Actually Spend Their Time
Whether you have a dedicated guest room or your guests will be spending time in the living room and dining room, these common spaces need attention before anyone arrives. This is where guests sit, relax, and form their overall impression of your home, so cleaning guest spaces before visitors come over goes a long way.
In the living room, fluff and straighten couch cushions, dust surfaces like coffee tables and shelves, and wipe down any glass surfaces. Decluttering these areas matters as much as cleaning them. Clutter reads as chaos even in a clean room. Clear off flat surfaces like side tables, the dining table, and the coffee table. Put things away rather than just shifting them to another spot.
If you have a dedicated guest room, make the bed with fresh sheets. Wipe down the nightstand and any surfaces a guest might place things on. Check that there are clean towels available and that the closet has a few free hangers. These small details signal that you actually prepared for them, which guests genuinely appreciate.
Straighten and fluff furniture cushions
Dust shelves, tabletops, and entertainment centers
Wipe glass surfaces and framed photos
Declutter flat surfaces throughout the living area
Make the guest bed with fresh linens if applicable
6. Floors: The Surface That Carries Every Bit of Dirt in Your Home
Floors are the foundation of a clean home. According to cleaning experts, floors carry all of the dirt that comes into the home, so vacuuming and mopping is essential before welcoming visitors. It’s easy to underestimate floors because you’re not always looking down, but guests are, especially when they walk in and sit down.
Vacuuming before guests arrive removes pet hair, dust, crumbs, and debris from carpets and hard floors. Follow up with a mop on hard flooring surfaces in the kitchen, bathrooms, and entry. Pay attention to corners and the edges along the baseboards, where dust tends to collect and isn’t always caught by a center-of-room vacuum pass.
If you have rugs, shake them out or run a vacuum over them. Area rugs in entryways and living rooms trap a surprising amount of debris. For hardwood floors, use a cleaner designed for the specific finish to avoid streaking or dulling the surface. Real Simple’s cleaning guides recommend cleaning floors last in any room so that debris from wiping surfaces above doesn’t fall onto floors you’ve already done.
Vacuum all carpeted areas and rugs
Sweep hard floors in the entry, kitchen, and hallways
Mop kitchen, bathroom, and entryway floors
Clean along baseboards and into corners
Shake out or vacuum area rugs
Need help covering all six of these areas before a big event? Our professional disinfection and deep clean services are built exactly for pre-event and pre-guest preparation, covering every surface from top to bottom so you don’t have to.
Quick Bonus Tips: The Forgotten Spots That Guests Notice
Once you’ve covered the six main areas, a few extra touches make a real difference. These are the forgotten spots that often don’t make it onto a standard cleaning-house-for-guests checklist, but guests tend to notice them.
Smell: Odors are one of the first things guests notice. Take out all trash, check the fridge for anything past its prime, and open a window or use a subtle, non-overwhelming air freshener. Avoid heavy scent sprays that can irritate guests with allergies or sensitivities.
Pet areas: If you have pets, clean their feeding area, wash their bedding, and vacuum upholstered furniture thoroughly. Pet hair on a couch is one of the most commonly noticed things guests encounter.
Ceiling fans and light fixtures: Dusty fan blades are visible from below and can actually drop dust onto surfaces when the fan runs. A quick wipe on the way through a room catches this.
Window sills and blinds: Dust collects quickly here and is easy to spot in natural light. A damp cloth along each window sill takes about 30 seconds per window.
The fridge exterior: If guests are helping themselves to drinks or food, they’ll touch the fridge. Wipe down the handle, the front surface, and the top if it’s visible.
Book a Pre-Guest Cleaning with Elite Maids House Cleaning
Cleaning your home before guests arrive doesn’t have to fall entirely on your shoulders. Elite Maids House Cleaning is a family-owned Arizona maid service serving Phoenix, Mesa, Scottsdale, Gilbert, Chandler, Glendale, Queen Creek, San Tan Valley, Tucson, Flagstaff, and the surrounding communities. Every cleaner is background-checked, bonded, fully insured, and rated five stars. We offer event cleanings, deep cleans, and recurring service backed by a reclean-at-no-cost satisfaction guarantee.
What are the most important things to clean before guests arrive?
The most important areas are the bathroom, kitchen, entryway, and floors. Guests form their first impression at the door and will almost certainly use your bathroom and pass through your kitchen. High-touch surfaces like door handles and light switches matter too, because they’re used constantly but rarely cleaned. Tackle those five areas first, and the rest of the home falls into place.
What is the daily 6 cleaning list?
A daily cleaning list typically includes making the bed, wiping down kitchen counters, cleaning the sink, doing a quick bathroom wipe-down, sweeping or vacuuming high-traffic floors, and clearing clutter from common areas. Keeping up with these six tasks daily means your home is always close to guest-ready and a full pre-visit cleaning takes far less time and effort.
What is the 5 5 5 rule for decluttering?
The 5-5-5 rule for decluttering means asking yourself three questions about any item: Can you replace it for less than five dollars? Would it take less than five minutes to replace? Have you used it in the last five months? If the answer to all three is yes, you can likely let it go. It’s a practical decision filter that speeds up decluttering before guests come over without overthinking every item.
What forgotten spots should I declutter before guests arrive?
The most commonly overlooked spots include the top of the refrigerator, window sills, the area around the toilet base, ceiling fan blades, and the inside of the microwave. Flat surfaces like side tables and countertops also collect clutter that gets ignored during daily routines. Checking these areas in a quick walkthrough before guests arrive catches the spots that standard cleaning routines miss.
How to Clean Your Apartment Like a Pro in Chandler
SHARE:
Cleaning your apartment like a pro means working room by room with the right supplies, a clear checklist, and a top-to-bottom approach that stops you from re-dirtying surfaces you’ve already cleaned. Renters in Chandler deal with desert dust, hard water stains, and busy schedules, so having a smart system in place makes all the difference. This guide walks you through every step, from gathering supplies to scrubbing the spots most people forget, so your apartment looks and feels genuinely clean.
1. About Apartment Cleaning: Why a System Matters More Than Effort
Most people spend way too much time cleaning their apartment and still feel like they missed something. That’s not a motivation problem. It’s a process problem. Apartment cleaning done right follows a logical sequence: you start high, work low, and move from the dirtiest zones to the cleanest. When you clean without a system, you end up spreading crumbs, dust, and grime from one area to another and doubling your workload.
The goal of any good apartment cleaning routine is efficiency. You want to pick up each tool once and put it down once. That means decluttering a room before you wipe anything, vacuuming before you mop, and letting cleaning products sit and do their chemical work while you move on to the next task. This kind of overlap is how professional cleaners finish a thorough apartment clean in a fraction of the time it takes most people.
If you’d like a deeper look at how this plays out room by room, our apartment cleaning guide for Mesa renters walks through every space in detail and the same principles apply directly to Chandler apartments.
2. Build Your Apartment Cleaning Checklist Before You Touch a Single Surface
Walking into a messy apartment without a cleaning checklist is like grocery shopping without a list. You’ll forget things, double back, and still leave without half of what you needed. A written apartment cleaning checklist keeps you on track and ensures nothing gets skipped, especially in smaller spaces where clutter builds fast.
Here’s a solid starting framework for your apartment cleaning checklist:
Declutter every room before cleaning begins (put things away, don’t just move them)
Dust ceiling fans, light fixtures, and tops of cabinets first
Wipe down all surfaces including countertops, shelves, and baseboards
Clean kitchen appliances inside and out
Scrub the bathroom sink, toilet, shower, and tub
Vacuum all floors and upholstery
Mop hard floors after vacuuming
Empty trash cans and replace liners
Clean mirrors and windows with a streak-free solution
Wipe down light switches and door handles
Print this out and check each item off as you go. That simple act of checking a box keeps your momentum going and prevents the mental fatigue of asking “wait, did I already do that?”
According to Real Simple, one of the most common cleaning mistakes people make is jumping from room to room instead of completing one area before moving to the next. Stick to the checklist order and your apartment cleaning routine will feel far less overwhelming.
3. Gather the Right Apartment Cleaning Supplies
You don’t need a cabinet full of specialty products to clean your apartment like a pro. What you do need is the right core kit, because using the wrong product on the wrong surface wastes time and can actually damage finishes. Here are the essentials every Chandler renter should keep on hand:
All-purpose cleaner: For countertops, appliance exteriors, and hard surfaces
Baking soda: A gentle abrasive that tackles odors, grout, and baked-on grime
Dishwashing soap: Cuts through grease on stovetops and range hoods
Disinfectant wipes: For quick touch-point cleaning on handles, switches, and faucets
White vinegar: Cuts through hard water deposits, which are especially common in Chandler’s hard water zones
Microfiber cloths: Trap dust and bacteria without scratching surfaces
Toilet brush and bowl cleaner
Scrub brush for grout and tile
Mop and bucket (or a spray mop for smaller apartments)
Vacuum with attachments for upholstery and tight corners
When choosing your all-purpose cleaner, it’s worth checking the EPA Safer Choice program, which certifies products that are safer for people, pets, and the environment. This matters especially in apartments with limited ventilation, where cleaning chemical fumes can linger longer than you’d expect.
4. Deep Cleaning Your Apartment: The Areas Most People Skip
A regular weekly wipe-down keeps your apartment looking presentable. But a real deep cleaning service tackles the areas that accumulate grime over months and become health hazards if ignored. If you’re doing a periodic thorough cleaning of your Chandler apartment, add these to your deep cleaning apartment checklist:
Inside the oven and microwave: Baked-on food and grease harbor bacteria and create odors
Behind and under appliances: Dust and food debris accumulate under the fridge, stove, and dishwasher
Refrigerator coils: Dusty coils make your fridge work harder and reduce its lifespan
Bathroom exhaust fan: A clogged fan creates moisture buildup and mold risk
Window tracks and sills: In Chandler’s dusty desert climate, these fill with grit fast
Cabinet interiors: Wipe shelves and drawer liners at least every few months
Grout lines: Use a scrub brush with a baking soda paste to restore grout color
Air vents and return registers: Dusty vents circulate allergens through your apartment constantly
Mattress surface: Vacuum and sprinkle baking soda to deodorize between sheet changes
The American Lung Association notes that indoor air quality is often significantly worse than outdoor air, and much of that is driven by accumulated dust, mold spores, and volatile compounds from cleaning products. A regular deep clean of these overlooked areas keeps your indoor environment healthier.
If you need a professional one-time deep clean to reset your space, our team offers full disinfection services that go well beyond a standard surface wipe.
5. How to Clean Your Apartment Fast Without Cutting Corners
Sometimes you have 45 minutes before guests arrive and the apartment looks like a tornado passed through. Cleaning your apartment fast is possible without completely skipping important steps. The trick is triage: identify what people will actually see and use, and prioritize those areas first.
Here’s a speed-clean sequence that works:
Minute 1-5: Do a fast sweep of every room and collect clutter into a laundry basket. Hide the basket.
Minute 5-15: Hit the bathroom hard. Wipe the sink, scrub the toilet bowl, wipe the mirror, and put out a clean hand towel.
Minute 15-25: Wipe kitchen counters and the stovetop. Load any visible dishes into the dishwasher or the sink.
Minute 25-35: Do a quick vacuum of the living room and any high-traffic areas.
Minute 35-45: Wipe down the main surfaces guests will touch, light switches, door handles, and the coffee table. Take out trash if it’s full.
For a faster clean every week, the key is maintaining the habit between sessions. Wipe down the stovetop after cooking, squeegee the shower glass after bathing, and declutter flat surfaces every night. These micro-habits mean your regular clean takes half the time.
Good Housekeeping recommends working in a “Z” pattern across surfaces when wiping, moving from left to right and top to bottom in overlapping strokes. This prevents you from going over the same area twice and ensures nothing gets missed.
6. Apartment Cleaning Checklist for Moving Out
Moving out of a Chandler apartment is stressful enough without worrying about losing your security deposit over a dirty oven or stained grout. A proper apartment cleaning checklist for moving out is more intensive than a regular clean because you’re handing the space back to a landlord who will inspect every corner.
Here’s what a move-out cleaning checklist should cover:
Kitchen: Clean inside oven and broiler drawer, wipe all cabinet interiors, clean inside fridge and freezer, degrease range hood, wipe dishwasher interior
Bathrooms: Remove all soap scum and hard water stains, regrout if needed, clean exhaust fan, wipe all cabinet interiors
Living areas: Patch small nail holes, clean baseboards, wipe window sills and tracks, clean blinds or wipe down window coverings
Floors: Deep vacuum carpets and consider professional steam cleaning, mop all hard floors including corners and edges
Walls: Spot clean scuffs and marks with a magic eraser or mild soap solution
All rooms: Wipe light fixtures, ceiling fans, and vents, clean all interior doors and frames
Our detailed move-out clean checklist guide gives you a printable, room-by-room breakdown that works for any Chandler apartment. If you’d rather hand the job off entirely, our professional move-in/move-out cleaning team handles everything from top to bottom so you can focus on the actual move.
7. How to Deep Clean Your Apartment Before Moving In
Moving into a Chandler apartment that looks clean on the surface doesn’t mean it actually is. Previous tenants leave behind bacteria, dust, grease, and grime in places you’d never think to check unless you know where to look. Doing a deep clean apartment before moving in is one of the smartest things a renter can do.
Start before your furniture arrives. An empty apartment is far easier to clean thoroughly. Focus on:
Wiping all cabinet shelves and drawer interiors before you stock them
Cleaning inside the oven, microwave, and fridge before storing food
Scrubbing the bathroom tile, grout, toilet, and tub or shower
Vacuuming and mopping all floors, paying attention to corners and edges
Wiping all light switches, door handles, and outlets
Cleaning inside all closets
Checking for mold around windows, under sinks, and in the bathroom
Mold is a genuine concern in Arizona’s monsoon season. According to the CDC’s guidance on mold in homes, even small colonies in moisture-prone areas can affect air quality and health. If you find mold during a move-in clean, report it to your landlord immediately and consider running a disinfection service before you settle in.
8. When to Hire a Professional Apartment Cleaning Service in Chandler
DIY apartment cleaning works great for maintaining a tidy space week to week. But there are moments when professional apartment cleaning service is worth every penny. If any of these apply to you, it’s time to call in the pros:
You’re moving out and need your full security deposit back
You’re moving into a new apartment and want a fresh start
Life is too busy to keep up with a regular cleaning routine
You’ve fallen behind and the cleaning task feels overwhelming
You’re hosting an event and need the space to be genuinely spotless
You want a one-time deep clean to reset after a renovation
Elite Maids House Cleaning serves Chandler renters and homeowners with recurring maid service as well as one-time deep cleans and move-out cleans. Every cleaner is background-checked, insured, and backed by a reclean-at-no-cost satisfaction guarantee. Check out cleaning Chandler prices and get an instant quote online, with same-day availability between 8am and 6pm.
According to The Spruce, professional cleaners use a zone-based method where each area of the home is treated as a contained unit, which helps them maintain consistency across every room and avoid cross-contamination between dirty and clean surfaces. That professional-grade approach is exactly what our Chandler cleaning teams follow on every visit.
Closing: Ready to Stop Stressing and Start Living in a Clean Apartment?
Whether you’re doing a routine weekly tidy or a full move-out scrub, having the right checklist and the right products makes the difference between a surface-level clean and a genuinely fresh apartment. Chandler renters have enough on their plates without spending every weekend with a mop in hand. If you’re ready to hand off the work to professionals who do this every single day, cleaning services Chandler, AZ are available on demand. Contact Elite Maids house cleaning today for a free quote and get back to the things that actually matter to you.
Frequently Asked Questions
How to clean your apartment like a professional?
Clean your apartment like a professional by following a top-to-bottom, room-by-room system. Start by decluttering, then dust high surfaces before wiping lower ones, and always vacuum before you mop. Let cleaning products sit and work while you move to the next task. Use a written checklist to stay on track and prevent re-dirtying surfaces you’ve already cleaned.
What is the 80/20 rule for cleaning?
The 80/20 rule for cleaning means that 80% of the visible dirt in your apartment comes from just 20% of the surfaces, typically high-traffic areas like the kitchen, bathrooms, and entryway. By focusing your energy on those zones first, you get most of the visual and hygienic impact of a full clean in a fraction of the time. Prioritize the toilet, sink, stovetop, and living room floor for fast results.
Is $50 an hour good for house cleaning?
Fifty dollars an hour is within a reasonable range for professional house cleaning, depending on your market and the scope of the work. In the Chandler area, rates can vary based on apartment size, the type of clean (standard vs. deep clean), and whether it’s a recurring service or a one-time visit. Recurring clients typically pay less per visit because the apartment stays at a manageable baseline between cleanings.
What is the 30 3 rule for cleaning?
The 30/3 rule for cleaning suggests spending 30 minutes per day maintaining your home across 3 focused tasks. Rather than letting cleaning pile up into a massive weekend project, you chip away at it daily with short, targeted sessions. For example: wipe the kitchen counters, clean the bathroom sink, and vacuum the living room. This habit keeps your Chandler apartment consistently clean without major effort on any single day.
I've Been a Professional House Cleaner for 18 Years in Tucson: Here Are My Best Before & After Secrets
SHARE:
After 18 years as a professional house cleaner, I’ve seen the inside of hundreds of homes across Tucson and I know exactly what separates a surface wipe-down from a genuinely clean home. House cleaner recommendations in northeast Tucson come up constantly in local conversations, and for good reason: the difference a skilled cleaner makes is visible the moment you walk through the door. In this post, I’m sharing the real techniques, tools, and habits that professional house cleaners rely on to deliver dramatic before-and-after results every single time.
1. Why Professional House Cleaning Results Look So Different From DIY Efforts
Most homeowners aren’t bad at cleaning. They’re just working with incomplete information. Professional house cleaning produces those jaw-dropping before-and-after results because trained cleaners follow a deliberate system, not a random sweep through each room. After 18 years of professional home cleaning, I can tell you the gap between a quick tidy and a thorough residential cleaning comes down to method, not muscle.
The single biggest differentiator is top-to-bottom, left-to-right cleaning. Professionals never clean the floor before the countertops. Dust and debris always fall downward, so if you wipe the floor first, you’re doing the work twice. Working systematically means no surface gets missed and nothing gets re-dirtied. According to Good Housekeeping, this structured approach is the foundation of every professional cleaning system worth trusting.
Another major factor is dwell time. When a professional applies a cleaning solution to a surface, they let it sit for 30 to 60 seconds before wiping. That chemical contact time breaks down grease and bacteria so the cloth does far less physical work. Most homeowners spray and immediately wipe, which means the product never fully activates.
If you want to learn how to clean your apartment like a professional or just get more out of your weekend cleaning sessions, understanding these two principles alone will change your results immediately.
2. The Tools That Make Before & After Transformations Possible
Cleaning techniques are only as good as the tools behind them. After years of professional house cleaning across Tucson homes, I’ve narrowed down the equipment that actually delivers results from the gear that just takes up space under the sink.
Microfiber cloths: A quality microfiber cloth traps dust and bacteria rather than pushing them around. Cotton rags spread particles; microfiber lifts them. I go through at least a dozen per home.
A double-bucket mop system: One bucket holds clean solution, one holds rinse water. Every professional cleaner uses this setup. Mopping a floor with a single dirty bucket just redistributes grime.
A HEPA-filter vacuum:HEPA filters capture particles down to 0.3 microns, including allergens and fine dust. In a dry, dusty climate like Tucson, this matters even more than in wetter cities. The EPA’s guidance on indoor air quality consistently points to fine particulate matter as one of the most significant indoor health concerns.
A grout brush: Tile grout is porous and holds grime like a sponge. A stiff-bristle grout brush reaches where cloths cannot. The before-and-after on a bathroom floor after proper grout scrubbing is one of the most dramatic transformations in residential cleaning.
A squeegee: Glass surfaces, shower doors, and mirrors streak when wiped dry with a cloth. A rubber squeegee removes water in one pass without lint. This is how hotel bathrooms stay streak-free.
Extension dusters: Ceiling fans, light fixtures, and the tops of cabinets collect thick layers of dust that most homeowners never touch. Reaching these spots is standard practice for any professional house cleaning visit.
If you’re serious about improving your own cleaning techniques, Real Simple’s cleaning guides offer solid product comparisons for each of these tool categories.
Tucson homes also deal with unique challenges: desert dust infiltrates through window seals, and monsoon season brings moisture that can promote mold growth in bathrooms. Keeping an eye on moisture-prone areas is something professional cleaners here always flag for homeowners. The CDC’s guidance on mold in homes is a useful reference if you notice early signs of moisture damage.
3. Room-by-Room Professional Cleaning Techniques That Create Real Results
Tips for cleaning houses professionally always come back to the same thing: treating each room as its own project with a defined start and end point. Here’s how a professional approaches the rooms that make or break a before-and-after reveal.
Kitchen
The kitchen is where grease accumulates invisibly. Above the stove, on cabinet fronts, on the range hood filter. I always start with a degreaser applied to those surfaces first, then move to countertops, then the sink, and finish with the floor. Cabinet fronts near the stove are the most commonly missed surface in any DIY kitchen cleaning. A warm solution of dish soap and water cuts through cooking residue without damaging finishes.
Bathrooms
In Tucson’s dry climate, mineral deposits from hard water build up fast on fixtures and glass. A diluted white vinegar solution dissolves calcium and lime scale far better than most store-bought sprays. Apply it, let it dwell, then wipe clean. For serious buildup, a pumice stone on toilet bowls removes stains that chemicals alone cannot shift. Professional cleaners always finish a bathroom with a squeegee on the mirror and a dry microfiber wipe on all chrome fixtures.
Living Areas
Dust settles on horizontal surfaces in a predictable pattern. Ceiling fan blades accumulate the most, followed by TV consoles, baseboards, and window sills. Working top-to-bottom means the vacuum pass at the end of the room captures everything that fell during dusting. Professionals rarely use feather dusters; microfiber traps rather than scatters.
Bedrooms
Under the bed is a graveyard of dust bunnies in most homes. A long-handle duster or a vacuum with an extension wand addresses this in under two minutes. Under furniture is one of the first things a professional cleaner checks during a deep cleaning service, because it’s a reliable indicator of how long a home has gone between thorough cleaning sessions.
For a structured checklist approach to cleaning before visitors arrive, see our guide on house cleaning in Tempe before guests for a transferable system you can apply to any Tucson home.
4. What Professional House Cleaners Know That Most Homeowners Don’t
If I told every client one thing, it would be this: product overuse is the number one self-inflicted cleaning problem in residential homes. More spray does not mean cleaner surfaces. Excess product leaves a residue that attracts new dirt faster. A light mist and proper dwell time outperforms a soaked surface every time.
Here’s what else professional house cleaners want you to know:
Mixing cleaning products can be dangerous. Bleach and ammonia-based cleaners produce toxic fumes. The EPA Safer Choice program certifies products that are effective without dangerous chemical combinations. Always check the label.
Clutter is not your cleaner’s enemy, but it does slow things down. A professional maid service cleans surfaces, not organizes belongings. Picking up before your scheduled visit means more of your paid time goes toward actual cleaning.
Frequency matters more than intensity. A home cleaned every two weeks stays in a manageable state. A home cleaned every six months requires a full deep clean just to reach baseline. Regular house cleaning is almost always more cost-effective in the long run.
Natural light reveals everything. Professional cleaners use portable work lights in bathrooms and kitchens to catch streaks and missed spots. Open your blinds after cleaning and check surfaces at an angle. You’ll catch what overhead lighting hides.
Eco-friendly products work. Many homeowners assume green cleaning products are less effective. After years of using both conventional and eco-friendly options in Tucson homes, I can say that high-quality plant-based products perform on par with chemical alternatives for most residential surfaces. They’re also better for indoor air quality, which is relevant given how often desert homes are sealed up against the heat.
Our full guide to spring cleaning walks through a seasonal deep-cleaning system that applies these principles from room to room.
5. How Professional House Cleaners Work So Fast Without Cutting Corners
One of the most common questions I hear from homeowners is: how do professional house cleaners clean so fast? The honest answer is that speed comes from repetition and system, not rushing. When you clean 300 homes, you stop making decisions mid-task. Every move is deliberate and pre-planned.
Here’s the structure behind efficient professional cleaning:
Carry everything at once. A professional caddy loaded with supplies means zero trips back to the supply bag. Every extra trip is wasted time. Experienced cleaners organize their caddy so the most-used products are at the front.
Clean in zones, not by task. It’s faster to fully complete one room before moving to the next than to dust the entire house, then vacuum the entire house, then mop the entire house. Zone cleaning eliminates backtracking.
Use both hands. While one hand sprays, the other positions the cloth. While wiping a surface in circles, the other hand steadies the object. This sounds small but across a full home visit, it saves 15 to 20 minutes.
The 20/10 rule in cleaning: Many professional cleaners apply a variation of this approach, working in focused 20-minute sprints followed by a 10-minute reset. It keeps energy levels consistent through a full workday of back-to-back cleaning jobs.
Let products do the work. Apply cleaner to the toilet bowl, then clean the sink while it soaks, then return to the toilet. Dwell time is not downtime; it’s multi-tasking built into the chemistry.
If you’re handling your own cleaning in a smaller space, check out our tips on keeping your home cleaner for practical habits that reduce how long each session takes.
For current Tucson house cleaning rates, it helps to understand that the speed and efficiency of a trained professional is priced into the service. You’re not paying for hours; you’re paying for results.
6. Move-Out and Deep Cleaning: The Before & Afters That Shock People Most
In 18 years, the most dramatic before-and-after transformations I’ve done are move-out cleaning jobs and one-time deep cleans. These are homes that haven’t had a thorough cleaning in months or, in some cases, years. The difference between the before photo and the after is the kind of thing people share with friends.
A professional move-in or move-out clean covers surfaces that a standard recurring visit never touches:
Inside oven, behind the oven, and oven drawer
Inside and behind the refrigerator
Inside all cabinets and drawers
Window tracks and door frames
Baseboards, vents, and light switch plates
Garage threshold and laundry room corners
In Tucson, move-out cleans are especially common at the end of lease terms in spring and early summer. Landlords and property managers in this market have high expectations, and a professional clean is often the difference between getting a full deposit back or not. Our professional move-out cleaning checklist covers every surface a landlord will inspect.
A one-time deep cleaning service follows a similar scope and is the right starting point for any home that’s switching from DIY cleaning to recurring professional service. The initial deep clean gets everything to a true baseline so that maintenance visits stay fast and effective. See our online booking page to schedule a deep clean or get an instant quote for any service level.
7. Tips for Being a Good Domestic Cleaner and What to Look for When Hiring One
Whether you’re thinking about becoming a professional house cleaner or just want to know how to evaluate someone you’re considering hiring, the same qualities matter. After nearly two decades in this field, here’s what separates a truly skilled cleaner from someone who simply shows up.
What makes a good professional house cleaner:
They ask questions before the first visit: what products do you prefer, are there pets or allergies, are there any off-limits areas?
They show up with their own supplies and equipment, fully stocked.
They follow a checklist every single time so nothing gets skipped.
They communicate if they find something during the clean (a leaking pipe, a broken tile, mold in a corner) rather than pretending they didn’t see it.
They’re background-checked, bonded, and insured. No exceptions.
They offer a satisfaction guarantee. If something was missed, they come back and fix it.
What to look for when hiring a professional house cleaner in Tucson:
Verified reviews from real Tucson homeowners, not generic profile reviews
Clear pricing with no surprise fees after the clean
Eco-friendly product options, especially relevant in Tucson where water conservation and indoor air quality matter to many families
Flexible scheduling, including the ability to book online without a phone call
A company that backs its work with a reclean guarantee
The Spruce’s professional cleaning resources offer solid advice on evaluating cleaners and understanding what a thorough residential cleaning visit should include. For verified local options, cleaning tucson reviews can help you compare what actual Tucson customers are saying about their experiences.
8. Keeping Your Tucson Home Clean Between Professional Visits
Even with recurring professional cleaning services, what you do between visits makes a real difference. In Tucson especially, dust accumulates quickly because of the desert environment, open windows during cooler months, and high foot traffic from outdoor activities. Here are the habits that keep homes looking clean longer:
Wipe down kitchen counters nightly. Crumbs and residue sit overnight and become harder to remove by morning. A 60-second wipe after dinner prevents buildup between visits.
Squeegee shower walls after every use. This single habit eliminates soap scum and mineral deposit buildup in bathrooms, cutting down on the scrubbing required at each professional cleaning session.
Put a doormat inside and outside every entrance. Tucson brings in red dirt and debris on shoes like nowhere else. Mats on both sides of the door catch the majority of outdoor particulate before it reaches your floors.
Run the exhaust fan during and after every shower. Moisture control prevents mold in bathrooms. The EPA’s mold prevention guidelines recommend at least 30 minutes of ventilation after a shower.
Declutter before your cleaner arrives. Items left on counters, floors, and tables are worked around rather than cleaned under. A quick 10-minute pick-up before each visit maximizes the time your cleaner spends on actual surfaces.
Spot-clean high-traffic areas weekly. Even on biweekly or monthly plans, wiping door handles, light switches, and faucet handles between visits keeps germs in check.
For event-specific prep, our checklist on home cleaning before guests arrive adapts well for Tucson households hosting family or planning gatherings.
Elite Maids House Cleaning offers weekly, biweekly, and monthly recurring plans for Tucson homes, all backed by a reclean-at-no-cost guarantee. Every cleaner on the team is background-checked, bonded, and insured, so you’re covered from the moment we arrive.
Ready to See Your Own Before & After? Contact Elite Maids House Cleaning in Tucson
After 18 years of professional house cleaning, the thing I hear most from clients after their first visit is: “I didn’t know my home could look like this.” That transformation is available to every Tucson homeowner. Whether you need a one-time deep clean, a recurring maid service, or a move-out clean before handing back the keys, Elite Maids House Cleaning is ready to deliver results that actually show. Check cleaning tucson cost to see what current customers are saying and how our pricing compares, then take the next step: contact Elite Maids house cleaning today for a free quote and find out why we’re the most-reviewed residential cleaning team in Arizona.
Frequently Asked Questions
Is $50 an hour good for house cleaning?
In Tucson, $50 per hour is within the standard market range for a professional house cleaner. Rates vary based on the size of the home, service type (standard vs. deep clean), and whether the company is insured and bonded. An independent cleaner may charge less, but a fully insured service with a satisfaction guarantee typically runs $45 to $65 per hour and offers more protection if something goes wrong.
Who is the famous cleaning lady?
The phrase “the famous cleaning lady” most often refers to Melissa Frances, the narrator behind the popular memoir-turned-series about a single mother who became a professional house cleaner. Her story brought mainstream attention to the hard physical and emotional realities of professional home cleaning work. The character resonated with many because it showed what experienced cleaners already know: this is skilled, demanding work that deserves real respect and fair pay.
What is the 20/10 rule in cleaning?
The 20/10 rule in cleaning means working in focused 20-minute cleaning sessions followed by a 10-minute break. Professional house cleaners use variations of this structure to maintain consistent energy and attention through back-to-back jobs. For homeowners, it makes tackling a messy home feel manageable because the work is broken into short, defined sprints rather than one overwhelming session.
How long do house cleaners last?
A typical professional cleaning visit for a standard three-bedroom Tucson home takes two to three hours with a solo cleaner or one to two hours with a two-person team. A deep clean or move-out clean can take four to six hours depending on the condition of the home. Recurring maintenance visits are usually faster because the home is already at a clean baseline from prior visits.