Before guests come over, focus on five key areas: the entryway, kitchen, bathrooms, high-touch surfaces, and visible floors. These spots are the first things visitors notice and the most likely to leave a lasting impression. This guide walks through each area in detail so you can do a quick clean before company arrives with confidence.
Nobody wants to scramble at the last minute when the doorbell rings. Whether you are hosting a casual dinner or a full holiday gathering, a targeted pre-guest cleaning checklist saves you from the frantic wipe-down that never quite works. The good news: you do not need to deep clean your entire home. You just need to hit the right spots. And if you want a true professional finish without the stress, a trusted cleaning team can have your home guest-ready faster than you might think.
1. Clean Your Entryway Before Guests Arrive
Your entryway is the very first thing guests see when they walk through the door. It sets the entire tone for your home, and it takes only a few minutes to get it right. Cleaning the entryway before guests arrive is one of the highest-impact moves you can make on short notice.
Start by sweeping or vacuuming the floor just inside the door, including any welcome mat. Shake the mat outside if it is dirty, or replace it entirely if it is beyond saving. Wipe down the door handle, light switch, and any small entry table or console. If you have a coat closet nearby, quickly stuff any loose items inside and close the door. Mirrors and glass panels near the entryway should be wiped free of smudges and fingerprints.
Check for shoes, bags, or clutter piled near the door. A clear entry path feels welcoming and spacious. Add a quick spritz of a neutral room spray if you want, but avoid anything overpowering. According to Good Housekeeping’s cleaning editors, guests form an impression of a home within seconds of stepping inside, which is exactly why the entryway deserves priority attention on your pre-guest cleaning list.
If you want a more thorough guide with specific checklist items, our home hosting cleaning checklist breaks it all down room by room.
2. Quick Kitchen Cleaning for Guests
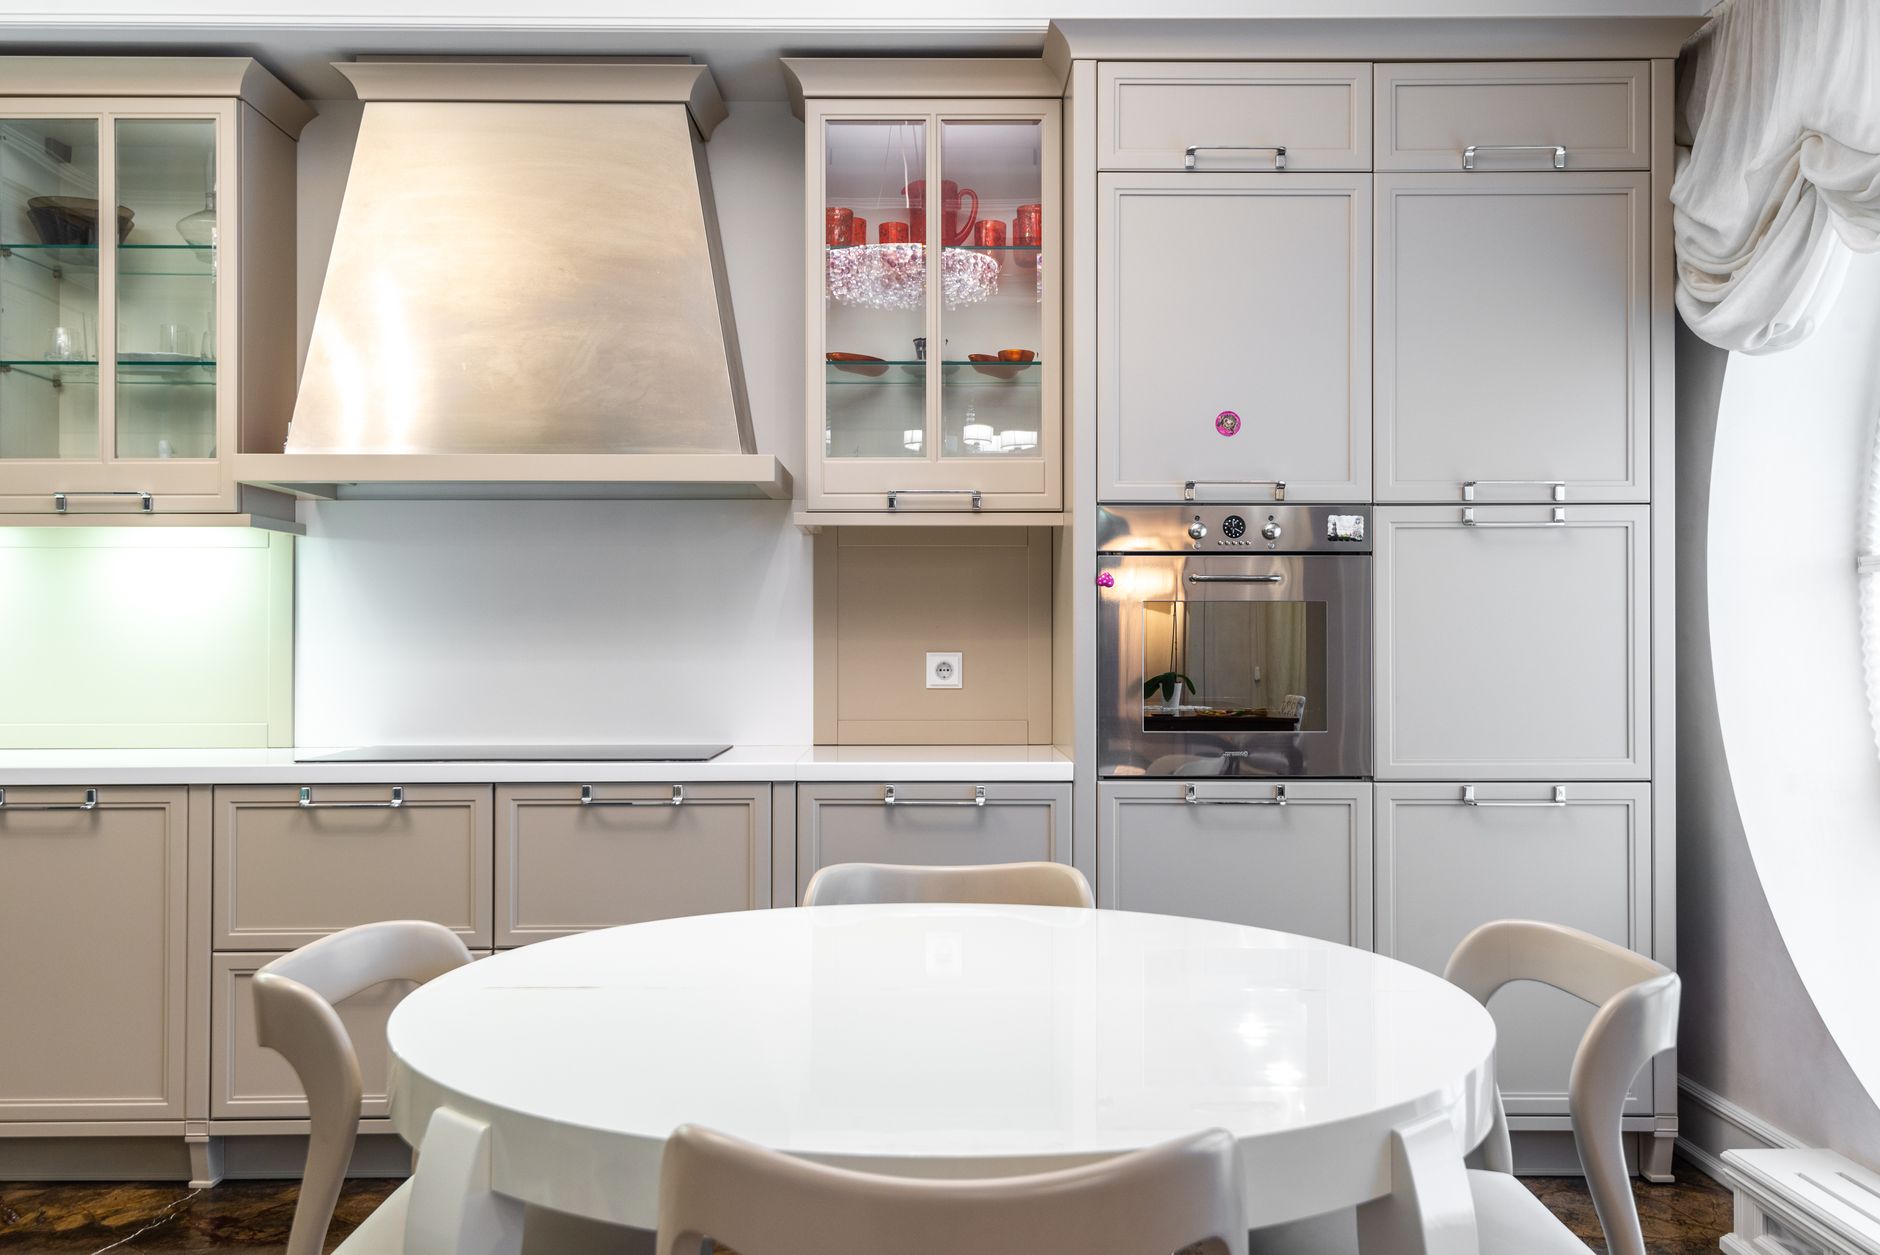
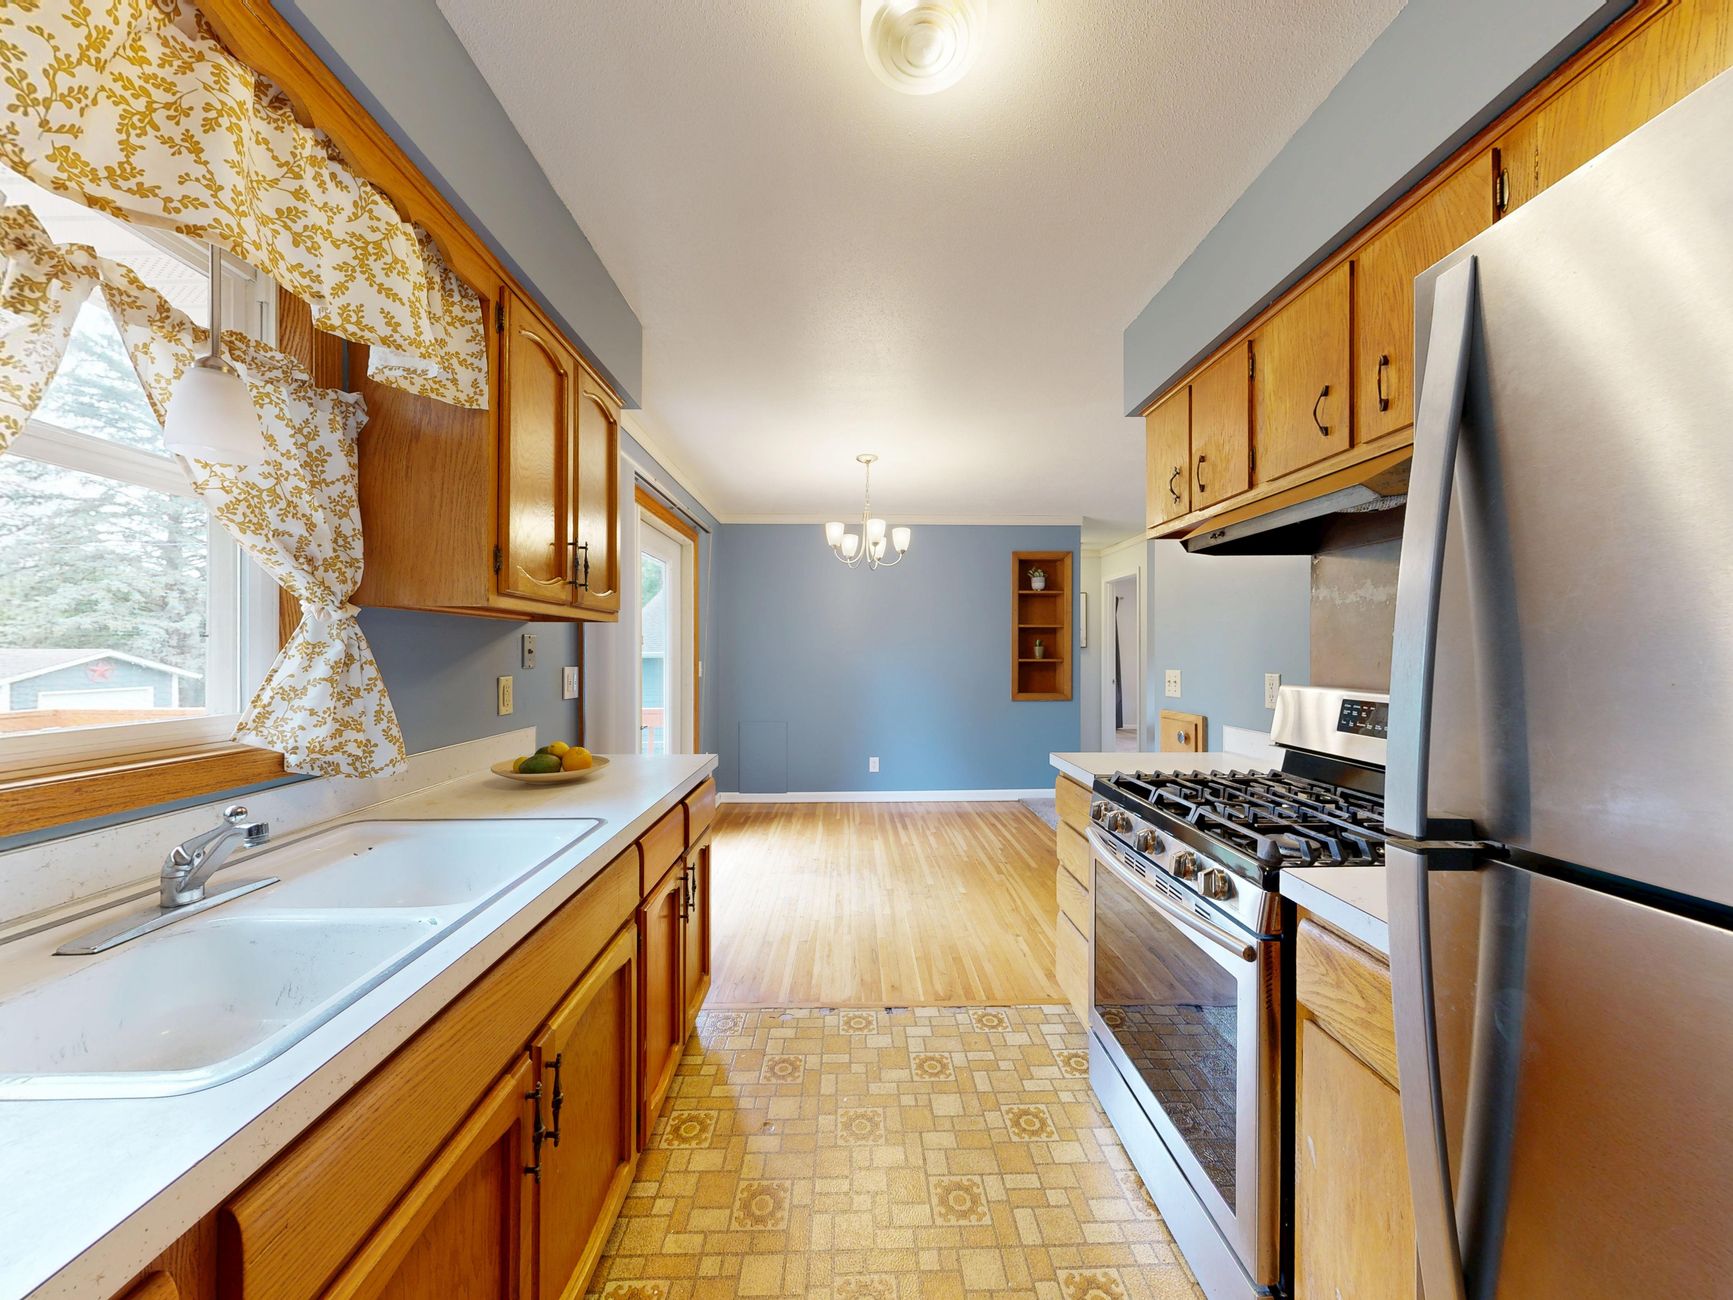
The kitchen is the heart of nearly every gathering. Guests wander in to refill drinks, drop off dishes, or just to chat. A quick kitchen clean before guests arrive is non-negotiable, and it does not have to take more than twenty minutes if you focus on the right spots.
First, clear the counters. Everything that does not belong should go into a cabinet or pantry. A clutter-free counter instantly makes the kitchen look cleaner than it actually is. Wipe down countertops and the stovetop with an all-purpose cleaner, paying extra attention to grease spots around the burners. If you cooked a meal before the guests arrive, wash pots and pans beforehand so you are not greeting anyone over a sink full of dirty dishes.
Clear out the sink completely and give it a quick scrub. A stainless steel or white sink that gleams reads as clean and hygienic. Empty trash cans before guests arrive so there is no overflowing bin or lingering odor. This is one of those details that guests may not consciously notice, but they absolutely notice when it is wrong.
Do a quick sweep or Swiffer pass on the kitchen floor, focusing on crumbs near the stove and prep areas. Wipe down the exterior of the refrigerator if it has smudges or old magnets and papers cluttering the front. You do not need to clean inside the refrigerator unless someone will be opening it, but a clean exterior counts.
If the kitchen connects to a dining area, wipe the table and chairs and make sure place settings or centerpieces are arranged neatly. Cleaning the kitchen before company arrives is one of the areas where effort pays off in proportion to how much time guests actually spend there.
3. Bathroom Cleaning Before Company Arrives
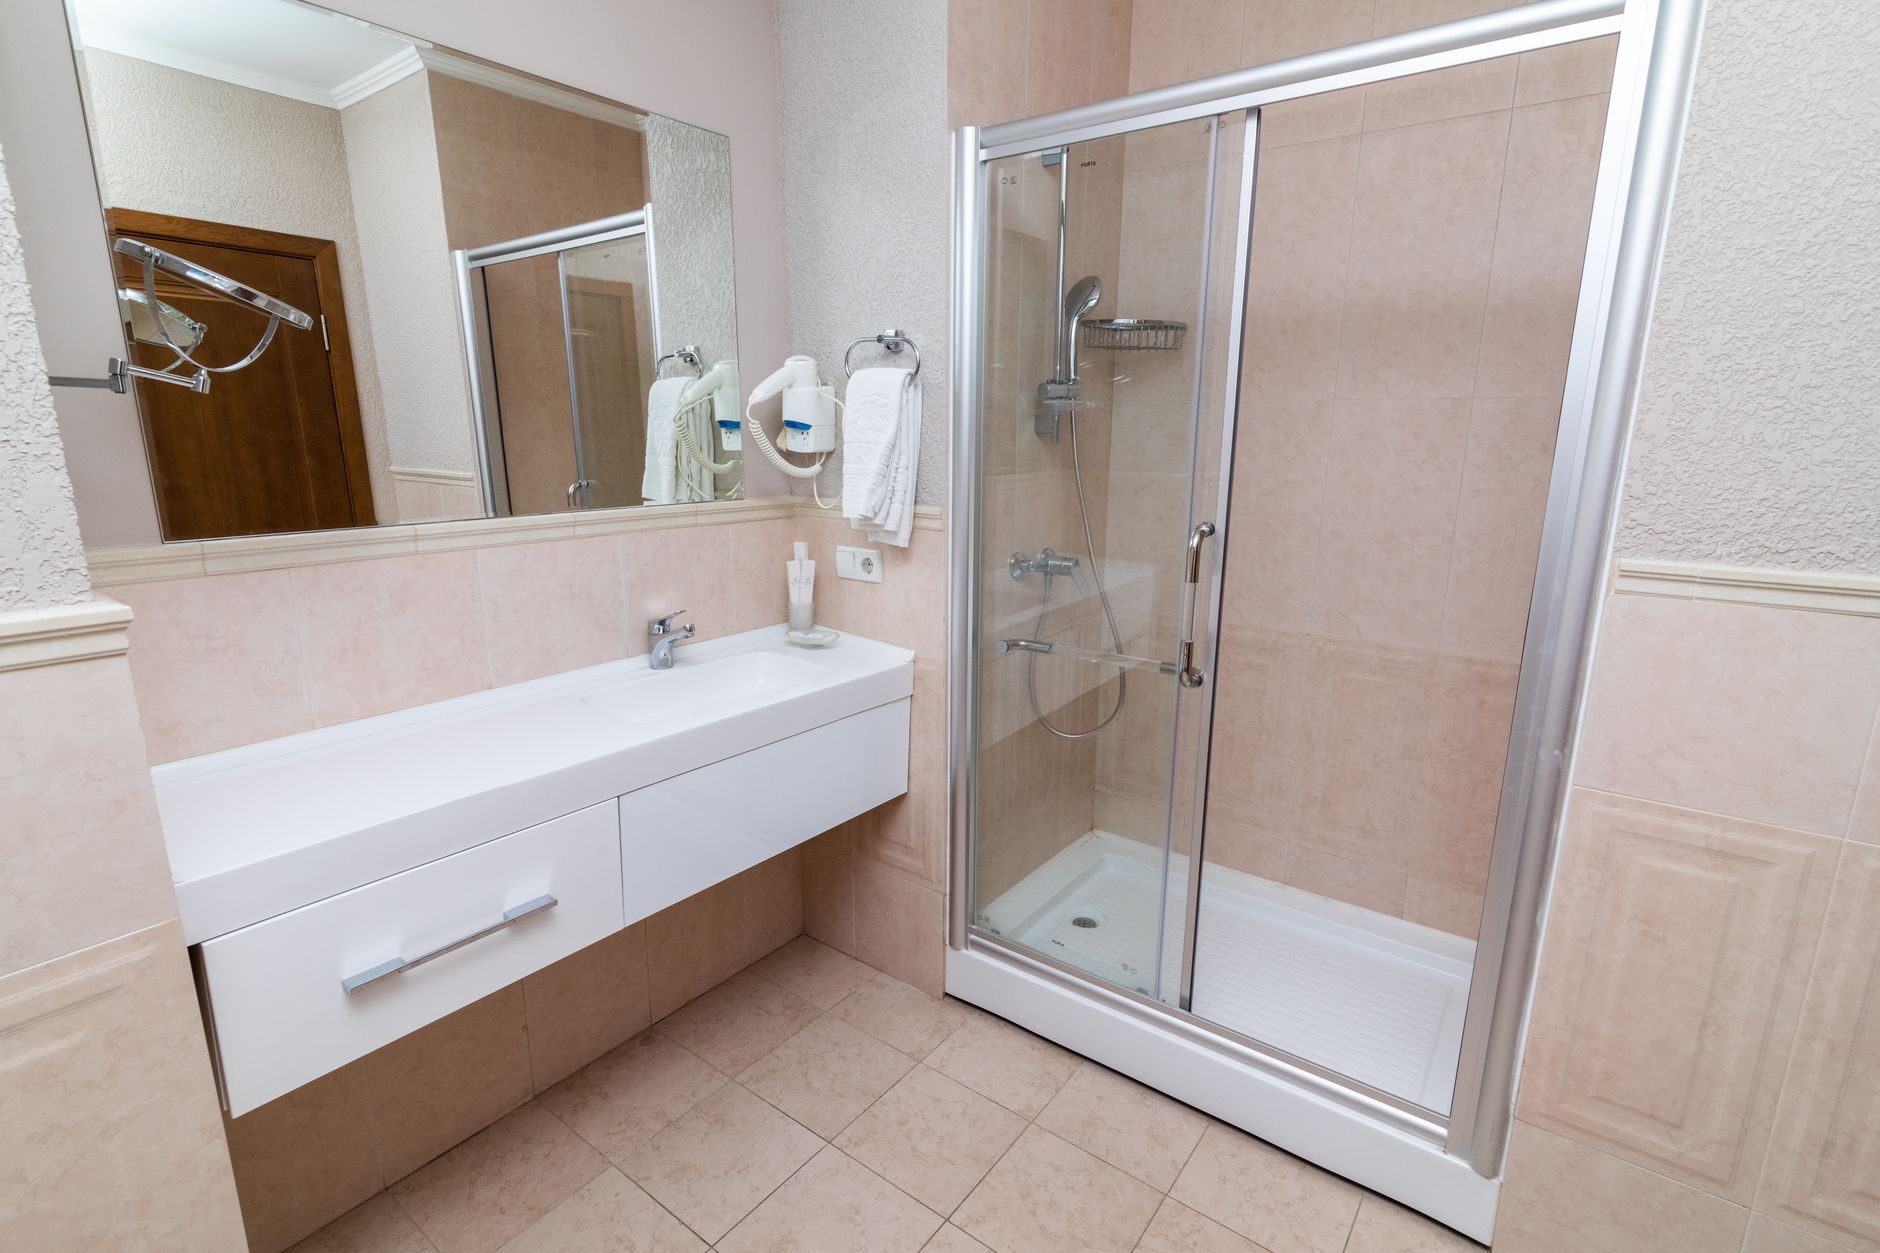
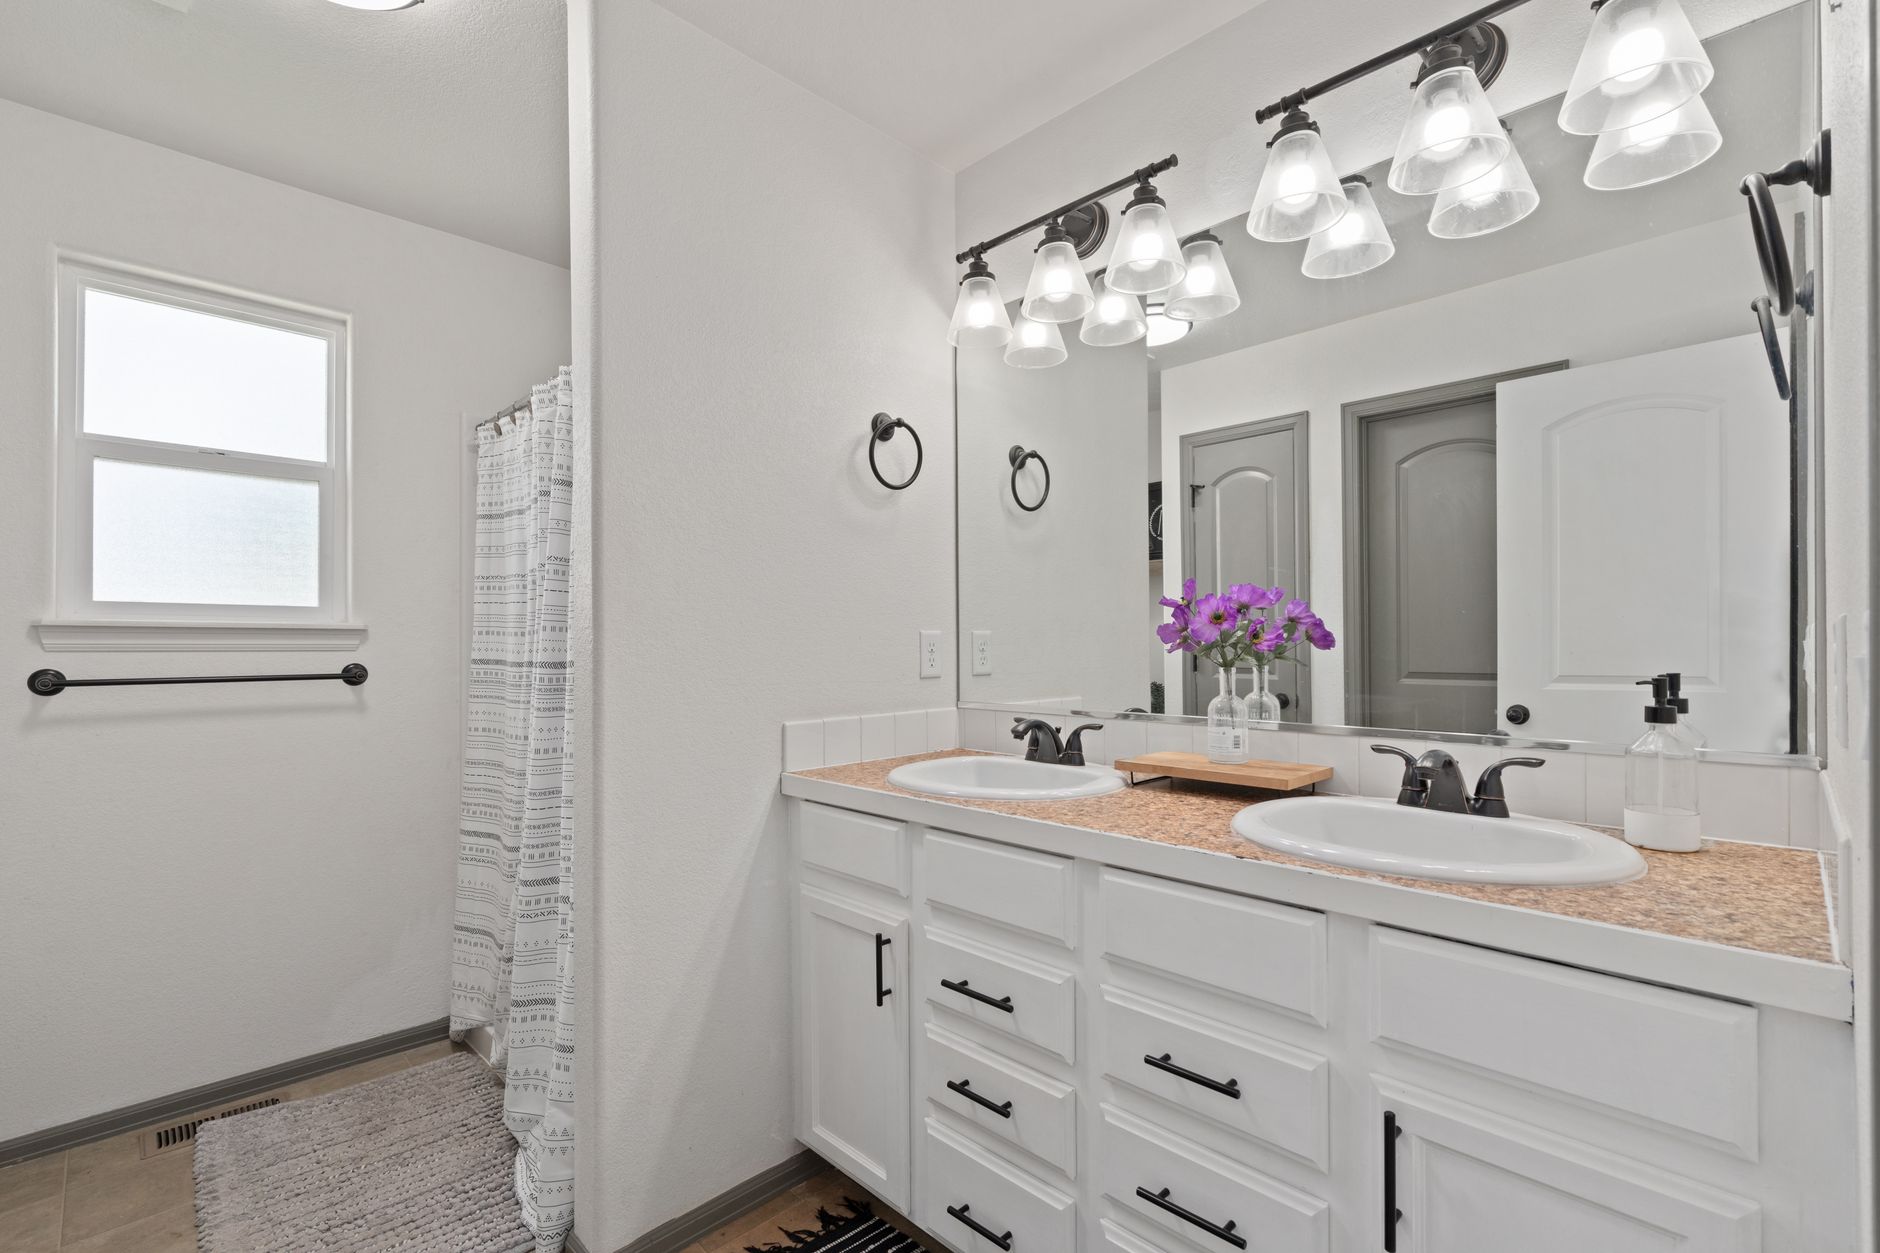
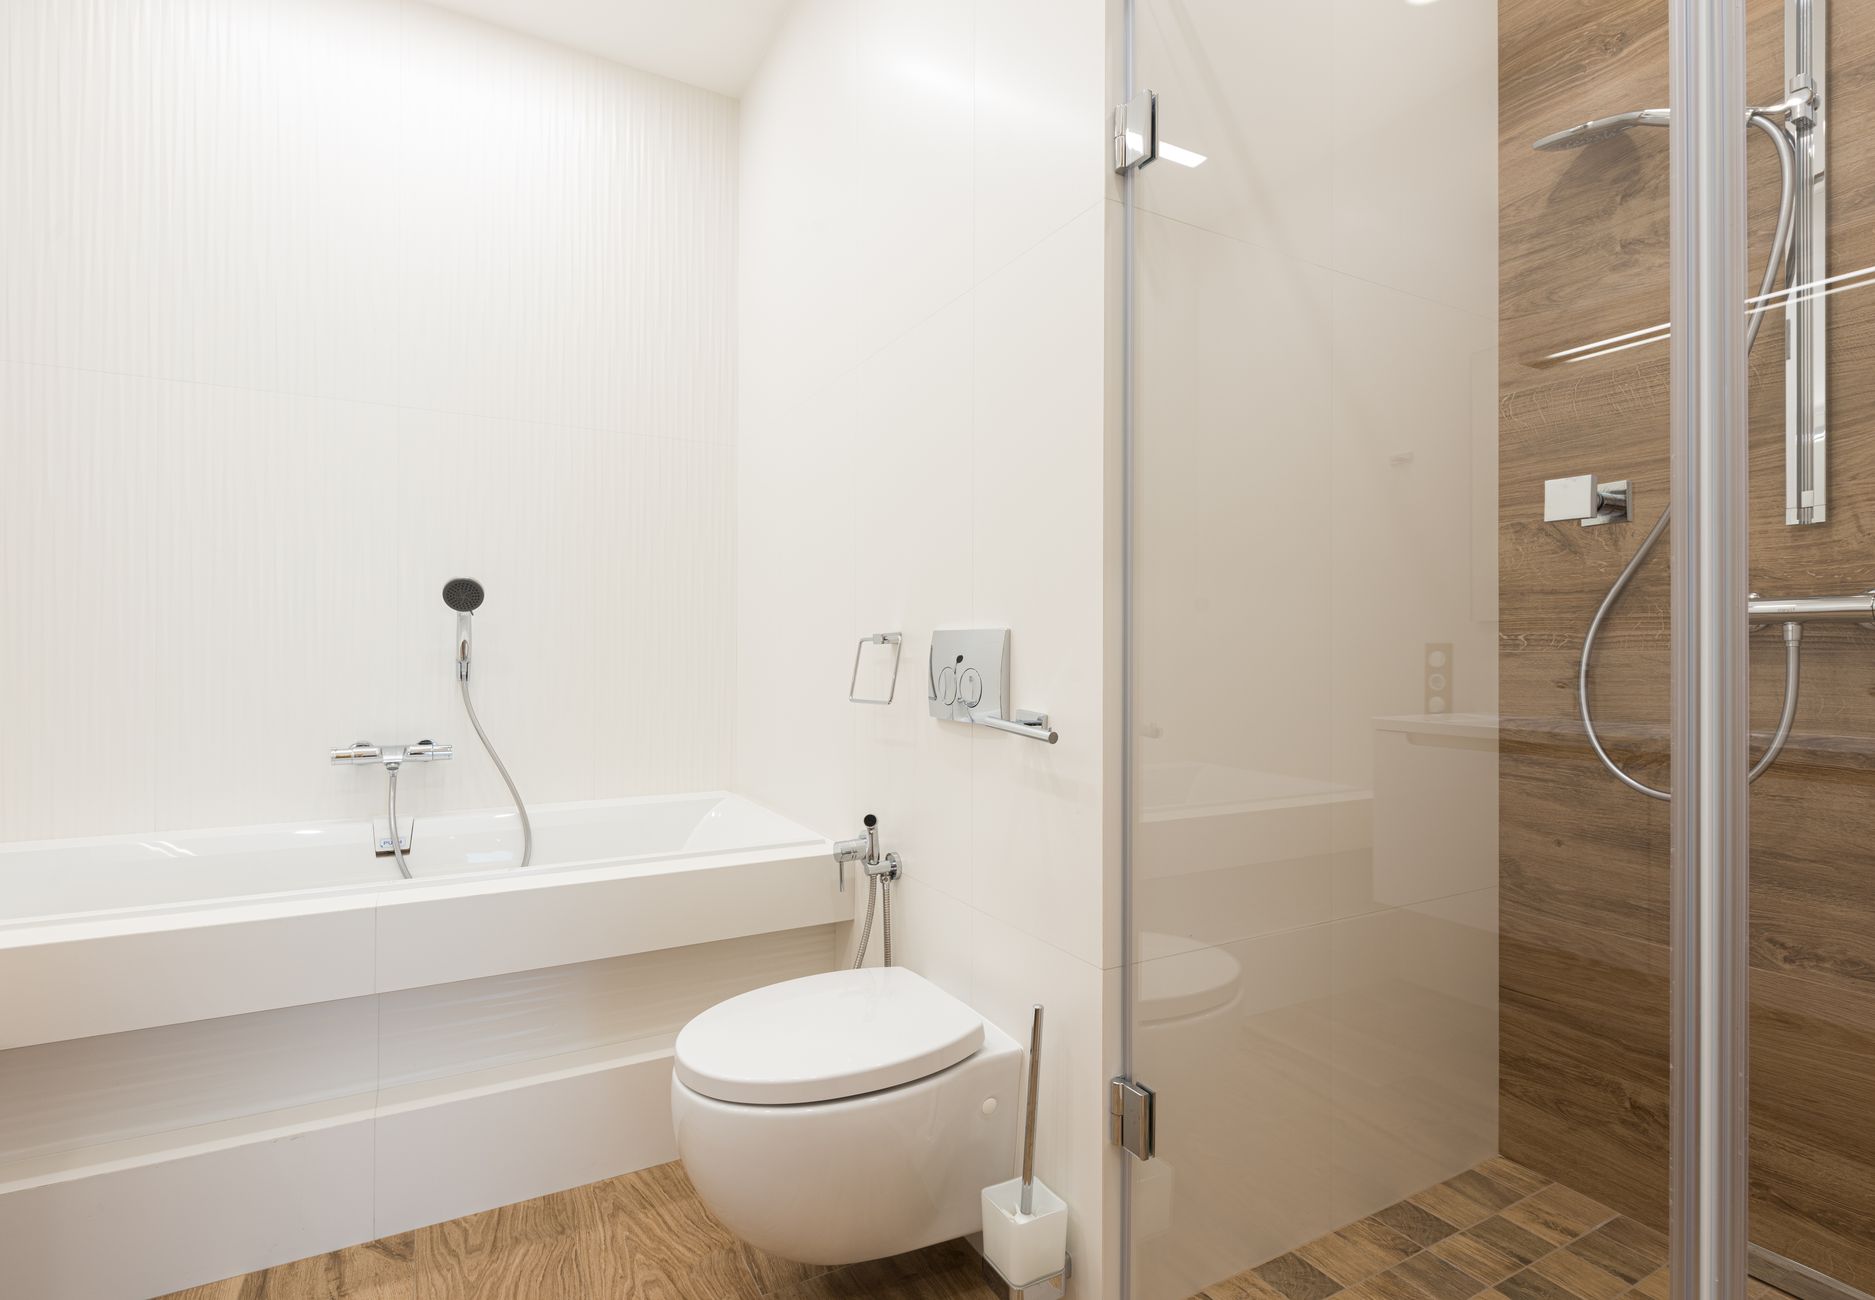
Bathrooms are where guests spend private time, and they notice everything. A clean bathroom before company arrives is one of the clearest signals that a host cares about their home. The good news: bathroom cleaning for guests does not require a full scrub. A focused fifteen-minute routine hits everything that matters.
Start with the toilet. Scrub the bowl with a toilet brush and cleaner, wipe the seat, lid, and base with a disinfectant wipe or cloth. Next, clean the sink and faucet. Toothpaste splatters, soap residue, and water stains around the faucet are common and easy to miss, but guests always spot them. Wipe the mirror until it is streak-free.
Replace or fold fresh hand towels and set out a clean hand soap dispenser. If the soap is nearly empty, refill or replace it. Check that there is enough toilet paper on the roll and set a spare roll nearby. Empty the small trash can in the bathroom, even if it is not quite full.
Give the floor a quick sweep and a wipe if needed. If you have a shower or tub visible from the bathroom door, pull the curtain closed or wipe down the glass door. According to Real Simple’s cleaning editors, the bathroom is the room guests judge most harshly during a visit, so even small touches like a folded towel or a small candle make a measurable difference.
If you are hosting overnight guests, a deeper clean of the shower and tub is worth the extra time. For recurring help keeping bathrooms spotless, our pre-guest house cleaning service keeps every bathroom in your home ready without lifting a finger.
4. Wipe Down High-Touch Surfaces Throughout Your Home
High-touch surfaces are the spots every person in your home contacts multiple times a day: door handles, light switches, remote controls, cabinet pulls, drawer knobs, and stair railings. These areas collect oils, bacteria, and visible grime faster than almost anywhere else, and they are easy to overlook during a quick clean before company comes over.
A microfiber cloth with an all-purpose cleaner or a pack of disinfectant wipes is all you need. Work through your home systematically: front door handle, interior door handles in common rooms and bathrooms, every light switch plate you will use during the gathering, remote controls on the coffee table, and cabinet pulls in the kitchen and bathrooms.
The EPA’s guidance on indoor air quality highlights that frequently touched surfaces are significant vectors for germ transfer in shared spaces. Wiping them down before guests arrive is a quick-clean step that has real health benefits, not just an aesthetic one.
Pay attention to the areas around seating, especially armrests on sofas and dining chairs. Coffee table surfaces should be wiped and cleared of junk mail, old cups, or random household items. Staircase railings, if you have them, should be wiped from top to bottom. All of these surfaces fall under the category of things guests notice most about your home, even if they cannot articulate exactly what looks clean or off.
This is also a good moment to do a quick visual sweep of every room guests will use. Look at each space from the doorway as a guest would. Straighten throw pillows, fold blankets, and pick up any items that are clearly out of place.
5. Clean the Floors in Every Room Guests Will Use
Floors are one of the most noticeable elements in any room. Visible crumbs, pet hair, dust bunnies in corners, or sticky spots on hard floors are things every guest sees the moment they walk in. Cleaning floors before guests arrive does not mean a full mop-and-polish job on your entire house; it means hitting the rooms that matter.
Start with a vacuum pass on all carpeted areas guests will enter: living room, hallway, dining room, and any bedrooms if guests will be there. Pay special attention to edges along walls and under furniture edges where dust accumulates. For hard floors, a dry microfiber sweep first picks up dust and debris, followed by a damp mop pass on any areas with stickiness or visible marks.
If you have pets, a lint roller on furniture and a good vacuum pass on rugs are essential before guests come over. Pet hair on seating is one of the most common complaints guests have, and it only takes an extra five minutes to address.
Spot-clean any obvious stains on carpet before guests arrive rather than trying to hide them with furniture. A small carpet stain remover applied even ten minutes before guests arrive can lift a fresh spot significantly. For older stains, our team at Elite Maids can handle stubborn stains as part of a holiday cleaning service or event clean so your floors look their best for any occasion.
Entryway floors deserve a second pass if there are multiple people walking in from outside. A quick sweep right before guests arrive removes the last bit of tracked-in debris.
6. Freshen Up Guest Rooms and Sleeping Spaces
If you are hosting overnight guests, the guest room is its own priority. Cleaning guest rooms before visitors arrive goes beyond making the bed, though that is the first and most visible step. A freshly made bed with clean linens communicates care and attention instantly.
Strip the bed and put on fresh sheets if the room has been sitting unused. Fluff pillows, add extra blankets if the season calls for it, and make sure there is a clear flat surface, a nightstand or dresser, where guests can set their belongings. Empty the trash can in the room and wipe down any dusty surfaces including the nightstand, dresser top, and windowsill.
Check the closet if guests will be using it. A few empty hangers and a small amount of cleared shelf space go a long way. Make sure the room smells fresh rather than stale or musty. If the room has been closed for a while, open a window for a few minutes before the guests arrive to air it out. For deeper concerns about indoor air quality, the American Lung Association’s indoor air guidance covers why ventilation matters in rooms that sit unused between guests.
Cleaning the guest room thoroughly also includes a quick vacuum of the floor, wiped mirrors, and clean windows if they have obvious smudges. If you only have a few hours before company arrives, focus on the bed, the bathroom they will use, and the surfaces at eye level.
7. Tackle Odors and Indoor Air Quality Before Your Guests Walk In
A home can look spotless and still smell off. Odors are one of the most immediate impressions guests register, and they are easy to miss because you live in the space. Addressing odors before guests arrive is a critical part of any pre-guest cleaning checklist that most guides underplay.
Start by identifying the sources: kitchen trash, pet bedding, diaper pails, gym bags, or laundry left in the washer too long. Empty trash cans before guests arrive in every room, not just the kitchen. Move pet bedding or litter boxes out of common areas if possible. Run the exhaust fan if you have been cooking something pungent.
Good ventilation is the most effective odor solution. Open windows for even fifteen minutes before guests arrive to cycle in fresh air. Avoid masking odors with heavy sprays or candles, which can layer scents uncomfortably. A light, neutral fragrance from a candle or a natural diffuser is fine, but let the underlying smell be clean rather than covered.
If you want a genuinely fresh-smelling home for a larger gathering, consider an all-season deep clean a day or two before the event. A thorough clean removes the source of odors rather than masking them, and the results last noticeably longer than a surface wipe-down.
For eco-conscious households, the EPA Safer Choice program certifies cleaning products that are effective without releasing harsh chemical fumes into your indoor air, which is especially important when guests include children or anyone with respiratory sensitivities.
Ready for Guests? Let Elite Maids Handle It
Getting your home guest-ready does not have to mean an hours-long scramble. By focusing on these five priority areas: the entryway, kitchen, bathrooms, high-touch surfaces, and floors, you cover the spots guests notice most without wasting time on areas they will never see. For upcoming gatherings, recurring visits, or a thorough clean before a big event, you can pre-guest home cleaning services also available by area if you want to see what neighbors nearby are doing to stay ahead of hosting. And when you are ready to hand it all off to a professional, get a free house cleaning quote from Elite Maids House Cleaning today. Our background-checked, five-star rated team serves Phoenix, Mesa, Scottsdale, Gilbert, Chandler, Glendale, and across Arizona’s Valley communities, with same-day booking available online between 8am and 6pm. Every visit is backed by a no-cost reclean guarantee so you book with total confidence.
Frequently Asked Questions
What to clean before having guests over?
Before guests arrive, prioritize the entryway, kitchen counters and sink, bathrooms, high-touch surfaces like door handles and light switches, and visible floors. These are the areas guests notice most. Empty trash cans, wipe mirrors, put out fresh towels, and do a quick floor sweep or vacuum in every room guests will use. A focused thirty to sixty minute clean covers all of it.
What is the 5 5 5 rule for decluttering?
The 5-5-5 rule for decluttering is a quick decision framework: if an item costs less than five dollars, takes less than five minutes to replace, and you have not used it in five months, let it go. It is a practical way to make fast decisions when clearing surfaces before guests arrive without overthinking every item you pick up.
What are the 5 basic cleaning principles?
The five basic cleaning principles are: clean from top to bottom so debris falls to lower surfaces you have not cleaned yet; clean from back to front so you do not track dirt over clean areas; clean dry before wet to remove loose debris first; use the right product for each surface; and work in a systematic pattern so no area is missed. These apply whether you are doing a quick clean or a full deep clean.
What are the 5 things to stay clean?
The five things to keep consistently clean in any home are: kitchen counters and sink, bathrooms, floors, bedding and soft surfaces, and high-touch points like handles and switches. Staying on top of these five areas with regular maintenance prevents the buildup that makes pre-guest cleaning feel overwhelming. A recurring professional cleaning schedule keeps all five in check without daily effort on your part.
Top Rated Cleaning Supplies: The Complete Product Guide
SHARE:
The top rated cleaning supplies right now include multi-surface sprays, microfiber cloths, oxygen-based stain removers, grout cleaners, and enzyme-based odor eliminators. These products consistently outperform their competitors in independent testing, real-world use, and consumer reviews. This guide breaks down the best household cleaning products by category so you can stock your supply closet with confidence.
1. Multi-Surface Sprays: The Foundation of Any Cleaning Supply Collection
A reliable multi-surface spray is the workhorse of any well-stocked cleaning cabinet. These all-purpose cleaners cut through grease, fingerprints, food residue, and everyday grime on countertops, appliances, stovetops, and sealed surfaces without scratching or streaking. When shopping for the best multi-surface cleaning products, look for formulas that are pH-balanced so they are safe on a variety of materials.
Great Value Multi Purpose Cleaner in Lemon Scent is one of the most purchased all-purpose cleaners available today, and for good reason. At under $3 for 32 fl oz, it delivers solid grease-cutting performance at a fraction of what you pay for name-brand alternatives. Consumer Reports’ laundry and cleaning reviews consistently highlight value-driven multi-surface sprays as a smart buy for households that clean frequently.
For households with sensitivities or allergy concerns, fragrance-free or plant-derived multi-surface sprays are worth the upgrade. If you want to go deeper on choosing formulas that work safely for sensitive households, the hypoallergenic cleaning supplies guide on this blog is a great next read. When choosing any all-purpose household cleaner, check for the EPA Safer Choice label, which signals that every ingredient has been reviewed for human and environmental safety.
2. Microfiber Cloths and Sponges: The Best Reusable Wipes for Every Surface
Microfiber cloths are among the highest-rated cleaning products across every credible review source, and it is easy to see why. A quality microfiber cloth can pick up bacteria, dust, and grease with nothing but water, making it one of the most effective and eco-friendly cleaning tools available. The ultra-fine fibers create a static charge that traps particles rather than pushing them around like a traditional cotton rag does.
When choosing microfiber wipes and cleaning cloths, look for a gsm (grams per square meter) rating of at least 300 for general cleaning and 400+ for glass and stainless steel. The best reusable cleaning sponges are those with a scrubbing side for stuck-on messes and a soft side for everyday wiping. Cellulose sponges are another popular pick for kitchen use because they absorb water quickly and hold it well during scrubbing tasks.
One important tip: wash your microfiber cloths separately from cotton towels. Cotton lint sticks to microfiber and clogs the tiny fibers, cutting their cleaning power significantly. Dedicated cleaning cloths that are washed properly can last hundreds of cycles, making them a far better investment than disposable wipes over time.
3. Disinfectants and Sanitizing Sprays: Top Rated Products for Killing Germs
Disinfectants are not the same as cleaners, and understanding the difference matters. A cleaner physically removes dirt and residue. A disinfectant kills bacteria and viruses on contact after the surface is already clean. The top rated disinfecting sprays and sanitizing products must sit on a surface for a specified “dwell time” to actually work, typically 30 seconds to 10 minutes depending on the formula.
The EPA Safer Choice program maintains a list of certified disinfecting products that meet safety and efficacy standards. If you are buying a disinfectant to kill specific pathogens, look for an EPA registration number on the label. Products like quaternary ammonium-based sprays and hydrogen peroxide-based disinfectants are two of the most widely recommended categories for home use.
For households dealing with mold or mildew, disinfectants alone are not enough. The CDC recommends addressing the moisture source before applying any sanitizing product. You can learn more about professional-grade sanitizing approaches by exploring disinfection services offered by Elite Maids.
Avoid using disinfectants on porous surfaces like untreated wood or grout without reading the label first. Certain formulas can bleach or damage finishes. And always ventilate the room during use, since many sanitizing sprays emit volatile organic compounds (VOCs) that can irritate airways. The EPA’s guidance on VOCs and indoor air quality is a useful reference when selecting products for enclosed spaces.
4. Bathroom Cleaners: Highest Rated Supplies for Toilets, Tiles, and Tubs
The bathroom is where cleaning product quality really shows. The highest rated bathroom cleaning supplies are formulated to dissolve soap scum, hard water deposits, and limescale without requiring you to scrub for 20 minutes. For toilets, gel-based bowl cleaners with hydrochloric acid or citric acid are the two most effective options for cutting through mineral buildup and stains.
For tile and grout, a dedicated grout cleaner with an alkaline formula or an oxygen bleach base will do far more than a generic spray. Grout is porous and traps soap residue and mildew easily, so a product that can penetrate the surface rather than just coat it is key. Pair it with a stiff-bristled grout brush for the best results.
Shower doors and tub surrounds respond best to daily spray-on shower cleaners that prevent soap scum from building up in the first place. These preventive bathroom cleaning products are sprayed on after showering without rinsing, creating a thin barrier that keeps residue from bonding to the surface. It is a simple habit that dramatically reduces the amount of scrubbing needed during a deep clean.
If you want a broader strategy for tackling your whole home rather than just the bathroom, the spring cleaning guide on this blog covers a room-by-room approach that pairs well with stocking up on the right supplies.
5. Kitchen Cleaning Products: Top Picks for Grease, Stovetops, and Appliances
Kitchen grease is a different animal from regular household dirt. It bonds to surfaces and bakes on under heat, which means standard all-purpose sprays often underperform. The top rated kitchen cleaning products are specifically formulated with degreasers, which break down fat molecules and emulsify them so they rinse away cleanly.
Citrus-based degreasers and enzyme-based kitchen sprays are two of the most effective categories right now. Citrus formulas use d-limonene (a compound extracted from citrus peel) to dissolve grease naturally, while enzyme-based products use biological agents to break down organic matter. Both outperform standard all-purpose cleaners on stovetops and range hoods.
For ovens, a paste-based oven cleaner or a baking soda and dish soap combination applied overnight gives you the best lift on baked-on grease without harsh fumes. For stainless steel appliances, a dedicated stainless steel cleaner applied with the grain of the metal will remove fingerprints and restore shine without streaking. Kitchen cleaning products that actually work are covered in depth in a separate post on this blog if you want a more focused kitchen breakdown.
The Good Housekeeping cleaning guides are also a reliable resource for independently tested kitchen product recommendations that go beyond marketing claims.
6. Laundry Products: Best Detergents and Fabric Care Supplies
Laundry is a category where the gap between the best and the mediocre products is very real. The highest rated laundry detergents today use enzyme cocktails that target specific stain types: proteases for protein-based stains like blood and sweat, lipases for grease and oil, and amylases for food and starch stains. A detergent with all three enzyme types is your best all-around pick.
Concentrated detergent pods and liquid concentrates are the most popular laundry cleaning products among households that want performance without excess packaging. They also tend to perform better in cold water, which saves energy without sacrificing cleaning power. If you have a high-efficiency (HE) washer, always use HE-labeled detergent to prevent excess sudsing that can damage the machine over time.
Beyond detergent, oxygen-based laundry boosters are some of the most praised laundry supply add-ons available. Products based on sodium percarbonate release hydrogen peroxide in the wash, which whitens whites and brightens colors without the harshness of chlorine bleach. These fabric-safe stain removers can be added to almost any wash load as a pre-soak or in-wash booster.
For delicates and wool, a pH-neutral wool wash or delicate fabric cleaner is the right tool. Enzyme detergents, while excellent for regular loads, can damage protein-based fibers like wool and silk over repeated washes. Keeping a separate delicates-specific laundry product on hand protects your investment in quality clothing.
7. Floor Cleaners: Top Rated Products for Hardwood, Tile, and Carpet
Different floor types need different cleaning solutions, and using the wrong one can cause real damage. The top rated floor cleaning products for hardwood are pH-neutral, water-minimizing formulas. Excess water is hardwood’s enemy, causing warping and staining over time. Spray mops paired with diluted hardwood-safe cleaners are the safest method for regular maintenance of wood floors.
For tile and grout floors, an alkaline floor cleaner diluted per the label instructions cuts through dirt and residue without leaving a film. Residue buildup from improperly diluted floor cleaners is actually one of the most common reasons tile floors look dull even after mopping. Always rinse with clean water after mopping tile if you are using a concentrated solution.
Carpet cleaning products split into two camps: dry cleaning powders and liquid spot treatments. Enzyme-based carpet spot cleaners are the top pick for pet stains and odors because they break down the uric acid in pet urine rather than simply masking the smell. For whole-carpet refreshing between professional cleanings, a dry carpet powder that you sprinkle, let sit, and vacuum up works well for odor control without dampening the fibers.
If your home has a mix of floor types, consider investing in a concentrated multi-floor cleaning product that can be diluted differently for each surface. This approach keeps your cleaning supply closet manageable and reduces the number of products you need to rotate through. For eco-conscious households in Arizona looking for floor cleaners that are safe for the local environment, the post on eco-friendly cleaning products is worth reading.
8. Specialty Cleaners: Glass, Stainless Steel, and Hard-to-Clean Surfaces
Specialty cleaning products exist because some surfaces genuinely need targeted formulas. Glass cleaner is the classic example. The top rated glass cleaning products use ammonia or isopropyl alcohol as the active ingredient, which evaporates quickly to prevent streaking. Avoid using paper towels on glass if possible since they can leave behind lint. A clean microfiber cloth or crumpled newspaper gives a streak-free result far more consistently.
Stainless steel cleaners are another specialty product worth having in your rotation. Regular sprays leave water spots and fingerprint smears on stainless steel. A dedicated stainless steel cleaning spray or oil-based wipe applied with the grain of the metal buffs out smudges and leaves a thin protective layer that repels future fingerprints.
For stone surfaces like granite or marble countertops, only pH-neutral stone cleaners should be used. Acidic cleaners like vinegar and many bathroom sprays will etch and dull stone permanently. A stone-specific cleaner maintains the finish without risking damage. If you have quartz countertops, those are more forgiving but still benefit from a gentle, non-abrasive daily cleaner over generic all-purpose sprays.
9. Eco-Friendly and Natural Cleaning Supplies: Safe Alternatives That Actually Work
Eco-friendly cleaning supplies have come a very long way. The best natural cleaning products today match or exceed conventional formulas in real-world cleaning performance while cutting out ingredients that affect indoor air quality and waterways. If you have children or pets at home, or you simply want to reduce chemical exposure, natural cleaning alternatives are worth exploring seriously.
Plant-derived surfactants, citric acid, and sodium bicarbonate are the backbone of most effective natural household cleaners. These ingredients are biodegradable, low-toxicity, and widely available. The EPA’s Safer Choice program certifies products where every ingredient has been vetted for safety, making it a reliable filter when shopping for eco-friendly cleaning supply options.
Concentrated cleaning tablets that dissolve in water are one of the more interesting innovations in the natural cleaning supply space right now. You buy small tablets, drop one into a reusable spray bottle with water, and you have a ready-to-use cleaner without the plastic waste of buying new bottles every time. These refill-format products have gained strong reviews from consumer groups and environmental organizations alike.
The American Lung Association’s indoor air resources highlight why reducing chemical VOCs indoors matters, especially in Arizona where many households keep windows closed for much of the year due to heat. Choosing lower-VOC cleaning products is a practical step toward healthier air inside your home. You can also check out the post on natural cleaning solutions for room-by-room ideas that work in the Arizona climate.
10. Odor Eliminators and Air Fresheners: Top Rated Products for Fresh-Smelling Rooms
Odor eliminators and air freshening products are a category where the difference between masking and eliminating smells really matters. The top rated odor eliminating products use one of three mechanisms: enzymatic breakdown of odor-causing organic molecules, activated charcoal that adsorbs odor compounds, or chemical neutralizers that react with and cancel out odor molecules. Simply spraying a fragrance over a smell does not remove it, which is why air fresheners alone disappoint so many people.
Enzyme-based odor eliminators are the gold standard for pet odors, smoke smells, and cooking odors that have embedded into soft surfaces like upholstery and carpet. For general room freshening, activated charcoal bags placed in closets, car interiors, and bathrooms work passively and last for months before needing to be recharged in sunlight.
Baking soda remains one of the simplest and most effective odor-absorbing products available. An open box in the refrigerator, a sprinkle on carpet before vacuuming, or a bowl placed in a musty closet are all time-tested uses that genuinely work. For persistent odors tied to mold or mildew, however, no air freshener substitutes for finding and addressing the source of moisture causing the problem.
11. Cleaning Tools and Equipment: Supplies That Make Products Work Better
The right tools make even good cleaning products work noticeably better. A quality spray bottle with an adjustable nozzle, for instance, lets you switch between a fine mist for glass and a concentrated stream for grout. Cheap spray bottles clog, drip, and distribute product inconsistently, which wastes both the cleaner and your effort.
Grout brushes, extendable scrubbers, squeegees, and microfiber mop heads are the cleaning tools that professional cleaners rely on daily. The Spruce’s cleaning resource library covers a wide range of tool-specific tips that complement any product selection. The cleaning pros at Elite Maids use professional-grade tools and techniques that are calibrated to product formulas, which is one reason results from a professional cleaning visit look so different from a DIY effort with the same products.
A telescoping duster with a washable microfiber head is one of the most underrated cleaning tools for Arizona homes, where dust accumulates fast due to dry desert conditions. It reaches ceiling fans, light fixtures, and high shelves without a step stool, cutting cleaning time significantly. Pair it with a quality HEPA vacuum and you have a foundation for a consistently clean home between professional visits.
12. Where to Buy Top Rated Cleaning Supplies: Best Retail and Online Sources
Knowing where to shop for the best cleaning supply products is nearly as important as knowing what to buy. For everyday essentials like multi-surface sprays, laundry detergent, and microfiber cloths, big-box retailers offer the widest selection and the most competitive pricing. Home Depot’s cleaning supply section is a strong source for commercial-grade products like concentrated degreasers, mop systems, and heavy-duty disinfectants that are not always easy to find in grocery stores.
For research-backed product recommendations, Consumer Reports and Good Housekeeping remain two of the most trusted sources for independently tested cleaning products. Both organizations evaluate products under controlled conditions rather than relying on manufacturer claims, making their recommendations genuinely useful when you are choosing between competing brands.
If you are looking for specialty or eco-friendly cleaning supply products, specialty cleaning retailers and online marketplaces carry a wider range of concentrated formats, refillable systems, and fragrance-free options than most brick-and-mortar stores stock. The EPA Safer Choice website also has a searchable product database where you can filter by product type and use, making it easy to find certified-safe options across every cleaning category.
For a deeper look at keeping your home clean all year long rather than just at one time, the house cleaning in Phoenix post has practical daily and weekly habits that pair well with having the right products on hand.
Ready to Let the Professionals Handle It?
Stocking the right cleaning supplies is a great step, but even the best rated cleaning products on the market cannot replicate what a trained, experienced cleaning team delivers. Whether you need a routine recurring clean, a thorough deep clean before a move, or a full reset after an event, Elite Maids House Cleaning has a service built for it. Every cleaner is background-checked, fully insured, and backed by a no-cost reclean guarantee so you never have to wonder if the job was done right. If you are ready to come home to a genuinely clean house without lifting a finger, contact Elite Maids house cleaning today for a free quote and get an instant online estimate in minutes.
Frequently Asked Questions
What are the top rated cleaning supplies recommended by Consumer Reports?
Consumer Reports consistently rates enzyme-based laundry detergents, concentrated multi-surface sprays, and microfiber cleaning cloths among the highest performing cleaning supplies. They evaluate products in controlled lab settings for actual cleaning effectiveness rather than marketing claims. For disinfectants specifically, look for EPA-registered formulas with a confirmed kill claim on the label.
What cleaning supplies do professional house cleaners use?
Professional cleaners typically use commercial-grade multi-surface sprays, concentrated degreasers diluted to the correct ratio, microfiber cloths, grout brushes, and HEPA-filter vacuums. They select products based on surface type and soil level rather than using one product for everything. Professionals also follow strict dwell times for disinfectants, which is a step many DIY cleaners skip.
Are eco-friendly cleaning products as effective as conventional ones?
Today’s plant-derived and natural cleaning products perform comparably to conventional formulas for most household tasks. EPA Safer Choice-certified products have been independently tested for both safety and cleaning efficacy. For heavy-duty jobs like oven degreasing or grout restoration, a targeted specialty formula, whether conventional or eco-friendly, will outperform a general-purpose natural spray.
How do I know if a cleaning product is safe for my family and pets?
Look for the EPA Safer Choice seal, which means every ingredient has been reviewed for human and environmental safety. Avoid products with chlorine bleach, ammonia, or high-VOC solvents in households with small children, pets, or people with respiratory sensitivities. Always ventilate rooms during and after use, and store products in a locked cabinet away from children and animals.
What is the difference between a cleaner, a sanitizer, and a disinfectant?
A cleaner removes visible dirt and residue through physical or chemical action. A sanitizer reduces bacterial counts on a surface to a safe level but does not necessarily kill all pathogens. A disinfectant kills a broader range of bacteria and viruses on contact after the surface has already been cleaned. For full germ elimination, you need to clean first and then disinfect as a second step.
Before guests arrive, focus on six key areas: the entryway, kitchen, bathrooms, high-touch surfaces, guest rooms or common spaces, and floors. These are the spots guests notice most, and tackling them in the right order makes your home feel genuinely welcoming. The sections below walk through exactly what to clean in each area so you can host with confidence.
Whether you’re hosting a dinner party, a holiday gathering, or just a friend stopping by, getting your home guest-ready doesn’t have to mean a full weekend overhaul. If you’re looking for a professional house cleaning service in Arizona to handle the heavy lifting, Elite Maids House Cleaning has you covered. But if you’re doing it yourself, this checklist will make sure you hit every spot that actually matters.
1. The Entryway: Your Home’s First Impression
The entryway sets the tone for everything that follows. It’s the first thing guests see when they walk through the door, and a cluttered or dirty entryway instantly signals that the rest of the home might not be much better. Cleaning your entryway before guests arrive is one of the highest-impact things you can do in the least amount of time.
Start by clearing the floor of shoes, bags, and anything that’s just sitting there waiting to be put somewhere else. Wipe down the front door itself, inside and out. Fingerprints, smudges, and dust collect on door frames and handles constantly, and guests physically touch the door handle before they even step inside. Sweep or vacuum the entryway floor, and if you have a doormat, shake it out or replace it if it’s past saving.
Wipe down the door handle, door frame, and light switch plate
2. The Kitchen: The Room Guests Always Wander Into
No matter what kind of gathering you’re hosting, guests end up in the kitchen. It’s just the nature of entertaining. That makes the kitchen one of the most important rooms to clean before guests arrive. People notice smells, sticky countertops, and a sink full of dishes, even when they’re trying to be polite about it.
Wash any pots, pans, and dishes beforehand so you’re not stacking dirty cookware on top of each other while trying to entertain. Clear the counters as much as possible. A clutter-free counter reads as clean even if you haven’t scrubbed it yet, but go ahead and wipe it down with an all-purpose cleaner. Pay special attention to the stovetop and the area around the sink, both of which collect grease and food residue fast.
Empty the trash can before guests arrive. This is one of the most overlooked steps in the whole cleaning-house-for-guests process, but a half-full or full trash can often has an odor that spreads through the kitchen and adjoining rooms. Replace the bag so the can is fresh.
Wash or load all dishes and put away any drying rack items
Wipe down countertops, the stovetop, and the backsplash
Empty and reline the trash can
Clear the sink and wipe it dry
Wipe down appliance fronts (fridge, microwave, dishwasher)
Sweep or mop the kitchen floor
For a broader seasonal reset of the kitchen and the whole house, the ultimate guide to spring cleaning covers a complete top-to-bottom approach you can apply any time of year.
3. Bathrooms: The Room That Makes or Breaks the Visit
Bathrooms are where guest opinions of your home get formed. A dirty bathroom is memorable in the worst way. Cleaning your bathroom before guests come over doesn’t take as long as you think, especially if you focus on what guests actually see and touch rather than trying to do a full deep clean every time.
Scrub the toilet, including the base and the back, and wipe down the seat. Spray and wipe the sink and faucet handles. Clean the mirror. Replace the hand towel with a fresh one if it’s been hanging there a while. Put out a new roll of toilet paper and make sure there’s a spare visible so guests don’t have to go hunting. If you have a shower or tub that might be visible, give the exterior a quick wipe even if you’re not cleaning the whole thing.
Pay attention to the floor. Hair and dust collect around the base of the toilet and along the wall corners. A quick sweep and mop makes a big difference. And if your bathroom has any tendency toward mildew, especially in humid climates or monsoon season here in Arizona, make sure there’s no visible mold on grout or caulk. The EPA’s guidance on mold is clear that bathroom surfaces are one of the most common spots for mold growth in residential homes.
Scrub and wipe down the toilet, including the base
Clean the sink and faucet handles
Wipe the mirror
Replace hand towels and set out fresh toilet paper
Sweep and mop the floor
Empty the bathroom trash can
If your bathroom needs more than a quick wipe-down, our home disinfection services go well beyond the surface to sanitize the areas guests come into contact with most.
4. High-Touch Surfaces: What Guests Notice and Touch Most
High-touch surfaces are exactly what they sound like: the spots in your home that get touched over and over throughout the day. These areas accumulate germs, fingerprints, and grime faster than anywhere else, and they’re often completely forgotten in a pre-guest cleaning routine. Cleaning high-contact surfaces before guests arrive is a quick task that makes the whole home feel cleaner and more hygienic.
Work through each room and look for the things everyone touches. Light switches, door handles, cabinet pulls, remote controls, stair railings, and countertop edges all fall into this category. A microfiber cloth dampened with an all-purpose cleaner moves fast through these spots. According to Good Housekeeping’s cleaning experts, most people skip these surfaces entirely during routine cleaning, which means they can go weeks without being wiped down.
Light switches in every room guests will use
Door handles and knobs throughout the main living areas
Cabinet pulls in the kitchen and bathroom
TV remotes and shared devices
Stair railings if your home has stairs
Chair backs and armrests
If you’re short on time and want to cover these surfaces thoroughly, a Phoenix Valley house cleaning team can move through all of these spots in a fraction of the time it takes on your own.
5. Guest Rooms and Common Living Spaces: Where Guests Actually Spend Their Time
Whether you have a dedicated guest room or your guests will be spending time in the living room and dining room, these common spaces need attention before anyone arrives. This is where guests sit, relax, and form their overall impression of your home, so cleaning guest spaces before visitors come over goes a long way.
In the living room, fluff and straighten couch cushions, dust surfaces like coffee tables and shelves, and wipe down any glass surfaces. Decluttering these areas matters as much as cleaning them. Clutter reads as chaos even in a clean room. Clear off flat surfaces like side tables, the dining table, and the coffee table. Put things away rather than just shifting them to another spot.
If you have a dedicated guest room, make the bed with fresh sheets. Wipe down the nightstand and any surfaces a guest might place things on. Check that there are clean towels available and that the closet has a few free hangers. These small details signal that you actually prepared for them, which guests genuinely appreciate.
Straighten and fluff furniture cushions
Dust shelves, tabletops, and entertainment centers
Wipe glass surfaces and framed photos
Declutter flat surfaces throughout the living area
Make the guest bed with fresh linens if applicable
6. Floors: The Surface That Carries Every Bit of Dirt in Your Home
Floors are the foundation of a clean home. According to cleaning experts, floors carry all of the dirt that comes into the home, so vacuuming and mopping is essential before welcoming visitors. It’s easy to underestimate floors because you’re not always looking down, but guests are, especially when they walk in and sit down.
Vacuuming before guests arrive removes pet hair, dust, crumbs, and debris from carpets and hard floors. Follow up with a mop on hard flooring surfaces in the kitchen, bathrooms, and entry. Pay attention to corners and the edges along the baseboards, where dust tends to collect and isn’t always caught by a center-of-room vacuum pass.
If you have rugs, shake them out or run a vacuum over them. Area rugs in entryways and living rooms trap a surprising amount of debris. For hardwood floors, use a cleaner designed for the specific finish to avoid streaking or dulling the surface. Real Simple’s cleaning guides recommend cleaning floors last in any room so that debris from wiping surfaces above doesn’t fall onto floors you’ve already done.
Vacuum all carpeted areas and rugs
Sweep hard floors in the entry, kitchen, and hallways
Mop kitchen, bathroom, and entryway floors
Clean along baseboards and into corners
Shake out or vacuum area rugs
Need help covering all six of these areas before a big event? Our professional disinfection and deep clean services are built exactly for pre-event and pre-guest preparation, covering every surface from top to bottom so you don’t have to.
Quick Bonus Tips: The Forgotten Spots That Guests Notice
Once you’ve covered the six main areas, a few extra touches make a real difference. These are the forgotten spots that often don’t make it onto a standard cleaning-house-for-guests checklist, but guests tend to notice them.
Smell: Odors are one of the first things guests notice. Take out all trash, check the fridge for anything past its prime, and open a window or use a subtle, non-overwhelming air freshener. Avoid heavy scent sprays that can irritate guests with allergies or sensitivities.
Pet areas: If you have pets, clean their feeding area, wash their bedding, and vacuum upholstered furniture thoroughly. Pet hair on a couch is one of the most commonly noticed things guests encounter.
Ceiling fans and light fixtures: Dusty fan blades are visible from below and can actually drop dust onto surfaces when the fan runs. A quick wipe on the way through a room catches this.
Window sills and blinds: Dust collects quickly here and is easy to spot in natural light. A damp cloth along each window sill takes about 30 seconds per window.
The fridge exterior: If guests are helping themselves to drinks or food, they’ll touch the fridge. Wipe down the handle, the front surface, and the top if it’s visible.
Book a Pre-Guest Cleaning with Elite Maids House Cleaning
Cleaning your home before guests arrive doesn’t have to fall entirely on your shoulders. Elite Maids House Cleaning is a family-owned Arizona maid service serving Phoenix, Mesa, Scottsdale, Gilbert, Chandler, Glendale, Queen Creek, San Tan Valley, Tucson, Flagstaff, and the surrounding communities. Every cleaner is background-checked, bonded, fully insured, and rated five stars. We offer event cleanings, deep cleans, and recurring service backed by a reclean-at-no-cost satisfaction guarantee.
What are the most important things to clean before guests arrive?
The most important areas are the bathroom, kitchen, entryway, and floors. Guests form their first impression at the door and will almost certainly use your bathroom and pass through your kitchen. High-touch surfaces like door handles and light switches matter too, because they’re used constantly but rarely cleaned. Tackle those five areas first, and the rest of the home falls into place.
What is the daily 6 cleaning list?
A daily cleaning list typically includes making the bed, wiping down kitchen counters, cleaning the sink, doing a quick bathroom wipe-down, sweeping or vacuuming high-traffic floors, and clearing clutter from common areas. Keeping up with these six tasks daily means your home is always close to guest-ready and a full pre-visit cleaning takes far less time and effort.
What is the 5 5 5 rule for decluttering?
The 5-5-5 rule for decluttering means asking yourself three questions about any item: Can you replace it for less than five dollars? Would it take less than five minutes to replace? Have you used it in the last five months? If the answer to all three is yes, you can likely let it go. It’s a practical decision filter that speeds up decluttering before guests come over without overthinking every item.
What forgotten spots should I declutter before guests arrive?
The most commonly overlooked spots include the top of the refrigerator, window sills, the area around the toilet base, ceiling fan blades, and the inside of the microwave. Flat surfaces like side tables and countertops also collect clutter that gets ignored during daily routines. Checking these areas in a quick walkthrough before guests arrive catches the spots that standard cleaning routines miss.
How to Maintain a Clean Home Between Professional Cleanings
SHARE:
Maintaining a clean home between professional cleanings comes down to a handful of consistent daily and weekly habits. Small tasks done regularly, wiping counters, doing a quick tidy, and tackling high-traffic areas, prevent buildup so your home never gets out of hand. This guide covers 10 practical, time-saving strategies any household can start using today.
1. Build a Simple Daily Cleaning Routine That Actually Sticks
The biggest reason homes fall into chaos between visits is the absence of a daily routine. You do not need an hour of cleaning every day. A focused 10-to-15-minute routine is enough to keep your home clean between professional cleanings without burning out. Consistency beats intensity every time.
A solid daily routine looks like this:
Wipe down kitchen counters and the stovetop after cooking
Do a quick 5-minute sweep or vacuum in the entryway, kitchen, and living room
Wipe bathroom counters and rinse the sink after use
Make the beds each morning (this alone makes a room look 80% cleaner)
Return items to their designated spots before going to bed
Building these micro-tasks into your existing schedule is easier than carving out a separate block of time. Tie them to anchors you already have: wipe the stove while the coffee brews, tidy the living room during a TV commercial break, reset the bathroom after your morning routine. The daily routine keeps surface grime from compounding into the kind of mess that takes a whole afternoon to fix.
Working with a professional house cleaning service in Arizona on a recurring schedule makes the daily routine even easier because you are always starting from a freshly deep-cleaned baseline.
2. Declutter First, Cleaning Around Clutter Does Not Count
Clutter is the silent enemy of a tidy home. You cannot truly clean surfaces that are buried under mail, shoes, toys, and random objects. Decluttering regularly is one of the most underrated ways to keep your home cleaner with less effort, because less stuff means fewer places for dust and grime to hide.
Try these decluttering habits to make home cleaning easier:
Adopt the one-in, one-out rule: whenever something new comes into the house, something else leaves
Do a 10-minute “reset” at the end of each day to return items to their proper places
Keep a donation box in a closet so you can drop items in whenever you realize you no longer need them
Deal with mail immediately: recycle junk, file what matters, and do not let it pile up on counters
When surfaces are clear, wiping them down takes seconds. When counters are stacked three items deep, cleaning them takes 10 minutes of moving things around. Reducing clutter in your home is not just an aesthetic choice, it is a cleaning strategy. According to Real Simple, decluttering consistently is one of the highest-impact things you can do to reduce cleaning time overall.
3. Focus on High-Traffic Areas to Keep the House Tidy Every Day
Not every room in your home gets equally dirty. Your kitchen, bathrooms, entryway, and living room are the areas that accumulate grime, germs, and mess the fastest. Keeping your house tidy between cleaning visits is much more manageable when you concentrate daily attention on these high-traffic zones rather than trying to clean every room every day.
Here is what to prioritize in each high-traffic area:
Kitchen: Wipe the stovetop, counters, and sink daily. Spot-clean the microwave interior when you see splatter. Empty the trash before it overflows.
Bathrooms: Keep a small spray bottle of all-purpose cleaner under each sink and wipe the counter, faucet, and toilet seat daily. This prevents soap scum and limescale from building up.
Entryway: Sweep or vacuum frequently to stop tracked-in dirt from spreading through the rest of the house. A shoe rack or mat at the door makes a big difference.
Living room: Fluff pillows, fold throws, and wipe the coffee table. A tidy living room feels clean even if nothing has been scrubbed.
The EPA’s guidance on indoor air quality highlights that dust and particulates in high-traffic zones contribute to poor air quality indoors, which is another great reason to stay on top of these areas daily.
4. Use the Right Cleaning Tools and Products for Faster Home Maintenance
Having the right cleaning supplies within easy reach removes one of the biggest barriers to daily upkeep: friction. If you have to dig through a cabinet to find a sponge, you will skip the task. Keeping supplies organized, accessible, and effective is one of the smartest strategies for maintaining a cleaner home between visits.
Recommended tools to keep on hand for routine home maintenance cleaning:
Microfiber cloths: More effective at trapping dust and bacteria than paper towels or cotton rags. Keep a stack in the kitchen and each bathroom.
All-purpose spray cleaner: One good bottle handles counters, appliance exteriors, and bathroom surfaces. Look for EPA Safer Choice certified products if you want a safer option for your family and pets. The EPA Safer Choice program lists products that meet strict safety and environmental standards.
A lightweight cordless vacuum: A cordless vacuum makes quick daily passes on floors effortless. No cord means you will actually use it.
Squeegee for shower glass: 30 seconds after every shower prevents hard water spots and soap scum from building up.
Trash bags stocked inside the bin: The moment you take out a full bag, the next one is already there. Simple, but it removes a delay that causes overflowing bins.
If you prefer a more natural approach to day-to-day cleaning between professional visits, you may want to read about eco-friendly home cleaning using natural ingredients that are safe for kids, pets, and sensitive households.
5. Tackle Laundry and Dishes Consistently to Prevent Overflow
Two of the fastest ways a home spirals into visible disorder are laundry piles and overflowing sinks. Staying on top of both requires systems more than willpower. Keeping up with dishes and laundry is a cornerstone of a consistently clean home, and it is far easier to do a little daily than a mountain weekly.
Simple systems that work:
Run the dishwasher every evening and unload it every morning so there is always somewhere for dirty dishes to go
Do one load of laundry per day rather than saving it all for one day (wash, dry, and put away, never let it sit)
Keep a dedicated laundry basket in each bedroom so clothing never ends up on the floor
Wipe down the sink and counters after doing dishes, they are already wet, so it takes 20 seconds
These habits also make your professional cleaning appointment more effective. When your cleaner arrives to a home free of dirty dishes and laundry overflow, they can spend their time on the deep cleaning tasks that actually make a difference, scrubbing grout, cleaning inside appliances, and sanitizing surfaces. For a deeper understanding of the value that professional service adds, check out this comparison of professional cleaning vs. DIY to see which tasks are worth handing off entirely.
6. Spot Clean Immediately to Avoid Stains and Buildup
One of the most effective ways to keep your home clean between scheduled appointments is to deal with messes the moment they happen. Spot cleaning right away is almost always faster and easier than scrubbing a dried or set stain later. This single habit can save you hours of deep-cleaning effort over the course of a month.
Spots worth treating immediately:
Food or drink spills on counters, floors, and upholstery
Grease splatter on the stovetop (much easier to wipe while still warm)
Toothpaste drips and soap rings in bathroom sinks
Muddy footprints or pet paw prints on floors
Water rings on wood furniture
Keep a small roll of paper towels and a spray bottle in both the kitchen and bathroom so you never have a reason to walk past a mess. The principle is simple: a 30-second wipe now beats a 15-minute scrub later. This is especially relevant in Arizona’s dry climate where spills and grime can dry and harden faster than in more humid regions.
Research from Good Housekeeping consistently shows that immediate stain treatment dramatically improves the odds of full removal compared to waiting even a few hours.
7. Assign Household Cleaning Tasks and Get Everyone Involved
Maintaining a clean home is not a one-person job. When every household member has a defined role, the workload shrinks considerably and no single person gets burnt out. Dividing household cleaning tasks by age and ability is one of the most practical strategies for keeping things clean and tidy between professional cleaning appointments.
How to make shared cleaning tasks work:
Assign each person a specific daily or weekly task rather than asking for general “help” (general requests get ignored)
Give children age-appropriate tasks: wiping baseboards, vacuuming their room, or emptying small trash cans
Post a simple task chart on the fridge or a shared notes app so expectations are clear
Rotate tasks monthly so no one gets stuck with the least desirable jobs
It also helps to communicate clearly about what the professional cleaner handles versus what the household handles. Your recurring cleaning appointment with Elite Maids covers the deep work, scrubbing, sanitizing, reaching corners the daily routine misses. The household handles the everyday upkeep in between. That division of labor makes both efforts more effective.
8. Do a Weekly Reset to Stay Ahead of Deep Cleaning Needs
On top of your daily habits, setting aside 30-to-60 minutes once a week for a more thorough home reset keeps things from compounding into a deep-clean emergency before your next appointment. Weekly cleaning tasks bridge the gap between daily tidying and professional deep cleaning, giving you a consistently fresh and comfortable space.
A weekly home reset should include:
Vacuuming all floors, including under furniture edges and along baseboards
Mopping hard floors with an appropriate cleaner for the surface type
Cleaning bathroom toilets, tubs, and shower tiles
Wiping down kitchen appliance exteriors (fridge, microwave, oven door)
Changing and washing bed linens
Emptying all trash cans throughout the house
Dusting ceiling fans, shelves, and furniture surfaces
If your household runs on a biweekly or monthly professional cleaning schedule, this weekly reset is what keeps your home in a livable, presentable state in the weeks between those visits. Think of it as maintenance, the same way you would not skip an oil change just because your car got a full service recently. You can also pair your weekly reset with a bigger seasonal push. The ultimate guide to spring cleaning is a great place to start when it is time to go beyond the weekly routine and tackle the whole house systematically.
9. Manage Pet Hair and Allergens Proactively
For households with pets, managing pet hair and dander is one of the most constant home cleaning challenges between professional appointments. Pet hair can coat furniture, embed in carpets, and float through the air in a matter of hours. Staying ahead of it requires a few targeted tools and habits rather than reactive cleanup sessions.
Proactive pet hair and allergen management:
Brush your pets outside at least twice a week to reduce shedding indoors
Keep a lint roller near the couch, pet beds, and at the front door for quick passes
Use a vacuum with a HEPA filter specifically designed for pet hair on upholstered surfaces and rugs
Wash pet bedding weekly to prevent odor and dander buildup
Keep pets off upholstered furniture if hair and allergens are a persistent problem
Indoor allergens including pet dander are a genuine air quality concern. The American Lung Association notes that pet dander is one of the most common indoor allergen triggers, and regular cleaning is one of the primary ways to reduce exposure. This matters especially in busy Arizona households where pets spend more time indoors during extreme summer heat.
10. Know What to Leave for Your Professional Cleaning Appointment
Part of maintaining your home well between professional cleanings is knowing which tasks NOT to stress over, because your cleaning team will handle them. Recognizing this boundary makes your daily and weekly routine feel lighter, not heavier, and helps you focus your energy where it actually makes a difference.
Tasks that are best reserved for your professional cleaner:
Deep scrubbing of grout lines in bathrooms and kitchens
Cleaning inside the oven, refrigerator, and dishwasher
Washing windows inside and out
Moving furniture to clean underneath
Sanitizing garbage cans and recycling bins
High dusting of ceiling fans, vents, and crown molding
Deep disinfecting of bathrooms, including behind toilets and under sinks
When you book with Elite Maids House Cleaning, every cleaner is background-checked, insured, and backed by a reclean satisfaction guarantee. You handle the light daily upkeep and let the professionals take care of the tasks that require time, expertise, and the right equipment. That combination is the most efficient path to a consistently clean home. You can book a house cleaning online in minutes with instant pricing and same-day availability between 8am and 6pm.
Ready to take back your weekends? Stop spending your free time on deep cleaning tasks and let the professionals handle the hard work. Contact Elite Maids house cleaning today for a free quote and find out why we are the most-reviewed residential cleaning team in Arizona. Book online in minutes with instant pricing and no phone call required.
Frequently Asked Questions
How to keep your house clean like a professional housekeeper?
Professional housekeepers work in zones, move top-to-bottom so debris falls to the floor last, and clean in a consistent sequence every time. They also use the right tool for each surface rather than one cloth for everything. Adopt a daily routine for high-traffic areas, deal with messes immediately, and reserve deep tasks for scheduled professional visits.
What is the 80/20 rule in housekeeping?
The 80/20 rule in housekeeping suggests that roughly 20% of your cleaning actions produce 80% of the visible results. Focusing your daily effort on the kitchen, bathrooms, and entryway, the highest-impact zones, keeps the whole home looking clean even when you cannot scrub every surface. Prioritize these areas daily and save the rest for your professional cleaning appointment.
How often should a home be professionally cleaned?
For most households, a biweekly professional cleaning is the most popular schedule because it keeps buildup manageable without feeling excessive. Families with pets, young children, or allergy sufferers often benefit from weekly professional cleanings. Monthly visits work well for individuals or couples who maintain strong daily habits. The right frequency depends on your household size, lifestyle, and how much daily upkeep you do between visits.
What is the 10 10 10 rule for cleaning?
The 10 10 10 rule means spending 10 minutes tidying, 10 minutes cleaning surfaces, and 10 minutes on floors or laundry each day. This 30-minute total keeps the home in a consistently clean state without requiring a marathon cleaning session. It is one of the most practical frameworks for maintaining a clean home between professional cleanings because it breaks the work into small, non-intimidating chunks.
A printable cleaning schedule for working moms breaks your home tasks into small, daily chunks so nothing piles up by the weekend. When you know exactly what to clean and when, the mental load shrinks fast. Below you will find a full daily and weekly system, plus a free downloadable-style checklist you can print and post on your fridge today.
1. Why Working Moms Need a Dedicated Cleaning Schedule
Between early wake-ups, school drop-offs, a full workday, and everything that comes after, most working moms are running on fumes by Thursday. Without a house cleaning schedule for busy families, small messes snowball into overwhelming weekend-long scrub sessions. A structured cleaning plan stops that cycle cold.
A dedicated cleaning schedule for working moms does three things: it spreads the workload across every day of the week, it gives each family member a clear role, and it removes the daily decision fatigue of figuring out what to clean next. Research from the Good Housekeeping cleaning experts consistently shows that short daily habits prevent dirt buildup far more effectively than marathon weekend sessions.
If you are a single working mom juggling everything alone, this structure matters even more. A single working mom cleaning schedule that takes 15 to 20 minutes per day is absolutely achievable, and we will show you exactly how to build one.
2. Before You Get Started: Set Up for Success
Before diving into the actual daily cleaning list for working moms, spend ten minutes doing a one-time setup. This prep work makes the entire system stick.
Gather your supplies in one caddy. Keep a portable cleaning caddy stocked with an all-purpose spray, microfiber cloths, a toilet brush, and a scrubber so you never waste time hunting for products.
Pick your print format. A simple table with seven columns (one per day) works well. You can sketch one on paper or use any free word-processing app to create an easy printable cleaning schedule for working moms PDF that you post on the fridge.
Assign zones. Divide your home into zones: kitchen, bathrooms, bedrooms, living areas, and laundry. Each zone gets a dedicated day so no single day feels heavy.
Decide on eco-friendly products. If you prefer greener options, look for products on the EPA Safer Choice list, which certifies formulas that are safer for families and the environment.
Loop in the kids. Even a five-year-old can wipe down a bathroom counter. Assign age-appropriate tasks and reduce your solo load immediately.
Once your supplies are ready and your zones are mapped, your free cleaning schedule for working moms practically runs itself. The hardest part is the first day.
3. Daily Cleaning Schedule for Working Moms: Before Work Tasks
The goal of a before-work routine is quick wins that keep the house from descending into chaos while you are gone. Aim for ten minutes or less. Here is a reliable daily cleaning list for working moms to tackle each morning:
Make beds (or have kids make their own).
Wipe down kitchen counters after breakfast.
Load dirty dishes into the dishwasher and start it.
Do a 60-second bathroom counter wipe in the main bath.
Toss in a load of laundry if it is laundry day.
These five tasks take roughly eight to ten minutes but set a clean baseline for the entire day. A working mom cleaning schedule that starts strong in the morning means you come home to a house that already looks halfway done. That mental relief alone is worth the effort.
If mornings are truly impossible, shift these tasks to the night before. Many moms find that a ten-minute reset the night before is easier than a rushed morning routine. Either way, the daily cleaning schedule framework is the same.
4. After Work: Quick Evening Cleaning Tasks
After a long day, the last thing you want is a two-hour clean. The good news: your after-work tasks only need to take 10 to 15 minutes. The key is resetting, not deep cleaning.
Clear and wipe the dinner table.
Wipe stovetop and counters after cooking.
Run the dishwasher if you did not do it in the morning.
Do a quick toy or clutter pickup in the living room.
Swap laundry from washer to dryer if applicable.
Think of this as your “reset to zero” routine. You are not cleaning to perfection; you are making sure tomorrow morning starts from a neutral, manageable state. This approach is the backbone of any practical house cleaning schedule for busy families.
For families in Arizona’s hotter months, evening is also a good time to check for dust on ceiling fans and air vents. Desert dust accumulates quickly, and a fast wipe-down two or three times a week keeps indoor air quality in check. The EPA’s indoor air quality guidelines note that regular surface cleaning is one of the simplest ways to reduce household airborne particles.
5. Before Bedtime: Wind-Down Cleaning Tasks
A short bedtime routine ties the day together and keeps Monday morning from feeling like a disaster. The before-quiet-time tasks are the lightest of the day.
Wipe bathroom sink and mirror (one minute per bathroom).
Fold and put away the laundry you washed today.
Set out anything needed for tomorrow morning (backpacks, lunches, gym bags).
Do a final living room scan: pillows straightened, throw blankets folded.
Empty any trash cans that are full.
These tasks are simple enough that older kids and partners can handle most of them. When everyone in the household follows the same working mom cleaning schedule, the burden stops sitting on one person’s shoulders.
6. The Ultimate Weekly Cleaning Schedule for Working Moms
The ultimate weekly cleaning schedule assigns one zone to each day so no single evening becomes overwhelming. Here is a Monday-through-Sunday layout that works well for most households:
Monday: Kitchen deep reset. Clean inside the microwave, wipe cabinet fronts, scrub the sink, and mop or Swiffer the kitchen floor.
Tuesday: Bathrooms. Scrub toilets, clean tub or shower walls, mop bathroom floors, replace towels.
Wednesday: Bedrooms. Change bed linens, dust nightstands and dressers, vacuum bedroom floors.
Thursday: Living areas. Dust surfaces, vacuum upholstered furniture, vacuum or mop living room floors.
Friday: Catch-up and laundry. Finish any missed tasks, run household laundry, clean out the fridge of expired food.
Saturday: Outdoor or miscellaneous. Wipe down patio furniture, clean the garage entry, or tackle a single organization project.
Sunday: Rest. Seriously. The system only works if you protect at least one day of rest.
This weekly cleaning schedule for busy families keeps each day to 20 to 30 minutes of focused effort. You can print this layout as your free cleaning schedule for working moms and put it straight on the fridge. If you prefer a working mom cleaning schedule PDF, simply type it into any document app and print.
For a more detailed breakdown of daily, weekly, and monthly tasks beyond this framework, check out this complete home cleaning schedule that covers everything from daily wipe-downs to seasonal deep dives.
7. Monthly and Seasonal Tasks to Add to Your Printable Schedule
A daily cleaning list for working moms handles the surface-level work, but some tasks only need attention once a month or once a season. Slot these into your printable schedule so they do not slip through the cracks.
Monthly Tasks
Clean oven interior and dishwasher filter.
Wipe down baseboards and light switches.
Wash shower curtain liners.
Clean behind the toilet and around the base.
Disinfect trash cans inside and out.
Seasonal Tasks
Deep clean inside the refrigerator.
Wash windows inside and out.
Flip or rotate mattresses.
Clean ceiling fan blades and light fixtures.
Declutter closets and donate unused items.
Seasonal deep cleaning is where many households fall behind. If a full seasonal refresh feels daunting, reading through the ultimate guide to spring cleaning gives you a room-by-room checklist to work through at your own pace.
For Arizona families, seasonal cleaning also means addressing the dust that blows in during monsoon season and the extra foot traffic during the holidays. When your seasonal workload spikes, it is perfectly reasonable to bring in a bonded and insured Arizona cleaning team to handle the heavy lifting so you can focus on the family.
8. How to Customize a Printable Cleaning Schedule for Your Household
No two households run the same way, so a one-size-fits-all printable schedule will only get you so far. Here is how to tailor your easy printable cleaning schedule for working moms to fit your real life.
Factor in your work hours. If you work long shifts three days a week and shorter days the other two, assign heavier tasks to your lighter days.
Account for pets. Households with dogs or cats need daily vacuuming of pet-traffic areas and more frequent litter or outdoor cleanup. Build those into your daily cleaning schedule.
Adjust for home size. A two-bedroom apartment and a five-bedroom house require very different time investments. Scale the schedule to match.
Use color coding. On your printable, color-code tasks by family member. Kids see their tasks in green, parents in blue. This visual system reduces the “I didn’t know I was supposed to do that” conversation.
Build in grace days. Life happens. If Tuesday’s bathroom day gets skipped, move it to Wednesday and shift the rest of the week by one day. A rigid schedule breaks; a flexible one sticks.
Real Simple’s cleaning editors recommend a similar zone-based approach, noting on Real Simple Cleaning that breaking the home into manageable sections is far less overwhelming than tackling the whole house at once.
9. When to Call in Professional Help
Even the most organized working mom cleaning schedule has limits. There will be weeks where illness, travel, deadlines, or just plain exhaustion throw everything off. That is not a failure of your system; that is real life. Knowing when to call in a professional cleaning team is as much a part of smart home management as having a schedule in the first place.
Professional cleaners are especially valuable for:
Deep cleans after illness. When a stomach bug or respiratory infection moves through the family, a thorough disinfecting clean goes beyond what a daily schedule covers.
Post-holiday cleanup. After hosting family gatherings, an Arizona holiday cleaning service can restore the house to normal in a single visit.
Move-in and move-out situations. Whether you are moving into a new rental or prepping a home for sale, a professional team saves you enormous time and stress.
Quarterly resets. Some families keep their daily routine but bring in a team once a quarter to handle baseboards, grout, ovens, and other areas that require more time and equipment.
Schedule crashes. If a particularly demanding month derails your routine for several weeks, a single professional clean resets the baseline so your daily schedule can pick back up without catching up to months of buildup.
Elite Maids House Cleaning serves families across Arizona including Phoenix, Mesa, Scottsdale, Gilbert, Chandler, Glendale, Queen Creek, San Tan Valley, Tucson, and Flagstaff. Every cleaner is background-checked, five-star rated, bonded, and insured. If you are in the Flagstaff area and want a schedule framework paired with professional support, the house cleaning schedule for working moms in Flagstaff is a helpful local resource.
10. Printable Cleaning Schedule Tips That Actually Stick
Creating a free cleaning schedule for working moms is one thing. Getting yourself and your family to actually follow it is another. Here are the habits that separate schedules that work from schedules that end up buried under mail on the counter.
Post it visibly. Print your schedule and tape it inside a cabinet door or on the fridge. Digital reminders work too, but a physical printout is harder to ignore.
Celebrate streaks. Use a dry-erase marker on a laminated printable to check off each day. A visual streak of completed days is surprisingly motivating for both adults and children.
Prep the night before. If Tuesday is bathroom day, put the cleaning caddy in the hallway on Monday night. Friction is the enemy of consistency; reduce it wherever you can.
Start with just one week. Do not commit to a lifetime of cleaning schedules. Just commit to one week. After seven days, the habit often takes care of itself.
Link tasks to existing habits. Wipe the bathroom counter while your coffee brews. Vacuum the living room while the kids watch their 30-minute show. Pairing cleaning tasks to existing routines makes them nearly automatic.
Review monthly. Every month, spend five minutes reviewing what worked and what did not. Swap out tasks that consistently get skipped and replace them with something more realistic for your schedule.
The FlyLady Method, popular among working moms, uses a very similar zone-and-habit approach. If you want to explore that system in depth, the FlyLady cleaning routine for busy moms covers how to adapt it to a real household.
For households that want to go beyond the basics, The Spruce’s cleaning guides offer deep dives into product choices, technique improvements, and room-specific strategies worth bookmarking.
Take Back Your Weekends with Elite Maids House Cleaning
A well-built easy printable cleaning schedule for working moms gives you structure, reduces stress, and keeps your home consistently clean without requiring marathon weekend sessions. Start with the daily before-work and after-work tasks, layer in the weekly zone system, and customize it to match your household’s real rhythm. When life gets busy or the schedule gets away from you, you do not have to handle it alone. If you are ready to reclaim your free time and come home to a spotless house, contact Elite Maids house cleaning today for a free quote and let Arizona’s most-reviewed residential cleaning team handle the heavy work for you.
Frequently Asked Questions
How do I make a realistic cleaning schedule as a working mom?
Start by listing every cleaning task in your home, then assign each one to a specific day based on how often it needs to happen. Keep daily tasks under 15 minutes and weekly tasks under 30. Use a zone system so you are only focused on one area of the house per day. Print it, post it visibly, and adjust after the first week based on what actually got done.
What is the best daily cleaning routine for a busy mom?
The most effective daily cleaning routine for a busy mom has three micro-sessions: a 10-minute before-work reset covering dishes, counters, and bed-making; a 15-minute after-work evening reset covering dinner cleanup and a laundry swap; and a 5-minute bedtime tidy covering bathroom surfaces and a final living room scan. That totals about 30 minutes spread across the full day, which feels manageable even on exhausting workdays.
How do I keep my house clean when I work full time?
The key is consistency over intensity. Daily 10 to 15 minute habits prevent buildup far better than one long weekend clean. Assign zones to each weekday, involve every family member, keep your cleaning supplies within easy reach, and schedule one professional deep clean per quarter to tackle the tasks your daily routine cannot cover. Families across Arizona rely on recurring professional cleaning visits to keep the system sustainable long-term.
What should a single working mom prioritize when cleaning?
Focus first on health-critical areas: kitchen surfaces, toilets, and high-touch points like door handles and light switches. These spaces spread illness most quickly. Next, prioritize the spaces where your family spends the most time, typically the kitchen and living room. Let less-used rooms like guest bedrooms wait for a dedicated weekly or monthly slot rather than daily attention.
Can I get a free printable cleaning schedule for working moms?
Yes. The schedule in this post is designed to be print-ready. Simply copy the daily and weekly task lists into any word-processing document, format them into a table with one column per day, and print. Laminating the page and using a dry-erase marker lets you reuse the same sheet every week without reprinting. Many moms also save it as a working mom cleaning schedule PDF on their phone for quick reference.
To deep clean your kitchen from top to bottom, start at the ceiling and work your way down: dust vents and light fixtures, then tackle appliances, cabinets, counters, the sink, and finally the floor. This order keeps dislodged grime from re-dirtying surfaces you have already cleaned. The steps below walk through every zone in the right sequence, with tips on products, timing, and common pitfalls to avoid.
Before you pick up a single sponge, clear the counters completely, pull out the trash bin, and gather your supplies: an all-purpose cleaner, degreaser, baking soda, white vinegar, microfiber cloths, a grout brush, and rubber gloves. Having everything within reach means you will not lose momentum halfway through the kitchen deep cleaning process. If you prefer to skip the scrubbing entirely, Elite Maids House Cleaning offers professional deep cleaning that covers every surface listed here.
1. Dust Ceiling Vents, Light Fixtures, and the Top of Cabinets
Always clean from the highest point down. Grease and dust collect on top of cabinets, on range hood vents, and on light fixtures in ways most people never see until they stand on a step stool. Use a dry microfiber cloth or a long-handled duster to knock debris loose, then follow with a damp cloth dampened in warm soapy water. Cleaning these elevated surfaces first means any fallout lands on surfaces you have not touched yet. Remove range hood filters if they are metal mesh and soak them in hot water with a few squirts of dish soap or a tablespoon of washing soda for 15 minutes before scrubbing and rinsing. Re-installing clean filters dramatically improves ventilation, which matters because cooking grease vapors are a known contributor to poor indoor air quality, according to the EPA’s indoor air quality guidance.
2. Scour the Stove and Cooktop
The stove is the hardest-working surface in the kitchen, and it shows. Scouring the stove properly means removing grates or burner caps and soaking them in a sink of hot, soapy water while you work on the cooktop surface itself. Spray a degreaser on the cooktop, let it sit for five minutes, then scrub with a non-scratch pad in small circles. For ceramic or glass cooktops, a paste of baking soda and a few drops of dish soap applied with a soft cloth removes baked-on residue without scratching. Stove deep cleaning also includes the knobs: pull them off, wipe the panel behind them with a damp cloth, then wash the knobs in soapy water and dry them before snapping them back. Do not overlook the area between the stove and the countertop, a thin spatula wrapped in a microfiber cloth can fish out years of crumbs and grease from that gap.
3. Overhaul the Oven
Oven deep cleaning is one of the most skipped chores in the kitchen, and one of the most rewarding when it is finally done. If your oven has a self-cleaning cycle, run it the night before your deep clean session and wipe the ash out the next morning with a damp cloth. If you prefer a manual approach, coat the interior walls, bottom, and door glass with a paste of one cup baking soda mixed with enough water to form a spreadable consistency. Leave it overnight, then wipe it away with a damp cloth and follow with a spray of white vinegar to dissolve any remaining residue. Pay special attention to the oven door glass: the grime there is baked on in layers, and the baking soda paste does an excellent job lifting it. Oven racks can be soaked in a bathtub with hot water and dish soap, scrubbed with a stiff brush, rinsed, and dried before being replaced. A thorough oven cleaning removes carbon buildup that can produce unpleasant odors during cooking and ensures the appliance runs efficiently.
4. Tackle the Refrigerator Inside and Out
Tackling the refrigerator means emptying it completely before you do anything else. Toss expired items, consolidate leftovers, and set everything else on the counter. Remove all shelves and drawers and wash them in the sink with warm soapy water. While they dry, wipe the interior walls, ceiling, and floor of the refrigerator with a solution of two tablespoons baking soda dissolved in one quart of warm water. This mild alkaline solution cleans without leaving chemical odors that can transfer to food. Refrigerator deep cleaning also means pulling the unit away from the wall to vacuum the condenser coils, which collect dust and force the motor to work harder. Wipe the exterior, including the top, sides, and handles, with an all-purpose cleaner. Do not forget the rubber door gaskets: these collect mold and food particles in their folds. Scrub them with an old toothbrush dipped in a solution of one part white vinegar to one part water. Mold in refrigerator gaskets is more common than most people realize; the CDC’s guidance on mold in homes recommends addressing it promptly to protect household health.
5. Degunk the Dishwasher and Deep Clean the Sink
Most people assume the dishwasher cleans itself. It does not. Degunking the dishwasher starts with pulling out the bottom rack and removing the filter, usually a twist-off cylinder at the base of the spray arm. Rinse the filter under hot water and scrub it with a brush until the mesh is clear. Wipe the interior walls and the door gasket with a damp cloth, then place a cup of white vinegar on the top rack and run a hot cycle. Follow that with a cycle where you sprinkle a half-cup of baking soda on the floor of the dishwasher to deodorize. For disinfection services that go beyond surface-level cleaning, a professional team can sanitize these hidden zones using EPA Safer Choice certified products.
Deep cleaning the sink requires more than a quick rinse. Scrub the sink basin with a paste of baking soda, then rinse and follow with a spray of white vinegar to remove mineral deposits and neutralize odors. Sink deep cleaning also means descaling the faucet aerator: unscrew the tip of the faucet, drop the aerator into a small cup of white vinegar for 20 minutes, then rinse and replace. Clean the drain by pouring half a cup of baking soda down it, followed by half a cup of vinegar. Let it fizz for 10 minutes, then flush with boiling water. Wipe the faucet and handles until they shine. Good Housekeeping’s cleaning guides recommend weekly sink maintenance to prevent buildup between deep cleans.
6. Conquer the Cabinets and Pantry
Cabinet deep cleaning covers both the exterior surfaces and the interior. Outside first: spray a degreaser on cabinet fronts, handles, and the area directly above the stove where grease vapor settles. Let the degreaser dwell for two to three minutes, then wipe with a microfiber cloth. For wood cabinets, follow with a wood-safe cleaner or a diluted dish soap solution. Conquering the cabinets on the inside means pulling everything out, wiping the shelves with a damp cloth, and allowing them to dry before replacing items. While the shelves are empty, check for expired pantry goods, consolidate duplicates, and add shelf liner paper if the surface is worn. Wipe down every jar, box, and can before putting it back. For a full picture of how cabinet cleaning fits into a whole-home refresh, our whole-home deep cleaning checklist walks through every room in detail.
7. Get Counters Gleaming and Sanitize the Backsplash
Getting counters gleaming means knowing your surface first. Granite and natural stone should never see vinegar or acidic cleaners, use a pH-neutral stone cleaner instead. Laminate and quartz counters handle an all-purpose cleaner well. Spray the counter, let it sit for one minute to break down any residue, then wipe from back to front with a clean microfiber cloth. Counter deep cleaning also means moving the small appliances, toaster, coffee maker, knife block, and cleaning underneath them, which is where crumbs accumulate most. Wipe the appliances themselves: the outside of the coffee maker, the crumb tray of the toaster, and the exterior of the blender. Clean the backsplash using the same all-purpose spray and a soft cloth for tile or a non-scratch sponge for grout lines. For stubborn grout stains, a paste of baking soda applied with a grout brush, left for five minutes before scrubbing and rinsing, brings tile lines back to near-original brightness. If your spring reset includes the kitchen, our ultimate guide to spring cleaning pairs perfectly with this checklist.
8. Deep Clean the Microwave
Microwave deep cleaning is faster than most people expect. Place a microwave-safe bowl filled with one cup of water and a few slices of lemon (or two tablespoons of white vinegar) inside and run it on high for five minutes. The steam loosens every splatter on the interior walls and ceiling. Carefully remove the hot bowl, then wipe the interior with a damp cloth. The turntable plate lifts out and can be washed in the sink with dish soap. You should wipe spills, splatters, and crumbs out of your microwave after every use, and give it a thorough deep clean at least once each week or once each month depending on usage. Wipe the exterior, including the door handle and control panel buttons, with a cloth lightly dampened with all-purpose cleaner. Never spray liquid directly onto the control panel.
9. Polish Pots, Pans, and Small Appliances
Polishing pots and pans is the step that brings your cookware back to looking like new. For stainless steel pans with discoloration inside, a paste of baking soda and a few drops of dish soap applied with a non-scratch pad works well. Rinse thoroughly and dry immediately to prevent water spots. Cast iron should never be soaked; instead, scrub it with coarse salt and a paper towel, rinse quickly, and dry immediately on a warm burner before applying a thin coat of cooking oil. For copper pots, a paste of equal parts salt, flour, and white vinegar shines the exterior. Polishing small appliances like the stand mixer, food processor, and blender involves wiping down the body with a damp cloth and disassembling any removable parts for a proper wash. For anyone managing a move and needing a thorough kitchen reset, our move-out clean checklist covers exactly what landlords and buyers inspect.
10. Mop and Sanitize the Kitchen Floor
Kitchen floor deep cleaning is the final step, and it is done last precisely because everything you have shaken loose from higher surfaces has now settled here. Start by sweeping or vacuuming thoroughly, including under the stove, refrigerator, and dishwasher if they can be moved. For tile and grout floors, fill a bucket with hot water and a floor cleaner appropriate for tile and mop in overlapping strokes, rinsing the mop head frequently. Grout lines on the floor respond well to the same baking soda and grout brush technique used on the backsplash. For vinyl plank or hardwood-look flooring, use a damp (not wet) mop with a hardwood-safe cleaner to avoid moisture damage. Sanitizing the kitchen floor after mopping adds an extra layer of protection, especially in homes with young children or pets. The EPA’s Safer Choice program is a useful reference for identifying floor sanitizers that clean effectively without introducing harsh chemicals into your home environment. Let the floor dry completely before walking on it or replacing any furniture.
Deep Clean Kitchen Checklist: A Quick-Reference Summary
Use this checklist to track your progress through the kitchen deep cleaning process. A printed or digital kitchen deep cleaning checklist keeps you moving efficiently and ensures nothing gets skipped:
Dust ceiling vents, light fixtures, and the tops of cabinets
Remove and soak range hood filters; wipe range hood exterior
Scour stovetop, grates, burner caps, knobs, and the gap beside the stove
Deep clean oven interior, door glass, and racks
Empty and wipe refrigerator interior; clean shelves, drawers, and gaskets
How Much Does a Professional Kitchen Deep Clean Cost?
Kitchen deep cleaning cost varies by the size of the kitchen, how long it has been since the last thorough clean, and the scope of work requested. A standalone kitchen deep clean through a professional service typically ranges from $80 to $200 depending on the region and the level of detail required. Full-home deep cleaning packages, which include the kitchen, tend to offer better value per room. Factors that increase cost include oven interior cleaning, refrigerator interior cleaning, and grout scrubbing. For Arizona homeowners in Phoenix, Mesa, Scottsdale, Gilbert, Chandler, Glendale, Queen Creek, San Tan Valley, Tucson, and Flagstaff, the trusted cleaning team at Elite Maids House Cleaning provides instant online quotes so you know the price before anyone walks through your door.
If you are weighing the time cost against the financial cost, consider that a full kitchen deep clean done properly takes four to six hours for a single person. A professional team cuts that time dramatically while delivering consistent results backed by a satisfaction guarantee.
Your kitchen works hard every day, and it deserves a thorough reset on a regular basis. Whether you tackle the entire deep clean kitchen checklist yourself or hand the job to professionals, the key is following a top-to-bottom order, using the right products for each surface, and not skipping the small details like the faucet aerator and the refrigerator coils. For homeowners who would rather spend their weekend doing something they enjoy, professional kitchen disinfection services are available on demand. Ready to hand over the scrubbing? Contact Elite Maids house cleaning today for a free quote and get your kitchen sparkling without lifting a finger.
Frequently Asked Questions
How to clean a kitchen from top to bottom?
Start at the highest points: dust ceiling vents, light fixtures, and the tops of cabinets first. Move down through appliances (stove, oven, microwave, refrigerator, dishwasher), then cabinets, counters, the sink, and the backsplash. Finish by sweeping and mopping the floor. This top-to-bottom sequence prevents debris from re-dirtying surfaces you have already cleaned, making the whole process faster and more efficient.
What are some common mistakes when cleaning a kitchen?
The most common mistakes are cleaning in the wrong order (mopping before dusting, for example), using the wrong cleaner for a surface (like vinegar on granite), skipping the inside of the microwave or oven for weeks at a time, and forgetting high-touch zones like cabinet handles and the refrigerator door gasket. Using a structured kitchen deep cleaning checklist eliminates most of these errors by keeping you on track.
How often should you deep clean a kitchen?
Most households benefit from a full kitchen deep clean every one to three months, with lighter maintenance cleaning done weekly. High-use kitchens, those in homes with children or frequent cooking, may need a thorough deep clean monthly. The stovetop and microwave should be wiped down after each use to reduce buildup and make scheduled deep cleans much faster and easier.
What cleaning products work best for a kitchen deep clean?
A degreaser handles baked-on grease on the stove and cabinet fronts. Baking soda makes a gentle abrasive paste for the oven, sink, and pots. White vinegar descales faucets, deodorizes drains, and cuts through mineral deposits. An all-purpose cleaner covers counters, the microwave exterior, and appliance surfaces. For stone counters, use a pH-neutral cleaner only. The EPA’s Safer Choice certified products are a reliable standard for effectiveness and safety.
Can I deep clean my kitchen without harsh chemicals?
Yes. Baking soda, white vinegar, dish soap, and hot water handle the vast majority of kitchen cleaning tasks without harsh fumes or chemical residue. For stubborn grease, look for plant-based degreasers that carry the EPA Safer Choice label. Lemon juice also works as a mild acid for descaling and deodorizing. Proper dwell time, where you let the cleaner sit on the surface before scrubbing, does most of the heavy lifting regardless of which product you choose.
Ultimate Whole House Deep Cleaning Checklist: Every Room, Every Task
SHARE:
A whole house deep cleaning checklist covers every room from top to bottom, tackling the grime, dust, and buildup that routine weekly cleaning misses. Deep cleaning goes beyond surface tidying to scrub grout, degrease appliances, wash baseboards, and disinfect high-touch surfaces. This guide walks you through a full room-by-room deep cleaning checklist so nothing gets skipped.
Why a Whole House Deep Cleaning Checklist Actually Works
Most people start deep cleaning with good intentions and run out of steam halfway through the hallway. A whole house deep cleaning checklist solves that problem by breaking one overwhelming project into small, completable tasks. When every task is written down, nothing falls through the cracks, and you never stand in the middle of the living room trying to remember whether you already cleaned the ceiling fan or just thought about cleaning it.
There is a real reason professional cleaners use checklists on every single visit. It is not because they lack experience. It is because a written list removes the mental load of deciding what comes next. You work through it, check things off, and move on. That structure keeps energy high and results consistent whether you are cleaning solo, tag-teaming with a partner, or coordinating a family effort.
A printable deep cleaning checklist also creates accountability. Hang it on the fridge, work through it on a Saturday morning, and you have a visible record of what got done. For households doing quarterly deep cleans, a deep cleaning checklist PDF you can save and reuse is worth its weight in gold. If you prefer a digital version, a deep cleaning house checklist printable you can pull up on any device works just as well.
According to Good Housekeeping’s cleaning coverage, deep cleaning two to four times a year keeps allergen levels, mold risk, and general buildup manageable between regular maintenance cleans. That cadence makes a room-by-room checklist worth building and saving for repeated use.
If you already have disinfection services on your radar, a thorough checklist helps you communicate exactly which areas you want prioritized before the cleaners arrive.
What to Gather Before You Start Deep Cleaning Your House
Walking from room to room to fetch supplies is one of the biggest time-wasters in any deep cleaning session. Gather everything before you begin and carry it with you in a caddy or bucket. Here is what a complete deep cleaning supply kit looks like:
Baking soda and white vinegar for natural scrubbing
Grout brush and old toothbrush for tight corners
Microfiber cloths (at least a dozen)
Scrubbing sponges and non-scratch pads
Mop and bucket, or a spray mop
Vacuum with attachments (crevice tool, upholstery brush, dusting brush)
Extension duster for ceiling fans and high ledges
Rubber gloves
Trash bags
Step stool or small ladder
Eco-friendly cleaning options matter more than many people realize. The EPA’s indoor air quality guidelines note that many conventional cleaning products release volatile organic compounds that linger indoors. Choosing lower-VOC formulas is a practical step, especially in homes with children, elderly residents, or anyone with respiratory sensitivities.
Once your caddy is packed, you are ready to move through the checklist by room. Always work top to bottom within each room: dust falls down, and you want to vacuum or mop floors last, not first.
The Ultimate Guide to Deep Cleaning Your House: Room-by-Room Checklist
This is the core of any whole house deep cleaning checklist. Work through each room completely before moving to the next. Resist the urge to bounce between rooms; finishing one space at a time keeps momentum going and lets you see real progress.
Kitchen Deep Cleaning Checklist
The kitchen collects grease, food residue, and bacteria faster than any other room. A thorough kitchen deep clean includes:
Clean inside the oven, including the door glass and racks
Degrease the stovetop, burners, drip pans, and grates
Wipe down the range hood and clean or replace the filter
Clean the microwave inside and out, including the turntable
Wipe all cabinet fronts, handles, and drawer pulls
Clean inside cabinets and drawers, remove items, wipe surfaces, replace
Deep clean the refrigerator: empty shelves, wash drawers, wipe door gaskets
Clean the dishwasher: run a cleaning cycle and wipe the door seal
Descale the coffee maker and electric kettle
Scrub the sink, faucet, and drain
Wipe down the backsplash
Clean countertops and corners where crumbs collect
Wash walls and baseboards near the stove
Dust light fixtures and clean light switches
Mop the floor, getting under appliances where possible
For a detailed kitchen deep clean guide specific to Arizona homes, the monthly kitchen deep cleaning service resource from our San Tan Valley team covers additional Arizona-specific considerations like hard water deposits on fixtures.
Bathroom Deep Cleaning Checklist
Bathrooms need the most disinfecting work in any deep clean. Mold spores and bacteria thrive in humid environments, and standard weekly scrubs rarely address grout lines or exhaust fan covers. A thorough bathroom deep cleaning session covers:
Scrub and disinfect the toilet: bowl, tank, seat, hinges, and base
Deep clean the shower or tub: scrub tiles, grout, and caulk lines
Remove and wash the shower curtain and liner, or clean glass doors with a squeegee and glass cleaner
Descale the showerhead by soaking in vinegar
Scrub the sink and faucet, clean the drain stopper
Wipe down the vanity and cabinet fronts inside and out
Clean the mirror with glass cleaner
Remove the exhaust fan cover and wash it; wipe down the fan blades
Wash walls, baseboards, and behind the toilet
Replace or launder the bath mat
Mop or scrub the floor, including corners and around the toilet base
The CDC’s guidance on mold in homes highlights bathrooms as a primary risk zone. Keeping grout sealed, the exhaust fan clean, and surfaces disinfected regularly reduces mold growth substantially.
Bedroom Deep Cleaning Checklist
Bedrooms collect dust, skin cells, and pet dander faster than most rooms because of the soft furnishings. A proper bedroom deep clean includes:
Strip and wash all bedding, including mattress protector and pillow covers
Vacuum and flip or rotate the mattress
Dust ceiling fan blades and light fixtures
Wipe down nightstands, dressers, and headboard
Clean mirrors and glass surfaces
Vacuum upholstered furniture and under the bed
Wipe down window sills and clean windows
Dust blinds or wash curtains
Clean baseboards and door frames
Vacuum under and behind furniture
Wipe down light switches and doorknobs
Vacuum or mop the floor
Living Room and Common Area Deep Cleaning Checklist
Living rooms see a lot of daily use but are often cleaned superficially. A complete deep clean for this space means:
Dust ceiling fan, vents, and light fixtures
Clean windows, tracks, and sills inside and out
Dust and wipe all shelves, entertainment units, and decor
Clean electronics and remote controls with a microfiber cloth
Vacuum or spot-clean upholstered furniture, under cushions, and along seams
Clean throw pillows and blankets: wash or spot treat
Wipe down coffee tables and side tables
Clean baseboards and trim
Deep vacuum rugs and carpets; spot-treat stains
Mop hard floors
Wipe down light switches and outlet covers
Laundry Room Deep Cleaning Checklist
The laundry room is the most neglected room in most homes. A full deep cleaning checklist for this space includes:
Clean the washing machine drum with a machine cleaner or a hot vinegar cycle
Wipe the washer door seal and clean the detergent drawer
Clean the dryer drum, door, and lint trap; vacuum the dryer vent duct
Wipe down the exterior of both appliances
Clean the utility sink
Wipe shelves and cabinets inside and out
Sweep and mop the floor, including behind the appliances
Entryway, Hallways, and Stairs
These transitional spaces bring outdoor dirt into the home and often go overlooked in a standard house clean. During a full house deep clean, make sure to:
Sweep and mop tile or hardwood entryway floors
Wash the front door inside and out, including the handle and kick plate
Clean the coat closet: wipe shelves, vacuum the floor
Dust stair railings and balusters
Vacuum stair carpet or scrub stair treads
Wipe down hallway walls and baseboards
Clean light fixtures and switches
Deep Cleaning Tips for an Apartment or Smaller Home
An apartment deep cleaning checklist follows the same room-by-room structure but has a few unique considerations. In a smaller space, ventilation matters more because cleaning product fumes concentrate quickly. Open windows while you clean and take breaks between rooms. For apartments with a single bathroom, budget extra time there since it handles heavier daily use relative to the floor plan.
Renters should also pay attention to areas that affect security deposits: oven interiors, stovetop drip pans, bathroom grout, and window tracks are the most common sources of deductions. A thorough apartment deep cleaning checklist that documents completed tasks before move-out gives you a record if disputes arise. This overlaps with a move-out cleaning checklist, and the tasks are largely identical.
Small-space deep cleaning also benefits from a declutter pass before you begin. Surfaces covered in items are harder to clean properly, and moving objects only once saves time. Do a quick sweep through each room to clear counters, floors, and shelves, then work the checklist from top to bottom.
For room-by-room deep cleaning approaches proven to work in real Arizona homes, the deep cleaning service by room resource covers additional detail on hard-to-reach spots most people miss.
How to Use This Deep Cleaning Checklist With Your Whole Family
A whole house deep cleaning checklist becomes even more powerful when the work is shared. Assigning tasks by room means multiple people can clean simultaneously rather than following each other through the house. Print out the checklist or pull up a deep cleaning house checklist PDF on a tablet, then divide rooms based on who handles what best.
Younger children can handle simple tasks: wiping baseboards, decluttering toys, or loading laundry. Teenagers can take full ownership of one room. Adults can tackle the high-effort areas like the kitchen, bathrooms, and appliances. Checking tasks off together keeps everyone motivated and makes the project feel like a team effort rather than a chore marathon for one person.
Setting a time limit for each room also helps. Most rooms in an average home take 20 to 45 minutes when worked efficiently with a checklist in hand. A full house deep clean typically runs three to six hours depending on square footage and how long it has been since the last thorough cleaning. Knowing that in advance makes the commitment feel manageable rather than open-ended.
For households that need holiday cleaning services before a family gathering, having a pre-visit checklist helps you prep the space so the professionals can focus on the deep work rather than general tidying.
Families across Arizona who use recurring house cleaning Arizona services find that pairing a professional deep clean with a family maintenance routine between visits keeps homes consistently clean without weekend-consuming effort.
When to Hire a Professional for a Whole House Deep Clean
A DIY deep cleaning checklist is excellent for maintenance and light-to-moderate buildup. But there are situations where calling in a professional deep cleaning team is the smarter choice. If the home has not been deep cleaned in six months or more, the scope of work often exceeds what one or two people can reasonably accomplish in a day. Moving into a new home, preparing a property for sale, or recovering from a renovation are all scenarios where professional deep cleaning services deliver faster and more thorough results than a solo effort.
Professional cleaners work from the same room-by-room checklist framework, but they bring commercial-grade equipment, trained technique, and multiple sets of hands. Areas like grout, oven interiors, refrigerator coils, and window tracks that take a DIY cleaner an hour of scrubbing can be handled efficiently with the right tools and cleaning chemistry.
Arizona’s hard water is a particular challenge. Mineral deposits build up quickly on faucets, showerheads, and glass surfaces. A professional cleaning team familiar with Arizona homes knows how to tackle calcium and lime buildup without damaging fixtures. Deep cleaning services in San Tan Valley and deep cleaning services in Chandler cover exactly this kind of regional buildup in detail.
The the cleaning pros at Elite Maids are background-checked, bonded, insured, and backed by a reclean-at-no-cost satisfaction guarantee. Every visit is handled by a five-star rated cleaner who works from a thorough professional deep cleaning checklist built specifically for Arizona residential homes.
Printable and PDF Whole House Deep Cleaning Checklist
A deep cleaning house checklist PDF or a deep cleaning checklist printable you can physically post in each room makes the process significantly easier. Having the list visible while you work means you never have to stop, think, or pull up a browser tab to remember what comes next.
When building a printable deep cleaning checklist for your own home, organize it by room rather than by task type. Grouping all dusting tasks together sounds logical, but moving through the house room by room is faster in practice because your supplies, focus, and momentum stay in one place.
A good deep cleaning checklist PDF free download format includes three columns: the task, a checkbox, and a notes field for things like “grout needs resealing” or “window latch is stiff.” That notes column turns your checklist into a home maintenance log over multiple uses.
For an apartment deep cleaning checklist, a single-page printable that covers kitchen, bathroom, living area, bedroom, and entryway is usually enough. For larger homes, break the checklist into two pages: one for the main living floor and one for bedrooms and bathrooms. According to Real Simple’s cleaning guides, a room-by-room format consistently produces better results than task-category lists because it maps directly to how people actually move through their homes.
Ready to hand the heavy work to someone else? Contact Elite Maids house cleaning today for a free quote. Elite Maids serves Phoenix, Mesa, Scottsdale, Gilbert, Chandler, Glendale, Queen Creek, San Tan Valley, Tucson, and Flagstaff. Book online in minutes with instant pricing, no phone call required, and same-day availability between 8am and 6pm. Every cleaner is background-checked, bonded, and insured, and every job is backed by a satisfaction guarantee. Give your home the thorough deep clean it deserves without giving up your weekend.
Frequently Asked Questions
How long does a whole house deep clean take?
A full house deep clean typically takes three to six hours depending on the size of the home, the number of people cleaning, and how long it has been since the last deep clean. A 1,000 square foot apartment might take two to three hours with one person working efficiently, while a 2,500 square foot home can take four to six hours or more.
What is the difference between a regular clean and a deep clean?
A regular maintenance clean focuses on surface tidying: vacuuming, wiping counters, cleaning toilets, and mopping floors. A deep clean goes significantly further, covering inside appliances, grout lines, baseboards, ceiling fan blades, window tracks, cabinet interiors, and other areas that accumulate buildup over time and are skipped during weekly or biweekly cleaning visits.
How often should I deep clean my house?
Most cleaning professionals recommend deep cleaning a home two to four times per year. Households with pets, children, allergies, or high foot traffic may benefit from quarterly deep cleans. Between sessions, a consistent recurring cleaning schedule keeps buildup from reaching the point where a deep clean becomes a major project.
Can I use the same deep cleaning checklist for an apartment?
Yes. An apartment deep cleaning checklist uses the same room-by-room structure as a whole house checklist. The main differences are scale and specific features like shared laundry facilities or the absence of a garage. Focus extra attention on the bathroom and kitchen since those spaces handle proportionally more use in a smaller footprint.
What should I clean first when deep cleaning a house?
Always start with the rooms that take the longest or require the most drying time, typically the kitchen and bathrooms. Within each room, work top to bottom: dust ceiling fans and vents first, then surfaces and fixtures, and finish with the floor. This way, any debris that falls during dusting gets picked up in the final vacuuming or mopping step.
To clean hardwood floors properly, sweep or vacuum daily to remove grit, then damp-mop weekly using a pH-neutral cleaner like Method or Pledge, diluted dish soap, or a dedicated hardwood floor solution. Avoid soaking the wood, which causes warping and swelling. This guide walks you through every step, from routine care to tackling tough stains, so your floors stay beautiful for years to come.
The Right Way to Clean Hardwood Floors Every Week
Consistent weekly care is what separates floors that look great at year ten from ones that show scratches and dullness after year two. Cleaning hardwood floors on a regular schedule does not have to be complicated, but the method matters as much as the frequency.
Start every session with a dry pass. Use a microfiber dust mop or a vacuum set to the bare-floor setting to lift sand, pet hair, and crumbs. Grit is the number-one enemy of a hardwood surface because every footstep grinds those particles against the finish like sandpaper. A dry sweep before any wet cleaning prevents that abrasion from happening.
Once the floor is clear of loose debris, prepare your mopping solution. A specialized cleaner such as Pledge FloorCare or Method Squirt and Mop works well here, as does a simple solution of a few drops of liquid dish soap mixed into a gallon of warm water. Whatever you choose, wring your mop until it is barely damp. Puddles of water are your floor’s worst enemy, and standing liquid will seep into the seams and cause the wood to cup or buckle over time.
Mop in the direction of the wood grain and work backward out of the room so you are not stepping on the clean surface. Let the floor air dry completely before walking on it. If you notice streaks, a second pass with a clean, barely damp mop usually takes care of it.
Keeping up with this routine is much easier when your home already has a solid cleaning baseline. If you are spending weekends catching up on deep work rather than maintenance, the team at Elite Maids House Cleaning offers recurring weekly, biweekly, and monthly plans that handle the hard stuff so you can focus on upkeep between visits.
Best Hardwood Floor Cleaning Products: What to Use and What to Avoid
Choosing the right hardwood floor cleaning products can feel overwhelming given how many options line store shelves. The short answer is: stick to products that are pH-neutral and specifically labeled safe for hardwood or sealed wood floors.
Reliable options include:
Method Squirt and Mop: Plant-based, low-residue, and widely available. It cleans effectively without leaving a slippery film.
Pledge FloorCare Multi-Surface Cleaner: Trusted by many homeowners for its streak-free finish on sealed hardwood.
Diluted dish soap: A few drops of a gentle liquid soap in warm water is one of the oldest, most effective DIY hardwood floor cleaners around. Just keep the solution diluted and the mop barely damp.
Bona Hardwood Floor Cleaner: A go-to for professional cleaners because it dries fast and leaves no buildup.
Products to avoid entirely:
Steam mops: The heat and moisture force water vapor into wood grain and destroy the finish over time.
Vinegar or lemon juice: These acids etch the protective finish, leaving the wood vulnerable and dull-looking.
Oil soaps (like Murphy Oil Soap) used too frequently: While marketed for wood, regular use leaves a residue that builds up and makes the floor look hazy.
If you want to confirm whether a product is formulated with safer ingredients, the EPA Safer Choice program maintains a searchable database of cleaning products that have passed rigorous safety and environmental standards. It is a quick way to vet any cleaner before it touches your floors.
How to Remove Stains from Hardwood Floors Without Damaging the Finish
Removing stains from hardwood floors is where most people go wrong because the instinct is to scrub harder or reach for a stronger chemical. Both approaches tend to make things worse. The key is to match the cleaning method to the stain type.
Water Marks and White Rings
These are usually trapped moisture in the finish, not in the wood itself. Rub a small amount of plain mayonnaise or a paste of non-gel toothpaste and baking soda over the ring, let it sit for ten minutes, then wipe clean with a soft cloth. The mild abrasive and oils help re-disperse the trapped moisture.
Pet Stains and Urine
Blot up as much liquid as possible immediately. Mix a tablespoon of dish soap into two cups of warm water and work it gently into the stain. Rinse with a barely damp cloth. For older, set-in stains, a small amount of 3% hydrogen peroxide applied to a cloth (not poured directly) can help lift the discoloration, though test in an inconspicuous spot first because peroxide can lighten some finishes.
Grease and Food
A few drops of dish soap on a damp cloth is usually enough to cut through cooking grease or food spills. Work in small circles and rinse with a clean damp cloth immediately after.
Dark Stains and Ink
These are the most stubborn. Try a cloth dampened with rubbing alcohol first. If the stain has penetrated the finish entirely and reached the raw wood, it may require light sanding and recoating, which is a job for a flooring professional rather than a DIY fix.
Consistent disinfection of high-traffic areas, especially around entryways and kitchens, keeps stains from becoming a recurring problem. Our professional disinfection services target exactly those zones using products that are safe for sealed wood surfaces and effective against household pathogens.
Deep Cleaning Hardwood Floors: When and How to Do It
Deep cleaning hardwood floors goes beyond the weekly mop. It addresses the buildup of old cleaner residue, wax, and fine grime that accumulates in the wood grain over months and makes floors look dull even right after mopping.
Plan on a thorough deep clean of your hardwood two to four times per year, more often if you have pets or kids. Here is the process:
Clear the room: Move furniture to expose the full floor. You cannot deep clean around chair legs properly.
Vacuum with a soft-bristle attachment: Get along baseboards and into corners where debris hides.
Apply a hardwood floor cleaner in sections: Work in four-foot strips across the room. Spray the cleaner directly onto a microfiber mop pad rather than the floor, then mop in the direction of the grain.
Scrub problem areas by hand: For corners, transitions, and grout lines around inlays, use a soft-bristle brush with a small amount of your cleaning solution.
Rinse with a clean, barely damp mop: This lifts any cleaner residue that would otherwise dry to a cloudy film.
Dry thoroughly: Open windows if weather permits and run a fan to speed drying. Do not replace furniture until the surface is completely dry to the touch.
For households where floor care has slipped for a season or two, a professional deep cleaning visit is often the most efficient way to reset the baseline. Book your deep clean online with Elite Maids for same-day availability and an instant quote, no phone call needed.
According to the Good Housekeeping cleaning resource center, one of the most common mistakes homeowners make during deep cleaning is using too much water, a point worth emphasizing: if you can see water sitting on the surface for more than a few seconds, you are using too much.
Protecting Hardwood Floors Between Cleanings
Protecting your hardwood floors is as important as cleaning them. Good habits between washes extend the life of the finish dramatically and reduce how often you need to deep clean.
Use rugs at entries and high-traffic paths: Entry mats trap the grit and moisture that cause the most finish wear. A mat outside and just inside every exterior door makes a measurable difference.
Add felt pads to furniture legs: Dragging chairs across hardwood without felt pads creates fine scratches that dull the finish over months. Check pads every few months because they wear out and fall off.
Control indoor humidity: Wood expands when humidity is high and contracts when it is low. Keeping your home between 35 and 55 percent relative humidity prevents seasonal gapping and cupping. The American Lung Association’s indoor air quality guidance notes that proper humidity control also reduces mold and dust mite activity, which matters beyond just your floors.
Trim pet nails regularly: Dog and cat nails are surprisingly effective at scratching hardwood. A regular trim schedule is one of the simplest ways to protect your floor’s finish.
Avoid walking on hardwood in stiletto heels: The concentrated pressure of a narrow heel can dent even hard species like oak and maple.
Sweep or dust-mop daily in heavy-use areas: You do not need to mop every day, but a quick dry pass in the kitchen or main hallway takes about two minutes and prevents grit buildup significantly.
Hardwood Floor Cleaning Mistakes That Shorten the Life of Your Floors
Knowing what not to do when cleaning hardwood floors is just as valuable as knowing the right technique. Some of the most common hardwood floor cleaning mistakes are ones homeowners repeat for years without realizing they are causing cumulative damage.
Using Too Much Water
This is the single most common mistake. Even a well-sealed floor has microscopic gaps between boards where water can seep in. Over time, excess moisture causes the wood to swell, warp, and eventually separate at the seams. Always wring your mop to the point where it feels almost dry before it touches the floor.
Skipping the Dry Sweep Before Mopping
Mopping without sweeping first just moves grit around and drags it across the finish under a wet mop head, which is exactly how you create fine scratches across a wide area quickly. Dry sweep every time before any wet cleaning.
Using the Wrong Vacuum Setting
Most upright vacuums have a rotating beater bar that is great for carpet but will scratch hardwood finishes. Always switch to the bare-floor or hard-surface setting, which disengages the brush roll.
Applying Polish or Wax on Top of Polyurethane
Many homeowners try to restore shine by adding floor wax or polish to a polyurethane-finished floor. The two products are not compatible. The wax sits on top of the finish and creates a hazy, sticky layer that attracts dirt. When the floor eventually needs to be refinished, that wax has to be stripped first, adding cost and labor to the project.
Ignoring Manufacturer Recommendations
Different wood species and finish types have different tolerances. Engineered hardwood, for example, is more moisture-sensitive than solid hardwood with a thick polyurethane coat. Check with your flooring manufacturer’s care guide before committing to any cleaning product or method.
If your floors have reached the point where no amount of routine cleaning restores their look, that is a signal for professional attention, either a deep cleaning service from trusted Arizona house cleaners or a conversation with a flooring specialist about refinishing.
Eco-Friendly Hardwood Floor Cleaning Options
Eco-friendly hardwood floor cleaning is not just a trend; it is a practical approach that is often gentler on wood finishes and on the air quality inside your home. Natural and plant-based cleaners tend to leave less chemical residue, which means less buildup on the floor surface over time.
Simple DIY options that are genuinely effective:
Diluted dish soap: A few drops of a plant-derived dish soap in warm water is one of the safest and most effective DIY hardwood floor cleaners available. Use sparingly and dry immediately.
Castile soap solution: A teaspoon of liquid castile soap in a gallon of warm water cleans without harsh surfactants and rinses completely clean.
Rubbing alcohol spot cleaner: For sticky spots and ink stains, a cloth dampened with isopropyl alcohol works fast without soaking the wood.
When shopping for ready-made eco-friendly products, look for the EPA Safer Choice label as a quick vetting tool. Products that carry this certification have been reviewed for both human safety and environmental impact across their full ingredient list, not just the active cleaning agents.
Avoid DIY formulas that include vinegar, lemon juice, or essential oils in high concentrations. Despite their reputation as natural cleaners, the acid in vinegar and citrus gradually strips polyurethane finishes, and some essential oils leave an oily residue that attracts dust. Eco-friendly does not mean acidic is fine on hardwood.
At Elite Maids, we offer eco-friendly product options on every cleaning visit for clients who prefer plant-based formulas in their homes. It is a simple checkbox when you book, and it applies to every surface we clean, including your hardwood floors.
Your hardwood floors are one of the most valuable and visible features in your home, and they respond well to consistent, informed care. Whether you are establishing a new cleaning routine or troubleshooting years of buildup, the strategies in this guide will help you get results without risking damage to the finish or the wood underneath. When the job is bigger than a weekend project, visit Elite Maids House Cleaning to learn how our team handles it, and contact Elite Maids house cleaning today for a free quote with same-day availability across Phoenix, Scottsdale, Mesa, Chandler, Gilbert, and the greater Arizona Valley.
Frequently Asked Questions
What is the best thing to use to clean hardwood floors?
The best cleaner for hardwood floors is a pH-neutral, hardwood-specific product such as Method Squirt and Mop, Bona Hardwood Floor Cleaner, or a simple solution of a few drops of dish soap in warm water. Avoid vinegar, steam mops, and any cleaner containing bleach or ammonia, as all of these will strip or etch the protective finish over time.
Can I use a steam mop on hardwood floors?
No. Steam mops force hot moisture into wood grain and seams, which breaks down the finish, causes the wood to swell, and can eventually lead to warping and cupping. Even on floors described as “sealed,” steam is too aggressive. Stick to a barely damp microfiber mop and a gentle liquid cleaner instead.
How often should you clean hardwood floors?
Dry sweeping or dust-mopping should happen daily in high-traffic areas and every two to three days in lighter-use rooms. Damp mopping with a hardwood cleaner is appropriate once a week for most households. A full deep clean of hardwood floors is recommended two to four times per year, or more frequently in homes with pets or children.
How do you get scratches out of hardwood floors?
For light surface scratches in the finish, a wood touch-up marker or a small amount of matching wax stick blended into the scratch can make it nearly invisible. Deeper scratches that cut into the wood itself typically require sanding and recoating by a flooring professional. Preventing scratches with felt furniture pads and entry mats is far easier than fixing them after the fact.
Is vinegar safe for cleaning hardwood floors?
No. Despite being a popular home remedy, vinegar is acidic and will gradually dull and etch the polyurethane finish on hardwood floors with repeated use. Once the finish is compromised, the raw wood beneath is exposed to moisture and staining. Use a pH-neutral cleaner or plain diluted dish soap instead, and save the vinegar for surfaces that can handle acidity.
How to Deep Clean Your Bathroom: A Step-by-Step Guide
SHARE:
A thorough bathroom deep clean means scrubbing every surface from ceiling to floor, including the spots a quick weekly wipe misses: grout lines, toilet bases, showerhead nozzles, and behind the toilet tank. Deep cleaning a bathroom removes built-up soap scum, mineral deposits, mold, and bacteria that can affect your family’s health. This step-by-step guide walks you through every task in order so nothing gets skipped.
Step 1: Declutter and Prep the Bathroom Before You Clean
Every effective bathroom deep clean starts before you pick up a single sponge. Remove everything from countertops, windowsills, shower shelves, and the floor. Toss empty shampoo bottles, expired products, and anything that doesn’t belong. A clutter-free bathroom lets you reach surfaces you’d otherwise skip, and it stops you from cleaning around obstacles instead of under them.
While you’re clearing the space, pull out your supplies so they’re within arm’s reach: an all-purpose cleaner, a disinfectant spray, a grout brush, a scrubbing pad, microfiber cloths, rubber gloves, and a mop or floor scrubber. Pre-soaking is the secret weapon of a proper bathroom scrub-down. Spray your toilet bowl cleaner, apply a cleaning solution to the shower and tub, and let everything dwell for at least five to ten minutes while you work on other areas. The product does most of the heavy lifting so you don’t have to.
If you’re preparing for a large event or a post-renovation bathroom refresh, our holiday cleaning service is built exactly for situations where you need every room, bathrooms included, immaculate in one visit.
Step 2: Deep Clean the Toilet from Top to Bottom
The toilet is the most bacteria-dense fixture in your home, so it deserves its own dedicated step. Spray a disinfectant generously on the outside of the toilet: the tank lid, tank body, flush handle, seat lid (top and underside), seat, bowl rim, and base. Let the disinfectant sit for the manufacturer’s recommended contact time, usually two minutes, before wiping in that same top-to-bottom order. Use a fresh cloth or paper towel at each zone to avoid cross-contaminating surfaces.
For the bowl itself, a gel or foam toilet bowl cleaner works best because it clings to the underside of the rim where stains and limescale hide. Scrub with a toilet brush, paying extra attention to the siphon jets under the rim. For stubborn mineral rings, a pumice stone designed for porcelain is a surprisingly effective tool that won’t scratch the bowl. Flush and rinse the brush before returning it to its holder.
Don’t forget the toilet base and the floor directly around it. Bacteria and grime accumulate there constantly, yet it’s one of the most commonly skipped spots in a routine bathroom cleaning. A disinfectant spray and a paper towel handle it in seconds.
According to the CDC, moisture-heavy environments like bathrooms create conditions where mold and bacteria thrive, making regular disinfection especially important in this room.
Step 3: How to Clean Your Bathtub or Shower the Right Way
Cleaning your bathtub or shower is the most physically demanding part of a bathroom deep clean, but the right approach makes it far less of a struggle. Start by rinsing the walls and tub floor with warm water to loosen surface grime. Then apply a cleaning paste or spray, a mixture of baking soda and dish soap works well on acrylic and porcelain, while a dedicated tile and grout cleaner is better for ceramic tile surrounds.
Work from the top down: clean the showerhead, then the walls, then the tub floor. For the showerhead, fill a plastic bag with white vinegar, submerge the showerhead in it, and secure the bag with a rubber band. Leave it for 30 minutes to dissolve mineral buildup, then wipe and run hot water through the nozzles. A small detail brush or an old toothbrush is ideal for scrubbing individual nozzle holes.
Grout lines are where most people give up during a deep clean of the bathroom. A stiff grout brush and a paste of baking soda and hydrogen peroxide applied directly to the lines cuts through discoloration. Scrub in short circular motions, let it sit for a few minutes, then rinse. For stubborn mold in grout, the EPA’s mold guidelines recommend cleaning with a detergent solution and ensuring the area dries completely after to prevent regrowth.
Glass shower doors get a film of soap scum that dulls them quickly. A squeegee used after every shower prevents the worst buildup, but for existing scum, spray with undiluted white vinegar, wait five minutes, then wipe with a microfiber cloth. For textured shower floors, a stiff scrub brush and a tile cleaner will reach into the texture far better than a flat sponge.
If you’d rather have a professional handle the heavy scrubbing, check out our guide on deep cleaning bathrooms in Chandler homes to see what a professional bathroom deep clean covers.
Step 4: How to Clean a Bathroom Sink and Vanity Area
The bathroom sink collects toothpaste residue, soap scum, and water spots daily, yet it’s often wiped down rather than truly cleaned. For a proper bathroom sink cleaning, start by clearing everything off the vanity top. Spray the faucet, handles, and basin with a disinfectant or all-purpose cleaner. Use a small brush, a grout brush or an old toothbrush works perfectly, to scrub around the base of the faucet and the handles, where grime collects in the crevices.
Scrub the basin itself with a non-scratch scrubbing pad to remove soap scum and toothpaste stains. Pay special attention to the drain area and the overflow hole near the top of the sink bowl. The overflow hole is a notorious collector of mold and biofilm; a small bottle brush or a pipe cleaner dipped in bleach solution cleans it out thoroughly.
Cleaning a bathroom sink properly also means wiping down the vanity cabinet fronts, the mirror, and any hardware. For the mirror, a spray of glass cleaner and a lint-free microfiber cloth gives a streak-free result. Wipe in an S-pattern rather than in circles to avoid redistributing the cleaner. If you notice water staining on faucet hardware, a cloth dampened with white vinegar dissolves mineral deposits without scratching the finish.
The vanity countertop itself should be disinfected and dried. Standing water encourages mold growth along the backsplash and caulk lines, so always dry these areas after cleaning. If your caulk is discolored or pulling away from the wall, re-caulking is a straightforward weekend task that makes a dramatic difference in the overall cleanliness of the sink area.
Step 5: Deep Clean Bathroom Tiles and Grout
Bathroom tile cleaning goes beyond a surface wipe. Grout is porous, which means it absorbs dirt, soap, and moisture over time, turning from white or cream to gray or brown. The most effective way to deep clean bathroom tiles is to work in small sections, applying a grout cleaner or a paste of baking soda and water directly to the grout lines, letting it dwell, and then scrubbing with a stiff brush.
For wall tiles, a spray-and-wipe routine with an all-purpose cleaner handles everyday grime, but a deep clean of bathroom tiles requires a heavier-duty approach: a tile cleaner applied to the full tile surface, scrubbed with a scrubbing pad, then rinsed thoroughly. Pay attention to the grout lines at eye level, which often get missed because they’re harder to see clearly.
Floor tile cleaning benefits from a similar method. A tile-safe floor cleaner diluted in a bucket, applied with a stiff mop, and left to dwell for a few minutes before scrubbing loosens the ground-in dirt that builds up from foot traffic. After scrubbing, mop with clean water to rinse, and then dry the floor to prevent water from sitting in grout lines and encouraging mold. According to the EPA’s indoor air quality resources, controlling moisture in bathrooms is one of the most effective ways to prevent mold growth that can compromise air quality throughout your home.
If you want a room-by-room approach to tackling every surface in your home at this level, our whole house deep cleaning checklist is a useful companion resource.
Step 6: Tackle the Spots Most People Miss
A genuine bathroom deep clean covers the areas that a weekly wipe-down never reaches. These are the zones that cause buildup to compound over months and years if left unaddressed. Going through this list once every few months makes your routine cleaning much easier to maintain.
Exhaust fan cover: Remove the cover grate and vacuum or wipe away the dust buildup. A clogged fan runs less efficiently, leaving humidity in the room longer and accelerating mold growth.
Behind and underneath the toilet: Use a long-handled brush or a sponge on a stick to clean the wall directly behind the toilet and the floor beneath the tank overhang.
Door tracks and hinges: Shower door tracks collect hair, soap, and mold. A small brush and a diluted bleach solution clear them out. Cabinet hinges and door hinges can be wiped with a damp cloth and dried immediately.
Light fixtures and switch plates: Dust and moisture combine on bathroom light fixtures. Wipe them down with a dry cloth first, then a lightly damp cloth if needed. Switch plates can be wiped with a disinfectant wipe.
Ceiling corners: This is where mold spores often first appear. A damp microfiber cloth on an extension handle or a mop head reaches ceiling corners easily. For any visible mold, a diluted bleach solution or a mold-specific remover handles it at the source.
Towel bars and toilet paper holder: These get handled constantly but rarely cleaned. A quick wipe with a disinfectant cloth covers them in seconds.
Toothbrush holder and soap dish: Both collect standing water and bacteria. Remove them, wash in the sink with dish soap, rinse, and dry before replacing.
If you’d rather hand off this level of detail to a professional team, you can book a bathroom deep clean online with instant pricing and same-day availability.
Step 7: Clean the Bathroom Floor and Finish Strong
The bathroom floor is always the last step, because everything you’ve cleaned above will have dripped, splashed, or shed debris downward. Sweep or vacuum first to remove hair, dust, and loose debris. This is especially important before mopping, because mopping over hair just moves it around rather than removing it.
For deep cleaning bathroom floors, fill a bucket with warm water and a floor cleaner appropriate for your floor type. Tile floors handle most cleaning solutions well. Vinyl floors need a gentler cleaner to avoid dulling the finish. Stone floors (marble, travertine, slate) require pH-neutral cleaners only, acidic cleaners like vinegar etch stone surfaces over time.
Mop in sections, working backward toward the door so you don’t step on the wet floor as you go. For grout lines on the floor, a scrub brush attachment on a drill or a dedicated grout brush and some elbow grease makes a visible difference. Rinse the floor with clean water after mopping to remove any cleaner residue, then leave the bathroom door open and the exhaust fan running to dry the floor as quickly as possible.
Wipe down baseboards as a final step. Baseboards in bathrooms collect dust and moisture, and cleaning them last means you catch any drips from the mopping step at the same time. A damp microfiber cloth and a quick pass is all it takes.
For Arizona homeowners who want a detailed bathroom-specific approach tailored to their region’s hard water and dust conditions, our guide to deep cleaning bathrooms in Tucson homes covers those local considerations in depth.
Your Bathroom Deep Cleaning Checklist at a Glance
Use this bathroom cleaning checklist before you start so nothing gets missed. Print it, save it to your phone, or bookmark this page as your go-to reference every time a deep clean is due.
Remove all items from counters, shelves, and the floor
Apply toilet bowl cleaner and let it dwell
Spray shower and tub surfaces and let them soak
Disinfect toilet exterior top to bottom
Scrub toilet bowl and under the rim
Clean toilet base and surrounding floor
Scrub shower walls, tub, and floor
Clean showerhead with vinegar soak
Scrub grout lines in shower and on floor tiles
Clean glass shower doors
Deep clean bathroom sink basin, faucet, and handles
Clean the overflow hole and drain
Wipe vanity countertop, cabinet fronts, and mirror
Clean wall tiles and floor tiles
Wipe exhaust fan cover
Clean ceiling corners and light fixtures
Disinfect towel bars, toilet paper holder, door handles
Wash soap dish and toothbrush holder
Sweep or vacuum floor
Mop and scrub bathroom floor
Wipe baseboards
Run exhaust fan until floor is dry
A full bathroom deep clean done at this level typically takes 45 to 90 minutes for a single bathroom, depending on its size and how long it’s been since the last deep clean. Doing it every one to three months keeps the bathroom manageable between routine weekly cleans. If you want a professional team to handle the whole process, Arizona’s most-reviewed house cleaning company has background-checked, fully insured cleaners ready to book today.
Ready to get your bathrooms spotless without spending your weekend on your knees scrubbing grout? Contact Elite Maids house cleaning today for a free quote and find out why Arizona families trust us to handle the hard work. Book online in minutes with instant pricing, same-day availability, and a satisfaction guarantee that means we reclean at no cost if anything falls short.
Frequently Asked Questions
How often should you deep clean a bathroom?
Most bathrooms benefit from a thorough deep clean every one to three months, with a lighter maintenance clean weekly or biweekly in between. High-traffic bathrooms used by multiple people may need deep cleaning more often. Regular maintenance cleaning keeps the space sanitary, but only a full deep clean addresses grout, mineral buildup, and the hidden spots that routine cleaning skips.
What is the best way to remove mold from bathroom grout?
Apply a paste of baking soda and hydrogen peroxide directly to discolored grout lines, let it sit for 10 to 15 minutes, then scrub with a stiff grout brush. For more persistent mold, a diluted bleach solution (one cup bleach per gallon of water) applied with a brush and rinsed thoroughly is effective. Always ventilate the bathroom well during and after treatment.
How do you get rid of soap scum in a shower or bathtub?
White vinegar is one of the most effective solutions for dissolving soap scum. Spray undiluted white vinegar on affected surfaces, let it sit for five to ten minutes, then scrub with a non-scratch pad and rinse. For heavy buildup, a commercial soap scum remover or a paste of dish soap and baking soda can cut through layers that vinegar alone won’t remove.
What is included in a professional bathroom deep clean?
A professional bathroom deep clean typically covers toilet disinfection inside and out, shower and tub scrubbing, grout cleaning, sink and faucet descaling, mirror and vanity cleaning, floor mopping and grout scrubbing, fixture wiping, and detail work on areas like exhaust fans, door tracks, and baseboards. The scope can vary by provider, so confirming the checklist before booking is always a good idea.
How much does a professional bathroom deep clean cost?
Pricing varies based on bathroom size, condition, and location. A standalone bathroom deep clean from a professional service generally ranges from $75 to $200 per bathroom, with full-home deep cleans priced by square footage or room count. Getting an instant online quote from your local cleaning company is the fastest way to see exact pricing for your specific home.
July Heat-Safe Cleaning Tips Every Arizona Homeowner Needs
SHARE:
Cleaning your home safely in July means adjusting your routine to account for extreme heat, intense UV exposure, and the humidity spikes that arrive with monsoon season. Certain products degrade or off-gas faster in high temperatures, and surfaces that look fine in spring can harbor mold or bacteria by midsummer. This guide walks through the most important summer home cleaning tips, room by room and surface by surface, so you can keep your home fresh without putting yourself or your family at risk.
1. Switch to Heat-Safe, Low-VOC Cleaning Products
Most people never think about how temperature affects the cleaning products stored under their sink or in the garage. In July, many Arizona homes routinely hit 85°F or higher indoors before the AC kicks in, and garages can reach 120°F or more. Standard aerosol sprays, solvent-based cleaners, and products with high alcohol content become genuinely hazardous at those temperatures. Cans can rupture, and volatile compounds evaporate into your breathing air at a faster rate.
The EPA’s guidance on volatile organic compounds (VOCs) makes clear that indoor VOC concentrations can be two to five times higher than outdoor levels, and heat accelerates that problem significantly. Choosing low-VOC or VOC-free cleaners during summer months is one of the smartest quick summer home cleaning adjustments you can make.
Store all cleaning products in a cool, climate-controlled cabinet inside the home, not in a garage or outdoor shed.
Check labels for storage temperature ranges, most products are rated for 50°F to 100°F maximum.
If you use spray bottles you’ve mixed yourself, label them with the date, diluted solutions degrade faster in the heat and lose effectiveness.
Eco-friendly, plant-based cleaners tend to be more heat-stable and are a solid default choice for summer cleaning indoors. If you want professional-grade results without the chemical guesswork, licensed and insured Arizona maids from Elite Maids arrive with pre-vetted, safe products appropriate for the season.
2. Scrub Outdoor Cushions and Pillows Before They Bake On
Outdoor cushions and pillows take a beating in July. The combination of sweat, sunscreen, dust, monsoon moisture, and intense UV exposure creates a perfect recipe for mold, mildew, and ground-in stains. Scrubbing outdoor cushions and pillows now, before the worst of the monsoon moisture arrives, is one of the most time-sensitive summer cleaning tasks on your list.
Here is how to clean outdoor cushions and patio pillows without damaging the fabric or foam:
Remove covers if they have zippers and check the care tag for washing instructions.
Mix a solution of one tablespoon dish soap, one tablespoon of borax, and one quart of warm water in a bucket.
Scrub both sides of each cushion with a stiff-bristled brush, paying extra attention to seams where moisture collects.
Rinse thoroughly with a garden hose and stand the cushions on their edges so water can drain from both sides.
Allow them to dry completely in the sun before returning them to the furniture. In Arizona’s July heat, this usually takes only a couple of hours, but make sure the interior foam is dry, not just the surface.
For wicker furniture frames, a damp cloth with a mild soap solution works well for cleaning wicker furniture surfaces. Use a soft toothbrush to get into the weave. Rinse with a damp cloth (not a hose, excessive water warps natural wicker) and dry immediately. If your wicker has started to gray or crack, a coat of outdoor furniture wax after cleaning adds a protective barrier against the summer sun.
3. Dust and Reverse Your Ceiling Fans for Summer
Ceiling fans are one of the most overlooked surfaces in any summer cleaning routine. By July, the blades have typically accumulated months of dust, and if you have not already reversed the fan direction for warm weather, your fan is working against you. Dusting and reversing ceiling fans is a simple task that makes a noticeable difference in both air quality and comfort.
Ceiling fans should spin counterclockwise in summer to push cool air down toward the floor. Most fans have a small directional switch on the motor housing. The American Lung Association’s indoor air guidance notes that reducing dust accumulation on moving surfaces like fans is a meaningful step for households with asthma or allergy concerns.
Use an old pillowcase slipped over each blade to capture dust without spreading it into the room, slide it toward you and the dust falls inside the case.
Wipe down the motor housing with a dry microfiber cloth.
Clean the light kit globes if present, remove them carefully and wash with warm soapy water.
Flip the directional switch to counterclockwise (when viewed from below) for summer operation.
Plan to dust ceiling fans at least twice during summer, once at the start of July and again after monsoon season settles dust and debris throughout the house. This simple step also ties naturally into your monthly home cleaning plan; for a broader seasonal schedule, the monthly home cleaning schedule for Phoenix homeowners breaks down exactly what to tackle each month.
4. Deep Clean Your Refrigerator Before Summer Groceries Pile Up
July is prime time for the fridge to become a food-safety hazard. Higher kitchen temperatures mean any spills or drips that go unnoticed turn into bacterial growth zones faster than they would in January. Cleaning out the fridge and deep cleaning its interior is one of those professional kitchen cleaning tips that separates a truly hygienic kitchen from one that just looks tidy.
Here is a practical approach for cleaning your refrigerator in summer:
Remove everything from one shelf at a time rather than emptying the whole fridge at once, which keeps cold air loss to a minimum.
Toss anything expired, wilted, or questionable, July heat makes food-borne illness more likely, so err on the side of caution.
Remove drawers and shelves and wash them in the sink with warm soapy water. Let them reach room temperature before washing to avoid cracking.
Wipe down interior walls with a solution of two tablespoons of baking soda per quart of warm water, it deodorizes and cleans without leaving chemical residue near food.
Clean the rubber door gasket with a soft brush dipped in the baking soda solution. Gasket mold is common in summer and often missed.
Vacuum or brush the condenser coils at the back or underneath the unit. Dusty coils make the fridge work harder in July heat and can shorten the appliance’s life.
While you are in the kitchen, take a few minutes to address the backsplash. Learning how to clean a backsplash properly depends on the material: tile takes a simple all-purpose cleaner and grout brush, while glass or stainless steel backsplashes need a streak-free cleaner applied with a microfiber cloth. Greasy July cooking residue is easier to lift while it is still fresh, so wipe down the backsplash after every cooking session during the summer months.
5. Prevent Mold in the Bathroom Before Monsoon Season Peaks
Monsoon humidity is real in Arizona, and July is when it begins to climb. Preventing bathroom mold during summer is not just about aesthetics, mold can affect air quality and health, particularly for people with respiratory sensitivities. According to the CDC’s guidance on mold in homes, the key to mold prevention is controlling moisture, not just scrubbing surfaces after mold appears.
Stopping bathroom mold before it starts means addressing the conditions that allow it to grow:
Run the exhaust fan during every shower and for at least 20 minutes afterward. If your fan is weak or noisy, July is a good time to replace it.
Squeegee or wipe down shower walls after each use to remove standing water from tile grout and glass surfaces.
Deep clean grout lines with a paste of baking soda and hydrogen peroxide, apply, let it sit for 15 minutes, then scrub with a stiff brush. This is far more effective than bleach for long-term mold prevention in bathroom tile.
Check the caulk around the tub and shower surround for cracks or dark spots. Re-caulking is a fast fix that prevents serious moisture intrusion behind walls.
Wash bath mats weekly and hang them to dry fully between uses rather than leaving them flat on the floor.
Inspect under-sink cabinets for slow leaks, dripping supply lines create ideal mold conditions and are easy to miss until the damage is significant.
For households that need a thorough reset before monsoon season hits full force, a professional home disinfection service can sanitize grout, tile, and bathroom surfaces at a level that regular weekly cleaning simply cannot match.
6. Clean Kitchen Cabinets and Oven Racks the Heat-Safe Way
Summer cooking, barbecues, big family meals, more time at home, means kitchen cabinets and oven racks accumulate grease faster. The best way to clean white kitchen cupboards and painted cabinet faces in July is to avoid abrasive scrubbers and high-heat cleaning methods that can damage the finish.
For cabinet exteriors:
Mix a few drops of dish soap with warm water and wipe down cabinet faces with a soft microfiber cloth. Work top to bottom so drips fall on areas you have not cleaned yet.
For stubborn grease, a small amount of undiluted dish soap applied directly to the cloth and rubbed in circles lifts grime without scratching.
Dry immediately with a clean cloth, letting water sit on painted wood surfaces in humid July air can cause swelling or finish damage.
Buff with a dry cloth for a clean, streak-free finish on white kitchen cupboards.
For oven racks, the easiest approach to cleaning oven racks without harsh chemicals is the bathtub soak method: line the tub with old towels to protect the surface, lay the racks flat, fill with hot water and a generous squirt of dish soap, and let them soak overnight. In the morning, the baked-on residue wipes off with minimal scrubbing. Rinse and dry thoroughly before returning to the oven. Avoid this task during the hottest part of the day if your home runs warm, working with hot water in a poorly ventilated bathroom during a July afternoon is uncomfortable at best.
For a broader room-by-room deep clean approach to tackle summer buildup, the seasonal deep cleaning guide covers the full-home reset process in detail.
7. Get the Grill and Outdoor Cooking Area Clean and Safe
Getting ready to grill safely in July requires more than just firing up the grates. A dirty grill is a fire hazard, and built-up grease can flare unpredictably in summer heat. Cleaning the grill and outdoor cooking area before every use is a non-negotiable for food safety and safety in general.
Heat the grill on high for 15 minutes to carbonize residue, then use a stiff wire grill brush to scrub the grates while they are still hot. This is the most effective way to clean grill grates without special products.
Once cool, wipe grates with a cloth dampened with vegetable oil to season them and prevent rust.
Remove and wash the drip tray or grease catcher regularly, in July, grease left sitting in a hot outdoor tray can attract insects and create a fire risk faster than in cooler months.
Wipe down the exterior of the grill with a damp cloth and a small amount of dish soap. Stainless surfaces benefit from a wipe with a microfiber cloth in the direction of the grain to avoid micro-scratches.
Check the burner tubes for spider webs and debris, this is surprisingly common in summer and can cause uneven heating or dangerous flare-ups.
Also consider the outdoor cooking zone around the grill: sweep away loose debris, wash down any concrete or tile in the area with a deck brush and soapy water, and keep a dedicated outdoor mat near the back door to catch grass clippings and dirt before they migrate inside. Grass stain prevention in summer starts at the threshold, a stiff brush mat and a quick shake routine keeps summer lawn mess from spreading onto your floors.
8. Do a Clean Sweep: Tackle July Dust and Debris Indoors
July in Arizona means dust storms, monsoon mud, and an endless cycle of sand and debris tracking through the front door. Doing a thorough clean sweep of high-traffic areas weekly, rather than waiting for the mess to build, is one of the most practical summer home cleaning strategies for desert living.
Vacuum hard floors and area rugs at least twice a week in July. Dust from haboobs settles into every crevice and is fine enough to aggravate allergies even after a surface looks clean.
Mop hard floors with a damp (not soaking wet) microfiber mop after vacuuming. Avoid cleaning in the heat of the day when floors dry so fast the cleaner leaves a residue, early morning or evening is better.
Shake out rugs and entry mats outdoors weekly. In July, these trap an outsized share of monsoon dirt.
Wipe down baseboards and door frames, dust accumulates here quickly and is easy to miss until it becomes visible buildup.
Check window sills after any dust storm. Fine sediment packs into corners and can be removed with a dry microfiber cloth or a vacuum crevice attachment.
For homes that see heavy dust infiltration after storms, doing a clean sweep of the whole house top-to-bottom is worth doing within 24 hours of a major haboob. If that feels overwhelming, Arizona cleaning company Elite Maids can schedule same-day service between 8am and 6pm so you are not living in the aftermath for days. For more outdoor cleaning strategies heading into the dry heat months, the outdoor summer cleaning tips post covers everything from patio surfaces to entryways.
9. Prep Floors and Entryways for Grass Stains and Summer Foot Traffic
Summer means bare feet, lawn games, and kids coming in straight from a sprinkler. Preparing floors and entryways to handle grass stains and summer foot traffic keeps your interior floors from looking worn down by August. Cleaning summer floor stains promptly is far easier than addressing stains that have set.
Place a heavy-duty scraper mat outside every door used regularly in summer. A mat with stiff bristles removes grass blades and mud before they get tracked inside.
For grass stains on carpet, act fast: blot with a clean cloth to absorb moisture, then apply a mixture of one teaspoon of dish soap and one cup of cold water. Blot again, do not rub, and rinse with cold water. Repeat until the stain lifts.
For hardwood or tile floors, a damp microfiber mop pass right after peak foot-traffic times (after dinner, after kids come in from outside) prevents stains from drying and bonding to the surface.
Consider a no-shoes policy for summer, it sounds simple but dramatically reduces the amount of grass, dirt, and sunscreen residue tracked onto floors.
10. Freshen Up High-Touch Surfaces and Reduce Summer Bacterial Buildup
Summer brings more people in and out of the home, houseguests, kids home from school, neighbors dropping by for barbecues. High-touch surfaces like door handles, light switches, drawer pulls, remote controls, and countertops accumulate bacteria faster when foot traffic increases. Refreshing these surfaces weekly with an appropriate disinfectant is one of the simplest but most impactful summer home cleaning moves you can make.
Use a disinfectant wipe or a cloth dampened with a diluted isopropyl alcohol solution (70% alcohol, which is the effective concentration for surface disinfection) on all high-touch surfaces at least once a week.
Pay extra attention to kitchen drawer pulls and cabinet handles near the stove, these get touched with greasy or food-contaminated hands constantly during summer cooking.
Wipe down the exterior of small appliances (toaster, coffee maker, blender) weekly. These attract grease mist and fingerprints and are often skipped during routine cleaning.
Clean light switches with a dry or very lightly dampened cloth, avoid excess moisture near electrical components.
Disinfect bathroom faucet handles and flush levers more frequently when the house is busy. In summer, these see dramatically more use than in quieter months.
For guidance on which disinfecting products are safest for indoor use in warm weather, Good Housekeeping’s cleaning resources offer well-researched, regularly updated product roundups you can trust.
Summer in Arizona is relentless, but your home does not have to show it. When you are ready to hand off the hard work to professionals, contact Elite Maids house cleaning today for a free quote, Arizona’s most-reviewed residential cleaning team is ready to handle everything from a quick refresh to a full-home deep clean, with same-day booking available online and a satisfaction guarantee on every visit.
Frequently Asked Questions
Is it safe to use bleach-based cleaners indoors during Arizona’s summer heat?
Bleach is less safe in high heat environments because it releases chlorine gas more readily at elevated temperatures. In a hot, poorly ventilated Arizona home in July, this can cause eye and respiratory irritation. If you use bleach-based cleaners, open windows, run fans, and work during cooler morning hours. Better yet, switch to hydrogen peroxide-based or EPA Safer Choice-certified alternatives during peak summer months.
How often should I deep clean my home in summer versus other seasons?
Most Arizona homes benefit from more frequent cleaning in summer, not less. Dust storms, monsoon mud, increased foot traffic, and humidity spikes create faster buildup than winter months. Weekly surface cleaning and monthly deep cleaning is a practical standard, with additional targeted sessions after major dust storms or large gatherings. A recurring professional cleaning service keeps buildup from compounding between visits.
What is the best time of day to clean my home in July heat?
Early morning, before 10am, is the best time to tackle summer cleaning tasks, especially any work that involves ventilating the home or using water-based products that need time to dry. Avoid cleaning during the peak afternoon heat window (noon to 4pm) when indoor temperatures climb and products evaporate or dry too quickly to work properly. Evening is a good second option once the home has cooled.
How do I stop monsoon dust from coming back inside right after I clean?
Monsoon dust infiltration is a real challenge in Arizona. The most effective approach combines weatherstripping on doors and windows to reduce air gaps, high-quality HEPA air filters changed regularly, heavy-duty entry mats at every exterior door, and a quick post-storm cleaning sweep within 24 hours of any major haboob. Consistent weekly vacuuming with a HEPA-equipped vacuum also prevents fine particles from recirculating.
Can I store cleaning supplies in my garage during the Arizona summer?
No. Arizona garage temperatures regularly exceed 120°F in July, which is above the safe storage range for most cleaning products. Aerosol cans can rupture and flammable solvents become a fire risk at those temperatures. Store all cleaning supplies in a cool, climate-controlled interior cabinet. Check product labels for maximum storage temperatures and relocate any products currently kept in the garage before the summer peak.