How to Deep Clean Your Kitchen in Arvada: Step-by-Step Guide
SHARE:
Deep cleaning your kitchen means going well beyond the daily wipe-down to scrub grease, grime, and bacteria from every surface, appliance, and hidden corner. A thorough kitchen deep clean tackles everything from the inside of your oven to the tops of your cabinets. If you live in Arvada and want a spotless kitchen, the steps below walk you through the entire process. If you would rather hand it off to the pros, Cleaning Services in Arvada, CO are just a booking away with Elite Maids House Cleaning.
1. Gather Your Kitchen Cleaning Products Before You Start
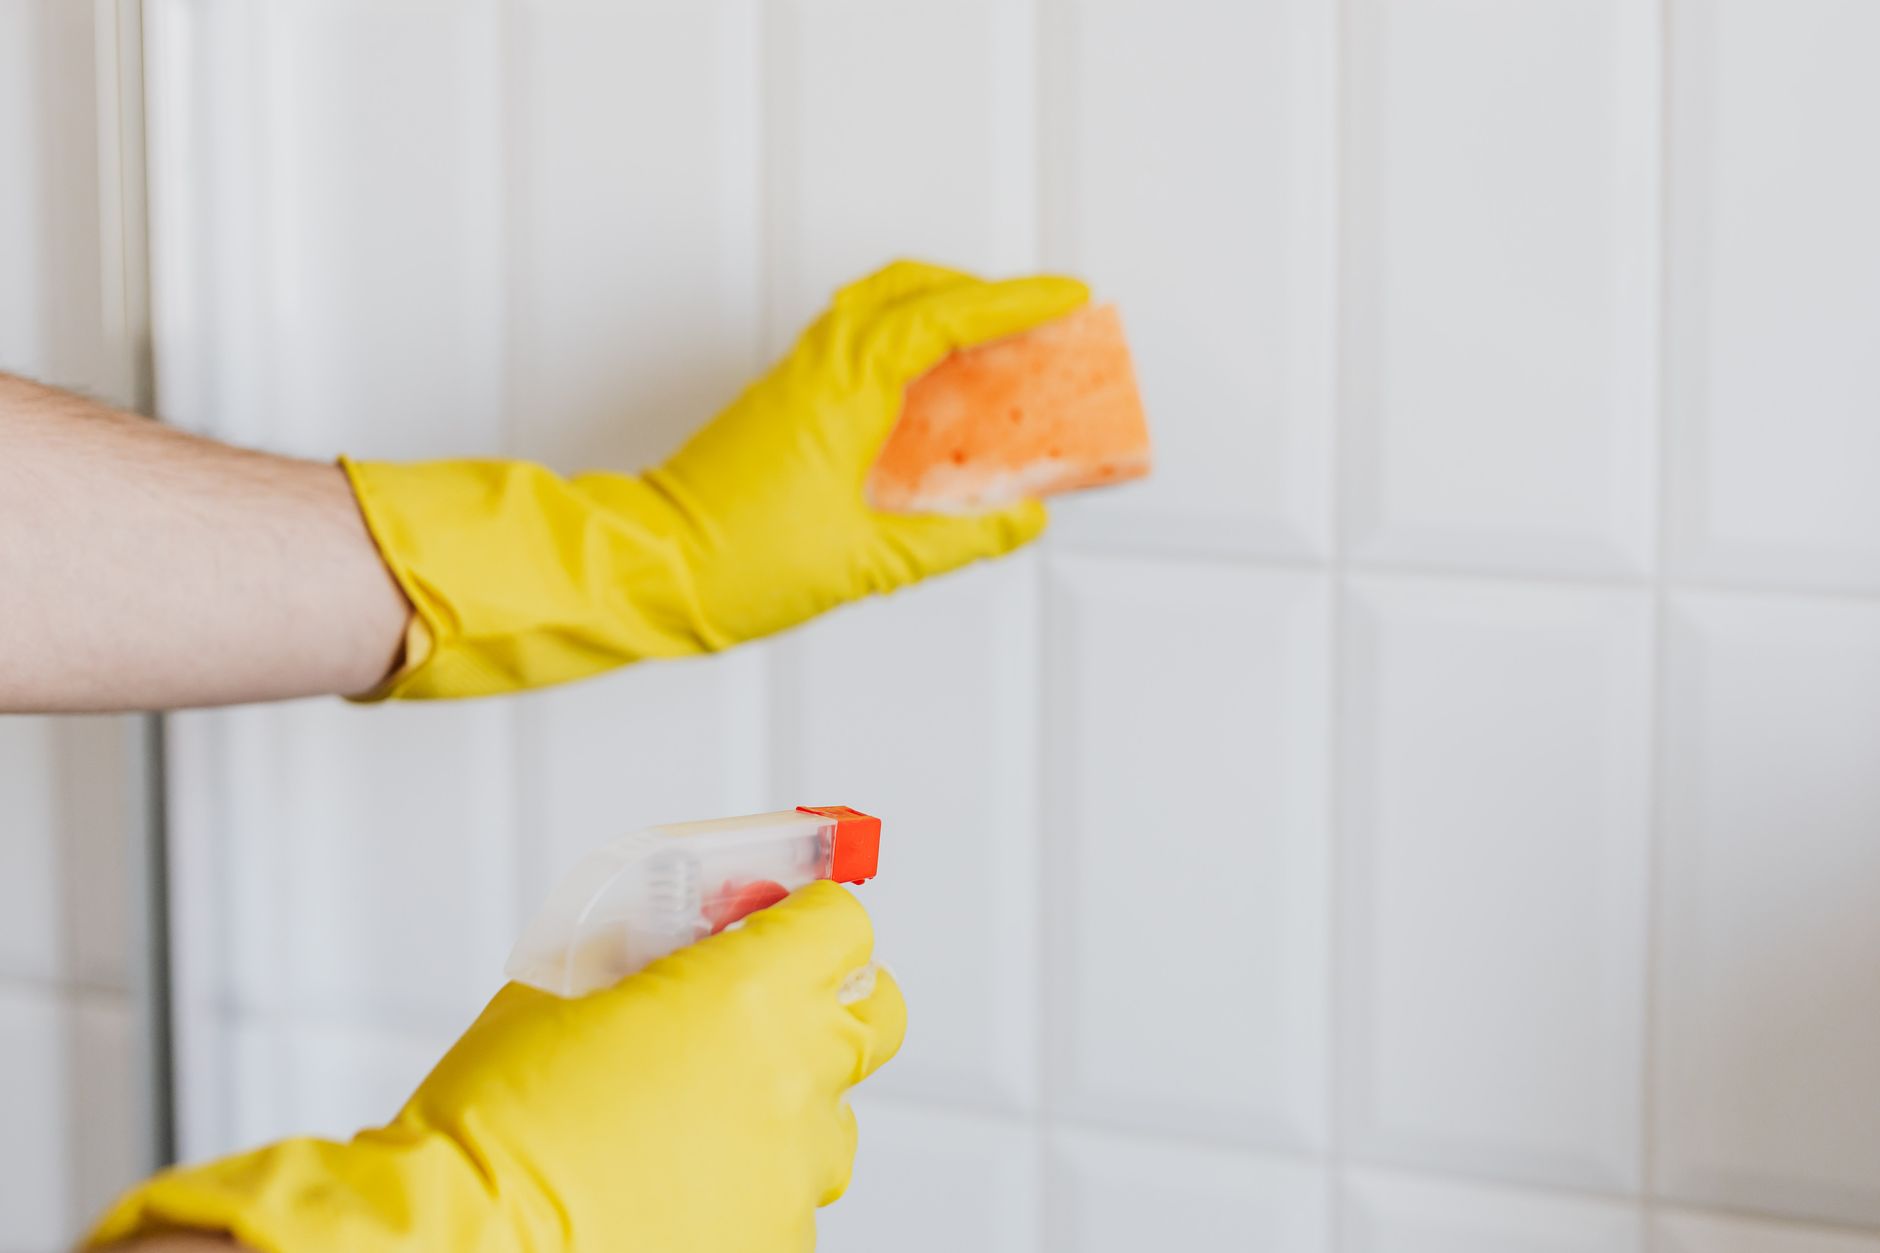
Before you scrub a single surface, assemble all of your kitchen cleaning products in one spot. Running back and forth for supplies wastes time and kills your momentum. The right arsenal of cleaning products makes every step faster and more effective.
A degreaser spray for the stovetop, range hood, and backsplash
Microfiber cloths, scrub sponges, and a stiff-bristle brush
A steam mop or mop bucket for the floor
Rubber gloves to protect your hands from harsh kitchen cleaning products
Trash bags for the purge step
If you prefer greener options, look for plant-based degreasers and fragrance-free multi-surface sprays. According to Good Housekeeping, microfiber cloths trap up to 99% of bacteria on their own without heavy chemical use, which is great for food-prep surfaces. Having everything staged before you start is one of the smartest moves on any professional deep cleaning checklist.
2. Clear and Declutter Every Surface and Cabinet
A real deep clean starts with an empty canvas. Pull everything off your countertops, remove items from shelves, and take everything out of at least one cabinet section at a time. Toss expired pantry items, consolidate duplicates, and donate anything you have not used in months.
Decluttering before cleaning is step one on every deep clean house checklist worth following because it prevents you from cleaning around obstacles and then wondering why things still look cluttered afterward. With bare surfaces in front of you, you can actually clean the counters, not just the five inches of visible space between the toaster and the blender. This is also a good time to check that cabinet hinges and drawer slides are working properly, and to wipe down the inside walls of every cabinet with a damp microfiber cloth.
Arvada homeowners with large kitchens should break this step into zones: one upper-cabinet zone, one lower-cabinet zone, and the pantry. Tackle one zone at a time so the job does not feel overwhelming.
3. Deep Clean Your Appliances Inside and Out
Appliances are the biggest grease and odor traps in the kitchen, and they are also the most commonly skipped during a routine clean. A proper kitchen deep clean hits every appliance from the inside out.
Oven
Remove the racks and soak them in hot soapy water in the sink. Apply a baking soda paste (baking soda plus water) to the interior walls, leave it for at least 30 minutes, then scrub and wipe clean. For really baked-on grease, use your oven’s self-clean cycle or a heavy-duty oven cleaner. Wipe the door gasket and clean the glass inside and out.
Refrigerator
Remove all shelves and drawers, wash them in the sink, and wipe every interior surface with a solution of warm water and a little baking soda. Clean the door gaskets with a toothbrush. Pull the fridge away from the wall and vacuum the condenser coils, this actually helps the appliance run more efficiently and extends its life. Wipe down the exterior and the top, which is a major dust collector.
Microwave
Place a microwave-safe bowl of water with a few lemon slices inside and run it on high for three minutes. The steam loosens caked-on splatter, and then you can wipe everything clean with almost no scrubbing. Clean the turntable plate separately in the sink.
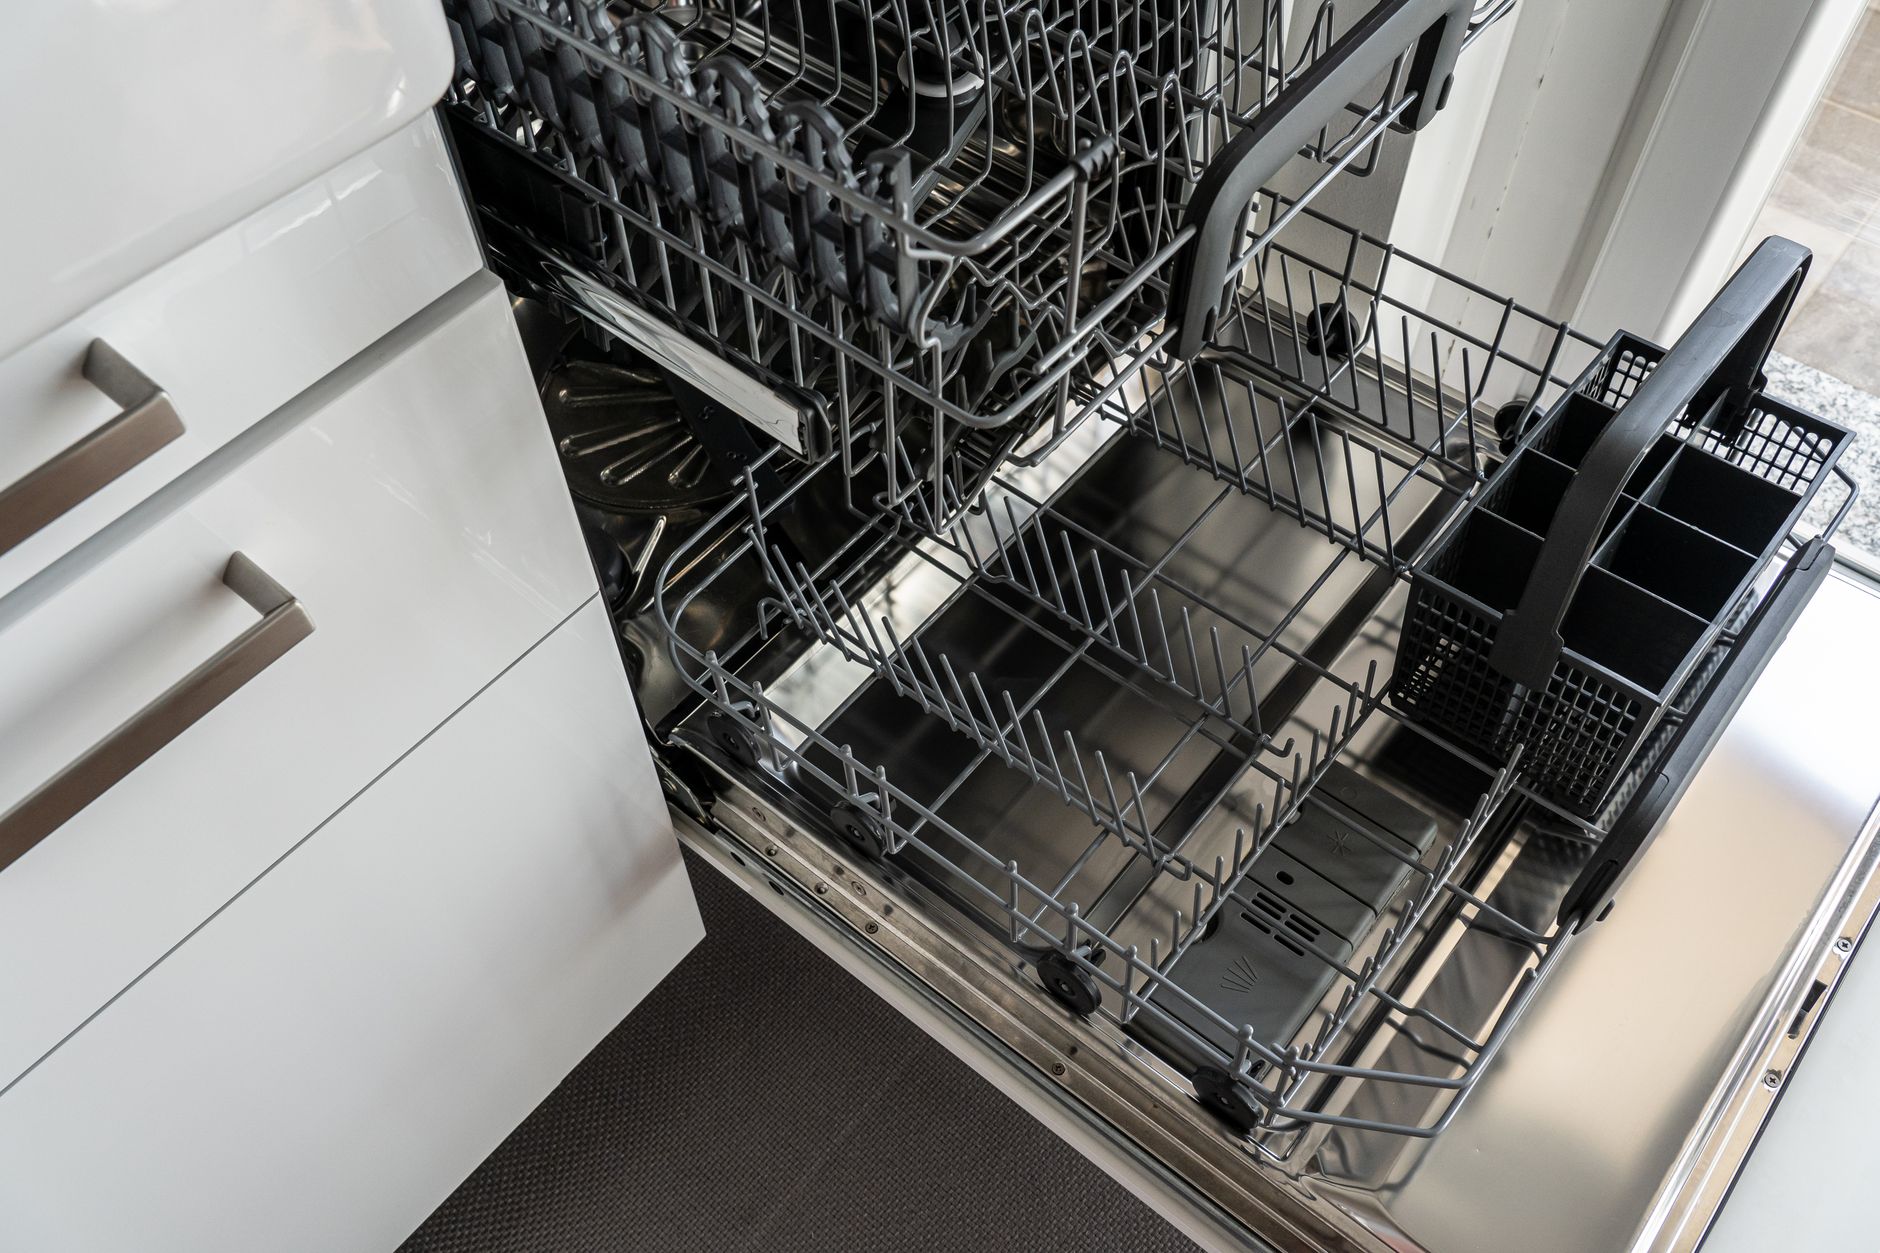
Dishwasher
Run an empty cycle with a cup of white vinegar on the top rack to remove mineral deposits and odors. Then sprinkle baking soda on the bottom and run a short hot cycle. Clean the door seal and the filter at the bottom, many homeowners never clean the filter and wonder why their dishwasher smells.
Small Appliances
Wipe down the coffee maker exterior, toaster (empty and clean the crumb tray), air fryer basket, and blender base. These are prime spots where grease and sticky residue accumulate over time.
This is one area where deep cleaning services really earn their keep. A professional team follows a full appliance checklist so nothing gets missed.
4. Scrub the Stovetop, Range Hood, and Backsplash
Grease gravitates upward when you cook, which means your stovetop, range hood, and backsplash take the hardest hit of any surfaces in the kitchen. These three areas require their own dedicated step in any thorough kitchen deep clean.
Stovetop: For gas burners, remove grates and burner caps and soak them in hot soapy water. Scrub the cooktop surface with a degreaser and a non-scratch pad. For glass or ceramic tops, use a razor scraper tool at a low angle to lift burnt food before cleaning with a ceramic-safe cleaner.
Range Hood: Remove the grease filters and soak them in boiling water mixed with baking soda and a few drops of dish soap. According to The Spruce, range hood filters should be cleaned every one to three months depending on how often you cook. Wipe down the hood exterior and interior with a degreaser.
Backsplash: Spray your backsplash tiles with an all-purpose degreaser and let it sit for two minutes. Scrub grout lines with a stiff-bristle brush, then wipe the whole surface clean. For stubborn grease, a paste of baking soda and dish soap left for five minutes works extremely well.
5. Clean Countertops, the Sink, and Garbage Disposal
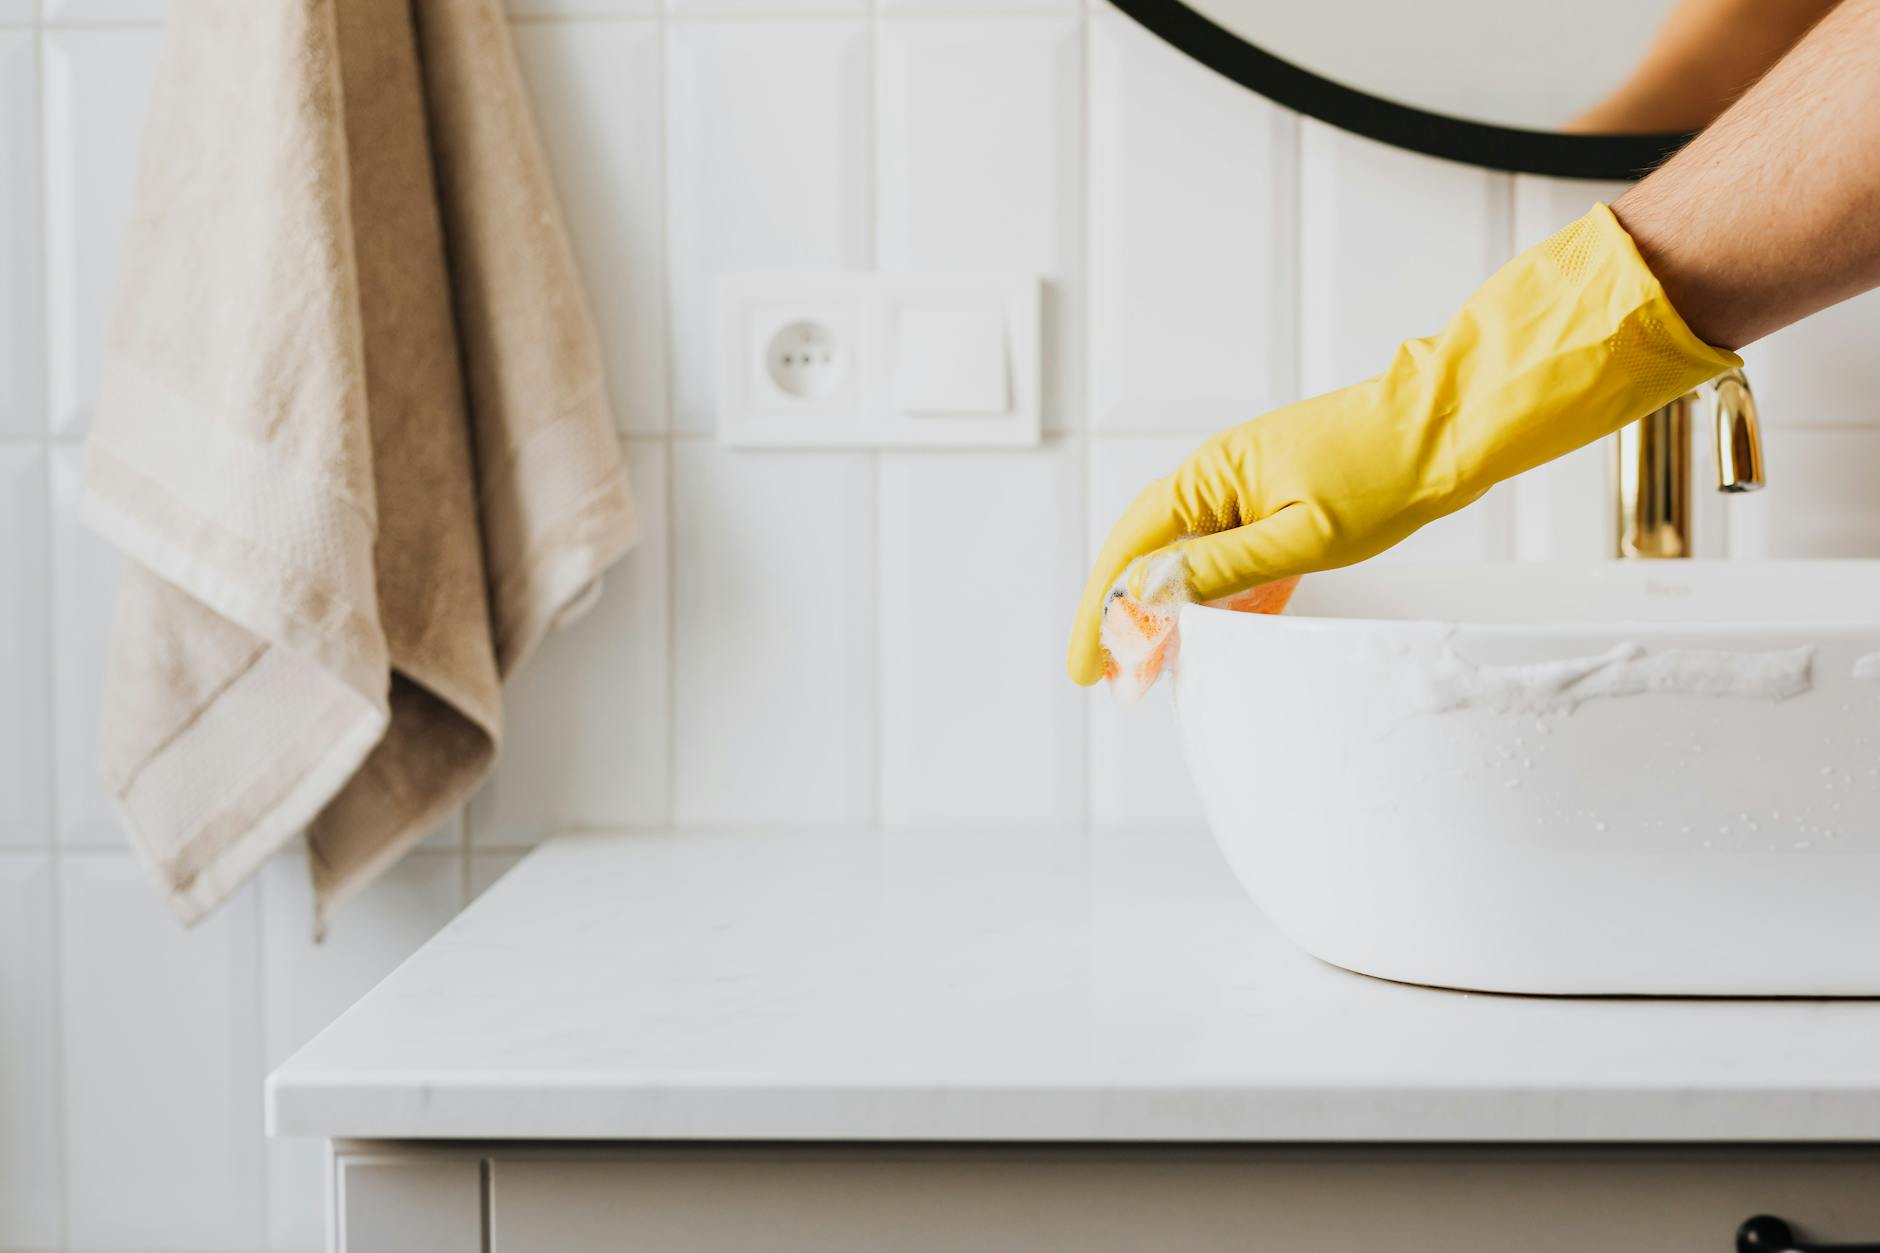
Countertops in Arvada kitchens come in all materials, and each one has a slightly different cleaning approach. For granite or natural stone, skip the vinegar and use a pH-neutral cleaner instead. For laminate and quartz, an all-purpose spray works great. For butcher block, scrub with coarse salt and half a lemon, then condition with food-safe mineral oil after cleaning.
With counters clear and wiped, move to the sink. Sprinkle baking soda around the basin, scrub with a sponge, then rinse. For stainless steel sinks, a little bar keeper’s friend or baking soda paste removes water stains and restores the shine. Clean the faucet and around the handles, where grime loves to hide. Do not overlook disinfection services for the sink and drain, which are among the highest-bacteria zones in the entire home according to food-safety research.
The garbage disposal is easy to freshen: drop in a few ice cubes and a handful of coarse salt, run it for 15 seconds, then follow with half a lemon. This clears residue from the grinding blades and kills odors at the source. This step is almost always skipped on a routine clean and almost always included on a professional deep cleaning checklist.
6. Wipe Down Cabinets, Walls, and the Ceiling
Cabinet fronts are greasy. Even if you cannot see it, run a damp cloth over a cabinet door near the stove and you will see the residue come off on the cloth. Spray a degreaser on all cabinet fronts, let it dwell for 60 seconds, and wipe down with a clean microfiber cloth. Pay special attention to the area around handles and knobs, which get touched dozens of times a day.
Kitchen walls and the ceiling directly above the stove collect cooking grease and steam over time. Fill a bucket with warm water and a small amount of dish soap. Using a wrung-out sponge, wipe down the walls in sections. For painted walls, avoid excessive moisture and do not scrub too aggressively or you may dull the finish. For tile walls, you can scrub more freely. The ceiling can be wiped with a microfiber mop on an extension pole.
The EPA’s indoor air quality guidelines note that cooking residue and grease on surfaces can contribute to poor indoor air, which is a good reason to make wall and ceiling cleaning a regular part of your kitchen deep clean in Arvada rather than a once-a-decade task.
For more ideas on how to connect kitchen cleaning to a full house routine, the whole house deep cleaning checklist is a useful companion resource.
7. Deep Clean the Kitchen Floor
The kitchen floor is the last thing you clean in the room because everything you wipe, sweep, and scrub falls downward. Start by sweeping or vacuuming to remove crumbs and debris from every corner and under the appliances. Pull the stove and refrigerator out if you can and sweep underneath them as well. The buildup under major appliances is often shocking and is a good reason to schedule a deep clean at least twice a year.
Mop based on your floor type:
Tile floors: Use a hot water and tile cleaner solution. Scrub grout lines with a stiff brush. Grout absorbs stains and grease over time, so a targeted grout cleaner makes a noticeable difference.
Vinyl floors: Use a vinyl-safe cleaner diluted in warm water. Avoid bleach-based solutions, which can damage the surface coating over time.
Hardwood floors: Use a barely damp mop with a hardwood floor cleaner. Never soak hardwood, as excess moisture causes warping and swelling.
Laminate floors: Same rule as hardwood. A lightly damp mop with a laminate-safe cleaner only.
After mopping, allow the floor to air dry completely before walking on it heavily or pushing appliances back into place. For Arvada homeowners who want a full floor-to-ceiling kitchen refresh, consider booking a house cleaning service in Arvada, CO that includes detailed floor care.
8. Clean the Inside of Windows, Blinds, and Light Fixtures
These areas are often overlooked but they make a major difference in how bright and fresh your kitchen looks after a deep clean. Kitchen windows get greasy film from cooking, and window blinds are notorious dust magnets in Arvada homes.
Windows: Spray a streak-free glass cleaner and wipe with a clean microfiber cloth in a circular motion first, then finish with vertical strokes to eliminate streaks. Clean the window sills and frames with a damp cloth.
Window Blinds: Close the blinds flat and wipe with a dry microfiber cloth or a blind-cleaning tool. Then flip them the other way and repeat. For heavily soiled blinds, take them down and rinse them in the tub with warm soapy water.
Light Fixtures: Turn off the lights and let the bulbs cool. Remove light covers or globes and wash them in warm soapy water. Wipe down the fixture base with a damp cloth. Changing a burnt bulb while you are up there is a nice bonus.
Consumer Reports consistently recommends microfiber over paper towels for glass and light fixtures because it captures particles rather than just pushing them around.
9. Tackle the Refrigerator Exterior, Trash Can, and Recycling Area
Two spots that rarely get the attention they deserve during a kitchen clean-up: the outside of the refrigerator and the trash area. Both are touched constantly and both carry bacteria and odors.
For the fridge exterior, wipe down all sides with an all-purpose cleaner. For stainless steel, use a stainless-specific wipe or a cloth with a small amount of mineral oil to remove fingerprints and restore shine. Always wipe in the direction of the grain on stainless to avoid scratching. Clean the top of the refrigerator as well, which tends to collect grease and dust.
For the trash can, take it outside if possible. Spray the interior with an all-purpose or disinfecting cleaner and let it sit for five minutes. Scrub the inside walls and bottom with a long-handled brush, rinse, and let it dry in the sun if Arvada weather allows. Do the same for any recycling bins. This step alone can eliminate a lot of lingering kitchen odors.
When it comes to Cleaning services Arvada homeowners trust, Elite Maids House Cleaning covers every one of these steps as part of a full kitchen deep clean. For more on trusted House Cleaning Services in Arvada, CO, our city page covers everything we offer.
10. Finish With a Final Wipe-Down and Odor Refresh
Once every surface has been cleaned, do a final walkthrough with a fresh microfiber cloth lightly dampened with an all-purpose spray. Hit the light switches, outlet covers, and cabinet handles one more time. These are high-touch surfaces that collect germs and often get missed in the first pass.
For a natural odor refresh, simmer a small pot of water on the stove with cinnamon sticks, citrus peel, and a few cloves. This neutralizes cooking smells without leaving a chemical fragrance. If you prefer, a box of open baking soda at the back of the refrigerator or under the sink absorbs ambient odors over several weeks.
Place a fresh liner in the trash can, return your countertop appliances, and step back to admire the results. If you did all 10 steps, your kitchen is genuinely clean, not just visually tidy. That is the difference between a surface clean and a true kitchen deep clean.
When to Call a Professional for a Kitchen Deep Clean in Arvada
DIY deep cleaning is satisfying and absolutely achievable, but there are times when calling in a professional cleaning team makes more sense. If your kitchen has not been deep cleaned in more than six months, if you are moving into or out of a home, or if you are preparing for a large event, a professional residential cleaning service delivers results that are hard to match on your own.
Elite Maids House Cleaning serves Arvada with background-checked, fully insured, five-star rated cleaners who follow a comprehensive kitchen and whole-home deep clean checklist. Every visit is backed by a reclean-at-no-cost satisfaction guarantee, so you never have to worry about whether the job was done right. Online booking with instant quotes means you can schedule same-day service between 8am and 6pm without picking up the phone.
Whether you need a one-time kitchen deep clean, recurring maid service to stay on top of things weekly or biweekly, or a full cleaning arvada prices quote before you commit, Elite Maids is ready to help. Book your kitchen deep clean in Arvada today and get a free quote from the most-reviewed residential cleaning team in Arizona when you contact Elite Maids house cleaning today for a free quote.
Frequently Asked Questions
How much to charge for a deep clean on a kitchen?
Professional kitchen deep clean pricing in Arvada typically ranges from $100 to $300 depending on kitchen size, current condition, and the level of detail required. Heavily soiled kitchens with built-up grease may fall at the higher end. Most cleaning companies, including Elite Maids House Cleaning, offer instant online quotes so you know the exact price before booking with no surprise fees.
What does a kitchen deep clean include?
A full kitchen deep clean includes scrubbing appliances inside and out, degreasing the stovetop and range hood, cleaning cabinet fronts and interiors, sanitizing the sink and garbage disposal, wiping walls and backsplash, mopping the floor, and refreshing the refrigerator. A professional deep cleaning checklist also covers light fixtures, window blinds, and high-touch surfaces like handles and switches.
What is the 20 minute rule of cleaning?
The 20 minute rule means setting a timer for 20 minutes and cleaning as much as you can before it goes off. It works because the time constraint eliminates perfectionism and decision fatigue, and it builds momentum. Many people find they keep going past the 20 minutes once they have started. It is a practical way to stay on top of kitchen maintenance between deep cleans.
What is the best way to deep clean a kitchen?
The best way to deep clean a kitchen is to work top to bottom and back to front: start with cabinets and the ceiling, move to appliances and counters, then finish with the floor. Gather all your kitchen cleaning products before you start, tackle one zone at a time, and do not skip hidden areas like under appliances, inside the dishwasher filter, and behind the refrigerator. For the most thorough result, book a professional cleaning team in Arvada.
Cleaning a dishwasher step by step takes about 30 minutes and requires nothing fancier than white vinegar, baking soda, and a stiff brush. Start by removing and rinsing the filter, wipe down the door gasket and spray arms, run a hot vinegar cycle, then follow with a baking soda rinse. This guide walks Phoenix homeowners through every step so your machine comes out spotless and odor-free. If deep-cleaning your entire kitchen is the goal, our team at Elite Maids House Cleaning also offers Luxury cleaning services phoenix, so you can hand off the hard work entirely.
Step 1: Gather Your Supplies Before You Start
Before you begin cleaning the dishwasher, pull together everything you need so you are not running around mid-task. Having your materials ready makes the whole process faster and more thorough. Phoenix tap water is notoriously hard, so you will also want a descaling solution or plain white vinegar on hand to cut through mineral buildup that accumulates quickly in the Valley’s water supply.
A commercial dishwasher cleaner tablet (optional, see Step 5)
If you prefer eco-friendly cleaning options, the EPA Safer Choice program lists certified products that clean effectively without harsh chemicals. That matters whether you are running a quick refresh or doing a full deep clean of your kitchen appliances. For a broader approach to cleaning your kitchen from top to bottom, our guide on deep cleaning a kitchen in Phoenix covers every surface in detail.
Step 2: How to Clean a Dishwasher Filter
The dishwasher filter is the single most neglected part of the appliance, and it is almost always the source of bad smells. Most modern dishwashers have a manual-clean filter located at the bottom of the tub, usually a cylindrical piece that twists out by hand. If your machine is a KitchenAid dishwasher or a Samsung dishwasher, check your owner’s manual first because filter locations vary slightly by brand.
Follow these steps to clean the dishwasher filter properly:
Pull out the bottom rack and set it aside.
Locate the filter assembly in the center or rear of the tub floor.
Twist the filter counterclockwise and lift it out.
Rinse it under warm running water, scrubbing gently with a soft brush and dish soap.
For stubborn grease, soak the filter in warm soapy water for 10 minutes, then scrub again.
Rinse thoroughly and replace it by twisting clockwise until it locks into place.
Make cleaning the dishwasher filter a monthly habit. In Phoenix, where hard water leaves mineral scale on every surface it touches, a clogged filter forces the machine to work harder and leaves gritty residue on your dishes. Consumer Reports consistently flags filter maintenance as one of the top reasons dishwashers underperform over time.
Step 3: Wipe Down the Spray Arms, Door Gasket, and Interior Walls
Once the filter is back in place, shift your attention to the spray arms, door gasket, and the interior walls of the tub. These spots trap grease, food debris, and mold spores, especially in a warm climate like Phoenix, where heat accelerates microbial growth inside damp appliances.
Here is how to tackle each area:
Spray arms: Pull the spray arms off (most snap or unscrew easily) and hold them under running water. Use a toothpick or thin brush to clear any clogged holes. Rinse and reattach.
Door gasket: The rubber seal around the door edge collects mold and mildew. Wipe it down with a damp microfiber cloth dipped in warm soapy water, pressing into every fold. The CDC’s guidance on mold in homes notes that rubber seals in humid, enclosed spaces are common mold hotspots, so this step is more important than most people realize.
Interior walls and door: Spray a little white vinegar on a cloth and wipe down the inside walls, the door panel, and the bottom of the tub. Pay extra attention to the sides of the door where soap scum builds up.
Utensil baskets and racks: Remove the racks, rinse them in the sink, and scrub any coated tines that show rust or residue.
Skipping this manual wipe-down and relying only on machine cycles is a common mistake. The spray arms cannot reach the door gasket or the crevices along the tub edges, so hand-cleaning those areas is always necessary for a truly clean dishwasher interior.
Step 4: How to Clean a Dishwasher with Vinegar and Baking Soda
Cleaning a dishwasher with vinegar and baking soda is the most popular natural method, and for good reason. White vinegar cuts through grease, dissolves mineral deposits, and neutralizes odors. Baking soda follows up with a gentle abrasive scrub that brightens the interior and absorbs lingering smells. Together, they tackle what daily wash cycles leave behind.
Here is the step-by-step method for cleaning a dishwasher with vinegar:
Place a dishwasher-safe bowl filled with 2 cups of white distilled vinegar on the top rack of an otherwise empty dishwasher.
Run a full hot-water cycle. The vinegar disperses through the machine, breaking down grease, soap scum, and hard-water scale.
Once the cycle ends and the machine cools slightly, sprinkle 1 cup of baking soda across the bottom of the tub.
Run a short hot-water cycle again.
Open the door and let the tub air dry. You should notice a noticeably fresher smell and a cleaner-looking interior.
This method for cleaning a dishwasher with vinegar and baking soda works on most machines, including Whirlpool, KitchenAid, Samsung, and Bosch models. If you want to skip using vinegar entirely (some manufacturers advise caution with rubber gaskets and older machines), you can substitute a citric-acid-based cleaner. The Good Housekeeping cleaning team recommends citric acid as a gentler alternative for machines with rubber components that have seen a lot of use.
Step 5: What Is the Best Dishwasher Cleaner for Hard Water?
Hard water is one of the top complaints from Phoenix homeowners when it comes to dishwasher performance. Phoenix sits in a region where water hardness regularly exceeds 200 parts per million, leaving white cloudy deposits on glassware, the tub walls, and the spray arms. Choosing the right dishwasher cleaner for hard water makes a real difference in how well your machine cleans and how long it lasts.
Here are the options worth knowing:
Commercial dishwasher cleaning tablets (Affresh, Finish, Cascade): Affresh dishwasher cleaner tablets are among the most widely recommended for hard-water mineral buildup. Drop one in the bottom of an empty machine and run a hot cycle. Affresh’s formula is designed specifically to break down limescale and iron deposits.
Citric-acid powder: A natural and effective hard-water dishwasher cleaner. Add 2 to 3 tablespoons to the detergent dispenser and run a hot cycle. It dissolves calcium deposits without the smell of vinegar.
White vinegar cycles (see Step 4): A solid DIY option for mild to moderate hard-water buildup, though it requires more frequent application than commercial tablets.
Rinse aid: Adding rinse aid to the dispenser every few weeks prevents new mineral deposits from forming on dishes and interior surfaces. This is especially useful in Phoenix where hard water is a constant factor.
If your dishwasher has heavy scaling that none of these approaches are fully clearing, it may be time for a professional appliance service call. That level of mineral buildup is common in Phoenix homes that have gone a year or more without a proper machine cleaning.
Speaking of which, if the rest of your home needs the same attention your dishwasher just got, our deep cleaning service covers every room from top to bottom with the same thorough approach outlined in this guide. You can also book a cleaning online and get an instant quote without picking up the phone.
Step 6: How to Get Rid of Dishwasher Odors
A smelly dishwasher is almost always caused by food debris rotting in the filter, mold growing in the door gasket, or standing water that never fully drains. In Phoenix, the combination of heat and trapped moisture creates the perfect environment for odors to develop fast. Getting rid of dishwasher odors is about eliminating the source, not just masking the smell.
Here is how to remove dishwasher odors for good:
Clean the filter first (see Step 2). This removes the most common odor source immediately.
Wipe the gasket with a vinegar-soaked cloth. Mold hiding in the rubber folds is a very common culprit for that musty smell.
Check the drain: Run the garbage disposal before starting a dishwasher cycle if your units share a drain line. A clogged disposal backs water into the dishwasher tub.
Leave the door cracked: After every cycle, crack the dishwasher door open a few inches to let steam escape and air circulate. This simple habit prevents mold and mildew from taking hold.
Run a baking soda cycle monthly: Sprinkle a cup of baking soda across the tub bottom and run a short hot cycle. Baking soda is a natural odor absorber and neutralizer.
Persistent odors that return within days of cleaning usually point to a drain problem or a gasket that needs replacing. If you are dealing with mold growth beyond just the gasket, the EPA’s mold resources are worth reviewing, particularly for households with young children or anyone with respiratory sensitivities.
For more practical kitchen cleaning habits that prevent odors throughout your home, read our tips on cleaning oven racks without chemicals, another often-neglected appliance surface.
Step 7: How Often Should You Clean Your Dishwasher?
How often you should clean your dishwasher depends on how heavily you use it and the quality of your water supply. For most Phoenix households, which deal with hard water daily, the following schedule works well:
Weekly: Wipe the door gasket and exterior controls with a damp cloth. Rinse any visible debris from the filter area.
Monthly: Remove and fully clean the filter. Run a full vinegar cycle followed by a baking soda cycle. Wipe down the spray arms and interior walls.
Every 3 months: Use a commercial dishwasher cleaner tablet like Affresh for a deeper descale treatment. Check the spray arm holes for clogs and clear them if needed.
Annually: Inspect the door gasket for cracks or mold that has penetrated the rubber. A worn gasket should be replaced.
If you run your dishwasher once or twice a day (common in larger Phoenix households with kids), lean toward monthly cleaning rather than stretching it to six weeks. The more cycles the machine runs, the faster buildup accumulates. The Spruce’s cleaning team puts it plainly: a dishwasher that is cleaned regularly not only smells better but uses less energy because water moves more freely through unclogged spray arms and filters.
Staying on top of regular appliance cleaning is part of keeping a clean house overall. If you want a system for the whole home, our post on house cleaning tips for a spotless home breaks down a realistic routine you can actually stick to.
Keeping up with regular dishwasher cleaning is one of those habits that pays off in multiple ways. Most Phoenix homeowners do not think about it until the machine starts leaving spots on glasses or smelling musty, but by that point the buildup has already been affecting performance for weeks.
Here is what consistent dishwasher maintenance actually gets you:
Cleaner dishes every cycle. Clogged spray arms and dirty filters mean water is not reaching all surfaces equally. A clean machine actually cleans dishes.
Longer appliance life. Scale buildup corrodes internal parts over time. Regular descaling extends the life of the heating element, pump, and seals significantly.
Lower energy bills. A machine running with clogged components has to work harder and run longer to complete a cycle. Clean components mean shorter, more efficient cycles.
No embarrassing odors. A dishwasher that smells like a drain makes the whole kitchen feel dirty, even right after mopping the floors.
Fewer repair calls. Many dishwasher service calls in Phoenix are the result of neglected filters and scale buildup, both of which are completely preventable with monthly maintenance.
Appliance upkeep is just one piece of overall home care. If your Move out cleaning services Phoenix needs are coming up as you transition between homes, our team handles everything from appliance wipe-downs to full room cleans so your deposit comes back in full.
For households that want recurring professional support, our recurring maid service includes kitchen appliance exteriors as part of every scheduled visit, keeping your home consistently maintained between your own deep-cleaning sessions.
Closing: Let Elite Maids Handle the Heavy Cleaning in Phoenix
Cleaning your dishwasher step by step is a manageable DIY task, but your whole home deserves the same level of attention. Phoenix families trust Elite Maids House Cleaning for thorough, reliable house cleaning services that cover every corner, every appliance surface, and every room you do not have time to tackle yourself. Every cleaner on our team is background-checked, bonded, and fully insured, and every visit is backed by our reclean-at-no-cost guarantee. You can also get an instant quote and schedule a same-day cleaning online between 8am and 6pm without a single phone call. When you are ready to hand off the cleaning to professionals who get it right the first time, Mopstar Cleaners: Cleaning Services in Phoenix, AZ is just a click away. Reach out to Elite Maids House Cleaning today for a free quote and get your weekends back.
Frequently Asked Questions
How to clean a dishwasher step by step?
To clean a dishwasher step by step: remove and rinse the filter, wipe down the spray arms and door gasket by hand, place a bowl of white vinegar on the top rack and run a hot cycle, then sprinkle baking soda across the tub floor and run a short hot cycle. Finish by leaving the door cracked so the interior dries completely. The whole process takes about 30 minutes.
Can I use vinegar and baking soda together in the dishwasher at the same time?
No, do not use them at the same time. Vinegar is acidic and baking soda is alkaline, so combining them neutralizes both and reduces their cleaning power. Run the vinegar cycle first, let it finish, then add baking soda for a second cycle. This two-step approach delivers far better results than mixing them together.
How often should you clean your dishwasher in Phoenix?
Phoenix homeowners should clean the dishwasher filter monthly and run a full vinegar and baking soda cleaning cycle every four to six weeks. Phoenix’s hard water accelerates mineral buildup faster than in softer-water cities, so staying on a monthly schedule keeps the machine running efficiently and prevents the cloudy glassware and musty odors that come with neglected maintenance.
What is the best dishwasher cleaner for hard water?
For Phoenix hard water, Affresh dishwasher cleaner tablets and citric-acid powder are the most effective options. Both break down calcium and limescale deposits that white vinegar alone may not fully remove. Adding a rinse aid to the dispenser after every cleaning cycle also prevents new mineral deposits from forming on dishes and the interior walls of the tub.
Why does my dishwasher still smell after cleaning it?
Persistent odors usually mean the filter was not fully cleaned, mold remains in the door gasket folds, or there is a partial drain clog. Check the filter first, then inspect every fold of the rubber gasket with a vinegar-soaked cloth. If your dishwasher shares a drain line with the garbage disposal, run the disposal before every dishwasher cycle to keep the shared drain clear.
You can clean oven racks without chemicals by soaking them overnight in a bathtub filled with hot water and a generous amount of dish soap, then scrubbing with a non-scratch pad. This method lifts baked-on grease and food residue without fumes or harsh products. The steps below cover six proven approaches, from the baking soda and vinegar method to the overnight garbage bag hack, so you can pick what works best for your kitchen.
Step 1: Remove and Assess Your Oven Racks Before Cleaning
Before you start cleaning oven racks, pull them out completely and take stock of what you are dealing with. Hold each rack up to the light and look for layers of baked-on grease, carbonized food drips, and discolored metal. Knowing how dirty they are helps you choose the right method and soak time.
Lay an old towel on the floor or in the bathtub before you set the racks down. Oven racks can scratch porcelain tubs if dropped directly onto the surface. Once your racks are out, wipe off any loose crumbs or debris with a dry paper towel. This small step speeds up every cleaning method that follows.
If your racks are only lightly soiled, a quick soak and a light scrub may be all you need. If there is heavy, carbonized buildup that has been baking on for months, plan for an overnight soak. For Arizona households running their ovens hard through the cooler months, that kind of buildup is surprisingly common. If you are already researching spring cleaning guidance, adding oven racks to your list now means you will not be stuck scrubbing through the summer heat.
Step 2: The Bathtub Hot-Water Soak for Chemical-Free Oven Rack Cleaning
The bathtub soak is the most popular chemical-free oven rack cleaning method for a reason: it requires almost zero elbow grease. Fill your bathtub with the hottest water your tap produces, then add half a cup of dish soap. Submerge both racks completely and let them soak for at least four hours. Overnight is better for heavy grease.
The hot water softens the carbonized fat and food, and the dish soap breaks down the grease bonds. When you come back the next morning, the grime will slide off with a non-scratch scrubbing pad or an old dish brush. Rinse thoroughly and dry before returning the racks to the oven.
A few tips to get the most from this overnight oven rack cleaning approach:
Lay an old towel on the tub floor first to protect the porcelain.
Add half a cup of washing soda to boost grease-cutting power without introducing harsh chemicals.
Use tongs to handle the racks in hot water to avoid burns.
Scrub along the rack rails, not across them, to avoid scratching.
This is also a method worth knowing if you are curious about cleaning oven racks without chemicals in Tucson, where water hardness can leave mineral deposits if you do not rinse completely.
Step 3: How to Clean Oven Racks with Baking Soda and Vinegar
The baking soda and vinegar method is the go-to for anyone who wants to clean oven racks with baking soda and skip liquid soaks entirely. Start by placing the racks on a large sheet of aluminum foil or inside a large plastic bin. Sprinkle baking soda liberally across every surface of each rack, making sure to coat the crossbars and corners where grease collects most.
Next, spray white distilled vinegar directly over the baking soda. The two ingredients react and foam up, which physically lifts grease and carbonized residue away from the metal. Let the foam work for 30 to 60 minutes. For extremely dirty racks, apply a second round and wait an additional 30 minutes.
After the soak, scrub with a stiff brush or a balled-up piece of aluminum foil. The foil acts as a mild abrasive without scratching the rack coating. Rinse under hot running water and dry completely before reinserting into your oven.
The baking soda and vinegar approach is well recognized as an effective non-toxic cleaning combination. According to the EPA Safer Choice program, products built around ingredients like these are evaluated for safer human and environmental profiles, which is exactly why so many households prefer this route over commercial oven cleaners.
Step 4: The Garbage Bag Soak Hack for Very Dirty Oven Racks
The garbage bag method is one of the most effective clean oven racks hacks for people who want to keep the bathtub free or who do not have a tub large enough for their racks. Slide each oven rack into a large heavy-duty trash bag. Add half a cup of dish soap and enough hot water to fully submerge the racks inside the bag.
Seal the bag tightly, squeezing out excess air, and lay it flat in your backyard, on a patio, or in a utility room. Let it sit overnight. The sealed environment traps heat and keeps the soapy water in constant contact with the grease, which is what makes this clean oven racks overnight technique so effective without any chemical intervention.
In the morning, open the bag carefully over a utility sink or outside. The grease should wipe off with a sponge or cloth. Rinse the racks with a garden hose or in the tub, and dry them before reinserting.
For Arizona residents, this method has an extra advantage in warmer months: leaving the bag in the sun accelerates the process, since the heat intensifies the soak. That said, avoid leaving it out in direct full sun for more than eight hours, as the bag can degrade and leak.
A note on the question of can you clean oven racks in the dishwasher: most standard oven racks are too large for residential dishwashers, and the high heat cycle can warp lighter racks over time. If yours do fit, use the sanitize cycle with a standard detergent tablet, but inspect for warping afterward. The garbage bag and bathtub methods are generally safer for the racks themselves.
Step 5: Using Aluminum Foil as a Chemical-Free Scrubbing Tool
Cleaning oven racks with aluminum foil works as a standalone scrubbing method or as a complement to any of the soaking methods above. Tear off a palm-sized sheet of aluminum foil and crumple it into a tight ball. After your racks have soaked using whichever method you chose, use the foil ball to scrub away any remaining residue.
The aluminum foil provides just enough abrasive grit to lift stuck-on carbon and grease without scratching the metal finish of the rack. This is particularly useful on the thicker horizontal bars of the rack where residue tends to cake and harden over repeated cooking sessions.
Pair this approach with a thin paste of baking soda and a small amount of dish soap for targeted spots that did not fully release during soaking. Apply the paste, let it sit for 10 minutes, then scrub with the foil ball in circular motions. This combination of the chemical-free oven rack cleaning paste and mechanical scrubbing works well even on racks that have not been cleaned in a year or more.
The Good Housekeeping cleaning team has long recommended pairing natural abrasives with soaking methods for baked-on residue, and this foil-plus-paste approach is a practical application of exactly that principle.
Step 6: How to Clean Oven Racks Without Ammonia Using Dryer Sheets
If you want to clean oven racks without ammonia and without any scrubbing at all, the dryer sheet method is worth trying. Place your racks in the bathtub, cover them with a layer of dryer sheets, and fill the tub with warm water until the racks are submerged. Add a small amount of dish soap and let everything soak overnight.
The fabric softener compounds in dryer sheets work alongside the soap to loosen grease bonds at the surface level. After eight hours, the dryer sheets themselves double as gentle scrubbing pads. Swipe them along the rack bars and the grime lifts with minimal effort.
This is a particularly low-effort method for people with racks that are moderately dirty but not heavily carbonized. It does use dryer sheets, which are not entirely natural, but it avoids ammonia, bleach, and commercial oven cleaners entirely, making it a practical compromise for households that want to reduce chemical exposure without going fully DIY.
Speaking of reducing chemical exposure at home: the EPA notes that volatile organic compounds from cleaning products can be a meaningful contributor to poor indoor air quality. Choosing non-toxic oven rack cleaning methods is a practical step toward a healthier kitchen environment.
If you are a licensed and insured Arizona maids customer, you already know that reducing chemical exposure is something the Elite Maids team prioritizes across every cleaning visit with eco-friendly product options available on request.
Step 7: Dry, Reinstall, and Keep Oven Racks Cleaner Longer
No matter which cleaning oven racks method you used, drying thoroughly before reinstallation is critical. Wet racks placed back into a warm oven can develop rust spots, particularly on older racks where the coating has worn away. Use a dry cloth to wipe each rack down, then let them air dry for 20 to 30 minutes before sliding them back in.
Once your racks are clean and reinstalled, a light coating of vegetable oil or food-grade mineral oil applied with a paper towel will help them slide in and out more smoothly and create a slight barrier against future buildup. Wipe off any excess so it does not smoke during your next bake.
For ongoing maintenance, the single biggest habit that reduces how often you need to deep-clean oven racks is lining the oven floor with a reusable oven liner or a sheet of aluminum foil. Drips hit the liner, not the rack below. When the liner gets dirty, you replace or wash just that piece.
A home disinfection service can handle the deeper sanitizing of your oven cavity and other appliance surfaces while you focus on the racks themselves. Combining a regular professional clean with your own DIY rack maintenance keeps the entire oven area in better shape between visits.
If you are prepping your kitchen for guests and want a checklist of the spots most people forget, the post on forgotten spots to clean before guests arrive is worth a quick read before your next event.
Ready to Skip the Scrubbing?
Cleaning oven racks without chemicals is absolutely doable on your own, and the methods above prove it. But if your whole kitchen, bathroom, and living space need attention at the same time, there is a faster path. The team at professional house cleaning service in Arizona Elite Maids handles the deep work so you get your weekend back. Every cleaner is background-checked, bonded, and backed by a satisfaction guarantee with no-cost recleans if anything is missed. Contact Elite Maids house cleaning today for a free quote and book same-day service online in minutes.
Frequently Asked Questions
What is the easiest way to clean very dirty oven racks?
The easiest way to clean very dirty oven racks is the overnight bathtub soak. Fill the tub with hot water and half a cup of dish soap, submerge the racks completely, and leave them overnight. By morning, most of the baked-on grease will wipe off with a non-scratch pad and minimal scrubbing. Adding washing soda to the water boosts grease-cutting power without chemicals.
How do you clean oven racks with baking soda and vinegar?
Sprinkle baking soda generously over the racks, then spray white vinegar over the top. The fizzing reaction loosens carbonized grease and food residue. Let it sit for 30 to 60 minutes, then scrub with a brush or a balled-up piece of aluminum foil. Rinse thoroughly with hot water and dry before returning the racks to your oven.
Does the garbage bag method actually work for cleaning oven racks?
Yes, the garbage bag soak is one of the most effective chemical-free oven rack cleaning hacks available. Seal the racks inside a heavy-duty trash bag with hot water and dish soap overnight. The enclosed environment keeps the soapy water in constant contact with the grease. By morning, most residue wipes away with a sponge. It works particularly well when left in a warm spot.
Can you clean oven racks in the dishwasher?
Most standard oven racks are too large for a residential dishwasher. If yours fit, a sanitize cycle with a detergent tablet can work for lightly soiled racks. However, repeated high-heat dishwasher cycles can warp lighter racks over time. For heavily soiled racks, the bathtub soak or baking soda and vinegar method will produce better results with less risk of damage.
How often should oven racks be cleaned?
A thorough cleaning every one to three months is a reasonable target for most households. If you cook frequently or have a spill that drips onto the racks, spot-cleaning sooner prevents residue from carbonizing and bonding deeply with the metal. Keeping a reusable oven liner on the oven floor reduces how often the racks need a full soak between deep cleans.
How to Deep Clean a Kitchen in 30 Minutes in Santa Fe
SHARE:
You can deep clean a kitchen in 30 minutes by working in a specific order: clear surfaces first, then spray everything down at once so cleaners do the soaking while you scrub elsewhere. This method removes grease, bacteria, and grime without wasted motion. The steps below walk you through the exact sequence Santa Fe homeowners use to get a spotless kitchen fast, whether you’re doing a quick reset before guests arrive or following a regular cleaning in Santa Fe routine.
1. Gather Your Supplies Before You Start the Clock
The biggest time-waster in any kitchen deep clean is hunting for supplies mid-task. Before you start the timer, pull everything out: an all-purpose spray, a degreaser, a microfiber cloth, a scrub sponge, baking soda, white vinegar, paper towels, and a trash bag. Having every tool within arm’s reach means you never break momentum.
If you prefer safer, low-VOC products, check the EPA Safer Choice program for certified cleaners that cut grease without harsh fumes. Santa Fe kitchens tend to accumulate cooking residue fast, especially in homes where southwestern flavors and high-heat cooking are part of daily life. Prep your kit, set a timer for 30 minutes, and start at the top of the kitchen and work your way down to the floor.
2. Declutter Countertops and Clear the Sink
Speed-cleaning a kitchen starts with removing visual and physical clutter. Pull everything off the counters, stack dishes in the sink, and throw away any trash or expired items. Do not stop to wash individual dishes yet. This decluttering step takes about two to three minutes but makes every other step faster because you have open surfaces to work with.
A clean kitchen starts with clear surfaces. Once the countertops are bare, you can spray the whole surface in one pass instead of navigating around appliances and mail piles. If you follow a structured cleaning schedule for your home, this declutter habit aligns perfectly with routines like the ones covered in our guide on keeping a clean house every week.
3. Spray Everything Down at Once (This Is the Secret)
The single biggest time-saving trick in a 30-minute kitchen deep clean is spraying all surfaces simultaneously so the cleaner does the work while you move on. Spray the stovetop, countertops, backsplash, sink basin, and the exterior of appliances all at once. Then walk away for two to three minutes and tackle something else.
This dwell time is where the real cleaning happens. Degreasers and all-purpose sprays need contact time to break down grease and stuck-on food. Skipping this step and wiping immediately is why most kitchen cleaning takes longer. According to Good Housekeeping’s cleaning guides, allowing a cleaner to sit for at least 60 seconds on greasy surfaces can cut scrubbing time in half.
4. Scrub the Stovetop and Oven Exterior
After the dwell time, come back to the stovetop first since it typically holds the most stubborn residue. Use your scrub sponge on the grates or burner rings, then wipe with a damp microfiber cloth. For baking soda paste on stuck-on spots, mix two tablespoons of baking soda with a small amount of dish soap and apply directly to the problem area. Let it sit for one minute, then scrub.
Wipe down the oven exterior, including the handle, control knobs, and the area around the burners. If your oven has a glass door with interior grime, that is a separate job for a full deep cleaning service rather than a 30-minute sprint. Focus the 30-minute kitchen deep clean on what guests and family members actually see and touch daily. The Santa Fe climate, dry and dusty for much of the year, means the top of the stove and surrounding surfaces collect a fine layer of particulate even between cooking sessions.
5. Wipe Countertops, Backsplash, and Cabinet Fronts
Now that the spray has done its job, wipe down all the flat surfaces with a clean microfiber cloth. Work in long, straight strokes rather than circles to avoid pushing grime around. Move from the back of the counter toward the edge, sweeping crumbs and residue off the surface as you go.
Pay attention to the backsplash near the stove where grease spatters collect. Wipe the fronts of cabinet doors at the most-touched spots, typically around handles and near the base of the upper cabinets. Cabinet fronts are often skipped during a quick kitchen cleaning, but they hold grease residue that builds up over time. If you want a room-by-room approach to thorough kitchen and home cleaning, the deep clean checklist for your home is a useful reference even for Santa Fe households.
6. Clean the Sink and Faucet
A gleaming sink pulls a whole kitchen together visually. Spray the basin with your all-purpose cleaner or a dab of dish soap and scrub in circular motions. Pay close attention to the drain area and the caulk line where the sink meets the counter, since mold and mildew can develop in those joints. The CDC notes that moisture-prone surfaces in kitchens and bathrooms are common sites for mold growth, making sink cleaning a genuine health task, not just an aesthetic one.
Wipe down the faucet handles and base with a damp cloth. Use an old toothbrush around the base of the faucet where soap scum and mineral deposits collect. In Santa Fe, where the water supply can have higher mineral content, calcium buildup on faucet hardware is especially common. A quick spray of white vinegar on these spots dissolves mineral deposits in about 60 seconds. Rinse with warm water, then dry the faucet with a cloth to prevent water spots.
7. Wipe the Refrigerator Exterior and Handle
The refrigerator exterior is one of the most-touched surfaces in any kitchen, which means it carries fingerprints, food splashes, and bacteria. Wipe down the entire front of the refrigerator with an all-purpose spray and microfiber cloth, focusing on the door handles and dispenser area if you have one.
Do not open the refrigerator for an interior clean during your 30-minute sprint. Interior refrigerator cleaning belongs in a more thorough session, like a one-time deep clean or periodic holiday cleaning before family gatherings. For the 30-minute kitchen deep clean, the exterior wipe-down is enough to keep the appliance looking maintained and prevent grime from transferring to your hands every time you reach for the handle.
8. Sweep and Mop the Floor to Finish Strong
Floors go last, always. Everything you scrub and wipe above the floor sends debris downward, so sweeping before wiping countertops means sweeping twice. Spend two to three minutes sweeping corners, under the toe-kick space below cabinets, and the area directly in front of the stove where crumbs concentrate.
Follow with a damp mop or a spray-and-wipe system for a hard floor. You do not need a full bucket-and-mop setup for a 30-minute kitchen deep clean. A flat mop head with a reusable microfiber pad cleans a standard kitchen floor in under four minutes. Indoor air quality improves when floor cleaning is consistent, since kitchen floors hold food particles and allergens that get stirred into the air. The American Lung Association recommends regular cleaning of high-traffic floors as part of a healthy indoor environment strategy.
9. Tackle Microwave and Small Appliance Exteriors
With your floors drying, use the final few minutes on the microwave interior and small appliance exteriors. For the microwave, place a bowl of water with a few tablespoons of white vinegar inside and microwave it for two minutes. The steam loosens splattered food so you can wipe the interior clean with a single swipe of a damp cloth. Wipe the exterior, button panel, and handle.
Wipe the exterior of your toaster, coffee maker, and any other small appliances sitting on the counter. These collect crumbs, oil mist, and dust that make a kitchen look dirtier than it is. A fast wipe with a lightly damp microfiber cloth takes 20 seconds per appliance. If you want deeper help with kitchen cleaning or a full professional clean for your Santa Fe home, professional cleaning services can cover every surface, including the spots a 30-minute session can’t reach.
10. When a 30-Minute Deep Clean Is Not Enough
A 30-minute kitchen deep clean is a powerful reset, but it is not a substitute for periodic professional cleaning. If your kitchen has not had a thorough clean in several weeks, if grease has built up behind the stove, or if cabinet interiors need attention, a proper disinfection service is the right call. This is especially true before major events, after a renovation, or when moving into a new home.
Elite Maids House Cleaning brings background-checked, insured, and five-star-rated cleaners to homes throughout the region. Every visit is backed by a reclean-at-no-cost satisfaction guarantee, so you never have to worry about a job left half done. If you want to extend the results of your 30-minute kitchen deep clean, a recurring maid service on a weekly or biweekly schedule keeps surfaces consistently clean so 30 minutes genuinely does the job every time. For more kitchen-specific techniques similar to what works in the high desert climate of Santa Fe, see our step-by-step post on kitchen deep cleaning in Flagstaff, which covers many of the same challenges. According to Real Simple’s cleaning advice, consistent maintenance cleaning between professional visits is the most effective strategy for keeping a kitchen genuinely clean, not just tidy.
If your kitchen needs more than a quick 30-minute reset, or if you would rather spend your weekend doing anything other than scrubbing, reach out to the team that Santa Fe homeowners trust. Contact Elite Maids House Cleaning in Santa Fe today for a free quote and get your kitchen, and your whole home, back to spotless without lifting a sponge.
Frequently Asked Questions
Can you really deep clean a kitchen in 30 minutes?
Yes, if you follow the right sequence. The key is spraying all surfaces at once so the cleaner does the work while you move to the next task. Working top-to-bottom and saving floors for last prevents double-cleaning. You will cover countertops, appliance exteriors, the sink, stovetop, and floors in about 30 minutes with focused effort and the right supplies ready before you start.
What is the best cleaner to use for a quick kitchen deep clean?
An all-purpose degreaser handles the majority of kitchen grime including stovetop residue, cabinet fronts, and countertops. For tough grease, a paste of baking soda and dish soap works without scratching. White vinegar in water is effective for mineral deposits on faucets and microwave interiors. For eco-conscious households, the EPA Safer Choice label identifies products that cut grease without harsh chemicals or strong fumes.
How do I deep clean a kitchen without chemicals?
White vinegar, baking soda, and dish soap handle most kitchen cleaning tasks without conventional chemicals. A baking soda paste scrubs the stovetop and sink. Vinegar dissolved in water cuts grease on appliance exteriors and glass surfaces. Steam cleaning with a microwave-safe bowl of hot water and vinegar loosens interior grime in minutes. These methods are effective, low-cost, and safe for households with children or pets.
How often should I deep clean my kitchen?
A light clean after every cooking session keeps surfaces manageable. A 30-minute deep clean of the kitchen once a week prevents grease and grime from building up to a point where scrubbing becomes necessary. A true professional-level deep clean, covering interior appliances, cabinet interiors, and behind-appliance spaces, is worth scheduling every one to three months depending on how heavily the kitchen is used.
What areas do most people forget during a kitchen deep clean?
The most commonly skipped areas are the backsplash above the stovetop, the top of the refrigerator, the area around the base of the faucet, cabinet door edges and handles, and the exterior of the range hood or vent. These surfaces collect grease and dust quickly but are easy to wipe down in under a minute each once you build them into your regular kitchen cleaning routine.
How to Clean a Microwave with Vinegar in Glendale: A Step-by-Step Guide
SHARE:
To clean a microwave with vinegar, combine equal parts white vinegar and water in a microwave-safe bowl, heat the mixture for five minutes until steam fills the interior, then wipe away softened grease and food splatter with a damp cloth. The steam does most of the heavy lifting. This guide walks Glendale homeowners through every step, plus bonus methods using lemon, baking soda, and dish soap for stubborn messes.
If you live in Glendale and you have been putting off tackling that crusty microwave interior, you are not alone. Grease splatters, reheated leftovers, and forgotten popcorn bags all leave behind a buildup that seems impossible to scrub off without scratching the walls. The good news is that you probably already have the one ingredient that makes this job almost effortless sitting in your pantry right now. La Maid service and house cleaners reviews show that kitchens, and microwaves in particular, are one of the top requests homeowners make when they finally call in a professional crew. Whether you want to DIY it today or let someone else handle it, this step-by-step guide has you covered.
Step 1: Why Vinegar Is the Best Natural Microwave Cleaner
White distilled vinegar is one of the most practical natural cleaners you can keep under your sink. Its acetic acid content breaks down grease, dissolves mineral deposits, and cuts through dried food residue without scratching surfaces or leaving behind chemical residue. When you heat a vinegar-and-water solution inside a microwave, the steam penetrates baked-on grime and loosens it so a single wipe removes what would otherwise take ten minutes of scrubbing.
Another reason cleaning a microwave with vinegar makes sense for Glendale households is that it is genuinely safe. According to the EPA Safer Choice program, acetic acid is one of the lowest-hazard cleaning agents available. Unlike commercial oven sprays that contain harsh solvents, vinegar does not release toxic fumes into the air you breathe while cooking. That matters, especially in kitchens where the air circulates into living spaces. The American Lung Association notes that everyday cleaning products can affect indoor air quality, so choosing a low-VOC option like vinegar is a genuinely smart call.
Cleaning your microwave with vinegar also leaves no soapy residue that could transfer to food, which is a real concern with dish soap if you do not rinse thoroughly. For a weekly or bi-weekly kitchen refresh, vinegar is the default best choice.
Step 2: What You Need Before You Start Cleaning Your Microwave
Gathering your supplies before you start makes the job faster and prevents you from running to the cabinet mid-clean with dirty hands. Here is everything you need for a basic vinegar microwave cleaning session:
1 cup of white distilled vinegar
1 cup of water
A microwave-safe bowl or large measuring cup
A wooden spoon or toothpick (to prevent the liquid from superheating)
A clean microfiber cloth or several paper towels
A small bowl of warm water for the final wipe-down
Optional: a few drops of dish soap for the turntable plate
That is it. No specialty products, no trips to the store. If you want to add a fresh scent, drop a slice of lemon into the bowl before heating. The combination of cleaning a microwave with vinegar and lemon not only tackles grease but also leaves the interior smelling clean instead of like old food. Many Glendale homeowners prefer this combination for that reason alone.
One quick safety note: place a wooden spoon or toothpick in the bowl to prevent the liquid from superheating and erupting when you open the door. It is a rare occurrence, but it takes two seconds to prevent and is worth the habit.
Step 3: How to Clean a Microwave with Vinegar, Step by Step
This is the core method. Follow these steps in order and you will have a spotless microwave interior in under fifteen minutes, including wait time.
Remove the turntable plate. Lift out the glass turntable and the ring or roller it sits on. Set them aside in the sink with warm soapy water to soak while you work on the interior.
Mix your vinegar solution. Combine one cup of white vinegar with one cup of water in your microwave-safe bowl. Add a wooden spoon or toothpick to the bowl.
Heat the mixture. Place the bowl in the microwave and run it on high for five minutes. You want the interior to fill with steam. Do not open the door immediately.
Let it sit. After the timer goes off, leave the door closed for three to five minutes. The trapped steam continues to work on caked-on grease during this time. This is the step most people skip, and it is the one that makes the biggest difference.
Wipe the interior. Carefully open the door and remove the hot bowl (use a dish towel, it will be hot). Starting from the ceiling of the microwave, wipe down all interior surfaces with a damp microfiber cloth. The grime should come off with almost no pressure. Work your way down to the bottom and the door interior.
Tackle stubborn spots. If any spots resist, dip your cloth back into the warm vinegar solution from the bowl and press it against the spot for thirty seconds before wiping. Repeat as needed.
Clean the turntable. Scrub the soaking turntable plate and ring with a sponge or cloth, rinse, dry, and replace them.
Wipe the door seals and exterior. Use the remaining vinegar solution on a cloth to wipe the rubber door gasket, the outside of the door, and the control panel. Dry with a clean cloth.
That is the full method for cleaning a microwave with vinegar. If you do this once a month, you will never deal with a truly grimy microwave again. For homeowners who want their entire kitchen brought to this standard on a regular schedule, our house cleaning service in Glendale covers every surface, appliance, and corner in your kitchen as part of a recurring visit.
Step 4: How to Clean a Microwave with Baking Soda for Stubborn Buildup
Sometimes vinegar alone is not enough, especially if the microwave has not been cleaned in months or if grease has baked on through repeated high-heat cooking. In those cases, cleaning a microwave with baking soda is a powerful complement to the vinegar steam method.
Baking soda works as a mild abrasive that scrubs without scratching enamel or plastic surfaces. It also neutralizes odors at a chemical level, which vinegar alone sometimes cannot do for deeply embedded smells.
To use baking soda after the vinegar steam treatment, make a paste by mixing two tablespoons of baking soda with just enough water to form a thick consistency. Apply the paste directly to any remaining stuck-on spots inside the microwave. Let it sit for five to ten minutes, then scrub gently with a damp cloth or soft sponge. Wipe clean with a fresh damp cloth until no residue remains.
For the most thorough approach, you can combine both methods: use the vinegar steam first to loosen the majority of the buildup, then apply the baking soda paste to whatever remains. Cleaning a microwave with vinegar and baking soda together this way handles even the worst neglected microwaves without any harsh chemicals. This is essentially the same approach our team uses during a deep cleaning service when clients need a kitchen brought back from serious buildup.
For more guidance on tackling every part of your kitchen this thoroughly, see our detailed post on kitchen deep cleaning in Chandler, which covers appliances, cabinets, and everything in between using the same principles.
Step 5: Alternative Methods Including Lemon, Dish Soap, and Water
Vinegar is the go-to, but it is not the only option. Depending on what you have available and how messy the microwave is, these alternatives all work well.
How to Clean a Microwave with Lemon
Cleaning a microwave with lemon follows the same steam logic as vinegar. Slice a lemon in half and squeeze the juice into a microwave-safe bowl of water, then drop the lemon halves in too. Microwave on high for three minutes and let the steam sit for five minutes before wiping. The citric acid in lemon cuts grease and the natural oils leave a fresh scent. Many people prefer this method for light to moderate buildup when the vinegar smell is a concern.
How to Clean a Microwave with Dish Soap
For light, everyday splatter, cleaning a microwave with dish soap and warm water works perfectly well. Dip a microfiber cloth or sponge in warm soapy water, wring it out so it is damp rather than dripping, and wipe the interior. Rinse with a clean damp cloth. The key is to not use too much soap, since residue left behind can affect food flavor. This method is best for routine maintenance between deeper vinegar cleanings.
How to Clean a Microwave with Water Alone
If the microwave just has light steam condensation or recent light spatters, sometimes plain hot water in a bowl run for two to three minutes creates enough steam to wipe clean. This is more of a maintenance move than a cleaning method. For anything beyond fresh splatter, add vinegar or lemon to the water.
For a complete room-by-room breakdown of keeping your home clean from top to bottom, our deep cleaning guide for Glendale homes is a great companion resource. It covers every room with the same practical, no-nonsense approach as this post.
Step 6: How Often Should You Clean Your Microwave in Glendale
How often you need to clean your microwave depends on how heavily you use it and whether you consistently cover food before heating. As a general baseline, Good Housekeeping recommends wiping out your microwave at least once a week and doing a deeper steam clean once or twice a month. For households in Glendale that cook daily and use the microwave multiple times per day, weekly steam cleaning with vinegar is a reasonable routine.
A few habits dramatically reduce how often you need to do a full cleaning session:
Always cover food with a microwave-safe lid or paper towel before heating.
Wipe out any fresh splatter immediately after it happens, while it is still soft.
Leave the door open for a minute after use to let steam escape and prevent condensation buildup.
Clean the turntable plate in the sink weekly as part of dish washing.
When the microwave is just one item on a long list of things to clean, it helps to have a system for the whole house. You can find a printable reference in our ultimate deep clean checklist, which organizes every cleaning task by room and frequency so nothing falls through the cracks.
For Glendale households where a thorough kitchen cleaning is overdue, LA cleaning services from our team can handle the full scope of a kitchen deep clean, including appliance interiors, cabinet faces, backsplashes, and floors, on a schedule that works for your family. You can also explore Cleaning services glendale california to see everything we offer locally and get an instant quote without picking up the phone.
Step 7: When to Call a Professional House Cleaning Service in Glendale
Vinegar, lemon, and baking soda can handle most microwave messes on their own. But there are times when a microwave is genuinely the least of your kitchen cleaning concerns, and a professional cleaning crew is the faster, smarter solution.
If your microwave has months of baked-on residue, the interior smells even after cleaning, or you are preparing your home for a move, a rental turnover, or a special event, a professional cleaning service saves you hours. Our team at Elite Maids House Cleaning handles every appliance, surface, and corner in your kitchen as part of a full home clean. Every cleaner is background-checked, bonded, and fully insured, and every visit is backed by our no-cost reclean guarantee.
We also offer a book now option with instant quotes, so Glendale homeowners can lock in same-day service between 8am and 6pm without a phone call. Whether you need a one-time deep clean before guests arrive or want a recurring maid service that keeps your kitchen spotless week after week, we have a plan that fits.
If you are curious about seasonal cleaning beyond just the kitchen, our ultimate spring cleaning guide is packed with practical advice for getting your entire home reset efficiently.
Homes in Glendale deal with Arizona’s dry heat, dust, and desert grime on top of everyday cooking mess. A clean kitchen, starting with appliances like your microwave, makes the whole house feel more livable. Whether you prefer the DIY vinegar method or want a full kitchen overhaul handled by professionals, getting the microwave clean is a great place to start. Check out cleaning glendale prices to see our current service options and pricing for the area.
Ready to skip the scrubbing and let the experts take over? Contact Tidy home cleaning done right by booking with house cleaning services in Glendale, contact Elite Maids House Cleaning today for a free quote and get your home back in shape without lifting a finger.
Frequently Asked Questions
Does cleaning a microwave with vinegar actually remove tough grease?
Yes. The steam created by heating a vinegar-and-water solution loosens baked-on grease and food residue so it wipes away with minimal effort. For heavy buildup, follow the vinegar steam with a baking soda paste on stubborn spots. Together these two methods handle virtually any level of microwave mess without commercial chemicals.
Is it safe to use vinegar inside a microwave?
White distilled vinegar is completely safe to use inside a microwave. It does not damage the enamel coating, the turntable, or any plastic components. Once you wipe the interior dry, there is no residue that could transfer to food. According to the EPA Safer Choice program, acetic acid is among the safest cleaning agents available for household use.
How long should I microwave the vinegar and water solution?
Heat the solution on high for five minutes, then leave the door closed for an additional three to five minutes to let the trapped steam continue softening grime. The total dwell time matters as much as the heating time. Skipping the rest period is the most common reason this method does not work as well as expected for people trying it the first time.
Can I clean the microwave with lemon instead of vinegar?
Absolutely. Cleaning a microwave with lemon works on the same steam principle and is a great option if you dislike the smell of vinegar. Squeeze a lemon into a bowl of water, add the lemon halves, and microwave for three minutes. The citric acid cuts grease while the natural oils leave a fresh scent. It works best for light to moderate buildup.
How often should Glendale homeowners clean their microwave?
For households that use the microwave daily, a quick wipe-down once a week and a full vinegar steam clean twice a month is a solid routine. If you consistently cover food before heating and wipe fresh splatter immediately, you can get by with a deep steam clean once a month. The dry, dusty Glendale climate means dust settles on exterior vents quickly, so wipe those down weekly as well.
How to Clean a Coffee Maker with Vinegar: A Mesa Homeowner's Guide
SHARE:
If you live in Mesa and you start every morning with a cup of coffee, there is a good chance your coffee maker is working harder than you think. Mineral deposits from Arizona’s notoriously hard water build up inside the machine over time, slowing brew cycles, affecting flavor, and creating the kind of grime that most people never see. Knowing how to clean a coffee maker with vinegar is one of the easiest and most effective things you can do to protect that machine and keep your coffee tasting fresh. As one of the cleaning services mesa az have to offer, Elite Maids House Cleaning knows that a truly clean home includes the appliances you use every single day, not just the surfaces you can see.
Why Cleaning Your Coffee Maker with Vinegar Actually Works
White distilled vinegar is a weak acid, and that acid chemistry is exactly what you need to break down calcium and mineral scale inside a drip coffee maker. The Spruce’s cleaning guides consistently recommend white vinegar as a go-to descaling agent because it is non-toxic, inexpensive, and widely available at any grocery store. When you run a vinegar solution through the machine, the acetic acid dissolves the hard-water deposits that accumulate in the water reservoir, the heating element, and the internal tubing. Cleaning a coffee maker with vinegar also reaches places that a sponge or cloth simply cannot.
Mesa tap water is supplied by the Salt River Project and comes from the Colorado River and local groundwater, both known for high mineral content. That means scaling happens faster here than in many other cities. If you have not descaled your machine in the last month or two, there is a real chance buildup is already affecting your brew. Running a vinegar clean cycle is not a complicated process, but doing it correctly makes a noticeable difference from the very first cup afterward.
What You Need Before You Start the Vinegar Cleaning Process
Before you begin cleaning your coffee maker with vinegar, gather everything you need so the process goes smoothly from start to finish. You will not need any specialty products. Here is what to have on hand:
White distilled vinegar (do not substitute apple cider vinegar, which can leave behind a residue)
Fresh, cold water
A clean paper or reusable coffee filter
A soft cloth or sponge
Dish soap for washing removable parts
That is genuinely everything. There are commercial descalers on the market, and some of them are effective, but white vinegar does the same job for a fraction of the cost. According to Consumer Reports, vinegar-based descaling is one of the most tested and reliable methods for removing mineral scale from small kitchen appliances, including drip coffee makers.
If you are dealing with broader kitchen grime beyond just the coffee maker, you might also want to explore a full deep cleaning of your kitchen. A one-time deep clean covers everything from grease on range hoods to buildup behind appliances that you rarely move.
Step-by-Step: How to Descale a Drip Coffee Maker Using Vinegar
Here is the exact process for cleaning a drip coffee maker with vinegar, step by step. The whole routine takes about an hour, most of which is just waiting for cycles to run.
Step 1: Empty and rinse the carafe. Pour out any leftover coffee, remove the filter basket, and discard the used filter. Give the carafe and basket a quick rinse with warm water.
Step 2: Mix your vinegar solution. Fill the water reservoir with a mixture of equal parts white vinegar and water. For most standard 12-cup machines, that means about six cups of vinegar and six cups of water.
Step 3: Place a clean filter. Insert a paper filter or your reusable filter into the basket to catch any loosened deposits.
Step 4: Run a half brew cycle. Start the brew cycle as normal, but halfway through, turn the machine off. Let the vinegar solution sit in the machine for 30 to 60 minutes. This soaking time is what actually breaks down the mineral deposits, so do not skip it.
Step 5: Finish the brew cycle. Turn the machine back on and let it complete the cycle. The vinegar-water mix will flow through and carry the loosened scale out with it.
Step 6: Run two full rinse cycles with plain water. Fill the reservoir with fresh water and run a complete brew cycle. Repeat this a second time. Two rinse cycles ensure no vinegar flavor or smell remains in your next cup of coffee.
Step 7: Wash removable parts by hand. Use warm soapy water to wash the carafe, filter basket, and lid. Rinse thoroughly and let them air dry or wipe them dry with a clean cloth.
If your machine has a strong vinegar smell after two rinse cycles, run a third. It is better to take the extra time than to sit down with a cup of coffee that tastes like a salad dressing.
How Often Should Mesa Residents Clean Their Coffee Makers
Because of Mesa’s hard water, cleaning your coffee maker with vinegar once a month is a reasonable baseline. If you brew more than one pot per day, or if you notice your machine slowing down or your coffee tasting off, clean it more frequently. Signs that your machine needs descaling include:
Brew cycles taking longer than usual
Coffee that tastes flat, bitter, or slightly metallic
Visible white or gray mineral deposits inside the water reservoir
Gurgling or sputtering sounds during brewing
For context, Good Housekeeping’s cleaning team recommends descaling a coffee maker every one to three months, with harder water areas like Mesa falling on the more frequent end of that range. Setting a monthly reminder on your phone takes about five seconds and saves you from replacing an appliance that still has years of life left in it.
If you want to see how this kind of regular appliance care fits into a bigger kitchen cleaning routine, check out this guide on deep cleaning your home, which walks through a full room-by-room approach that Mesa homeowners can actually follow.
For Mesa residents also searching for comprehensive local cleaning help, the 10 BEST House Cleaning Services in Mesa, AZ list is a useful place to compare options and read verified local reviews before booking.
Cleaning the Outside of Your Coffee Maker
The vinegar rinse cycle takes care of the inside of the machine, but the exterior needs attention too. Coffee splatters, fingerprints, and dust collect on the outside of most coffee makers quickly, especially if the machine sits on a counter you use heavily every morning.
Wipe down the outside of the machine with a damp cloth and a small amount of dish soap. For stainless steel surfaces, wipe in the direction of the grain to avoid scratching the finish. The warming plate under the carafe often develops burnt-on coffee stains that can be tough to remove. A paste made from baking soda and a few drops of water applied with a soft cloth will lift those stains without scratching the plate. Rinse and wipe dry.
Pay attention to the area where the carafe sits. Coffee drips accumulate there and can become sticky if left too long. A quick wipe every few days keeps that area from becoming a bigger cleaning project. This kind of consistent upkeep is the same philosophy behind our recurring maid service, where regular scheduled visits prevent buildup from ever getting out of hand in any part of your home.
For homeowners in Mesa who want their kitchens to stay spotless beyond just the coffee maker, you might also consider how move out cleaning services Mesa, AZ handles appliance cleaning as part of a thorough property reset, which is helpful if you are preparing a home for sale or new tenants.
Natural Coffee Maker Cleaning Alternatives to Vinegar
Vinegar is the most popular and accessible option for cleaning a coffee maker naturally, but it is not the only one. If you are sensitive to the vinegar smell during the cleaning process, there are a couple of alternatives worth knowing about.
Citric acid powder: Mix one tablespoon of citric acid with four cups of water and run it through the machine the same way you would a vinegar solution. Citric acid is also effective at breaking down mineral scale and leaves no strong odor behind. You can find it in most grocery stores in the baking or canning aisle.
Baking soda: A solution of one quarter cup of baking soda dissolved in a full reservoir of water can help deodorize and lightly clean the interior of a coffee maker. It is not as effective as vinegar or citric acid for heavy scale removal, but it works well as a maintenance rinse between deeper cleans.
Whichever method you choose, the EPA’s guidance under the Safer Choice program supports using low-toxicity, plant-derived cleaning agents wherever possible in the home, and both vinegar and citric acid meet that standard easily.
If you want to apply this same mindset across your whole home, here is a solid resource for whole-home seasonal cleaning that covers natural product swaps room by room. And if you are also a homeowner in another part of the state, the team at house cleaning services in Arvada CO follows the same eco-friendly approach that Mesa clients have come to expect from the Elite Maids team.
When to Call a Professional Cleaning Service in Mesa
Cleaning your coffee maker with vinegar is a satisfying five-minute task to set up, but it is a reminder that a clean kitchen involves a lot more than one appliance. Grease on backsplashes, dust on top of refrigerators, grime around faucet bases, and film on cabinet faces are all part of what makes a kitchen feel truly clean or truly lived-in.
For Mesa residents who want a professional set of hands on all of it, the 10 House Cleaning Services in Mesa, AZ (2026 Guide) highlights what to look for in a local cleaning team, from background checks to satisfaction guarantees. If you are also doing a room-by-room kitchen and home deep clean, the guide on home deep cleaning in Glendale is a practical checklist that translates directly to Mesa homes as well.
Elite Maids House Cleaning serves Mesa homeowners with recurring house cleaning services as well as one-time deep cleans, event cleans, and move-in and move-out cleanings. Every cleaner is background-checked, bonded, and insured, and every visit is backed by a reclean-at-no-cost guarantee if anything falls short. Booking takes minutes online with an instant quote, and same-day availability between 8am and 6pm means you do not have to wait to get your home back to its best.
How to Clean Oven Racks Without Chemicals in Tucson
SHARE:
If you live in Tucson, you know how quickly a busy kitchen can turn a sparkling oven into a greasy, smoke-streaked mess. The good news is that you do not need a bottle of harsh fumes to get your oven racks looking like new. Learning how to clean oven racks without chemicals is one of those simple kitchen wins that takes very little money and almost no scrubbing when you do it right. Whether you are freshening up before the holidays or doing a full deep cleaning of your kitchen, this guide walks you through every step. And if you ever want help with cleaning in Tucson, the team at Elite Maids House Cleaning is always ready to take the work off your plate.
Why Chemical-Free Oven Rack Cleaning Matters for Your Home
Most commercial oven cleaners contain sodium hydroxide and other caustic compounds. According to EPA guidance on volatile organic compounds and indoor air quality, many conventional cleaning products release VOCs that linger indoors long after you have finished scrubbing. In a warm Tucson home where windows stay closed during brutal summer months, that indoor air exposure adds up fast.
Cleaning oven racks without chemicals means you skip those fumes entirely. You protect your lungs, keep residue off the surfaces that touch your food, and avoid the caustic splashes that can irritate skin and eyes. The American Lung Association’s indoor air guidance consistently points homeowners toward safer, less-toxic cleaning methods wherever possible. Going chemical-free is not just a trend; it is a practical step toward a healthier kitchen environment in Tucson.
Natural oven rack cleaning also tends to be gentler on the chrome plating of the racks themselves, which means they last longer and keep their finish without pitting or discoloration.
The Bathtub Soak Method for Cleaning Greasy Oven Racks
The single most effective way to clean greasy oven racks without any chemicals is a long overnight soak. Here is exactly how to do it:
Lay an old towel on the bottom of your bathtub to protect the surface from scratches.
Place the oven racks flat in the tub on top of the towel.
Fill the tub with hot water until the racks are fully submerged.
Add half a cup of dish soap and half a cup of baking soda directly to the water. Swirl to combine.
Let the racks soak for at least six hours, or overnight for heavy grease buildup.
In the morning, wipe the racks down with a non-scratch scrubbing pad. Most of the grease will slide right off with almost no effort.
Rinse the racks thoroughly, dry them completely, and slide them back in the oven.
This method for cleaning greasy oven racks works because the dish soap emulsifies the baked-on fat while the baking soda acts as a mild abrasive and deodorizer. Soaking oven racks overnight is the secret that makes scrubbing nearly effortless. For a deeper look at kitchen cleaning routines that work alongside this method, check out the ultimate deep clean checklist for your home.
Baking Soda and Vinegar Paste for Baked-On Oven Rack Grease
If you cannot use the bathtub or if the grease buildup is concentrated in specific spots, a baking soda and vinegar paste is your next best tool for removing baked-on oven rack grease. This approach targets stubborn spots without soaking the entire rack.
Remove the racks from the oven and lay them on a sheet of newspaper or an old towel outside or on a work surface.
Mix baking soda with just enough water to form a thick paste. Spread it generously over the greasy areas.
Let the paste sit for 20 to 30 minutes.
Spray or drizzle white vinegar directly over the paste. It will fizz and bubble as the two react.
After the fizzing settles, scrub with a stiff brush or a scrunched piece of aluminum foil used as a gentle abrasive.
Rinse with warm water and dry before replacing.
The fizzing reaction between baking soda and vinegar helps lift the baked-on oven rack grease from the metal surface without scratching. This is a great method to combine with a thorough spring cleaning routine when you are tackling the whole kitchen top to bottom.
For Tucson families who want to find cleaning in Tucson when life gets too busy for deep scrubbing, Elite Maids House Cleaning offers recurring maid service that keeps kitchens and entire homes consistently clean week after week.
How to Clean Oven Racks with Dryer Sheets
This one surprises most people, but dryer sheets are genuinely effective for oven rack cleaning without harsh products. The fabric softener compounds in the sheets help break down grease, and the sheets themselves provide a gentle scrubbing surface.
Place the oven racks in the bathtub and cover them with hot water.
Lay four to six dryer sheets directly on top of the racks and submerge them.
Add a squirt of dish soap and let everything soak for two to four hours.
Pull out a dryer sheet and use it to wipe down the racks. The texture picks up grease with very little pressure.
Rinse well and dry.
Many homeowners in Tucson are surprised by how well this chemical-free oven rack cleaning trick performs on moderate grease buildup. It does not require heavy scrubbing and leaves no residue behind. According to Good Housekeeping’s cleaning experts, dryer sheet soaks rank among the more underrated natural cleaning hacks for kitchen appliances.
Once your racks are clean, it is worth doing a quick wipe of the oven interior with a damp cloth and a little baking soda paste to complete the job. If you want to know what the cleaning in Tucson looks like when applied to a full kitchen, Elite Maids House Cleaning’s kitchen deep clean covers the oven exterior, stovetop, range hood, and all the surfaces that get skipped in a routine tidy-up.
Keeping Oven Racks Clean Between Deep Cleans
The real secret to making natural oven rack cleaning easier every time is not letting grease build up in the first place. A few simple habits extend the time between deep soaks significantly.
Wipe down oven racks with a damp cloth every two to three weeks before grease has a chance to bake on hard.
Place a baking sheet or piece of foil on the rack below whatever you are cooking to catch drips.
If something spills inside the oven, sprinkle the spot with baking soda immediately after the oven cools and wipe it away. Early intervention means no scrubbing later.
Once a month, pull the racks out and give them a quick rinse in the sink with hot soapy water. A five-minute rinse is far easier than a six-hour soak.
These maintenance habits apply to every home in Tucson, whether you cook every night or only use the oven on weekends. Consistent light upkeep is always faster than waiting for the buildup to become a project. For more kitchen and whole-home cleaning strategies, the house cleaning tips guide covers the foundational habits that keep homes cleaner between professional visits.
If your kitchen needs a more thorough reset, a deep cleaning service from a professional team can tackle the oven, range hood, refrigerator, cabinets, and every surface in between. It is especially useful before hosting guests or after a period when cleaning has slipped on the priority list.
Natural Cleaning Supplies to Keep on Hand in Tucson
Cleaning oven racks naturally without chemicals only requires a handful of pantry staples. Stocking these means you are always ready to tackle grease without a last-minute hardware store run.
Baking soda: A mild abrasive and odor neutralizer. Buy it in bulk because you will use it constantly.
White distilled vinegar: Cuts grease and reacts with baking soda to lift stubborn buildup.
Dish soap: The emulsifying backbone of most natural soak methods.
Coarse salt: Useful as an extra abrasive when combined with a half lemon to scrub rack surface grime.
Non-scratch scrub pads: Protect the chrome finish while still providing the friction needed to remove residue.
Dryer sheets: Versatile and surprisingly effective for light-to-moderate grease.
According to Real Simple’s cleaning guides, keeping these basics stocked means you can handle almost any routine household cleaning task without reaching for anything that carries a hazard warning label. For Tucson homeowners who prefer to keep their entire home maintained with eco-friendly products, professional cleaning in Tucson through Elite Maids House Cleaning includes eco-friendly product options on every visit.
And if the holiday season is approaching and the kitchen needs a full reset before guests arrive, the holiday cleaning service from Elite Maids House Cleaning is designed exactly for that moment. It covers the oven, kitchen, bathrooms, living spaces, and everything in between so you can focus on hosting instead of scrubbing.
When to Call a Professional House Cleaning Service in Tucson
Natural oven rack cleaning is completely manageable as a DIY project, but there are times when the whole kitchen or the entire home needs more than one person can reasonably tackle alone. If you are preparing for a big family gathering, moving into a new place, moving out of a rental, or simply catching up after a few months of a packed schedule, a professional house cleaning service saves time and delivers results that are hard to match with DIY methods alone.
Elite Maids House Cleaning serves Tucson with background-checked, insured, and five-star rated cleaners who back every visit with a reclean-at-no-cost satisfaction guarantee. Booking takes minutes online, same-day service is available between 8am and 6pm, and you get an instant quote without picking up the phone. The cleaning services in Tucson offered by Elite Maids cover everything from recurring weekly visits to one-time deep cleans and move-out cleans. If your kitchen, oven, and the rest of your home need a professional reset, contact Elite Maids house cleaning today for a free quote and let Tucson’s most-reviewed residential cleaning team give you your weekend back.
If your kitchen feels like it gets messy faster than you can clean it, you are not alone. For homeowners and renters across Flagstaff, keeping up with kitchen cleaning is one of the most common frustrations we hear about. Whether you live in a small apartment near NAU or a larger home in one of the city’s established neighborhoods, a solid kitchen cleaning checklist makes the whole process faster and less overwhelming. If you are searching for 10 BEST House Cleaning Services in Flagstaff, AZ, you already know that a truly clean kitchen takes more than a quick counter wipe. This guide walks you through every step so your kitchen stays spotless between professional visits.
Why a Kitchen Cleaning Checklist Actually Works
Most people clean their kitchens reactively. They spot something dirty and wipe it, then move on. The problem with that approach is that you consistently miss the same spots, and grease, bacteria, and grime build up in corners you forget about. A step-by-step kitchen cleaning checklist changes that by giving you a repeatable routine. According to the CDC, kitchens are one of the highest-risk rooms in the home for germ transmission, which means a thorough kitchen cleaning routine is not just about appearances. It is about protecting your family’s health. A kitchen cleaning checklist keeps the process systematic so nothing falls through the cracks, whether you are doing a quick daily tidy or a full deep clean.
Flagstaff’s elevation and dry climate mean dust and debris settle quickly, which makes consistent cleaning even more important here than in lower-elevation Arizona cities. Keeping a printed or digital kitchen cleaning checklist on hand helps residents stay on top of the unique challenges this environment creates.
Step 1: Clear Clutter and Empty the Dishwasher First
Before you touch a cleaning product, clear clutter off your counters completely. Put away anything that does not belong in the kitchen, throw out mail, and find a permanent home for items that have been drifting around. Clutter is the number one reason kitchen cleaning takes longer than it should because it forces you to work around things instead of cleaning surfaces properly.
Once your counters are clear, empty the dishwasher and the dish drainer. This gives you a place to put dirty dishes as you work, and it means you can load and run the dishwasher again before you finish cleaning. Empty the dish drainer and wash anything left sitting in the sink. Starting with a clear sink and empty dishwasher sets you up for the rest of the steps without interruption. Good Housekeeping consistently recommends this top-down, declutter-first approach as the most efficient way to clean any room in the home.
Step 2: Dust the Tops of the Fridge and Cabinets
This is the step most people skip, and it is the one that makes the biggest difference in how clean your kitchen actually feels. Dust the tops of your refrigerator and upper cabinets before you do anything else at surface level. If you clean counters first and then knock dust down from above, you are creating double the work for yourself.
Use a microfiber cloth or a duster with an extendable handle to reach the tops of cabinets. In Flagstaff, where dry air circulates year-round, dust accumulates on top of the fridge and cabinets faster than many residents expect. Once you have dusted from top to bottom, you can move to lower surfaces with confidence. This top-to-bottom method is one of the core principles in any professional kitchen cleaning guide and is used by every cleaner at Elite Maids House Cleaning when servicing homes throughout Flagstaff.
Step 3: Clean Small Appliances and Counter Items
Small appliances are kitchen cleaning weak spots. Your toaster, coffee maker, blender, stand mixer, and any other appliance that lives on the counter collects grease splatters, crumbs, and fingerprints over time. Cleaning small appliances thoroughly means unplugging them, wiping down the exterior with a damp cloth and mild cleaner, and shaking out or emptying any crumb trays.
For your coffee maker, Consumer Reports recommends running a mixture of equal parts water and white vinegar through the machine monthly to remove mineral buildup, which is especially relevant in areas with harder water. Clean anything else that stays out on your counters, including knife blocks, fruit bowls, and paper towel holders. Wipe each item down before returning it to a clean surface. This step is often where a kitchen cleaning checklist really pays off because it prevents you from forgetting items that blend into the background.
Step 4: Scrub Down the Stove, Oven Exterior, and Sink
Scrubbing down the exterior of your stove and oven is often the most time-consuming part of any kitchen cleaning routine, but it is also the most satisfying. Remove the burner grates if you have a gas stove and soak them in hot soapy water. Wipe down the stovetop surface with a degreaser, paying close attention to the edges and the area around each burner where grease tends to pool. For the oven exterior, wipe down the control panel and the door glass with a cleaner safe for those surfaces.
Next, clean the sink thoroughly. Rinse it out, spray with an all-purpose cleaner or a sprinkle of baking soda, scrub the basin, and wipe down the faucet and handles. The sink is one of the most bacteria-laden surfaces in any kitchen according to the CDC, so giving it dedicated attention rather than a quick rinse is important. For Flagstaff residents who want to keep their homes healthy and clean without harsh chemicals, EPA Safer Choice certified products are a great option for both the stovetop and the sink.
If your kitchen needs more intensive attention than your regular routine can handle, a professional deep cleaning service can address buildup that has accumulated over months, including inside the oven, behind appliances, and inside cabinets.
Step 5: Wipe Down All Counters and Take Out the Trash
Once your appliances and stove are clean, wipe down your counters from back to front using a clean microfiber cloth and your preferred surface cleaner. Work in sections and avoid cross-contaminating areas by using a fresh cloth or rinse frequently. Pay attention to the backsplash area behind the stove and sink where grease and water spots collect. Wipe down your counters completely before moving on.
Take out the trash as the final step of your kitchen cleaning routine, not the first. This way you can discard any debris, food scraps, and used cleaning cloths in one trip. Wipe down the inside and outside of your trash can with a disinfecting wipe or spray before putting in a fresh liner. This small step prevents odors from developing and keeps your kitchen feeling clean between deeper cleaning sessions.
Daily Kitchen Cleaning Habits That Keep Flagstaff Homes Fresh
A full step-by-step kitchen cleaning checklist is not something most people need to run through every single day. But building a short daily kitchen cleaning habit prevents the bigger jobs from becoming overwhelming. A good daily routine includes wiping your stovetop after cooking, loading dirty dishes directly into the dishwasher rather than leaving them in the sink, clearing the table after meals, and taking out the trash when it gets full rather than letting it overflow.
Daily kitchen cleaning takes about ten to fifteen minutes when you stay consistent, and it means your weekly or biweekly kitchen cleaning session goes much faster. If you want even more structure around your whole home routine, check out the ultimate apartment cleaning checklist for a full-home breakdown that works just as well for Flagstaff apartments and rentals.
For residents who live in apartments or rental units in Flagstaff, apartment cleaning services are available and can be scheduled on a recurring basis so the deep work gets handled professionally while you maintain the daily habits yourself.
And if you are preparing to move into or out of a property in Flagstaff, a professional house cleaning or move-in clean can get your kitchen and every other room to a truly fresh starting point without the stress of doing it all yourself during an already hectic time.
Let Elite Maids Handle the Hard Parts for You
Having a kitchen cleaning checklist is a great start, but some jobs genuinely need professional hands. If grease has built up on your cabinets, your oven interior needs attention, or you just want every surface in your kitchen cleaned thoroughly without spending your weekend doing it, Elite Maids House Cleaning is here for Flagstaff homeowners and renters. All of our cleaners are background-checked, fully insured, and backed by a reclean-at-no-cost satisfaction guarantee. You can book online in minutes and get an instant quote with no phone call required. Check out the cleaning Flagstaff prices and then contact Elite Maids House Cleaning today for a free quote and get your kitchen, and your whole home, back to spotless.
The Ultimate Kitchen Cleaning Guide & Checklist for Denver Homes
SHARE:
The kitchen is the hardest-working room in your home, and in a city like Denver, where families cook big meals and entertain often, it can go from clean to chaotic faster than you’d expect. If you’ve been searching the 10 Best House Cleaning Services Near Denver, Colorado for help getting your kitchen under control, you’re not alone. This complete kitchen cleaning guide walks you through every step, from quick daily habits to a thorough deep clean, so your kitchen stays spotless all year long. Whether you’re a Denver homeowner who loves to cook or just needs a reliable kitchen cleaning checklist to follow, this guide has you covered.
Your Essential Kitchen Cleaning Checklist
Every good kitchen cleaning routine starts with a solid kitchen cleaning checklist. Without one, it’s easy to wipe down the counters and call it done, only to realize three days later that the inside of the microwave looks like a science experiment. A proper kitchen cleaning checklist breaks the work into manageable tasks so nothing gets missed. Think of it as your roadmap, organized by how often each task needs to happen.
Here’s a simple kitchen cleaning list to keep on your fridge or save to your phone:
Wipe down countertops and backsplash daily
Clean the stovetop after each use
Wash dishes or run the dishwasher nightly
Wipe out the microwave weekly
Clean the oven, refrigerator, and dishwasher monthly
Scrub cabinets and baseboards every one to two months
Deep clean inside appliances and behind the refrigerator every few months
This deep clean kitchen checklist approach works because it spreads the effort out over time. You won’t dread cleaning if you’re not doing everything at once. For a more detailed version you can print and pin up, check out this ultimate kitchen cleaning checklist for a shiny, spotless home on our blog.
Gather the Right Kitchen Cleaning Tools Before You Start
Before you scrub a single surface, take five minutes to collect your kitchen cleaning tools and products. Hunting for a sponge mid-clean breaks your momentum and wastes time. Having everything in one caddy or bucket means you can move room to room, or zone to zone in the kitchen, without stopping.
Here are the kitchen cleaning products and tools worth keeping on hand:
Baking soda for scrubbing sinks and deodorizing drains
White vinegar for cutting grease on stovetops and appliances
A non-scratch scrub pad for baked-on messes
Microfiber cloths for streak-free surface wiping
A grout brush or old toothbrush for tile grout and tight corners
An all-purpose cleaner and a degreaser for heavy-duty surfaces
Dish soap and a quality sponge for the sink
If you’re concerned about chemicals in your home, look for products certified under the EPA Safer Choice program, which vets cleaning products for safer ingredients without sacrificing cleaning power. Denver families with young kids or pets especially benefit from making the swap to low-toxicity cleaners. Many house cleaning professionals, including the team at Elite Maids House Cleaning, offer eco-friendly product options for exactly this reason.
The Daily Kitchen Cleaning Routine That Actually Works
A daily kitchen cleaning routine doesn’t have to take long. In fact, people who spend just 10 to 20 minutes on their kitchen each day rarely need to do marathon scrubbing sessions on the weekend. This is sometimes called the 20-minute rule in cleaning, the idea that a consistent short burst of focused cleaning prevents the kind of buildup that takes hours to undo. Set a timer, put on a podcast, and knock out the basics before you go to bed.
Here’s what a solid daily kitchen cleaning routine looks like:
Step 1: Prep. Clear the counters. Put away groceries, mail, and anything that doesn’t belong in the kitchen.
Step 2: Tidy Up. Load or unload the dishwasher. Throw away any trash or food scraps.
Step 3: Wipe down surfaces. Hit the countertops, stovetop, and sink with a damp cloth and your cleaner of choice.
Step 4: Sink and drain care. Rinse the sink, wipe the faucet, and pour a little baking soda down the drain to keep it fresh.
Step 5: Surfaces. Don’t forget the cabinet handles and light switches. These get touched constantly and rarely get cleaned.
Step 6: Floors. A quick sweep or robot vacuum pass picks up crumbs before they get ground in.
Following these 7 steps in cleaning the kitchen on a daily basis cuts your weekly cleaning time nearly in half. It also means your kitchen looks presentable if guests drop by unexpectedly, which in Denver’s social culture is more common than you’d think.
Weekly Kitchen Cleaning Routine for a Consistently Clean Space
Your weekly kitchen cleaning routine goes a layer deeper than the daily habits. This is where you tackle the things that don’t need daily attention but will become real problems if ignored for too long. A good weekly kitchen cleaning schedule keeps grease from caking on the stovetop, prevents mold in the dish rack, and stops fridge odors before they start.
Add these tasks to your weekly kitchen cleaning list:
Wipe down the exterior of all appliances, including the refrigerator, microwave, and dishwasher
Clean inside the microwave with a bowl of steaming water and lemon juice
Wipe down cabinet fronts and handles, paying attention to the ones near the stove
Scrub the stovetop grates or burner covers
Empty and wipe down the dish rack
Mop the kitchen floor with a degreasing cleaner
Take out recycling and compost bins
For Denver homeowners who are short on time, a recurring maid service can handle this weekly kitchen cleaning routine for you. Having a professional come in weekly or biweekly means your kitchen stays in great shape without you having to find the time yourself. If you’re looking for the cleaning denver near me, a recurring service is the easiest way to stay ahead of the mess year-round.
According to Good Housekeeping’s cleaning guides, the stovetop and the sink are the two most bacteria-prone surfaces in the kitchen, so weekly attention to both isn’t optional if you care about keeping your family healthy.
How to Scrub Your Appliances and Cabinets the Right Way
Scrubbing your appliances and kitchen cabinets is one of those tasks most people avoid until things get really bad. But if you do it on a regular schedule, it takes far less effort each time. Knowing how to scrub your kitchen appliances correctly also means you won’t accidentally scratch a finish or damage a gasket.
For your appliances:
Oven: Use a baking soda paste mixed with water. Spread it on the interior walls, leave it overnight, and wipe clean the next morning. Avoid commercial oven cleaners with harsh fumes, especially if you have poor kitchen ventilation. The EPA’s indoor air quality guidelines flag aerosol cleaners as a common source of indoor volatile organic compounds.
Refrigerator: Remove all shelves and drawers. Wash them in warm soapy water, wipe the interior walls with a vinegar-water mix, and dry before reassembling.
Dishwasher: Run an empty cycle with a cup of white vinegar on the top rack, then sprinkle baking soda on the bottom and run a short hot cycle.
For your cabinets, a degreaser or a mix of dish soap and warm water works well on painted or wood finishes. Scrub gently with a soft cloth, then dry immediately to prevent water damage. Pay special attention to the cabinets directly above and beside the stove, as those collect the most grease over time. Denver homeowners who cook often will notice a real difference after a thorough cabinet scrub. You can also find more targeted advice in this guide on the ultimate monthly deep cleaning checklist for your kitchen.
If you’d prefer to hand this off to pros, the Cheapest cleaning in denver options available through Elite Maids House Cleaning include deep cleaning packages that cover appliances and cabinet interiors in full detail.
Kitchen Deep Cleaning Routine for a Truly Fresh Start
A full kitchen deep cleaning goes beyond the weekly and daily tasks to hit all the places you normally skip. A thorough deep cleaning of your kitchen a few times a year prevents the kind of long-term buildup that can affect air quality, attract pests, and make your kitchen feel old even when it isn’t.
Your kitchen deep cleaning checklist should include:
Pulling the refrigerator away from the wall to clean the coils and the floor underneath
Removing and washing range hood filters in hot soapy water
Cleaning inside all cabinet drawers and pantry shelves
Washing the window treatments above the sink
Scrubbing tile grout with a stiff brush and a baking soda paste
Wiping down baseboards and the top of the refrigerator
Mopping the floor thoroughly, including the edges and corners
One thing Denver residents often overlook is the connection between kitchen cleanliness and indoor mold. Moisture from cooking and dishwashing can build up in hidden areas. The CDC’s mold guidance for homes notes that kitchens are one of the most common places mold takes hold, especially around sinks, under dishwashers, and behind refrigerators. A deep cleaning routine helps you catch these spots before they become a real problem.
For help tracking all the tasks that belong in a full deep clean, check out what resources like Real Simple’s cleaning section recommend for scheduling seasonal kitchen deep cleans.
Professional Kitchen Cleaning Services in Denver
Even the most organized Denver homeowner can fall behind on kitchen cleaning. Life gets busy, and the kitchen is always the first room to show it. That’s where a professional cleaning service makes a genuine difference. Instead of spending your Saturday scrubbing the oven and mopping the floor, you can walk into a kitchen that looks and smells completely fresh without lifting a finger.
Elite Maids House Cleaning serves Denver with background-checked, five-star rated cleaners who know exactly what a proper kitchen cleaning checklist looks like and how to execute it efficiently. Every visit is backed by a reclean-at-no-cost satisfaction guarantee, so you never have to worry about the job not being done right. For those who want to compare local options, 2 Clean Ladies Denver is another search that brings up local professional cleaning results worth reviewing. Online booking with instant quotes means Denver homeowners can schedule a same-day service in minutes, no phone call required.
If you’re ready to stop fighting a losing battle with your kitchen and let someone else handle the dirty work, Roochii Cleaning Denver and similar local searches will show you how many options exist in your area. But for the most thorough kitchen deep cleaning in Denver, backed by the most-reviewed residential cleaning team around, contact Elite Maids House Cleaning today for a free quote and take the first step toward a kitchen you’re actually proud of.